How to Start LVP Flooring: Quick & Easy Guide
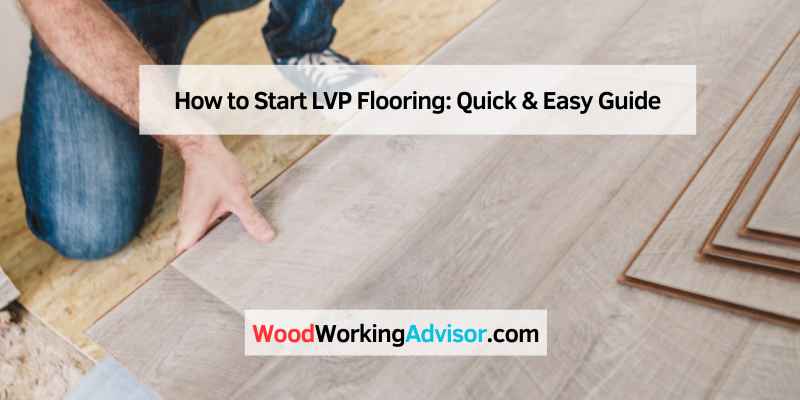
To start LVP flooring, score and cut the tongue off the first row using a utility knife. Set the first plank in place on the starting line with the cut side towards the wall.
This initial step is crucial for the success of the entire project, ensuring proper alignment and expansion gap maintenance. When it comes to laying vinyl plank flooring, starting from the most visible wall and running the planks parallel to it is recommended.
Ensure to start a quarter inch off the wall for a seamless and professional finish. By following these guidelines, you can begin your LVP flooring installation with precision and confidence.
Introduction To LVP Flooring
LVP flooring, also known as Luxury Vinyl Plank flooring, is a popular choice for homeowners looking for a durable and attractive flooring option. It is a type of vinyl flooring that mimics the look of real hardwood or stone, but at a fraction of the cost. LVP is made up of multiple layers, including a wear layer, a design layer, a core layer, and a backing layer. These layers work together to provide a flooring solution that is not only aesthetically pleasing but also resistant to scratches, stains, and water damage.
Benefits Of Choosing LVP
LVP flooring offers a range of benefits that make it a preferred choice for many homeowners. Here are some of the key advantages of choosing LVP:
- Durability: LVP is highly resistant to scratches, stains, and dents, making it suitable for high-traffic areas of the home.
- Waterproof: Unlike hardwood flooring, LVP is waterproof, making it an excellent choice for kitchens, bathrooms, and basements.
- Easy Maintenance: LVP requires minimal maintenance and can be easily cleaned with a damp mop or a mild cleaning solution.
- Realistic Appearance: LVP is designed to mimic the look and texture of real hardwood or stone, providing a high-end aesthetic without the high cost.
- Comfort: LVP is softer underfoot compared to hardwood or tile, providing a more comfortable walking surface.
Tools And Materials Needed
Before you start installing LVP flooring, you will need to gather the necessary tools and materials. Here is a list of items you will need:
| Tools | Materials |
|---|---|
| – Utility knife | – LVP flooring planks |
| – Measuring tape | – Underlayment (if required) |
| – T-square | – Adhesive (if required) |
| – Pry bar | – Transition strips |
| – Rubber mallet | – Caulk (for sealing gaps) |
| – Pull bar | – Floor cleaner |
Having these tools and materials ready before starting the installation process will help ensure a smooth and efficient flooring project.
Pre-installation Planning
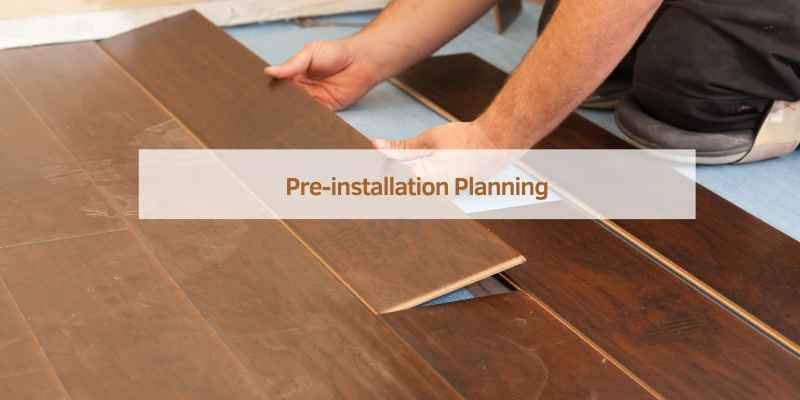
Before starting the installation process for LVP flooring, it’s important to carefully plan and prepare the space. This will ensure a smooth and successful installation, saving you time and effort in the long run. In this section, we will discuss two key aspects of pre-installation planning: measuring your space and choosing the direction of planks.
Measuring Your Space
Accurate measurements are crucial when it comes to installing LVP flooring. To determine the amount of flooring material you will need, start by measuring the length and width of the room. Use a tape measure to measure from wall to wall, accounting for any alcoves, closets, or irregularities in the room shape.
Once you have the measurements, calculate the square footage of the space by multiplying the length by the width. It’s always a good idea to add an extra 10% to your total square footage to account for any errors or future repairs.
| Room Length | Room Width | Square Footage |
|---|---|---|
| 10 ft | 12 ft | 120 sq ft |
For example, if your room measures 10 feet in length and 12 feet in width, the total square footage would be 120 square feet. Adding an extra 10%, your final calculation would be 132 square feet.
Choosing The Direction Of Planks
The direction in which you install the planks can have a significant impact on the overall look and feel of the space. There are a few factors to consider when choosing the direction:
- Room Shape: If your room is narrow, installing the planks parallel to the longest wall can create the illusion of a wider space. On the other hand, if your room is wide, installing the planks perpendicular to the longest wall can make the room appear longer.
- Natural Light: Take into account the direction of natural light. Installing the planks perpendicular to the incoming light can help minimize the visibility of seams.
- Entrance: Consider the direction from which the room is entered. Installing the planks parallel to the entrance can create a visually appealing flow.
Once you have considered these factors, you can make an informed decision on the direction in which to install the planks, ensuring a visually pleasing and well-balanced result.
By taking the time to properly plan and prepare before installing LVP flooring, you can set yourself up for a successful and hassle-free installation process. Measure your space accurately and choose the direction of planks thoughtfully to achieve the best possible outcome.
Floor Preparation
Before starting the installation of LVP flooring, proper floor preparation is crucial. This process involves cleaning the subfloor to ensure a smooth surface and making any necessary leveling and repairs to address imperfections.
Cleaning The Subfloor
- Remove any existing flooring materials.
- Sweep and vacuum the subfloor to remove dust and debris.
- Use a damp cloth to clean any stains or sticky residue.
Leveling And Repairs
- Inspect the subfloor for any uneven areas or damage.
- Fill in low spots with a self-leveling compound.
- Repair any cracks or holes using a suitable filler.
By thoroughly cleaning the subfloor and addressing leveling and repairs as needed, you will create a solid foundation for a successful LVP flooring installation.
Starting Your First Row
To start LVP flooring, first, score and cut the tongue off the initial plank. Place it along the starting line, cut side facing the wall, ensuring an expansion gap. Begin from the most visible wall, running the planks parallel, starting a quarter-inch away.
This sets up the project for success.
When it comes to installing LVP flooring, starting your first row properly sets up the whole project for success. The first row is the foundation for the rest of the installation, so it is important to take extra care during this stage. In this section, we will cover two important aspects of starting your first row: cutting the tongue of planks and ensuring proper expansion gaps.
Cutting the Tongue of Planks
Before laying down the first row of planks, cut off the tongue of the planks using a utility knife. This will ensure that the planks fit snugly against the wall and create a seamless finish. Use a straight edge to guide the knife and score the plank’s tongue. Then, snap off the tongue using your hands or pliers. Repeat this process for all planks in the first row.
Ensuring Proper Expansion Gaps
Expansion gaps are crucial when it comes to LVP flooring installation. These gaps allow the planks to expand and contract with changes in temperature and humidity, preventing warping or buckling. To ensure proper expansion gaps, use spacers between the wall and the planks in the first row. The recommended gap size is 1/4 inch. Make sure to maintain this gap throughout the installation by using spacers between each row.
In conclusion, starting your first row properly is essential for a successful LVP flooring installation. By cutting the tongue of planks and ensuring proper expansion gaps, you can create a sturdy foundation for the rest of the project. Remember to take your time during this stage and follow the steps carefully to achieve the best results.
Laying Down The Planks
Starting your LVP flooring project requires careful planning and execution. Begin by scoring and cutting the tongue off the first row of vinyl planks, then set them in place with the cut side towards the wall. Remember to maintain the expansion gap and start ¼ inch off the wall for the best results.
Laying Down the Planks is the most crucial step when it comes to installing LVP flooring. To ensure a successful installation, you need to take the time to do it right. Here are the steps to follow for laying down the planks:
Securing The First Plank
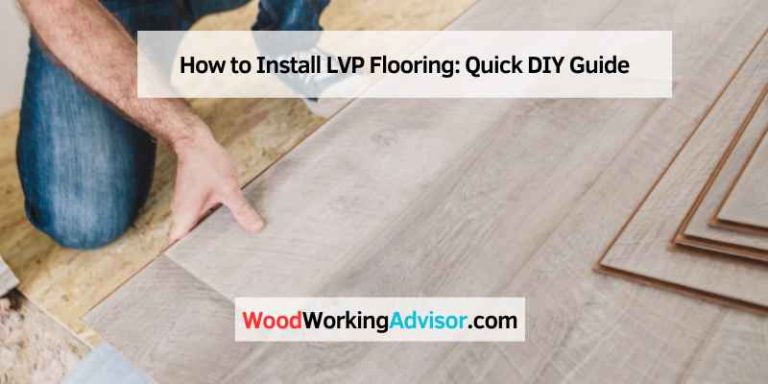
To start, score and cut the tongue off the first row of vinyl plank flooring using a utility knife. Then, set the first plank in place on the starting line with the cut side toward the wall, maintaining the expansion gap. Secure the first plank by nailing or gluing it to the subfloor.
Continuing The First Row
Once the first plank is secured, continue laying down the planks of the first row. Be sure to maintain the expansion gap between each plank. Use a tapping block and a hammer to lock the planks together. When you reach the end of the row, measure and cut the last plank to fit.
Starting The Second Row
To start the second row, cut the first plank to the appropriate length and begin at the same end of the room as the first row. Stagger the seams of the second row so that they don’t line up with the seams of the first row. Use a tapping block and hammer to lock the planks together.
Continuing The Installation
Continue installing the planks in rows until you reach the opposite wall of the room. Be sure to maintain the expansion gap between each plank. When you reach the final row, measure and cut the last plank to fit. Finally, install any necessary transition pieces to complete the installation.
Cleaning Up
Once the installation is complete, clean up any debris and remove any tape or spacers used during the installation process. Enjoy your newly installed LVP flooring!
Remember, proper installation is crucial to the longevity and durability of your LVP flooring. Take the time to follow these steps and ensure a successful installation.
Cutting And Fitting
When it comes to installing LVP flooring, cutting and fitting are crucial steps in achieving a professional-looking result. Properly measuring, marking, and cutting the planks ensures a seamless and visually appealing installation. In this section, we will discuss the essential aspects of cutting and fitting LVP flooring, including measuring and marking, as well as using cutting tools.
Measuring And Marking
Before cutting the LVP planks, accurate measurements and markings are essential for a precise fit. Start by measuring the space where the flooring will be installed, taking into account any irregularities or obstacles such as doorways or corners. Once the measurements are taken, mark the planks accordingly to indicate where they need to be cut to fit the space seamlessly.
Using Cutting Tools
When it comes to cutting LVP flooring, using the right tools is essential for achieving clean and accurate cuts. Common cutting tools for LVP flooring include a utility knife, a vinyl cutter, or a miter saw. Each tool has its advantages and specific applications, so it’s important to choose the most suitable one based on the cutting requirements of the project. By using the appropriate cutting tools, you can ensure that the planks are trimmed precisely to fit around obstacles and create tight seams, resulting in a polished and professional finish.
Staggering And Patterns
When it comes to installing LVP flooring, staggering the seams and creating pleasing patterns are essential steps that can enhance the overall aesthetic appeal of the floor. Properly staggering the seams and creating an attractive layout not only improves the visual appearance but also ensures the structural integrity of the flooring.
Staggering The Seams
Staggering the seams of LVP flooring is crucial to prevent weak points and increase the stability of the floor. When installing the planks, it’s important to ensure that the end joints are staggered at least 6 inches from the end joints in the previous row. This helps to distribute the weight and pressure evenly across the entire floor, reducing the risk of buckling or separation.
Creating A Pleasing Layout
Creating an aesthetically pleasing layout for your LVP flooring involves thoughtful planning and arrangement of the planks. One approach is to stagger the seams randomly, avoiding aligning the end joints in adjacent rows. This creates a more natural and appealing look, similar to traditional hardwood floors. Another popular method is to create patterns such as herringbone or chevron, which can add a unique and elegant touch to the floor.
Finishing Touches
To start LVP flooring, begin by scoring and cutting the tongue off the first row of planks using a utility knife. Place the first plank on the starting line, with the cut side towards the wall, while maintaining the expansion gap.
Lay the flooring parallel to the most visible wall, starting ¼ inch off the wall. For a comprehensive guide, check out online tutorials and videos for step-by-step instructions.
Installing Transition Strips
When installing LVP flooring, transition strips are crucial for a seamless and professional finish. These strips are used to connect the LVP flooring with other types of flooring materials, such as carpet, tile, or hardwood. To install transition strips:
- Measure the length required for the transition strip and cut it to size using a saw.
- Place the transition strip in the doorway or between different flooring types, ensuring it is level and secure.
- Use screws or adhesive to fix the transition strip in place, ensuring it is flush with the LVP flooring.
Adding Baseboards And Trims
Baseboards and trims provide the finishing touches to your LVP flooring installation, concealing the expansion gap and creating a polished look. Here’s how to add baseboards and trims:
- Measure the perimeter of the room to determine the length of baseboards needed.
- Cut the baseboards to the required lengths and miter the corners for a seamless fit.
- Secure the baseboards to the wall using a nail gun or adhesive, ensuring they are flush with the LVP flooring.
- Install trims around doorways and transitions to create a clean and professional appearance.
Maintenance And Care
Proper maintenance and care are essential for ensuring the longevity and visual appeal of your LVP (Luxury Vinyl Plank) flooring. By following some simple cleaning and prevention techniques, you can keep your LVP flooring looking pristine for years to come. Below are some key strategies for maintaining and caring for your LVP flooring.
Cleaning Your LVP Flooring
Regular cleaning is crucial for preserving the beauty of your LVP flooring. Here are some steps to effectively clean your LVP floors:
- Vacuum or Sweep: Remove loose dirt and debris using a vacuum cleaner or a soft-bristled broom.
- Mop with Mild Cleaner: Use a damp mop with a mild vinyl floor cleaner to remove stains and grime. Avoid using abrasive cleaners that may damage the surface.
- Dry Thoroughly: After mopping, ensure the floor is completely dry to prevent water damage and maintain its shine.
Preventing Scratches And Damage
Protecting your LVP flooring from scratches and damage is essential for its long-term durability. Here are some tips to prevent scratches and maintain the integrity of your floors:
- Use Furniture Pads: Place felt or rubber pads under furniture legs to prevent scratches and dents.
- Avoid High Heels: Discourage walking on the floors with high heels or shoes with sharp, exposed heels.
- Protect with Area Rugs: Use area rugs in high-traffic areas and under furniture to minimize wear and tear.
- Trim Pet Nails: Keep your pets’ nails trimmed to prevent them from scratching the LVP flooring.
- Regular Inspections: Periodically inspect the floor for any signs of wear or damage, addressing issues promptly.
By incorporating these cleaning and prevention practices into your regular maintenance routine, you can ensure that your LVP flooring retains its beauty and durability for years to come.
Common Pitfalls To Avoid
To start LVP flooring, avoid common pitfalls by ensuring the first row is set up properly. Score and cut the tongue off the first plank, then set it in place on the starting line with the cut side towards the wall, while maintaining the expansion gap.
Start from the most visible wall and run the planks parallel to it, ensuring a 1/4 inch gap.
When it comes to installing LVP flooring, there are a few common pitfalls that can be easily avoided with some careful planning and preparation. In this section, we’ll cover some of the most common issues that people encounter when installing LVP flooring and how to avoid them.
Avoiding Mismatched Patterns
One of the most common mistakes people make when installing LVP flooring is not paying attention to the pattern of the planks. If the planks are not installed in the correct pattern, it can result in a mismatched or uneven appearance. To avoid this, it’s important to carefully plan the layout of the flooring before you begin the installation process.
Here are some tips to help you avoid mismatched patterns:
– Lay out the planks in the desired pattern before you start installing them.
– Use a chalk line to mark the starting line and the layout of the planks.
– Make sure each row is staggered and that the seams are not aligned.
– Double-check your work as you go along to ensure that the pattern is consistent.
Dealing with Moisture Issues
Moisture can be a big issue when it comes to LVP flooring. If the flooring is installed in a damp or humid environment, it can cause the planks to warp or buckle over time. To avoid this, it’s important to take steps to control the moisture in the room before you begin the installation process.
Here are some tips to help you deal with moisture issues:
– Use a moisture meter to test the subfloor before you begin the installation process.
– Make sure the subfloor is clean, dry, and level before you start installing the planks.
– Use a moisture barrier underlayment to help prevent moisture from seeping up into the planks.
– Consider installing a dehumidifier in the room to help control the humidity levels.
By following these tips, you can avoid some of the most common pitfalls that people encounter when installing LVP flooring. With a little bit of planning and preparation, you can create a beautiful and durable floor that will last for years to come.
Advanced Tips And Tricks
Discover expert tips on starting LVP flooring successfully. Begin by cutting the tongue off the first plank and placing it against the wall with an expansion gap. For a seamless layout, start from the most visible wall and ensure planks run parallel, starting a quarter-inch away.
Advanced Tips and Tricks for LVP Flooring
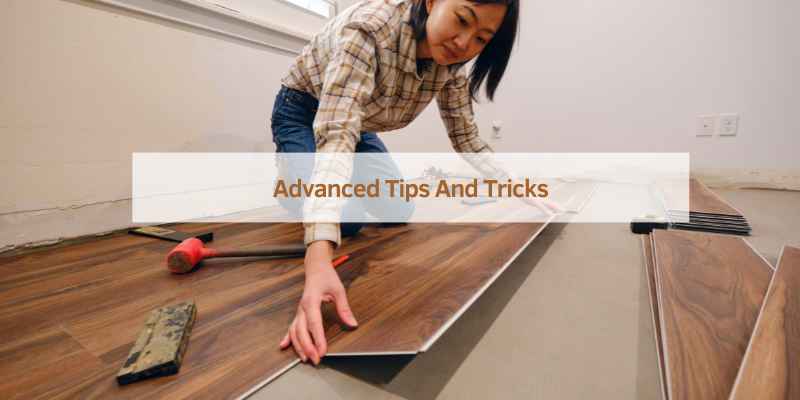
When it comes to installing LVP flooring, there are certain advanced tips and tricks that can make the process smoother and more efficient. Two common challenges that many DIYers face when installing LVP flooring are working around obstacles and handling complex room shapes. In this section, we’ll discuss these challenges and provide tips on how to overcome them.
Working Around Obstacles
Obstacles such as door frames, cabinets, and pipes can make it difficult to install LVP flooring. Here are some tips for working around these obstacles:
– Use a jigsaw or handsaw to cut the planks to fit around door frames or other obstacles.
– For cabinets, remove the toe kick and install the flooring underneath. Be sure to leave a small expansion gap around the cabinets.
– When installing around pipes, use a hole saw to cut a hole in the plank to fit around the pipe. Be sure to leave a small expansion gap around the pipe.
Handling Complex Room Shapes
Rooms with complex shapes, such as those with angles or curves, can be challenging to install LVP flooring in. Here are some tips for handling these complex room shapes:
– Use a chalk line to mark the center of the room and work outwards from there.
– For angles, measure the angle and cut the plank to fit. Be sure to leave a small expansion gap.
– For curves, use a heat gun to soften the plank and bend it to fit the curve. Be sure to leave a small expansion gap.
By following these tips and tricks, you can successfully install LVP flooring even in rooms with obstacles or complex shapes. Remember to always leave a small expansion gap around the edges of the room, and to use a pull bar to snugly fit the planks together. With a little bit of patience and know-how, you can have beautiful and durable LVP flooring in no time!
Frequently Asked Questions
How To Start The First Row Of Vinyl Plank Flooring?
To start the first row of vinyl plank flooring, cut the tongue off the first plank. Place it along the starting line with the cut side against the wall, ensuring an expansion gap. This sets the project up for success.
Where To Start When Laying Vinyl Plank Flooring?
To start laying vinyl plank flooring, cut the tongue off the first plank, place it along the starting line with the cut side facing the wall, and maintain an expansion gap. Begin from the most visible wall and run the planks parallel to it, starting ¼ inch off the wall.
Where Do You Start Floating Vinyl Plank Flooring?
Start floating vinyl plank flooring by placing the first row on the starting line with the cut side towards the wall. Maintain an expansion gap and ensure a snug fit.
Which Side Of Lvp Do You Start With?
Start the first row of LVP by cutting the tongue off the plank and placing it against the wall. Ensure the cut side faces the wall and maintain an expansion gap. Always start from the most visible wall and keep the planks parallel to it.
Conclusion
To kickstart your LVP flooring project, master the art of starting the first row. Properly positioning that initial plank paves the way for a flawless installation. Cut the tongue off the first row, align it with the starting line, and maintain the expansion gap.
This crucial step ensures a successful flooring endeavor.

