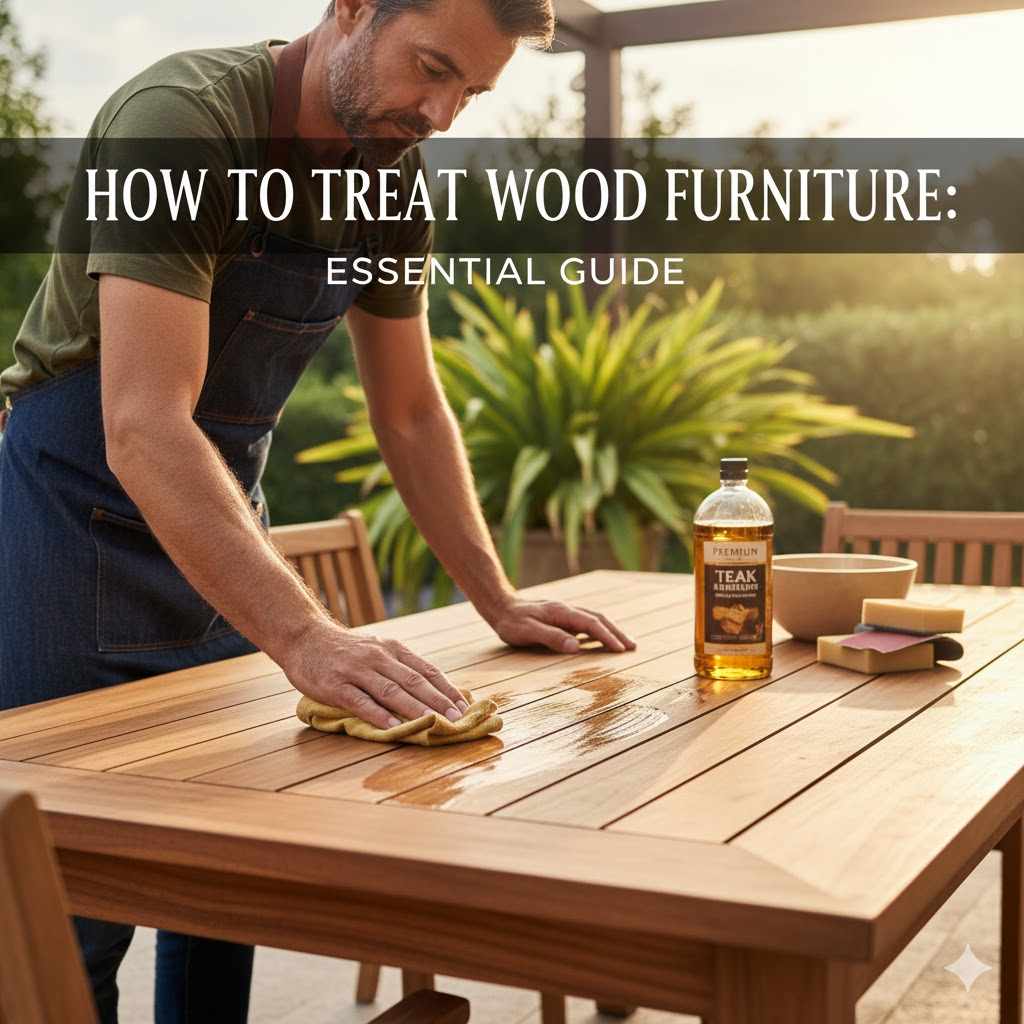
How To Treat Teak Wood Furniture: Essential Guide
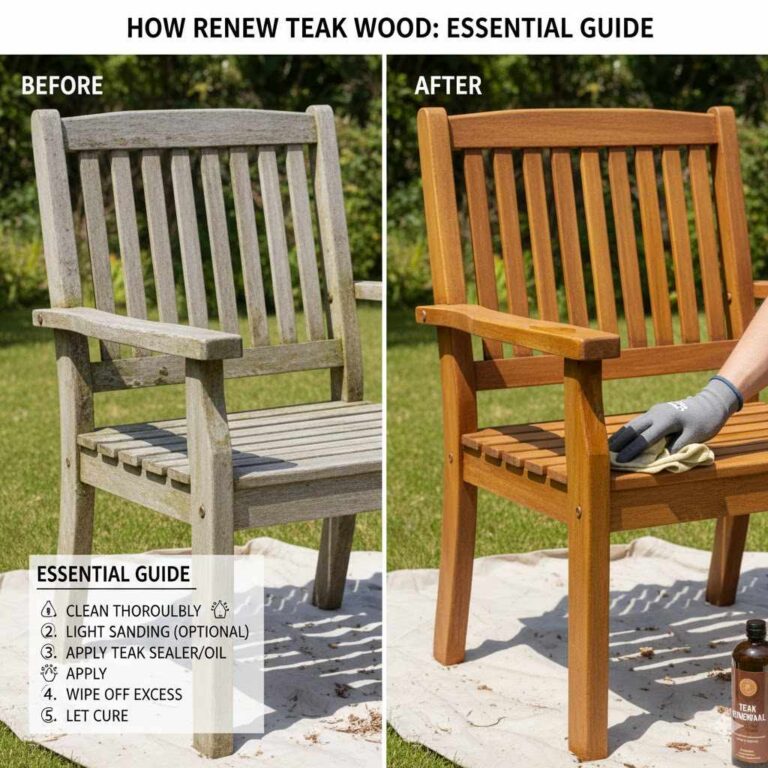
To properly treat your teak wood furniture, you should first clean it thoroughly with a mild soap solution to remove dirt. For new or well-maintained pieces, occasional light cleaning is usually enough. If you want to maintain the honey-brown color, apply a quality teak sealer or oil every 6–12 months, depending on exposure. Left untreated, teak develops a beautiful, silvery-gray patina.
Welcome! Are you admiring that gorgeous new teak patio set, or maybe trying to save a beloved, weathered piece? Teak wood is famous for lasting decades, even outdoors. However, keeping it looking its best—or understanding why it changes color—can feel confusing if you are new to wood care. Many folks worry they will ruin their investment by cleaning it wrong! Don’t sweat it. Treating teak is easier than you think, whether you want to keep that rich brown glow or embrace its natural silver shade. As your woodworking mentor, I will guide you through every simple step. Let’s look at exactly what your teak needs to thrive outside.
Why Teak Needs a Little TLC (And Why It Doesn’t)
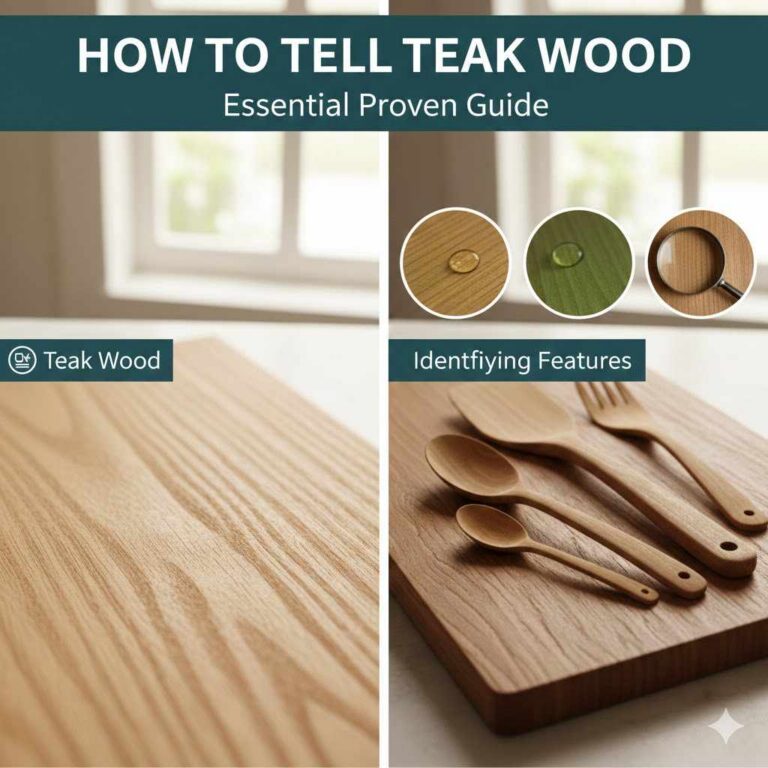
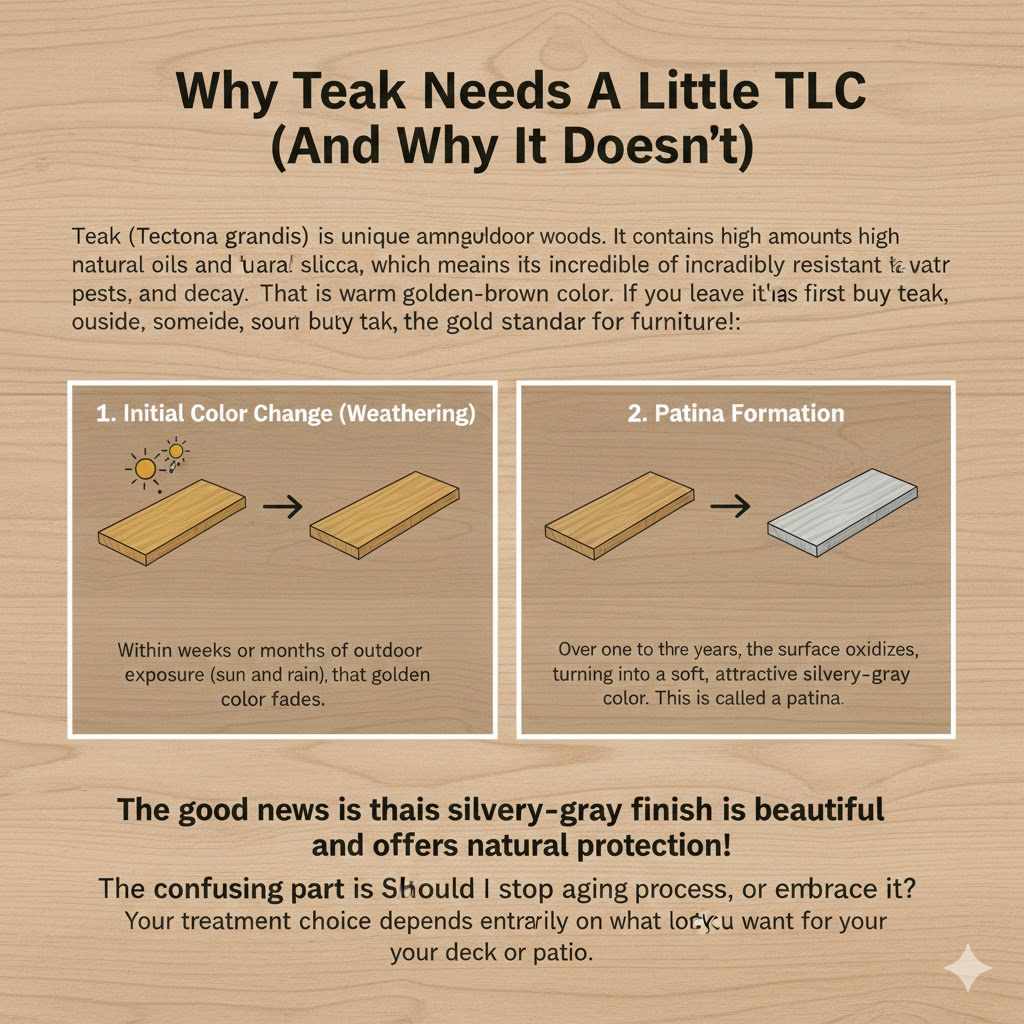
Teak (Tectona grandis) is unique among outdoor woods. It contains high amounts of natural oils and silica, which means it is incredibly resistant to water, pests, and decay. That is why it’s the gold standard for outdoor furniture!
When you first buy teak, it has a warm, golden-brown color. If you leave it outside, something natural happens:
1. Initial Color Change (Weathering): Within weeks or months of outdoor exposure (sun and rain), that golden color fades.
2. Patina Formation: Over one to three years, the surface oxidizes, turning into a soft, attractive silvery-gray color. This is called a patina.
The good news is that this silvery-gray finish is beautiful and offers natural protection! The confusing part is deciding: Should I stop the aging process, or embrace it? Your treatment choice depends entirely on what look you want for your deck or patio.
Essential First Step: How to Clean Teak Wood Furniture
Before you apply any oil, sealant, or decision on aging, every piece of teak needs a good clean. Dirt, grime, pollen, and mildew (especially in shaded, damp spots) build up over time and can actually hurt the wood fibers.
Tools You Will Need for Cleaning
- Bucket or container
- Warm water
- Mild, non-detergent soap (like dish soap, ensuring it has no harsh chemicals or ammonia)
- Soft cloth or sponge
- Soft-bristle brush (an old toothbrush works well for crevices)
- Garden hose with low pressure (or a clean bucket for rinsing)
Step-by-Step Guide to Washing Teak
Safety Tip: Never use high-pressure washers, steel wool, or abrasive chemical cleaners on teak. These will scratch the wood surface or strip away too much of the natural oil.
- Prepare Your Solution: Mix warm water with a small amount of mild soap—about one teaspoon per gallon of water should be plenty. You want a gentle bath, not a bubble bath!
- Wet the Surface: Lightly wet the entire piece of furniture using a hose on a very low setting, or use a damp cloth. Avoid soaking the wood entirely.
- Scrub Gently: Dip your soft cloth or sponge into the soapy water. Gently rub the entire surface of the teak, working with the grain of the wood, not against it. Pay extra attention to joints, screws, and areas where water tends to pool.
- Tackle Stubborn Spots (Mildew): If you find light mold or mildew spots, you can use a solution of one cup of white vinegar mixed with a gallon of water. Apply this directly to the spot and let it sit for a few minutes before gently scrubbing.
- Rinse Thoroughly: This is critical! Rinse all soap residue away using your garden hose on the lowest setting. Any soap left behind will attract dirt faster.
- Allow to Dry Completely: Let the furniture air dry outdoors. Depending on the humidity, this can take 24 to 48 hours. Do not try to treat, seal, or use the furniture until it is completely dry.
Two Paths for Teak: Weathered vs. Maintained Color
Once your teak is clean and dry, you must choose your long-term care strategy. There is no wrong choice here—just personal preference!
Path 1: Embracing the Natural Silvery-Gray Patina (Low Maintenance)
This is the easiest route. If you love the coastal, soft gray look, simply leave your clean furniture alone. The sun and rain will do the work!
- Pros: Requires almost no upkeep after cleaning; highly durable; avoids oiling mess.
- Cons: The color changes noticeably; some people find it looks less “luxurious” than the honey brown.
Path 2: Maintaining the Golden-Brown Color (Higher Maintenance)
If you want your teak to retain that rich, indoor-furniture look, you must seal or oil the wood periodically to slow down the UV breakdown and oxidation process. This is the core of how to treat teak wood outdoor furniture if you prefer the rich tone.
- Pros: Keeps the furniture looking new and rich in color.
- Cons: Requires reapplying products annually or semi-annually; maintenance can be messy; oils may attract some dust initially.
How to Treat Teak: Step-by-Step Guide to Maintaining Color
If you choose Path 2—keeping that beautiful honey color—you need the right product and the right technique. Here are your best options for treatment products:
Option A: Using Teak Oil or Teak Sealer
Many people use the terms “oil” and “sealer” interchangeably for teak, but they do different jobs. Teak oil is often a finish that penetrates and replenishes some of the natural oils, while a sealer often contains UV blockers to help fight sun damage.
Choosing Your Treatment Product
When shopping, look specifically for products labeled for “Teak” or “Hardwood Outdoor Furniture.” Avoid standard linseed oil or vegetable oils, as these can go rancid (turn sticky and foul-smelling) when left outdoors. If you want the best defense against UV rays, check for reputable sources that discuss UV inhibitors, such as those recommended by architectural standards bodies (e.g., studies on wood preservation materials).
| Product Type | Look Achieved | Reapplication Frequency | Ease of Use |
|---|---|---|---|
| Teak Oil (Natural Replenishment) | Deeper, natural color enhancement | 6–12 months | Medium (needs even application) |
| Teak Sealer (Protective Barrier) | Maintains existing color, slight sheen | 12–18 months | Easy (often spray or wipe-on) |
| Water-Based Stain/Varnish | Can significantly alter color | 1–3 years | Difficult (can look patchy) – Generally discouraged for beginners on teak. |
Step-by-Step Oiling/Sealing Process
- Ensure Dryness and Cleanliness: Your furniture MUST be clean and bone-dry (wait 48 hours after washing, especially if humid). Any trapped moisture will be sealed in.
- Prep the Surface (If needed): If your teak is already gray but you want the color restored, you may need to use a commercial “Teak Brightener” solution before oiling. This acidic cleaner chemically strips the gray surface layer, revealing the fresh color underneath. Always follow the brightener’s instructions carefully.
- Apply the Product: Whether you are oiling or sealing, always work in manageable sections, such as one chair or one tabletop at a time. Use a clean, lint-free cloth or foam brush. Apply the oil liberally, moving in the direction of the wood grain.
- Allow for Penetration: Let the oil sit on the surface for about 15 to 30 minutes. This gives the wood time to soak up what it needs.
- Wipe Off the Excess (Crucial Step!): This step separates a smooth finish from a sticky mess. Use a fresh, clean, dry cloth to wipe away every bit of excess oil sitting on the surface. If you leave oil on top, it will become gummy and attract dust or even peel away. The wood should feel smooth, not slick or wet.
- Let it Cure: Allow the furniture to sit undisturbed for at least 24 hours before bringing it back into service or stacking it.
Dealing with Tough Spots: Repairing Damage and Mold
Even the best wood can suffer occasional issues. Dealing with damage on teak is usually very straightforward because the wood itself is so tough.
Fixing Deep Scratches or Minor Dings
Since teak oils itself, deep scratches tend to blend in once they weather. However, if a scratch is bothering you, you can try this simple fix:
- Lightly dampen the scratch with water.
- Using a very fine-grit sandpaper (like 320-grit), lightly sand the edges of the scratch, blending them into the surrounding wood grain. Sand gently; you only want to smooth the edges.
- Wipe away the dust and reapply oil to that area if you are maintaining the golden color. If you are letting it weather, the area should fade to gray fairly quickly.
Eradicating Stubborn Mildew
For patches of tough, dark mildew that soap and vinegar won’t touch, you can turn to Oxalic Acid, often sold as “Wood Bleach.”
Caution: Always wear gloves, eye protection, and long sleeves when handling wood bleach, as it is strong. Ensure the area is shielded from pets and children. While this is an advanced technique, it is often the last resort for severe biological staining.
- Mix the Oxalic Acid powder according to the manufacturer’s instructions (usually dissolved in hot water).
- Apply only to the stained area using a plastic brush. Do not let it spread to untreated parts of the wood unless you plan to treat the whole piece.
- Allow it to work for 10–15 minutes. The stains should lift and turn lighter.
- Neutralize the acid thoroughly by rinsing repeatedly with plain water or a weak baking soda and water solution, followed by a final clean water rinse.
- Allow to dry completely before deciding on oiling or letting it weather.
Long-Term Care: Protecting Teak Furniture Seasonally
The most effective long-term treatment for teak is prevention. Where you store your furniture matters more than what you rub on it.
Best Practices for Seasonal Storage
If you live in an area with harsh winters (heavy snow, prolonged freezing temperatures) or extreme monsoon seasons, covering or storing your furniture is highly recommended. While teak can handle moisture, repeated freeze/thaw cycles are hard on any material.
- Cleaning Before Storage: Always give your furniture a thorough wash (see earlier steps) before storing it. Storing dirty wood encourages mold and pests.
- Drying Time: Ensure every single crevice is dry—absolutely dry—before putting it away.
- Covering: If you cannot store it indoors, use breathable, high-quality outdoor furniture covers. Plastic sheeting is generally a poor choice as it traps moisture underneath, leading to mildew. Look for covers specifically designed to allow airflow.
- Positioning: If stacked or placed close together during storage, put small spacers (like pieces of plastic or rubber) between surfaces to ensure air can move freely between the boards.
Summary of Yearly Maintenance Tasks
Think of this as your simple annual checklist, no matter which color path you chose:
- Spring Opening: Deep clean all surfaces thoroughly before use.
- Color Maintenance (If Desired): Re-oil or reseal in early spring before the main season starts.
- Mid-Summer Check: Inspect hardware. Tighten any loose screws or bolts, as wood expansion/contraction can loosen fasteners over time.
- Fall Closing: Clean, dry, cover, and store or secure for winter.
Teak Wood Maintenance Schedule Comparison
To keep things simple, here is a quick comparison of the annual effort required for the two main styles of teak care.
| Action | Weathered/Patina Look (Easy) | Golden/Oiled Look (Moderate) |
|---|---|---|
| Initial Cleaning | Annually (Spring) | Annually (Spring) |
| Deep Brightening/Restoration | Every 3–5 Years (as needed) | Only if the existing oil breaks down unevenly |
| Oiling/Sealing Application | Never | Annually (1-2 times per year) |
| Tightening Hardware | Annually | Annually |
| Time Commitment Per Year | 1–2 Hours | 3–4 Hours |

FAQ: Beginner Questions About Treating Teak
Q1: How often do I absolutely have to oil my outdoor teak furniture?
If you are happy with the silver-gray weathered look, you never have to oil it. If you insist on keeping the golden color, aim for once a year in mild climates, or twice a year if the furniture receives constant, direct sunlight.
Q2: Can I just leave my brand-new teak out in the rain?
Yes, you can! Teak is made to handle the weather. Rain will simply speed up the natural process where the wood turns from golden brown to a silvery gray. It won’t hurt the structural integrity of the wood.
Q3: What is the difference between a teak oil and a teak sealer?
Teak oil mainly tries to put back some of the wood’s natural moisture and deepen the color. A sealer generally includes UV protection built into its formula to actively fight the sun’s rays, which is the main reason the wood turns gray. A sealer often lasts longer between applications.
Q4: My teak furniture has black spots. Is it rotten?
Black spots on the surface are usually mildew or mold, not rot inside the wood. Teak’s high oil content keeps the core resistant to true internal decay. These spots can almost always be removed safely using the mild cleaning or vinegar solution mentioned above.
Q5: Should I sand my teak furniture?
Generally, no, sanding is not required unless you are removing severe weathering marks or dealing with splinters after a long time outdoors. If you do sand, only use fine-grit sandpaper (like 220-grit or higher) and always sand in the direction of the grain to avoid unsightly scratches.
Q6: Can I cover my teak furniture with a regular plastic tarp during winter?
It’s best not to. Trapped moisture under non-breathable plastic tarps causes wood to stay damp for too long, encouraging mold and mildew growth right where you don’t want it. Use specialized, breathable outdoor covers if storing outside.
Conclusion: Confidence in Caring for Your Investment
Caring for teak furniture doesn’t need to feel like a major chore or a high-stakes chemical balancing act. You have successfully learned that teak is tough by nature! Whether your goal is preserving that initial rich, honey tone with annual oiling or embracing the low-maintenance, classic silvery patina, the key is simple, gentle cleaning followed by consistent, measured application of your chosen treatment. Remember, you are the decision-maker here.
Choose the method that fits your lifestyle. With this guide, you are now equipped to keep your beautiful teak set looking fantastic and lasting for generations. Happy crafting and enjoying your outdoors!