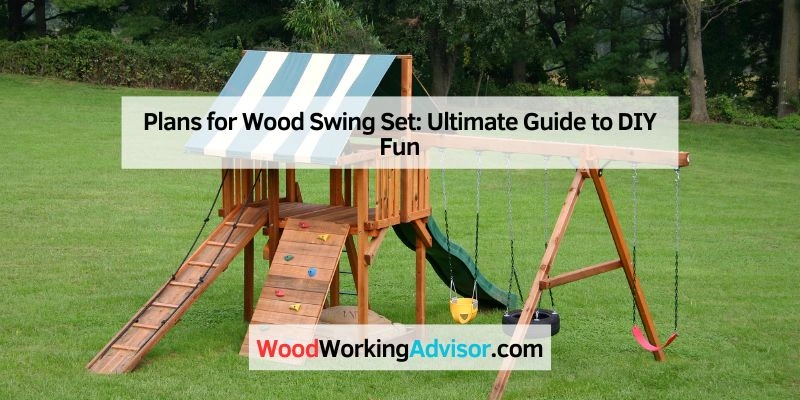
Plans for Wood Swing Set: Ultimate Guide to DIY Fun
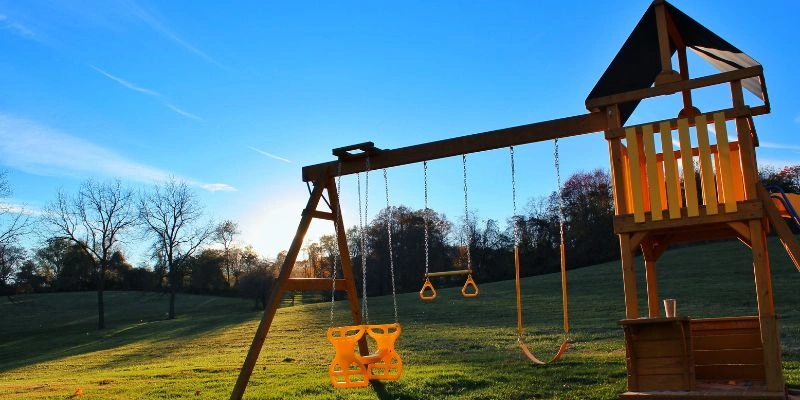
A wood swing set is a great addition to any backyard. It offers fun and exercise for children.
Planning to build a wood swing set can seem daunting at first. But with the right guidance, it becomes an exciting project. You’ll create a safe, enjoyable space for your kids. Plus, a wood swing set adds charm to your outdoor area.
In this blog, we’ll explore simple and effective plans for building a swing set. Whether you’re a DIY enthusiast or a beginner, you’ll find useful tips and advice here. Get ready to bring joy to your backyard with a wood swing set. Let’s dive in!
Introduction To DIY Wood Swing Sets
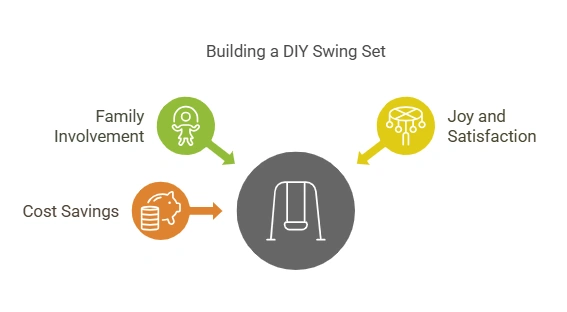
Creating a backyard play area for your kids is a project that brings joy and satisfaction. One way to achieve this is by building your own wood swing set. It’s a fun and rewarding task that the whole family can get involved in. Plus, it’s a great way to spend quality time together while also saving some money. Let’s dive into why you should consider building your own swing set and the benefits of a DIY approach.
Why Build Your Own
So, why should you bother building your own wood swing set? For starters, it allows you to customize the design to fit your yard perfectly. You can choose the type of wood, the size of the swing set, and even add unique features like a slide or a climbing wall. It’s all about creating a play area that suits your family’s needs.
Another reason is cost. Store-bought swing sets can be expensive. By building your own, you can save a significant amount of money. Plus, you get the satisfaction of knowing you built something with your own hands. It’s a fulfilling project that provides a sense of accomplishment.
Benefits Of DIY
There are numerous benefits to taking the DIY route for your wood swing set:
- Customization: As mentioned, you can tailor the swing set to your preferences and your yard’s dimensions.
- Cost-Effective: Building your own swing set is often cheaper than purchasing a pre-made one.
- Quality Control: You can ensure the materials and construction are of high quality, giving you peace of mind about the safety and durability of the swing set.
- Family Bonding: This project can be a great way to bond with your family. Everyone can pitch in, from sanding the wood to painting the final product.
Moreover, building a swing set is a fantastic learning experience. You’ll pick up new skills along the way, whether it’s woodworking, problem-solving, or even just following a detailed plan. Plus, the look on your kids’ faces when they see their new swing set is priceless.
In conclusion, building your own wood swing set is not just a project; it’s an adventure. It combines creativity, practicality, and family fun into one rewarding experience. So, roll up your sleeves, gather your tools, and start planning your DIY wood swing set today!
Choosing The Right Wood
Building a wood swing set is an exciting project. But, picking the right wood is key to making sure it’s safe and lasts a long time. You might be wondering, “Which wood is best?” Let’s dive into that and see what options you have.
Types Of Wood
There are several types of wood you can choose from. Each has its own strengths and weaknesses. Here are a few common choices:
- Cedar: Cedar is a popular choice because it is resistant to decay and insects. It also smells nice and is easy to work with.
- Redwood: Redwood is another great option. It is strong and has a natural resistance to rot and pests. It can be a bit more expensive, but its durability makes it worth the cost.
- Pine: Pine is often used because it is readily available and affordable. However, it is less resistant to decay and may need treatment to last longer.
Wood Treatment
Treating the wood is important to make sure your swing set stands up to the elements. Here are some tips on treating wood:
- Sealing: Apply a sealant to protect the wood from moisture. This helps prevent rot and keeps the wood looking good.
- Staining: Staining not only adds color but also provides an extra layer of protection. Choose a stain that is suitable for outdoor use.
- Painting: If you prefer a painted finish, make sure to use paint designed for outdoor wood. This will help protect the wood from sun and rain.
A friend of mine once built a swing set without treating the wood. It looked great for a year, but then the wood started to rot and the set became unsafe. Don’t make the same mistake. Treating the wood is worth the extra effort.
In conclusion, choosing the right wood and treating it properly will ensure your swing set is safe, durable, and enjoyable for years. Happy building!
Essential Tools And Materials
Building a wood swing set is a fun and rewarding project. But before you start, you need to gather all the essential tools and materials. Having the right tools and quality materials will make the job easier and ensure your swing set is safe and durable. Let’s dive into what you need.
Tool List
First, let’s talk about the tools. You don’t need a ton of fancy equipment, but there are some basics you can’t do without. Here’s a handy list:
- Measuring Tape: Accuracy is key, so make sure you have a good measuring tape.
- Drill: You’ll need this for making holes and driving screws. A cordless drill is handy.
- Saw: A circular saw or a handsaw works well for cutting wood to size.
- Level: To ensure your swing set is even and safe.
- Hammer: For driving nails and tapping things into place.
- Screwdriver: Both Phillips and flathead, for those screws and bolts.
- Wrench: For tightening bolts and nuts.
- Pencil: For marking measurements.
- Safety Gear: Don’t forget gloves, safety glasses, and ear protection.
Material List
Now, onto the materials. Choose quality wood and hardware to ensure your swing set lasts. Here’s what you’ll need:
- Wood: Pressure-treated lumber is best. Common sizes include 4×4 posts, 2×6 beams, and 1×4 slats.
- Screws and Nails: Galvanized or stainless steel to prevent rusting.
- Bolts and Nuts: For securing the structure. Make sure they are also rust-resistant.
- Swings and Accessories: Swings, chains, and any other play accessories you want to add.
- Concrete: For setting the posts into the ground for extra stability.
- Wood Sealer: To protect the wood from weather and wear.
In the end, having the right tools and materials is half the battle. Now, you’re ready to start building your wood swing set. Happy building!
Designing Your Swing Set
Designing a wood swing set can be a fun project. It requires careful thought and planning. Ensuring the design suits your space and needs is key. Let’s break down the steps to create the perfect swing set.
Measuring And Planning
Start by measuring your available space. Ensure you have enough room for the swing set. Leave extra space around it for safety. Sketch a simple plan. Note the dimensions and layout. This will help you visualize the final product.
Consider the height and width of your swing set. It should fit well in your yard. Think about the number of swings. Plan for additional features like slides or climbing walls. Make sure everything fits comfortably within your space.
Safety Considerations
Safety is a top priority. Choose sturdy, high-quality materials. Ensure all parts are securely fastened. Avoid sharp edges and rough surfaces. These can cause injuries.
Install the swing set on a soft surface. Grass, sand, or rubber mulch work well. These materials cushion falls. Regularly inspect the swing set. Check for loose bolts and worn-out parts. Replace them immediately to keep children safe.
Ensure the swing set is stable. Anchor it to the ground if needed. This prevents tipping and adds stability. Following these safety tips will keep your swing set fun and secure.
Building The Frame
Building the frame of your wood swing set is an exciting step in the process. This is where your project starts to take shape. A strong, well-built frame ensures that your swing set is safe and sturdy. Ready to get started? Let’s dive into the details of cutting the wood and assembling the frame.
Cutting The Wood
First things first, you need to cut the wood to the right sizes. Accurate measurements are crucial here. You don’t want wobbly swings, do you?
- Measure twice, cut once. This old carpenter’s saying is golden. Double-check your measurements before cutting.
- Use a saw that suits your comfort level. A handsaw works, but a circular saw can speed things up.
- Mark your cutting lines clearly. A pencil or chalk can do the trick.
Here’s a quick guide to common cuts:
| Part | Dimensions |
|---|---|
| Main beams | 4×4 inches, 8 feet long |
| Support posts | 4×4 inches, 6 feet long |
| Cross braces | 2×4 inches, varies |
Assembling The Frame
Now, let’s piece everything together. This part is like putting together a giant puzzle. Fun, right?
- Lay out the pieces: Arrange your cut wood in the shape of the frame on the ground. This helps you see how it all fits together.
- Attach the main beams: Use sturdy screws or bolts to connect the main beams to the support posts. Make sure they are level.
- Add cross braces: Cross braces add strength to your frame. Screw them in place securely.
Don’t forget to check for stability at each step. A wobbly frame is a no-go. If everything feels solid, congratulations! You’ve built the frame of your wood swing set.
Building the frame might seem daunting, but take it one step at a time. Before you know it, you’ll have a sturdy structure ready for swings, slides, and all sorts of fun.
And remember, measure twice, cut once – it’s the carpenter’s best friend! Happy building!
Adding The Swings
Once your wood swing set frame is ready, it’s time to add the most exciting part: the swings! This is where the real fun begins. Imagine your children’s laughter as they soar high, enjoying the fresh air. But first, let’s talk about the types of swings you can choose from and how to install them.
Types Of Swings
Choosing the right type of swing is crucial for both fun and safety. Here are a few popular options:
- Belt Swings: These are the classic swings most of us remember from childhood. They are flexible and comfortable.
- Tire Swings: Made from old tires, these swings offer a unique spinning experience. Plus, they are environmentally friendly!
- Bucket Swings: Perfect for toddlers, these swings provide extra support and safety with their high backs and leg openings.
- Disc Swings: These swings have a disc-shaped seat and are great for older kids who love a bit of a challenge.
Installing The Swings
Installation is key to ensuring the swings are safe and fun. Here are the steps to follow:
- Choose the Right Hardware: Use heavy-duty swing hangers and chains. They should be rust-resistant and strong enough to hold an adult’s weight.
- Measure and Mark: Measure the distance between the swings. Ensure there’s enough space to avoid collisions.
- Drill Holes: Use a drill to make holes where you marked. The holes should be slightly smaller than the swing hangers.
- Attach the Hangers: Screw the hangers into the holes. Use a wrench to tighten them securely.
- Hang the Swings: Attach the swing chains to the hangers. Make sure they are at the right height for your children.
And there you have it! Your swings are ready to use. Remember to check the swings regularly for any signs of wear and tear. Safety first, fun always!
Finishing Touches
Adding the finishing touches to your wood swing set can make all the difference. These final steps ensure durability and enhance the set’s appeal. Let’s explore some key finishing touches that will make your swing set stand out.
Painting And Sealing
Painting your wood swing set adds charm and protects it. Choose a weather-resistant paint. Bright colors can make the swing set more attractive. Ensure the wood is clean and dry before painting. Apply a primer first for better paint adhesion. Seal the wood after painting. This step protects the wood from moisture. A good sealant extends the swing set’s life.
Decorative Elements
Decorative elements personalize your swing set. Add fun designs or patterns with stencils. You can paint shapes or favorite characters. Attach flags or banners for a playful look. Consider adding flower boxes or fairy lights. These touches make the swing set unique. Ensure all decorations are safe and securely attached. Your kids will love the creative additions.
Maintenance Tips
Keeping your wood swing set in tip-top shape doesn’t have to be a daunting task. With a few simple maintenance tips, you can ensure that your swing set remains safe, sturdy, and fun for years to come. Whether you’re a seasoned DIY enthusiast or just starting out, these tips will help you maintain your swing set with ease.
Regular Inspections
Regular inspections are crucial to the longevity and safety of your wood swing set. Think of it like a routine check-up for your car. You wouldn’t skip those, right? Here’s what you need to do:
- Check for Splinters: Run your hand over the wood to feel for any rough spots. Sand them down to prevent injuries.
- Look for Rust: Inspect all metal components for signs of rust or wear. A little rust can quickly become a big problem if left unchecked.
- Inspect Fasteners: Ensure that bolts, screws, and nuts are tight. Loose fasteners can cause the structure to become unstable.
Remember, a quick 10-minute inspection once a month can save you from bigger issues down the road. Make it a part of your routine and it’ll soon become second nature.
Repair And Upkeep
Even with regular inspections, repairs and upkeep are inevitable. The good news? They don’t have to be complicated.
- Replace Damaged Parts: If you find any parts that are beyond repair, replace them immediately. This includes cracked wood, bent metal, or broken swings.
- Stain and Seal: Every few years, give your swing set a fresh coat of stain and sealant. This helps protect the wood from the elements and keeps it looking great.
- Lubricate Moving Parts: Apply a little lubricant to hinges, chains, and other moving parts to keep them operating smoothly.
Here’s a tip: Keep a small toolkit handy with all the essentials you might need for quick fixes. This way, you won’t have to hunt around for tools when it’s time for repairs.
So, there you have it. With these simple maintenance tips, your wood swing set will not only last longer but also provide a safe and enjoyable play space for the kids. And who knows? Maybe even the adults will sneak in a swing or two!

Frequently Asked Questions
Is It Cheaper To Build Your Own Swing Set?
Building your own swing set can be cheaper. Costs depend on materials, tools, and your DIY skills.
What Is The Best Wood To Build A Swing Set?
Cedar and redwood are the best woods for swing sets. They are durable, resistant to decay, and naturally insect-repellent.
What Length 4×4 For Swing Set?
Use a 4×4 post with a length of 8-10 feet for a sturdy swing set. Ensure it’s securely anchored.
How Much Does It Cost To Build A Wooden Swing?
The cost to build a wooden swing ranges from $100 to $500. Prices vary based on materials and design.
Conclusion
Building a wood swing set can be a rewarding project. It offers fun and exercise for kids. Plus, it adds charm to your backyard. Follow the plans carefully for best results. Always prioritize safety during construction. A well-built swing set lasts for years.
Your children will create wonderful memories playing on it. So, gather your tools and get started. Happy building!