How to Restore Wood Trim: Revive, Recoat or Strip?
Most wood trim needs a revive or a recoat, not a strip. Clean it with mineral spirits, restore the finish, and only strip when it is peeling or the wrong color. If your house predates 1978, check for lead paint before any sanding or scraping. This guide covers how to identify your trim’s finish, the five restoration levels from light to heavy, and the finish to use last.
Which Restoration Level Does Your Trim Need?
 |
Best Trim Reviver Pick Howard Restor-A-Finish, 16 oz (Neutral) A wipe-on, wipe-off finish restorer that blends out minor scratches on intact finishes, sold in nine tones from Neutral to Ebony Brown.
|
As an Amazon Associate we earn from qualifying purchases.
Most guides jump straight to sanding. That is the expensive mistake: every step up this ladder removes more of the original wood surface and adds a day of work, so start at the lowest level that fixes what you actually see.
| Level | What it looks like | What you do | Abrasive |
|---|---|---|---|
| 1. Clean | Dull, grimy, waxy buildup, finish intact | Wipe with mineral spirits, then a damp cloth | None |
| 2. Revive | Fine scratches, faded color, finish intact | Wipe on a finish reviver or thin wipe-on poly | 0000 steel wool or gray synthetic pad |
| 3. Scuff and recoat | Worn sheen, small dings, finish still bonded | Sand lightly, fill dents, add 2 to 3 coats | 220-grit, then 320-grit between coats |
| 4. Spot strip | Peeling or alligatored areas only | Strip the failed patches, feather the edges, refinish | 120 to 150-grit, then 220-grit |
| 5. Full strip | Wrong color, thick paint, or finish failing everywhere | Strip everything, sand, stain, and refinish | 150-grit, then 180 and 220-grit |
A finish that is intact but ugly belongs in levels 1 to 3. A finish that is failing (lifting, cracking into a scale pattern, or peeling in sheets) belongs in level 4 or 5. Color is the other trigger: stain can only go darker, so lightening trim means stripping.
Before You Sand or Strip: Lead Paint and Fumes
If your home was built before 1978, painted trim may contain lead. The EPA recommends that a certified lead inspector or risk assessor test surfaces you plan to renovate, because a home test kit only tells you about the spot you swabbed. Clear-finished, stained trim is usually not the problem. Paint layered over it, or under it, is.
The EPA’s lead-safe rules for contractors prohibit open-flame burning, heat guns above 1100 degrees Fahrenheit, and power sanding without a shroud and HEPA vacuum attachment in pre-1978 homes. Those are sensible limits for a homeowner too. Spread plastic sheeting, wet-mist surfaces before hand scraping, and never dry-sand suspect paint. The EPA’s guidance for DIYers is on its Lead-Safe Renovations for DIYers page.
Chemical strippers need their own precautions. The EPA banned methylene chloride paint removers for consumer use in 2024, after documented deaths from its fumes, so check the label of any old can in the garage and do not use one. Whatever product you choose, work with windows open and a fan pulling air out of the room, wear chemical-resistant gloves and eye protection, and use the respirator type the label specifies. A dust mask does not stop solvent vapors.
How to Identify the Finish on Your Trim
The right treatment depends on what is on the trim, and a two-minute test in a hidden spot (behind a door, under a window sill) tells you. Put a drop of denatured alcohol on a cotton swab and hold it on the finish for about 30 seconds.
| What happens | Likely finish | What it means for restoration |
|---|---|---|
| Softens or comes off on the swab | Shellac | Revives easily; a fresh coat of shellac melts into the old one |
| Alcohol does nothing, lacquer thinner softens it | Lacquer | Recoats well; new lacquer bonds to old |
| Neither one touches it | Varnish or polyurethane | Very durable; needs scuff-sanding for any new coat to grip |
| Paint sits on top and scrapes off in a film | Painted trim | Test for lead first if the house is pre-1978 |
Test the lacquer thinner only after the alcohol test, in a ventilated spot, and away from any flame or pilot light, because both solvents are flammable. This test is the step most tutorials skip, and it explains most recoating failures: a coat that will not bond, or wrinkles when it goes on, usually means the wrong finish was put over the old one.
Levels 1 and 2: Clean and Revive Without Stripping
Old trim collects cooking grease, hand oils, wax, and often layers of furniture polish. New finish will not bond over any of it, so cleaning is never optional, even when you plan to sand afterward.
- Dust first. Vacuum with a brush attachment, then wipe with a dry microfiber cloth.
- Cut the grease. Wipe a small section with a rag dampened (not soaked) in mineral spirits, turning the rag often. Grime and wax come off onto the rag.
- Wipe residue. Follow with a cloth dampened in clean water and a drop of dish soap, then dry immediately.
- Assess. Once the trim is clean, many finishes look far better already. Decide whether you still need more.
- Revive. Rub a finish reviver into the wood along the grain, let it soak briefly, and wipe off the excess. For fine scratches, 0000 steel wool with the reviver blends them in.
One caution on steel wool: if you plan a water-based finish afterward, use a gray synthetic pad instead, since steel fibers left in the grain can rust under water-based coatings. Also skip spray furniture polish on any trim you may refinish later, because silicone-containing polishes can cause fisheyes (small craters) in the new finish.
Level 3: Scuff-Sand and Recoat
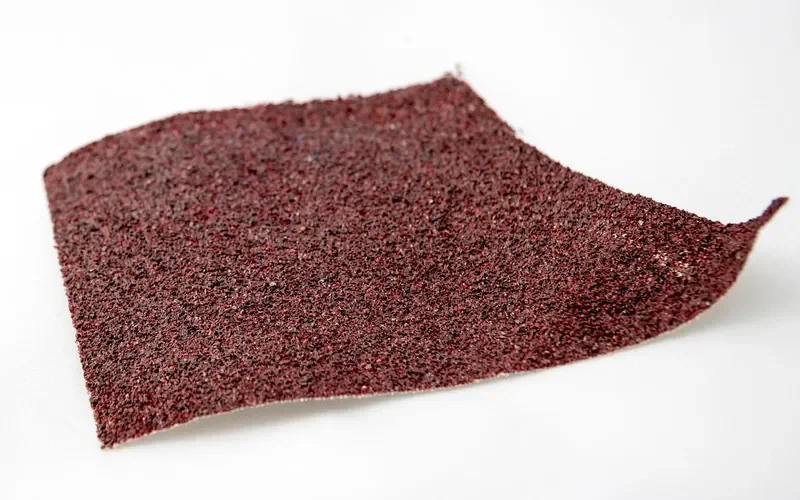
When the sheen is worn but the finish is still bonded, sanding only has to dull the surface so the new coat can grip, not remove the old finish. Use a sanding sponge or 220-grit paper wrapped around a block for flat runs, and fold the paper for coves and beads. Sand with the grain and stop as soon as the gloss is uniformly dull.
- Fill dents and nail holes first. A stainable filler works for bare wood, and a color-matched putty stick is easier on finished trim. See our guides to filling nail holes in trim and closing gaps of 1/4 inch or wider.
- Vacuum, then tack. Dust left on the trim becomes a bump in the finish.
- Darken with gel stain if needed. Gel stain sits on the surface and can go over a sanded, sound finish. Our gel stain vs oil stain comparison explains why.
- Apply thin coats. Two to three thin coats beat one thick coat, and trim edges are where drips and runs hide.
Wait for each coat to dry as the can directs before you sand lightly (320-grit) and recoat. If you are unsure how long to wait between products, our guide on waiting time before applying polyurethane over stain covers it.
Levels 4 and 5: Spot Stripping and Full Stripping
Strip only what has failed. Peeling patches can be stripped locally, and the edges feathered with 150-grit until you cannot feel a ridge with your fingertip. Paint on trim is a different job with its own techniques, so follow our full guide to removing paint from wood trim and the comparison of chemical, heat and sanding methods.
For clear finish that must come off entirely, a gel-type stripper clings to vertical trim better than a liquid. Apply a thick coat, keep it covered with plastic while it works, and scrape gently along the grain with a plastic scraper so you do not gouge soft wood like pine. Mineral spirits or the stripper maker’s recommended wash removes residue, and the wood needs to dry fully before you sand. If a dark stain ring or old dye remains, a wood stain remover may be needed before restaining.
For general background on refinishing wood pieces beyond trim, see our guide to restoring old wood.
Choosing the Final Finish for Trim
Trim takes more bumps, vacuum strikes, and cleaning than most surfaces, so the finish has to be durable and easy to wipe. Oil-based wipe-on polyurethane is forgiving because it self-levels and you apply it with a rag, so runs on profiles are rare. Water-based polyurethane stays clear and does not amber, which matters on pale woods like maple or on light-stained trim. Shellac is the easiest to repair later, but heat and alcohol can mark it. For sheen, satin or semi-gloss are the usual choices because they hide fingerprints better than gloss and wash better than flat.
One safety point on oil finishes: rags soaked in oil-based finish can heat up as the oil cures and, if left bunched, ignite spontaneously. Lay used rags flat outdoors to dry, or seal them in a metal container filled with water, before disposing of them.
Common Trim Restoration Mistakes
- Stripping a finish that only needed cleaning. Trim often looks ruined from wax and grime alone.
- Sanding through the edge of a profile. Corners and beads lose finish first, and sanding them flat destroys the profile. Use a sponge or folded paper, not a flat block, on curves.
- Applying stain over the old finish. It will sit as blotchy streaks or not color at all. Use gel stain or strip first.
- Skipping the test spot. Any new product should go on a hidden section first, including revivers and strippers.
- Ignoring the substrate. Some trim is painted MDF or finger-jointed pine, not solid stained hardwood, and it does not strip or sand like solid wood.
Frequently Asked Questions
Can I restore wood trim without taking it off the wall?
Yes. Every level in this guide works with the trim in place. Tape the wall edge, cover the floor, and work one section at a time. Removing trim only makes sense when it is cracked through, badly split at the miters, or needs to be replaced rather than restored.
Do I have to strip old finish before staining wood trim?
Only if you want a lighter color or the old finish is peeling. A sound finish can be scuff-sanded with 220-grit and recoated, and a gel stain can darken it. Stain cannot soak into an intact finish, and no stain can make trim lighter than it already is.
What is the easiest way to make dull wood trim shine again?
Clean it with mineral spirits to remove wax and grime, then wipe on a finish reviver or a thin coat of wipe-on polyurethane. If the finish is intact, this takes an afternoon and involves no sanding at all.
How do I know if my trim has lead paint?
If the house was built before 1978, assume painted trim may contain lead. The EPA recommends having a certified lead inspector or risk assessor test surfaces you plan to renovate. Do not dry-sand or scrape painted pre-1978 trim until it has been tested.
Can I paint over stained wood trim instead of restoring it?
Yes, but it is permanent in practice, because stripping paint from detailed trim is much harder than stripping clear finish. Deglossing, priming with a stain-blocking primer, and painting works, but restoration keeps the option of natural wood open.
Start with the cleaning step and judge the result before deciding to sand. In many cases the trim only needs to be cleaned and revived, and the heavier levels are for finishes that have actually failed.
Sponsored / affiliate links. As an Amazon Associate I earn from qualifying purchases. I may earn additional commission from eligible campaigns.