Smart Drill Bit Organization Ideas for Your Workshop
Organizing your workshop can sometimes feel tricky, especially when it comes to tools like drill bits. Finding the right bit quickly can be a challenge, and keeping them safe is important. This is because a disorganized workspace wastes time and could even cause accidents. But don’t worry! This guide will provide simple, effective Smart Drill Bit Organizer Ideas for Your Workshop. You will discover easy step-by-step methods to get your drill bits organized and your workspace working better.
Choosing the Best Drill Bit Storage System
Picking the correct storage system is the starting point for a well-organized drill bit collection. The perfect setup depends on your available space, the number of bits you have, and how you use them. You want a system that protects your bits from damage, keeps them accessible, and allows for easy identification. You’ll find there are many different organizational structures from simple boxes to custom-built racks. Careful consideration of these elements is important when planning your setup.
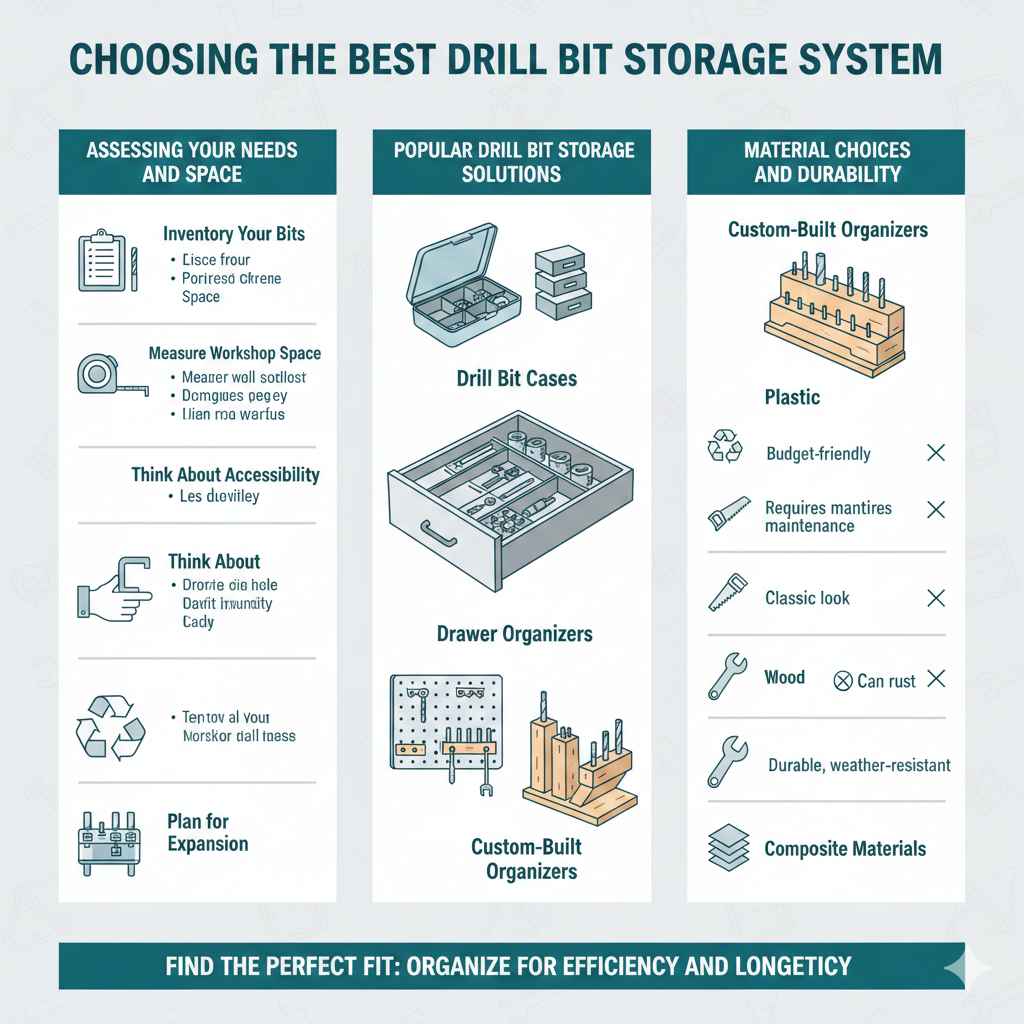
Assessing Your Needs and Space
Before you purchase or create any storage solutions, it’s necessary to do some groundwork. Begin by figuring out how many drill bits you currently own and also how many you plan to have. Consider the types of bits you use most often. You might focus on organizing the types of bits you regularly use first. Next, look at your workshop space. Where can you find the most suitable location for your drill bit organizer? Measuring the available space will also help you to decide the sizes and designs that will work well.
Inventory Your Bits: Take a complete inventory of all your drill bits. Sort them by size, type (e.g., twist, masonry, spade), and material. This step helps identify the scope of the project. Knowing how many bits you have ensures that your organization solution is large enough.
Knowing the amount and various types of drill bits you currently possess assists in designing a functional organizer. For example, if you mostly work with wood, a different organizational system would suit you compared to someone who works with metals or masonry. This is a very important step to begin with.
Measure Your Workshop Space: Measure the area in your workshop where you plan to install the organizer. This could be a wall, a drawer, or a workbench. Having precise dimensions prevents purchasing an organizer that is too big or too small.
Accurate measurements also guarantee that the organizer fits comfortably in your working area. Consider factors like overhead space, surrounding items, and user movement. You can select the most space-efficient system by measuring the available area.
Think About Accessibility: Decide how you want to access your drill bits. Do you need a system that allows quick access or one that provides more long-term protection? Consider the frequency of use and the work patterns in your shop.
Quick access means the drill bits are immediately available when needed. An easy-to-reach solution will save time when completing projects. Different needs require different organizational designs. Easy access is especially important for those who use drill bits often.
Plan for Expansion: Think about adding more bits in the future. Select a storage option that can expand as your collection grows.
It’s likely that your drill bit collection will grow with time. Selecting a system that accommodates your needs guarantees long-term practicality. Consider options such as modular systems. This design lets you add extra storage units as your bit collection grows.
Popular Drill Bit Storage Solutions
Once you understand your workshop needs, it’s time to examine popular drill bit storage options. From simple to advanced, there are many storage methods to choose from. Each system comes with different advantages and disadvantages based on its ease of use, cost, and capacity. The selection should center on what will be best for your workflow and workshop setup. Proper selection will save you time and create an enjoyable working environment.
Drill Bit Cases: Drill bit cases are the standard storage option. They are compact, portable, and come with various compartments for sorting. The convenience of these cases is that they often include bit size markings.
Drill bit cases are suitable for small to medium-sized collections. They are especially useful for anyone moving between locations. The cases are perfect for protection and easy transportation. Most cases have clear labeling for quick identification. This makes it easy to find what you are looking for.
Drawer Organizers: Drawer organizers fit in your existing tool drawers, offering a custom fit. Drawer organizers maximize space and keep the bits within easy reach. They usually have dividers or trays for size, type, and usage.
Drawer organizers help prevent clutter and improve shop organization. They help users quickly access drill bits during their work. The custom fit helps to make the most use of space in your drawers. This system also prevents bits from moving around during drawer opening and closing.
Wall-Mounted Racks: Wall-mounted racks save space by using wall areas. These racks often have holes or slots designed to hold each bit size. You can create a wall mount customized to your needs and available wall space.
Wall-mounted racks are an excellent option for organizing and saving space in your shop. They give a clear display of drill bit sizes. These racks can be placed near your workspace for added convenience. The easy-to-see design will save you time finding the correct bits.
Custom-Built Organizers: Those with woodworking skills can create customized organizers from wood or other materials. The custom design can fit any size, style, and storage need. This level of customization allows you to create the perfect organization.
Custom-built organizers are a great way to meet precise needs. They can include features such as angled shelves or specialized compartments. The process allows you to include unique design details. This will help make a one-of-a-kind, attractive, and highly useful tool organizer.
Material Choices and Durability
The materials that make up your drill bit organizer are crucial. The material used impacts the organizer’s durability, visual appeal, and maintenance. Selecting the right materials guarantees that your system is long-lasting, protects your bits, and is in good shape. Think about these materials and how they fit your workshop and how you work.
Plastic: Plastic organizers are budget-friendly, lightweight, and easy to clean. They provide good protection from moisture and are resistant to rust. Plastic is a good material for those on a budget, but it may not be as durable as other options.
Plastic organizers are ideal for beginners due to their low cost and ease of use. These organizers provide a clean, modern aesthetic. They are not prone to rusting, making them suitable for workshop environments. However, they may break if you drop them or if they get a lot of wear and tear.
Wood: Wooden organizers offer a classic look and can be customized to match your shop’s decor. Wood is sturdy and can easily be cut and shaped. You can create different layouts and designs.
Wood is a great choice for builders and people who like to create something special. It also requires some maintenance. You need to keep it protected from moisture and chemicals. Properly maintained wood can last for many years and add a touch of charm to your workspace.
Metal: Metal organizers are durable and will survive in a heavy-use shop. They offer excellent protection for your drill bits. They are a good choice for people who use their tools regularly. Metal organizers can be more expensive than other options, and they can rust if exposed to moisture.
Metal organizers are very strong and can bear much weight. They are an excellent choice for a busy workshop where tools need to resist constant use. Metal also provides resistance to harsh conditions, like impacts. Some metal organizers can be magnet-based for additional storage options.
Composite Materials: Composite materials mix various materials such as wood fibers and plastics. This material gives you the benefits of both while being durable and weather-resistant.
These materials offer excellent strength and durability, with better resistance to water and chemical damage. They are excellent for environments that see lots of wear or variable conditions. You can shape them to create custom solutions with all the advantages of multiple materials.
Crafting Your Own Drill Bit Storage Solutions
Crafting your own drill bit organizer lets you create a storage system that perfectly fits your workspace and needs. This hands-on process allows you to customize sizes, materials, and features. You will be able to make a functional tool organizer while also enjoying the satisfaction of a do-it-yourself project. Plus, you save money by making something yourself. Here is how you can make your own drill bit organizer.
Building a Simple Wooden Rack
A simple wooden drill bit rack is a great option for a beginner DIY project. It is simple, affordable, and easily customizable. The project involves basic carpentry skills, such as cutting, drilling, and joining wood pieces. These instructions give you the base of your own drill bit rack.
Gather Your Materials: You will need a piece of wood, drill bits of various sizes, wood glue, and screws. Choose wood that is at least 1/2 inch thick for strength and stability. Prepare safety gear like gloves and eye protection.
Start by getting all the materials needed before beginning your project. This will help make sure everything is within reach and can prevent issues. You’ll need wood, screws, glue, and maybe some paint or sealant to make your rack last longer. Make sure you also have basic woodworking gear, like a drill, saw, and measuring tools.
Cut the Wood: Cut the wood to the desired size using a saw. Decide the dimensions based on your space and collection size. Cut the wood into a backboard and shelves.
Precise cutting is vital for a nice-looking, functional rack. Ensure that cuts are square and that the boards are the right size. This forms the foundation of your rack. Make sure to cut all your pieces with precision.
Drill Holes: Drill holes in the shelves to hold your drill bits. Choose a drill bit that matches the size of your drill bits. Space the holes appropriately to avoid overcrowding.
The hole spacing and size are key for how well the rack holds your drill bits. The drill bits must fit snugly in their holes. This guarantees your drill bits remain in the right place. To make the most of your space, you can customize the spacing between holes.
Assemble the Rack: Attach the shelves to the backboard using wood glue and screws. Make sure the shelves are square. Let the glue dry completely before use.
The assembly phase requires careful attention to detail for strength. Ensure that all pieces are aligned correctly before tightening screws. Allow the glue to cure properly before using the rack. This guarantees that your drill bit rack is strong and durable.
Finishing Touches: After assembly, sand the rack to remove sharp edges. You can paint or stain the rack for a finished look and to protect the wood. Consider adding labels for each drill bit size.
Final touches make your rack last and look good. Sanding removes imperfections and guarantees a smooth surface. Painting or staining helps to protect the wood and personalize the rack. Labeling ensures you quickly find the correct drill bit. Doing so will make your organizer both attractive and useful.
Using Pegboard for Versatile Storage
Pegboard offers a modular and flexible drill bit storage solution. It’s a great choice if you require to change your storage setup over time. Pegboard is inexpensive and can be quickly customized. You can arrange and rearrange your storage system to meet changing needs. Here’s how to use it.
Choose Your Pegboard: Pick a pegboard of the right size to suit your workshop needs. You can choose from various materials such as wood, metal, or plastic. Make sure the pegboard you choose is durable and strong.
Think about the pegboard material. Wood pegboard can be painted or stained. Metal provides superior durability. Make sure the pegboard is thick enough to withstand the weight of your drill bits. Ensure it can fit in your workshop.
Mount the Pegboard: Mount the pegboard on a wall or a workbench. To keep enough space for the pegs, you should use stand-off brackets. These brackets allow you to place your pegs into the holes easily.
Proper mounting guarantees that the pegboard is secured. Use screws or anchors that work well with the wall material. Consider where you will put the pegboard so that it does not take up too much space. This gives you easy access to your bits.
Select Your Pegboard Accessories: Select pegs, hooks, and holders designed for pegboards. Get the ones that work with your drill bits. There are pegs designed to hold drill bits. You can also use small shelves or bins for accessories.
The right accessories will create a practical and effective storage setup. Choose pegs and hooks that can hold the weight of your drill bits. Ensure the accessories are easy to set up and rearrange. Consider items like small shelves for accessories or other tools.
Arrange and Organize: Put your drill bits in the pegboard system. You should group the drill bits by size or type. Keep the most often used bits closer for easy access.
A well-organized system will save you time and make the workshop more productive. Organize the bits according to how you use them most. Arrange the bits in a logical way that suits your work style. Think about the best locations for your most frequently used bits.
Add Labels: Label each spot or bin with the drill bit size or type. This helps with easy identification. Clear labeling will make it easy to find and return the drill bits.
Labels help with visual organization, improving efficiency. Using labels means you do not have to guess. This also helps with returning the bits after use. The labels should be easy to read and clear.
Repurposing Items for Unique Storage
Another approach to creating drill bit organizers is using everyday items you already own. Reusing items is eco-friendly and often very affordable. It also encourages innovative thinking in your workshop. You can create a one-of-a-kind storage system. Here are some of the ways you can use what you already have.
Mason Jars: Mason jars are perfect for storing drill bits. Arrange the jars on a shelf or attach them to a board. Mason jars are easily accessible and are suitable for many workshop settings.
Mason jars offer a visually attractive and functional storage solution. Group your bits by size or type inside each jar. You can use clear jars to see the bits without opening them. They also keep your drill bits safe from dust and debris.
Old Toolboxes: Repurpose an old toolbox by adding dividers or shelves to hold drill bits. You can paint or label the toolbox. Old toolboxes provide a classic appearance and ample space.
A repurposed toolbox gives a practical storage system with character. It provides space and protection for your drill bits. Consider adding dividers or custom shelves to arrange bits. This setup allows you to move your drill bits around easily.
Spice Racks: Small spice racks can hold drill bits. You can place spice racks on a wall or workbench. You can easily see the drill bits. Spice racks can be painted or modified to fit your needs.
Spice racks offer an organized, space-saving storage solution. The angled shelves make it easy to see all your bits. You can create a system for organizing the size or type of bits. They are also easy to install on any wall.
PVC Pipes: Cut different lengths of PVC pipes. Glue them together. You can make a custom holder that holds many bits. Paint and label the PVC pipes for easy access. PVC is also very cost-effective.
PVC pipes provide a simple and affordable storage option. Arrange your bits by size in each pipe. The different lengths help to accommodate varying sizes of bits. You can easily customize the size and configuration to fit your space.
Advanced Techniques and Extra Features
After you have a basic drill bit organization system, you may wish to add some extra features. These can improve the system’s efficiency and user-friendliness. From adding labels to incorporating magnetic strips, these modifications will make the experience even better.
Adding Labels and Markings
Labels and markings are key to an organized system. They allow you to instantly identify and select the correct drill bit. They cut down on the time it takes to find the bit you need. These small steps can dramatically improve the workflow in your workshop.
Labeling Techniques: Use labels. Write the bit size on each drill bit or storage spot. You can use a label maker, a pen, or stickers. Labeling makes it easier to find drill bits.
Clearly labeled storage helps you locate tools quickly. Ensure the labels are easy to read and long-lasting. Consider using different colors for labels to identify the various drill bit types. This adds another layer of organization.
Color-Coding Systems: Use a color-coding system. Assign different colors to different drill bit types. Using color coding makes visual sorting simpler.
Color coding lets you identify the drill bits without needing to read the labels. This makes the system more intuitive and efficient. This makes it easier to see and choose the drill bits. This will help with the workflow.
Size Indicators: Use size indicators. Place a size chart close to your storage system. This allows for quick reference when choosing a drill bit.
Size indicators are helpful for beginners and experts alike. This will assist you in selecting the correct drill bit. You can create a chart for your specific collection. This will assist in measuring different drill bit sizes.
Using Magnetic Strips and Holders
Magnetic strips and holders can improve drill bit storage, providing extra convenience and utility. These features are great for accessing tools rapidly and keeping your workspace tidy. The following steps should help with organization.
Installing Magnetic Strips: Stick magnetic strips onto the organizer or the workbench. Mount the drill bits to the magnetic strips for fast access. Magnetic strips are perfect for storing smaller, metal bits.
Magnetic strips allow for quick and easy access to frequently used drill bits. This helps make the workspace more organized. They are especially useful for keeping small bits at arm’s reach. You can add more strips depending on your needs.
Using Magnetic Holders: Use magnetic bit holders. These holders have slots for various drill bits. The magnetic design holds the bits firmly in place.
Magnetic holders make it easy to arrange and identify drill bits. They are perfect for both large and small sets. Magnetic holders are a great way to keep bits organized. This keeps your workspace clean and tidy.
Benefits of Magnetism: Magnetic solutions help prevent clutter and improve safety. They keep the drill bits in place and prevent them from falling. Magnetic storage also helps keep the bits clean and protected.
Magnetism increases the accessibility and organization of your drill bits. This is a very useful idea in your shop. Magnetic storage is perfect for easy access, and it helps to prevent injuries.
Adding Drawers and Compartments
Including drawers and compartments into your drill bit storage system is a great way to improve functionality. This lets you organize and separate various drill bit types and also accessories. It ensures that everything is kept and maintained in a convenient and safe manner.
Designing Drawers: You can create your own drawers or buy pre-made ones. Make sure the drawers are the correct size to fit your space. Dividers and inserts can be added to the drawers for organization.
Well-designed drawers will maximize space and keep things organized. You can make drawers that are the perfect size for your drill bits. Dividers are also important to keep the various drill bits organized. This improves the working environment and saves time.
Adding Compartments: Create separate compartments within the organizer. Use dividers, shelves, or small boxes to keep drill bits organized. These compartments can be customized to the size of the bits.
Compartments help to separate the bits and improve organization. You can create dedicated spots for different types of bits. The custom size is important so that the bits stay in place. This helps with managing the different sizes and kinds of drill bits.
Organizing Accessories: Organize accessories such as chuck keys and depth stops in your drawers and compartments. You can add small boxes or holders for better management. Make the accessories easy to find.
Keeping accessories within easy reach improves work efficiency. Adding compartments for accessories guarantees everything is kept in one place. Doing this simplifies the work process and also makes things easier to manage.
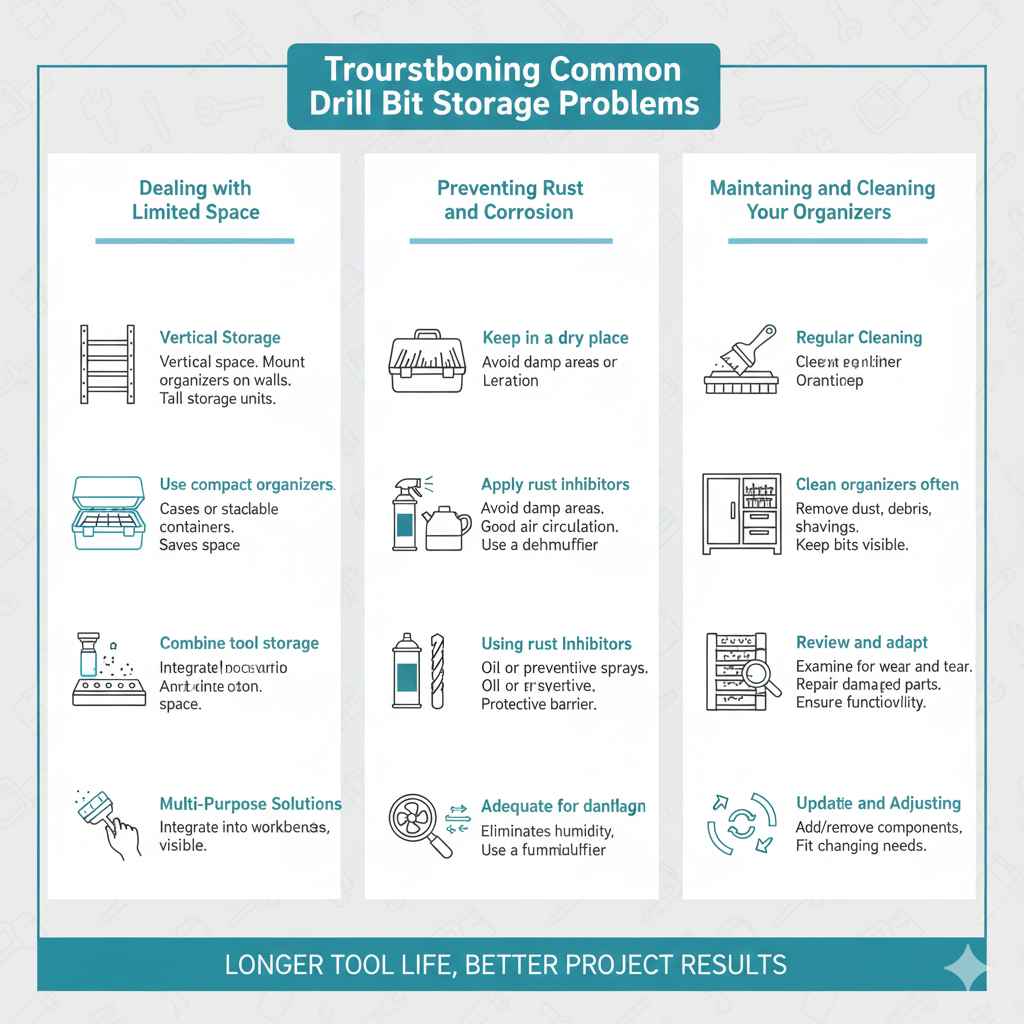
Troubleshooting Common Problems
Even with careful planning, some issues can happen with drill bit storage. Identifying and fixing these problems helps you to keep a well-managed and effective organization system. Learning about these problems can improve your experience.
Dealing with Limited Space
Limited space can be a major issue in many workshops. Creative thinking and effective strategies are required to use all available area. Think about how to maximize your space.
Vertical Storage: Utilize vertical space. Mount organizers on walls or doors. Use tall storage units instead of wide ones.
Vertical storage saves horizontal space. These options are ideal for workshops with limited square footage. Use the space above your workbench or on your doors. This will let you expand your storage without making the area feel crowded.
Compact Organizers: Use compact organizers like cases or stackable containers. They take up less space while offering good storage.
Compact organizers are suitable for small workshops or limited spaces. They are easy to move, which adds to their flexibility. These options provide enough storage without taking up too much room.
Multi-Purpose Solutions: Combine tool storage with drill bit storage. You can create a system that doubles the space. You can incorporate drill bit storage into your workbenches.
Multi-purpose solutions are a great way to save space. Integrate drill bit storage into tool chests or workbenches. Doing so enhances the functionality of your workshop. This is a very creative and efficient use of the limited space.
Preventing Rust and Corrosion
Drill bits are susceptible to rust, especially in humid environments. Protecting your bits from moisture ensures that they stay in top shape. Here are some preventative measures.
Storing in Dry Locations: Keep your drill bits in a dry place. Avoid keeping them near water sources or in damp areas. Proper storage helps keep the bits rust-free.
A dry environment is vital for maintaining your drill bits. Moisture is the main cause of corrosion. Make sure your storage location has good air circulation. This helps to prevent moisture buildup.
Using Rust Inhibitors: Apply rust inhibitors such as oil or rust-preventative sprays. This will protect your drill bits from rust. Applying this will create a barrier that keeps out moisture.
Rust inhibitors supply an extra layer of protection. These products are easily accessible and simple to apply. You can protect your bits from rust with regular applications. This is a very useful technique in humid environments.
Proper Ventilation: Make sure your storage area has good ventilation. Air circulation helps to eliminate humidity and prevent rust.
Adequate ventilation minimizes the chance of moisture buildup. This is especially useful in closed storage systems. You may wish to use a dehumidifier in your workspace. This will reduce humidity.
Maintaining and Cleaning Your Organizers
Keeping your drill bit organizers clean and maintained is essential for long-term usability. Routine maintenance and cleaning will ensure that your drill bits remain in good condition. You can also make sure your workspace is ready for use.
Regular Cleaning: Clean your drill bit organizers often. Remove any dust, debris, or metal shavings. Cleaning ensures that your drill bits remain visible and functional.
Routine cleaning is vital for maintaining the effectiveness of your storage system. Make sure you use a brush or vacuum to remove debris. Clean your organizers. This will prevent build-up. Regular cleaning helps to extend the life of your system.
Inspecting for Damage: Examine your organizers for wear and tear. Repair or replace damaged parts. Doing so keeps the organizer in working condition.
Inspect the organizers at regular intervals for any damage. Check for any cracks, splits, or loose parts. Addressing these problems immediately can prevent more serious damage. This will guarantee that your system remains functional and safe.
Updating and Adjusting: Review your storage system occasionally. Adapt or update your setup if needed. This will fit your changing needs.
Reviewing the system ensures it keeps meeting your demands. Add or remove storage components. Ensure the labels remain accurate. Modify your setup as your collection of bits grows or your work style evolves.
Frequently Asked Questions
Question: What is the best material for a drill bit organizer?
Answer: The best material depends on your specific needs. Wood offers a classic look and customizability, while metal provides durability. Plastic is cost-effective and easy to clean.
Question: How do I measure my drill bits for storage?
Answer: Use a ruler or calipers to measure the diameter and length of your drill bits. This will help you select the right size for the storage.
Question: What is the best way to prevent rust on drill bits?
Answer: Store your drill bits in a dry area. You can also apply a rust inhibitor or use a dehumidifier to reduce humidity.
Question: Can I build my own drill bit organizer?
Answer: Yes, you can! Building a custom organizer allows for full personalization of the size, features, and style.
Question: How can I organize drill bits in limited space?
Answer: Make use of vertical storage, like wall-mounted racks. Select compact organizers. Integrate drill bit storage with other tools.
Final Thoughts
Organizing your drill bits doesn’t have to be a difficult project. By starting with an assessment of your needs and space, you can choose a storage solution that fits your workspace and work habits. There are numerous ideas that will improve efficiency and help with your workflow. From simple drill bit cases to personalized custom-made racks, you have lots of choices to fit your specific needs. You can craft your own storage solutions using wood, pegboard, or even repurposed items. Using clear labeling, magnetic holders, and compartments will greatly improve the effectiveness of your system.
Remember to maintain and clean your organizer and also to troubleshoot any space or environmental problems. Don’t be afraid to experiment with different ideas and techniques. This will allow you to make the most of your space and maximize the efficiency of your workspace. Good luck with your project!