Spell Polyurethane: The Ultimate Guide to Perfect Finishes
Polyurethane is spelled as P-O-L-Y-U-R-E-T-H-A-N-E. It is a versatile polymer used in various industries, from furniture to automotive.
Polyurethane is a popular material known for its durability and flexibility. It serves multiple purposes, including insulation, coatings, and cushioning. This polymer can be found in everyday items like mattresses, shoes, and paints. Its excellent resistance to wear and tear makes it a preferred choice for both industrial and consumer products.
The versatility of polyurethane allows for various formulations, catering to specific needs and applications. Understanding how polyurethane works can help you appreciate its role in enhancing product performance and longevity. This introduction sets the stage for exploring the many benefits and uses of polyurethane in modern life.
Introduction To Polyurethane
Polyurethane is a versatile material used in many products. It is known for its durability and flexibility. This section will explore the basics of polyurethane and its benefits for finishes.
The Basics
Polyurethane is a type of polymer. It is formed by reacting diisocyanates with polyols. This reaction creates a strong, flexible substance.
Polyurethane can be found in different forms:
- Foams
- Coatings
- Elastomers
Each form has unique properties and uses. It is widely used in construction, furniture, and automotive industries.
Benefits For Finishes
Polyurethane finishes offer many advantages. Here are some key benefits:
| Benefit | Description |
|---|---|
| Durability | Resistant to scratches and wear. |
| Water Resistance | Protects surfaces from moisture damage. |
| Variety | Available in gloss, satin, and matte finishes. |
| Easy Application | Can be brushed, sprayed, or rolled on easily. |
Using polyurethane finishes enhances the beauty of wood and other materials. It creates a protective layer that lasts.
Types Of Polyurethane
Polyurethane comes in different forms. Each type has unique properties. Understanding these types helps in making the right choice. Here are the main classifications: oil-based and water-based polyurethane.
Oil-based Vs. Water-based
Oil-based and water-based polyurethanes differ in many ways:
| Feature | Oil-Based Polyurethane | Water-Based Polyurethane |
|---|---|---|
| Drying Time | Slower drying time | Faster drying time |
| Finish | Warmer, amber tone | Clear, less color |
| Odor | Stronger odor | Low odor |
| Durability | Highly durable | Less durable |
| Clean Up | Requires solvents | Soap and water |
Both types have pros and cons. Choose based on your project needs.
Choosing The Right Type
Select the right polyurethane for your project. Consider these factors:
- Application Area: Indoor or outdoor?
- Finish Desired: Glossy or matte?
- Drying Time: Quick or slow?
- Durability Needs: High traffic or low traffic?
- Identify your project requirements.
- Assess the environmental conditions.
- Determine the desired look.
- Make an informed choice.
Understanding these factors leads to better results. Select wisely for your next project.
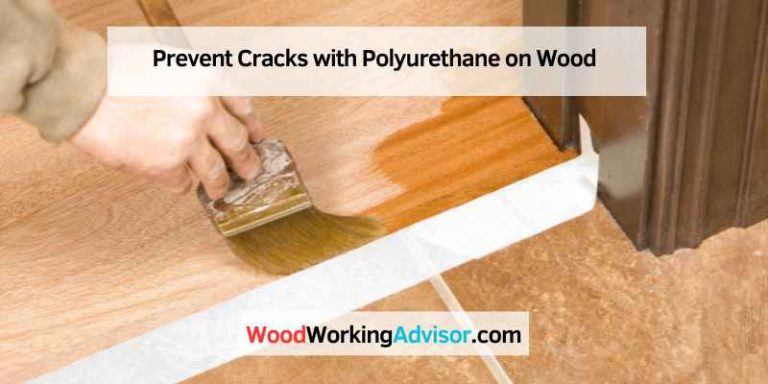
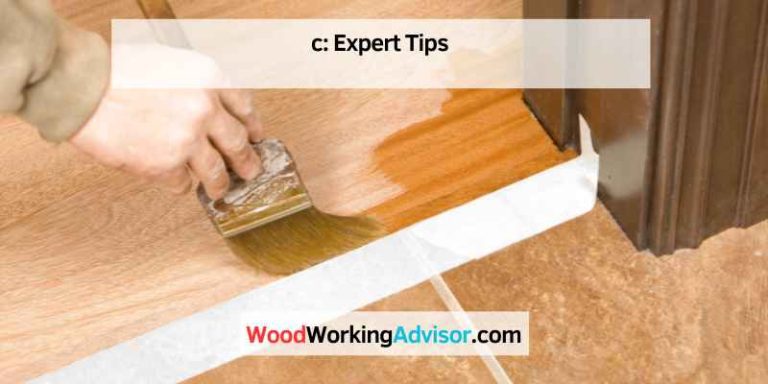
Preparation Is Key
Proper preparation ensures a smooth application of polyurethane. A well-prepared surface enhances durability and finish quality. Follow these steps to achieve the best results.
Surface Preparation
Surface preparation is crucial. It determines how well the polyurethane adheres. Follow these steps:
- Clean the Surface: Remove dirt, grease, and dust.
- Sanding: Sand the surface to create a smooth texture.
- Remove Dust: Wipe off dust with a damp cloth.
- Repair Imperfections: Fill cracks or holes with wood filler.
Make sure the surface is dry before applying polyurethane. Wet surfaces can cause bubbles.
Tools You’ll Need
Gathering the right tools makes the job easier. Here’s a list of essential tools:
| Tool | Purpose |
|---|---|
| Sander | To smooth the surface |
| Brush or Roller | For applying polyurethane |
| Damp Cloth | To remove dust |
| Wood Filler | To repair cracks and holes |
| Protective Gear | To ensure safety during application |
Having these tools ready streamlines the process. Always prioritize safety by wearing protective gear.
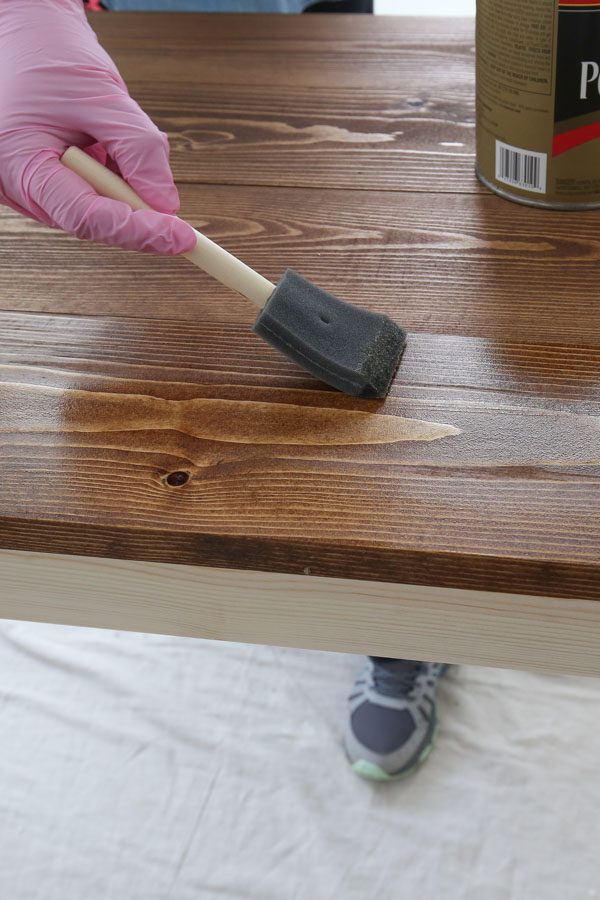
Application Techniques
Using Spell Polyurethane effectively requires the right application techniques. Proper methods ensure a smooth finish and long-lasting protection. Let’s explore two main techniques: brush and spray.
Brush Vs. Spray
Choosing between brush and spray techniques affects the final look. Here’s a comparison:
| Technique | Advantages | Disadvantages |
|---|---|---|
| Brush |
|
|
| Spray |
|
|
Achieving Smooth Layers
To get smooth layers with Spell Polyurethane, follow these tips:
- Prepare the surface well. Clean and sand as needed.
- Choose the right temperature. Ideal is between 60°F to 80°F.
- Apply thin coats. This helps avoid drips and runs.
- Allow proper drying time. Follow the manufacturer’s recommendations.
- Lightly sand between coats. This promotes better adhesion.
Using these techniques will ensure a beautiful finish. Enjoy your project with Spell Polyurethane!
Common Mistakes To Avoid
Applying polyurethane can be tricky. Many people make mistakes that affect the finish. Knowing these common errors helps you achieve a smooth, professional look.
Avoiding Bubbles And Streaks
Bubbles and streaks ruin the appearance of your project. Here are tips to prevent them:
- Mix Slowly: Stir gently to avoid air bubbles.
- Use the Right Brush: Choose a high-quality brush for a smooth finish.
- Thin Coats: Apply thin layers. This reduces drying time and bubbling.
- Check Temperature: Avoid applying in hot or humid conditions. Ideal temperature is between 70°F and 80°F.
Inspect your work after each coat. Look for imperfections. Sand lightly to fix any issues.
Dealing With Dust
Dust can settle on wet polyurethane. This ruins the finish. Follow these steps to minimize dust:
- Choose the Right Location: Work in a clean, dust-free area.
- Cover Surfaces: Use drop cloths or plastic sheets.
- Use a Tack Cloth: Wipe surfaces before applying the finish.
- Wait to Cure: Allow each coat to dry completely before touching.
Cleaning the workspace helps. It reduces dust particles in the air.
Curing And Drying
Curing and drying are essential steps in the application of Spell Polyurethane. Proper curing ensures that the finish is durable and long-lasting. Drying times can vary based on several factors. Understanding these will help achieve the best results.
Time Frames
The drying time for Spell Polyurethane can vary. Here are some general time frames:
| Condition | Drying Time |
|---|---|
| Touch Dry | 1-2 hours |
| Handle Dry | 4-6 hours |
| Fully Cured | 24-48 hours |
These times can change based on the environment. Always check the manufacturer’s guidelines for specific recommendations.
Factors Affecting Drying
Several factors can influence the drying time of Spell Polyurethane:
- Temperature: Higher temperatures speed up drying.
- Humidity: High humidity slows down drying.
- Airflow: Good airflow helps the drying process.
- Thickness of the coat: Thicker layers take longer to dry.
Understanding these factors allows for better planning. Adjusting conditions can lead to optimal results.
Maintenance And Care
Keeping your Spell Polyurethane in top shape is essential. Proper maintenance ensures durability and a beautiful finish. Follow these guidelines for cleaning, repairs, and touch-ups.
Cleaning Tips
Regular cleaning helps maintain the look and longevity of your polyurethane finish. Use the following tips:
- Dust Regularly: Use a soft cloth to remove dust.
- Avoid Harsh Chemicals: Use gentle cleaners only.
- Use Warm Water: Mix warm water with a mild soap.
- Soft Sponge: Wipe surfaces gently with a soft sponge.
- Dry Immediately: Use a dry cloth after cleaning.
Repair And Touch-ups
Minor damages can be fixed easily. Follow these steps for repairs:
- Identify the Damage: Check for scratches or dents.
- Clean the Area: Use a soft cloth to clean it.
- Apply Polyurethane: Use a small brush for application.
- Let It Dry: Follow the drying time on the label.
- Sand if Needed: Lightly sand for a smooth finish.
Touch-ups can restore the original beauty. Always match the finish type and color.
Advanced Tips And Tricks
Unlock the full potential of Polyurethane with these expert tips. Mastering application methods and experimenting with colors can elevate your project. Explore these advanced techniques to achieve stunning results.
Mixing Finishes
Combining different finishes can create unique looks. Here are some essential tips:
- Choose compatible finishes: Make sure the products mix well.
- Test small batches: Always try on scrap wood first.
- Use ratios: Start with a 1:1 ratio for mixing.
Here’s a simple table to guide your mixing ratios:
| Finish Type | Mixing Ratio |
|---|---|
| Satin and Gloss | 1:1 |
| Matte and Semi-Gloss | 2:1 |
| Gloss and Oil-Based | 3:1 |
Experimenting With Colors
Adding color to Polyurethane enhances visual appeal. Follow these steps:
- Use colorants: Choose high-quality pigments or dyes.
- Start light: Light colors show better results.
- Mix thoroughly: Ensure color is evenly distributed.
Consider these tips for color experimentation:
- Test different shades on scrap wood.
- Keep a record of color combinations.
- Adjust color intensity by adding more pigment.
With these advanced tips, you can create stunning effects. Let your creativity shine with Polyurethane.
Frequently Asked Questions
How Do You Spell Polyurethane?
Polyurethane is spelled as “P-O-L-Y-U-R-E-T-H-A-N-E. ” It is a versatile material used in various applications. This includes coatings, foams, and adhesives. Knowing the correct spelling can help in research and discussions.
What Is Polyurethane Used For?
Polyurethane is used for insulation, cushioning, and coatings. It serves in furniture, automotive, and construction industries. Its durability and flexibility make it a popular choice. Additionally, it can be found in everyday items like mattresses and shoes.
Is Polyurethane Safe For Home Use?
Yes, polyurethane is generally safe for home use. However, it can emit volatile organic compounds (VOCs) during application. Proper ventilation is essential when using polyurethane products. Always follow manufacturer guidelines for safe usage.
Can Polyurethane Be Painted?
Yes, polyurethane can be painted, but surface preparation is key. Sanding the surface ensures better adhesion for paint. Additionally, using a primer can enhance the finish. Choose paints compatible with polyurethane for the best results.
Conclusion
Understanding how to spell “polyurethane” is essential for many fields, including construction and manufacturing. This versatile material offers numerous benefits, from durability to flexibility. Mastering its spelling can enhance your communication and professionalism. Keep practicing, and you’ll become more confident in using this important term in your work or studies.