Wood Filler Target: Achieve Flawless Furniture Finishes!
Wood filler is designed for repairing cracks, holes, and imperfections in wooden surfaces. It provides a smooth finish and enhances the overall appearance of wood projects.
Wood filler is essential for anyone working with wood, whether for DIY projects or professional carpentry. It comes in various types, including water-based and solvent-based options. Each type has unique properties tailored for different applications. Choosing the right wood filler ensures a seamless repair that blends well with the surrounding wood.
It can be stained or painted after drying, making it versatile for various finishes. Understanding how to properly apply wood filler can significantly improve the quality of your woodworking projects, saving time and reducing the need for extensive sanding or refinishing.
The Magic Of Wood Filler
Wood filler works wonders on damaged wood. It repairs, enhances, and beautifies surfaces. This simple product transforms imperfections into perfection. Let’s explore its incredible benefits.
Concealing Imperfections
Wood surfaces often have dents and cracks. These flaws can ruin the overall look. Wood filler is perfect for hiding these imperfections. It fills gaps and smooths surfaces.
- Fixes cracks and holes
- Restores damaged furniture
- Prepares wood for painting
Applying wood filler is simple:
- Clean the area.
- Apply the filler with a putty knife.
- Let it dry completely.
- Sand it down for a smooth finish.
Enhancing Wood Beauty
Wood filler doesn’t just hide flaws. It also enhances the natural beauty of wood. It can be stained or painted to match any wood type.
| Wood Type | Recommended Filler | Color Match |
|---|---|---|
| Oak | Light wood filler | Golden brown |
| Walnut | Dark wood filler | Rich brown |
| Pine | White wood filler | Soft yellow |
Choose the right filler for the best results. Your wood will look brand new!
Types Of Wood Fillers
Choosing the right wood filler is crucial for your project. Different types serve various needs. Understanding these types helps you select the best option.
Water-based Fillers
Water-based fillers are popular for several reasons:
- Easy to clean with water.
- Low odor, safe for indoor use.
- Quick drying time.
These fillers are often used for:
- Minor cracks and holes.
- Furniture repairs.
- Touch-ups on stained surfaces.
They accept stain and paint well. Use them on softwoods and hardwoods.
Solvent-based Fillers
Solvent-based fillers offer durability and strong adhesion. Here are their key features:
- Resistant to moisture and temperature changes.
- Longer drying time compared to water-based fillers.
- Higher odor levels during application.
Best for:
- Exterior projects.
- Heavy-duty repairs.
- Wood with high movement.
These fillers work well on larger gaps and cracks.
Epoxy Fillers
Epoxy fillers are the strongest type available. They have unique properties:
- Excellent bonding strength.
- Highly resistant to chemicals.
- Can fill large voids and deep cracks.
Ideal for:
- Structural repairs.
- Boat and outdoor furniture.
- Projects needing a tough finish.
Mix the resin and hardener before application. Follow the instructions for best results.
Choosing The Right Filler For Your Project
Choosing the right wood filler can make your project shine. The right filler enhances the wood’s appearance and ensures durability. Understanding your wood type and its intended use is key.
Match The Wood Type
Different wood types need specific fillers. Here’s a quick guide:
| Wood Type | Recommended Filler |
|---|---|
| Oak | Water-based filler |
| Pine | Oil-based filler |
| Mahogany | Color-matched putty |
| Maple | Clear epoxy |
Choose a filler that matches your wood type. This ensures a seamless finish. Always test the filler on a hidden area first.
Consider The End Use
Think about how you will use the wood. Different projects need different types of fillers. Here are some factors:
- Indoor vs Outdoor: Use exterior-grade fillers for outdoor projects.
- Heavy Use: Choose durable fillers for furniture and floors.
- Finish Type: Match the filler with your final finish (paint, stain, etc.).
Prioritize durability for high-traffic areas. For decorative projects, look for fillers that blend well with the wood. Always read the label for guidance on the filler’s suitability.
Preparation For A Flawless Finish
Achieving a flawless finish with wood filler requires proper preparation. Each step is vital for a smooth and durable result. Focus on cleaning and sanding to ensure the best outcome.
Cleaning The Surface
Start with a clean surface. Dust, dirt, and grease can ruin your finish. Follow these steps to prepare the area:
- Remove any loose debris with a brush.
- Wipe down the surface with a damp cloth.
- Use a mild detergent for greasy spots.
- Allow the surface to dry completely.
Ensure no residues remain. A clean surface helps the wood filler adhere better.
Sanding Techniques
Sanding is crucial for a seamless application. Follow these techniques for the best results:
- Start with coarse sandpaper (80-120 grit).
- Sand in the direction of the wood grain.
- Use finer sandpaper (220 grit) for a smooth finish.
- Remove dust with a vacuum or cloth.
Proper sanding creates a rough surface for better wood filler adhesion. Always wear a mask to avoid inhaling dust.
| Sanding Grit | Purpose |
|---|---|
| 80-120 | Initial sanding to remove imperfections |
| 220 | Final sanding for a smooth finish |
Follow these guidelines for cleaning and sanding. They set the stage for a perfect finish with wood filler.
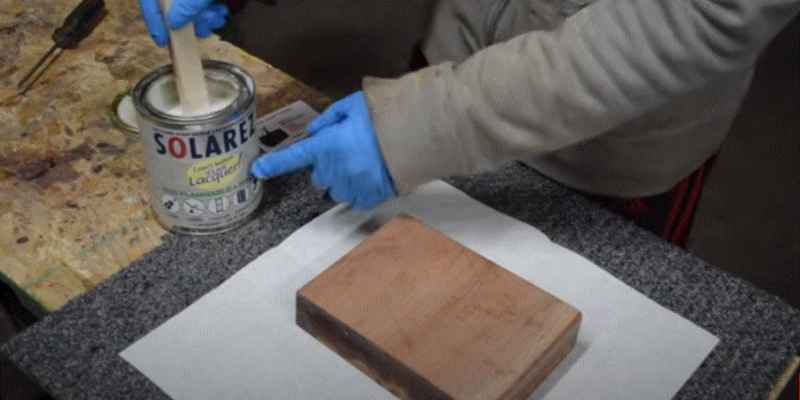
Application Techniques
Applying wood filler correctly ensures a smooth finish. Proper techniques lead to better results and durability. Follow these tips for effective application.
Applying Evenly
Even application is key for a seamless look. Here’s how to do it:
- Use a putty knife for smooth application.
- Fill the hole or crack fully.
- Press firmly to remove air bubbles.
- Spread in the direction of the wood grain.
For larger areas, consider using a trowel. This tool helps to cover more surface quickly. Always check for excess filler. Remove it with a putty knife.
Drying Time Matters
Drying time affects the final appearance. Each product has a specific drying time. Follow the manufacturer’s instructions closely.
| Wood Filler Type | Drying Time |
|---|---|
| Water-Based | 1-2 hours |
| Solvent-Based | 2-4 hours |
| Epoxy | 4-6 hours |
Wait until the filler is fully dry. This prevents smudging during sanding. Touch the filler lightly to check dryness. If it feels firm, it’s ready for the next step.
Sanding For Perfection
Sanding is key for a flawless finish with wood filler. Proper sanding smooths the surface and makes it ready for painting or staining. Achieving perfection requires the right tools and techniques. Let’s explore the best practices for sanding wood filler.
Choosing The Right Grit
Selecting the correct sandpaper grit is crucial. Different grits serve various purposes:
| Grit Size | Purpose |
|---|---|
| 80-120 | Initial sanding, removes excess filler. |
| 150-220 | Smooths the surface, prepares for finishing. |
Use a lower grit for rough spots. A higher grit helps create a smooth finish. Always start with a coarser grit, then move to finer grits.
Sanding Tips For Smoothness
- Sand in the direction of the grain: This prevents scratches.
- Use even pressure: Apply consistent pressure while sanding.
- Check for imperfections: Inspect the surface after each sanding pass.
- Clean the surface: Remove dust with a damp cloth before applying more filler.
Follow these tips to achieve a smooth finish. Patience is key. Take your time for the best results.
Staining And Painting Over Wood Filler
Wood filler is useful for repairing wood surfaces. After applying wood filler, many want to stain or paint over it. Understanding how to do this correctly is essential. This section covers stain compatibility and paint adhesion.
Stain Compatibility
Not all wood fillers accept stain the same way. Here are key points to consider:
- Type of Filler: Use a stainable wood filler for best results.
- Color Matching: Choose a filler that matches the wood color.
- Test First: Always test on a scrap piece of wood.
Here’s a quick table to help with stain compatibility:
| Wood Filler Type | Stain Compatibility |
|---|---|
| Water-Based Filler | Accepts stain well |
| Solvent-Based Filler | May not accept stain |
| Polyester Filler | Poor stain compatibility |
Paint Adhesion
Ensuring paint sticks to wood filler is crucial. Follow these steps for better adhesion:
- Sand Smooth: Sand the area after filler dries.
- Clean Surface: Remove dust before painting.
- Use Primer: Apply a primer for better adhesion.
Check the following tips for paint adhesion:
- Use high-quality paint.
- Follow the manufacturer’s instructions.
- Allow adequate drying time between coats.
Maintenance And Repairs
Maintaining wood surfaces keeps them looking great. Regular repairs prevent larger issues. Using the right wood filler can save time and money.
Regular Check-ups
Inspecting wooden surfaces regularly helps catch problems early. Look for:
- Cracks or splits in the wood
- Water damage signs
- Loose joints or connections
Checking twice a year is a good practice. This ensures you address small issues before they grow.
Quick Fixes For Future Cracks
Repairing small cracks quickly can save time. Here are some quick fixes:
- Clean the area around the crack.
- Apply wood filler using a putty knife.
- Allow it to dry completely.
- Sand the area smooth.
- Finish with paint or stain to match.
Using quality wood filler helps ensure durability. Choose a product that fits your specific needs.
| Common Issues | Recommended Action |
|---|---|
| Surface Cracks | Use wood filler and sand |
| Water Damage | Dry area and apply filler |
| Loose Joints | Re-glue or use filler |
Frequently Asked Questions
What Is Wood Filler Used For?
Wood filler is primarily used to fill holes, cracks, and imperfections in wood surfaces. It helps to repair damaged furniture, floors, and cabinetry. Once applied, it can be sanded smooth and painted or stained to match the surrounding wood. This ensures a seamless finish for your projects.
How To Apply Wood Filler Properly?
To apply wood filler, clean the area to remove dust and debris. Use a putty knife to spread the filler into the defect, pressing it firmly. Smooth the surface and let it dry according to the manufacturer’s instructions. Finally, sand it down for a flawless finish before painting or staining.
Can I Paint Over Wood Filler?
Yes, you can paint over wood filler once it’s fully cured. Ensure the surface is sanded smooth for optimal adhesion. Use a primer first if the filler is a different color than your paint. This will help achieve a uniform appearance and enhance the durability of the paint.
How Long Does Wood Filler Take To Dry?
Drying time for wood filler varies by brand and conditions. Typically, it ranges from 30 minutes to several hours. Factors like temperature and humidity can influence drying speed. Always check the product label for specific instructions to ensure proper application and finishing.
Conclusion
Choosing the right wood filler can transform your woodworking projects. With various types available, it’s essential to match the filler to your specific needs. Whether you’re repairing, filling, or finishing, the right product will enhance durability and appearance. Invest time in selecting quality wood filler for the best results in your projects.