How to Use a Hole Saw Drill Bit: Speeds, Steps & Fixes
A hole saw drill bit cuts round holes from 3/4 inch up to 6 inches — far beyond what a standard twist bit can manage — using a toothed cup and pilot bit mounted on an arbor that chucks into any drill. Speed is the detail most guides skip: running too fast burns the teeth and blows out the exit hole, unless you match RPM to the material. This guide covers mounting, drill speed by material, and stopping splinter-out and binding.
What Exactly is a Hole Saw?
Best Hole Saw Kit Pick
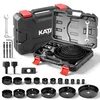
KATA 25 Piece Hole Saw Kit (3/4″-6″) – $20.99
Covers the exact 3/4″ to 6″ range this guide walks through, plus the mandrels and pilot bits you need — no separate arbor purchase required.
- Best for: Homeowners who want every common size in one case
- Why we picked it: Matches this guide’s full size range at a budget price
- Main drawback: Carbon steel teeth dull faster than bi-metal on metal or tile
Compare more hole saw kit options
 Option 1 HYCHIKA Bi-Metal Kit (17pc) – $35.99
|
 Option 2 Milwaukee Ice Hardened Kit (19pc) – $154.00
|
 Option 3 Amazon Basics Bi-Metal Kit (9pc) – $23.09
|
As an Amazon Associate we earn from qualifying purchases.
A hole saw is a cylindrical drill attachment that uses a ring of hardened teeth to cut round holes larger than a standard twist bit can manage — typically 3/4 inch to 6 inches in diameter. It mounts on an arbor with a center pilot bit and cuts wood, plastic, metal, and thin masonry. Skip it for anything under 1/2 inch — a standard bit is faster there; a hole saw only pays off once you need a genuinely large opening.
Think of it like a powerful, cylindrical hole saw that attaches to your drill. It has a toothed edge that rotates to bore through materials like wood, plastic, metal, and even thin masonry.
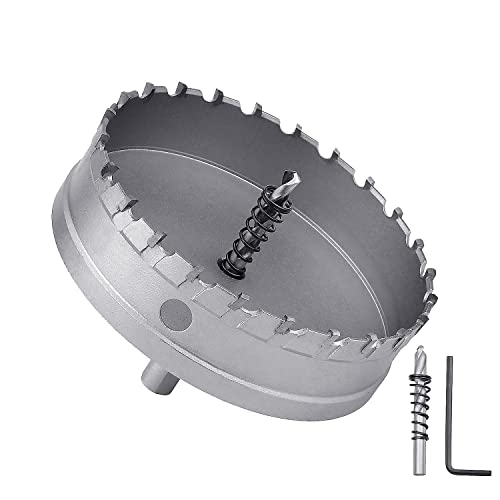
Anatomy of a Hole Saw
Understanding the parts will help you use it correctly:
- Arbor: The shank that attaches to your drill chuck. It usually holds a pilot drill bit in the center.
- Pilot Drill Bit: This small bit sits at the very center of the hole saw. Its job is to keep the hole saw steady and centered as you start cutting, preventing it from wandering.
- Mandrel: The main body that connects the arbor to the saw cup.
- Saw Cup: The large, cylindrical part with teeth on the edge. It does all the cutting.
- Teeth: The sharp edges that cut through the material. Different hole saws have different tooth configurations (e.g., variable pitch or straight teeth) for different materials.
Why Use a Hole Saw?
Standard drill bits are great for small holes, but they can’t create openings larger than about half an inch. Hole saws are designed for exactly that:
- Large Diameter Holes: From 3/4 inch up to 6 inches or even larger.
- Clean Cuts: When used properly, they produce smooth, round holes with minimal splintering or rough edges.
- Versatility: They can tackle wood, drywall, plastic, metal, and even some types of tile or brick with the right type of saw.
- Efficiency: They remove material quickly, saving you time compared to other methods for large holes.
Hole Saw vs. Spade Bit vs. Forstner Bit: Which Should You Use?
A hole saw isn’t always the right tool for a round hole — it’s just the right tool for a large one. Here’s how it stacks up against the other bits people reach for:
| Bit Type | Diameter Range | Best For |
|---|---|---|
| Hole Saw | 3/4 in. – 6 in. | Large, clean holes in wood, drywall, thin metal, and plastic |
| Spade Bit | 3/8 in. – 1-1/2 in. | Fast, rough holes in softwood where the edge won’t show |
| Auger Bit | Similar range, deeper reach | Deep, clean holes in wood with less binding |
| Forstner Bit | 1/4 in. – 2-1/4 in. | Flat-bottomed or overlapping holes where precision matters most |
Gathering Your Tools and Materials
Before you start cutting, let’s make sure you have everything you need — see our full drilling guide for more on drills, drivers, and screw work. Safety first, then the right gear.
Essential Tools
- Drill: A corded or cordless drill is necessary. For larger hole saws, a drill with a powerful motor and good torque is best. A drill with a variable speed setting is highly recommended.
- Hole Saw Kit: This typically includes several hole saws of different sizes and an arbor.
- Safety Glasses: Absolutely non-negotiable. Sawdust, debris, or even a shattered bit can cause serious eye injury.
- Work Gloves: To protect your hands from splinters and sharp edges.
- Measuring Tape: For accurately marking the center of your hole.
- Pencil or Marker: To mark your drilling spot.
- Clamps (Optional but Recommended): To secure your workpiece if it’s not already stable.
- Shop Vacuum or Compressed Air: To clean up sawdust and debris.
- Center Punch (for hard materials like metal or tile): This creates a small indentation to help the pilot bit start without slipping.
Choosing the Right Hole Saw
The material you’re drilling into will dictate the type of hole saw you need.
- Wood: Standard bi-metal or carbon steel hole saws work well. Look for ones with variable pitch teeth for faster cutting and less vibration.
- Metal: Bi-metal hole saws with fine teeth are best for cutting through various metals. For thicker metals, you might need specialized, heavy-duty saws.
- Plastic: Standard bi-metal or carbon steel saws are suitable. Plastic can sometimes melt if you drill too fast, so slower speeds are key.
- Drywall: Specialized drywall hole saws are very sharp and designed for quick cutting through this soft material.
- Masonry (Brick/Stone/Tile): These require specialized hole saws, often with diamond-coated edges or carbide tips, and usually need to be used with a hammer drill on a low setting or even without the hammer function, depending on the material. Water is often used as a coolant. According to OSHA, proper dust control is essential when cutting masonry to prevent silicosis. Always follow manufacturer guidelines for these specialized saws.
Understanding Hole Saw Sizes and Types
Hole saws come in a vast range of diameters. The size you need depends entirely on the project — for example, a 6-inch recessed light needs a 6-3/8″ hole saw, not a 6-inch one, since the housing needs clearance to seat flush. They also vary in depth, meaning how deep a cut they can make in a single pass. Most standard hole saws have a cutting depth of 1-1/4 to 2 inches. If you need to cut through thicker material, you’ll need multiple passes or a specialized deep-cut hole saw.
Types of Teeth & Their Purpose:
- Variable Pitch: Teeth are spaced at different intervals. This is good for reducing vibration and heat, making it ideal for smoother cuts in wood and plastics.
- Straight Teeth: Uniformly spaced teeth. These are generally faster but can be rougher and generate more heat, often used for softer materials.
- Carbide-Tipped: Teeth are coated with extremely hard carbide. These are excellent for harder materials like tile, brick, and fiberglass.
- Diamond Grit: The edge is coated with diamond particles. These are the go-to for very hard materials like porcelain tile, glass, and stone.
What RPM Should You Run a Hole Saw At?
Most guides just say “go slow,” but the real rule is that speed has to drop as diameter goes up, and it has to drop further as the material gets harder. A 6-inch hole saw needs to spin roughly 10 times slower than a 9/16-inch one in the same material, or it will burn the teeth before it finishes the cut. Manufacturers don’t publish one RPM for wood, since softwood tolerates much higher speed than dense hardwood — as a starting point, run wood noticeably faster than the metal speeds below, then back off if you see smoke or burning.
| Material (Bi-Metal Saw) | 9/16 in. Hole Saw | 6 in. Hole Saw |
|---|---|---|
| Cast Iron | 900 RPM | 90 RPM |
| Ceramic Tile | 790 RPM | 85 RPM |
| Aluminum | 580 RPM | 65 RPM |
| Fiberglass | 400 RPM | 40 RPM |
| Stainless Steel | 300 RPM | 30 RPM |
📊 Diameter changes everything: a 9/16-inch bi-metal hole saw can run at 900 RPM in cast iron, but a 6-inch hole saw in the same material has to drop to about 90 RPM — 10x slower — to avoid burning the teeth. Source: Pro Tool Reviews
Step-by-Step Guide: How to Use a Hole Saw Drill Bit
Now that you’re equipped, let’s get to the actual drilling. Follow these steps for a clean, successful cut.
Step 1: Prepare Your Workspace and Material
Ensure your material is stable. If it’s a piece of lumber or a panel, secure it to a workbench with clamps. If you’re drilling into a wall, make sure you know what’s behind it — electrical wires or plumbing. Use a stud finder that can detect these. Always work in a well-lit area.
Step 2: Attach the Hole Saw to the Arbor
This is a crucial step. Most arbors have a threaded shaft that the hole saw screws onto. Make sure the pilot drill bit can pass through the arbor. For a closer look at this step alone, see our full guide on how to attach a hole saw to a drill.
- Screw the hole saw onto the arbor. Hand-tighten it first.
- Tighten securely. Some arbors might have a set screw or a way to lock the hole saw in place for extra security. Ensure it’s snug to prevent it from wobbling or coming loose during drilling.
- Check the pilot bit. Ensure it’s a good length to start the cut and is sharp. If it’s dull, it will be harder to start the hole.
Step 3: Mark Your Drilling Location
Using your measuring tape and pencil or marker, make a clear, precise mark where you want the center of your hole to be. If you’re drilling into metal or tile, use a center punch to create a small dimple. This dimple will guide the pilot drill bit and prevent it from skidding.
Step 4: Set Up Your Drill
- Insert the arbor into your drill chuck. Make sure the chuck grips the arbor shank tightly and securely.
- Set the drill speed. Match the RPM to your material and hole saw diameter using the table above — high speeds cause excessive heat, binding, and rough cuts, especially as the saw gets larger.
- Engage the clutch (if your drill has one). Set the clutch to a lower setting to prevent the drill from overpowering you if the hole saw binds up.
- Turn off the hammer function if your drill has one, unless you are using a specialized masonry hole saw, and even then, consult the saw’s manual. Hammer action can shatter specialized hole saws or damage your material.
Step 5: Start Drilling
- Position the pilot bit. Place the tip of the pilot drill bit precisely on your mark.
- Apply steady, firm pressure. Hold the drill perpendicular (straight up and down) to the surface.
- Start the drill slowly. Let the pilot bit begin to cut.
- Gradually increase speed. Once the pilot bit has started creating a small indentation, you can increase the speed slightly, but maintain control.
- Maintain consistent pressure. Do not force the drill. Let the hole saw do the work.
“I don’t like to drill it at a real high, high speed. In some cases, you’re gonna wander up and down with your speed and work it.”
Step 6: Cutting Through the Material
- Drill at a steady pace. As the hole saw begins to cut into the material, you’ll feel it start to bore through.
- Clear debris periodically. Periodically (every 30 seconds to a minute), pull the drill back slightly while it’s still spinning slowly to clear the saw’s teeth of sawdust or metal shavings. A shop vacuum can be helpful here to suck debris away as you cut.
- Listen to the drill. If the drill sounds like it’s struggling, ease up on the pressure or slow down the speed. Forcing it can overheat the bit or break it.
- For thicker materials: If you’re cutting through material thicker than the hole saw’s depth, drill halfway or two-thirds through, withdraw the hole saw, then flip the workpiece over and drill from the other side, aligning with the existing cut. This minimizes tear-out on the exit side. If you can’t flip it, continue drilling from the initial side, being careful as you break through.
Step 7: Finishing the Cut and Removing Obstructions
- As you near the end of the cut: Ease up on the pressure to prevent the hole saw from plunging through quickly and damaging the backside of your material.
- Let the drill finish. Once you’ve cut all the way through, stop the drill.
- Carefully remove the hole saw. Pull it straight out of the hole.
- Remove the cut-out plug. The plug of material will likely be inside the hole saw. You can usually tap it out with a screwdriver or pliers. Sometimes, it might be stuck — see our full guide on how to get wood out of a hole saw for methods that work every time; check the arbor instructions too, as some have ejection features.
Step 8: Clean Up
Use your shop vacuum or compressed air to remove any sawdust or debris from the hole and the surrounding area. This not only makes for a cleaner finish but also allows you to inspect your new hole.
Tips for a Perfect Hole Every Time
Even with the best tools, a few pro tips can elevate your results.
- Lubricate for Metal: When drilling metal, use a cutting fluid or a light oil to keep the bit cool and improve cutting.
- Pilot Hole for Larger Saws: For very large hole saws, consider drilling a smaller pilot hole (just big enough for the arbor’s pilot bit) through the material first to help guide the larger saw with more accuracy.
- Slow and Steady Wins the Race: Patience is key. Rushing the process leads to rough edges, heat buildup, and potential accidents.
- Maintain Perpendicularity: Always try to keep the drill perfectly straight. Angled drilling can bind the saw and create an oval hole.
- Deal with Binding: If the hole saw binds (gets stuck), don’t try to force it. Stop the drill, back it out, and clear any packed debris. You might need to slightly enlarge the initial cut.
- Back Support for Wood: If drilling through thin wood, placing a piece of scrap wood on the backside before drilling can help reduce tear-out as the bit exits.
Hole Saw Maintenance and Storage
Taking care of your tools ensures they last longer and perform better.
- Clean After Use: Always clean sawdust, metal shavings, or other debris from the hole saw and arbor after each use. A stiff brush works well.
- Inspect for Damage: Before and after each use, check the teeth for any signs of damage, dullness, or wear. Inspect the arbor for bends or stripped threads.
- Lubricate (Sparingly): For metal hole saws, a light coating of oil can prevent rust.
- Store Properly: Keep hole saws organized in their case or a designated toolbox. Avoid storing them loose where they can get damaged or chip their teeth.
Common Problems and Troubleshooting
Even with instructions, things can go wrong. Here’s how to fix common issues.
| Problem | Cause | Solution |
|---|---|---|
| Hole Saw Won’t Start | Dull pilot bit, material too hard, not enough pressure. | Sharpen or replace pilot bit, use correct hole saw for material, apply steady pressure, use center punch on hard surfaces. |
| Rough Cut / Tear-Out | Drilling too fast, dull teeth, no back support. | Slow down drill speed, use variable pitch teeth, use scrap wood backing, ensure teeth are sharp. |
| Hole Saw Binding | Drilling too fast, not clearing debris, forcing the cut. | Slow speed, clear debris frequently, ease pressure, slightly enlarge start of cut if necessary. |
| Overheating | Drilling too fast, insufficient lubrication (metal). | Slow speed, use cutting fluid/oil for metal, clear debris more often. |
| Saw Wandering | No pilot hole started, dull pilot bit, not starting slowly. | Ensure pilot bit is sharp and on mark, start very slowly, use center punch on hard materials. |
| Teeth Damaged | Binding, forcing cut, wrong saw for material. | Stop immediately, clear debris. If minor damage, continue carefully. Severe damage requires replacement. Always use the correct saw type. |
When to Replace Your Hole Saw
Hole saws aren’t meant to last forever, especially with heavy use. You’ll know it’s time to replace one when:
- Teeth are dull or chipped: They won’t cut effectively and will require more force.
- The pilot bit is worn or damaged: It can’t guide the saw accurately.
- The arbor is bent or threads are stripped: It won’t attach securely to the drill.
- You’re experiencing excessive heat or burning: This is a sign of dull or damaged teeth.
- The cut quality significantly degrades: Despite trying all troubleshooting steps.
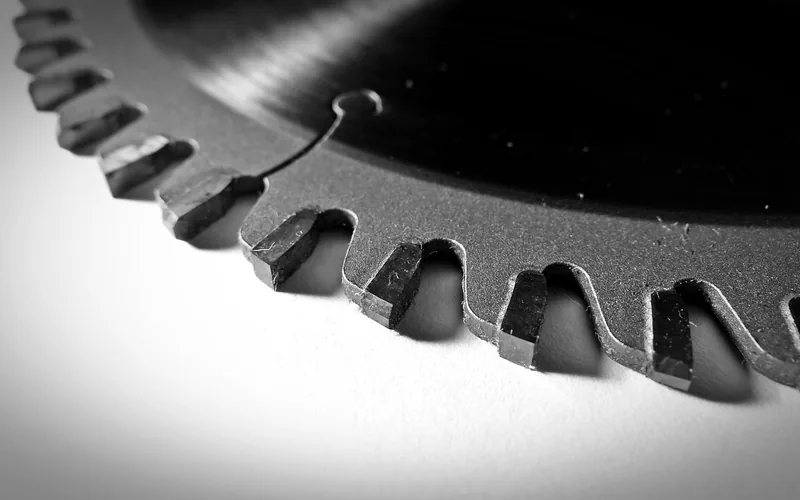
A worn-out hole saw can be dangerous and lead to poor results. It’s better to invest in a new one than risk an accident. The Centers for Disease Control and Prevention (CDC) offers excellent general safety guidelines for using power tools that apply across the board.
Frequently Asked Questions (FAQ)
Can I use a hole saw with a regular drill?
Yes, you can use a hole saw with most standard corded or cordless drills. However, for larger hole saws (over 2 inches in diameter) or for drilling through dense materials, a more powerful drill with good torque is recommended to prevent the drill from bogging down.
How do I prevent a hole saw from wandering on smooth surfaces like metal or tile?
To prevent wandering, use a center punch to create a small dimple on the exact spot you want to drill. This dimple will give the pilot drill bit a firm starting point. For very smooth surfaces like glass or porcelain tile, you may need a specialized diamond hole saw and a specific drilling technique, often involving slow speeds and water as a coolant.
How deep can a hole saw cut?
Most standard hole saws have a cutting depth of about 1-1/4 to 2 inches. If you need to cut through thicker material, you’ll need to make multiple passes, drilling as deep as the saw allows, then withdrawing and repeating. Alternatively, some specialized deep-cut hole saws are available for thicker materials.
What’s the difference between a bi-metal and a carbon steel hole saw?
Bi-metal hole saws have teeth made of high-speed steel (HSS) welded onto a flexible steel body. They are more durable and can cut through a wider range of materials, including tougher metals. Carbon steel hole saws are typically less expensive and are best suited for softer materials like wood and plastic.
How do I clean out the sawdust or debris from the hole saw after cutting?
After each use, let the hole saw cool down. Then, use a stiff brush, compressed air, or a shop vacuum to remove any sawdust or metal shavings. For stubborn plugs, you might need to use a screwdriver or pliers to gently pry them out. Always wear safety glasses when clearing debris.
What’s the difference between a hole saw and a spade bit?
A hole saw cuts a clean ring and leaves the center core intact, giving a smoother edge in holes from 3/4 inch to 6 inches. A spade bit removes all the material in the hole and cuts faster in softwood, but leaves a rougher edge and tops out around 1-1/2 inches. Use a spade bit for quick, rough holes; use a hole saw when edge quality matters or the hole is larger than 1-1/2 inches.
My hole saw is getting very hot. What should I do?
Excessive heat usually means you’re drilling too fast, applying too much pressure, or the bit is dull. Slow down your drill speed to match the RPM chart above, ease up on the pressure, and ensure you’re clearing debris frequently. If drilling metal, use a cutting fluid or lubricant.
A hole saw is one of the simplest power tools to get right once you match the speed to the material and let the pilot bit do its job. Mount it securely, start slow, back the exit side with scrap wood on wood, and swap in a fresh saw the moment the teeth start rounding over — that’s the difference between a clean hole and a burned one.
Sponsored / affiliate links. As an Amazon Associate I earn from qualifying purchases. I may earn additional commission from eligible campaigns.