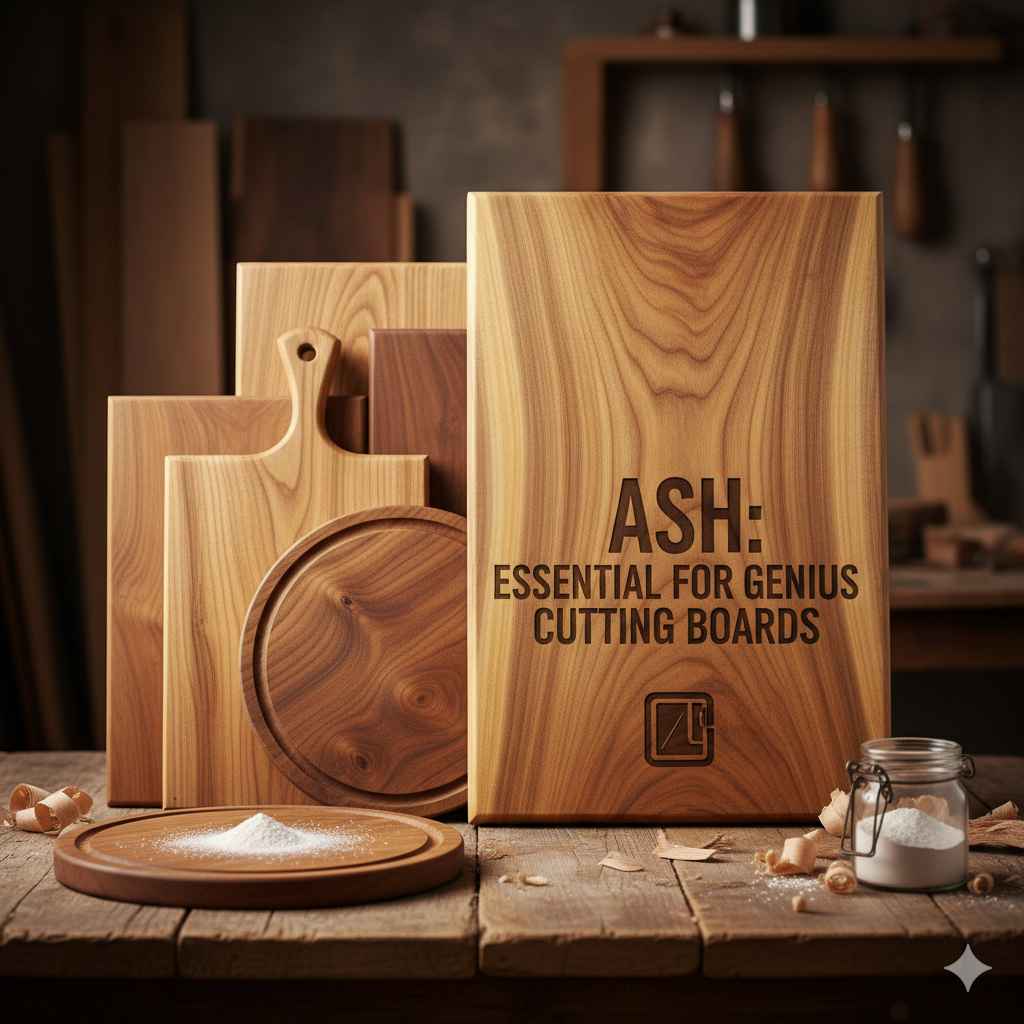
Ash: Essential For Genius Cutting Boards
Ash is an excellent wood choice for cutting boards due to its hardness, durability, attractive grain, and food-safe properties. It resists knife marks well and is relatively easy to work with, making it ideal for DIY projects. Choosing ash ensures a long-lasting, beautiful, and functional cutting board.
Ever looked at a beautiful wooden cutting board and wondered how it was made? Or perhaps you’ve tried making one and run into trouble finding the right kind of wood. It’s a common puzzle for DIYers and home cooks alike! You want a cutting board that looks good, lasts a long time, and is safe for preparing food. Many woods can work, but some are simply better suited for the job, offering that perfect blend of beauty and practicality. Don’t worry, because picking the right wood doesn’t have to be complicated. We’re going to explore why ash is a fantastic choice and how you can use it to create a genius cutting board of your own. Get ready to unlock the secrets of ash wood for your kitchen!
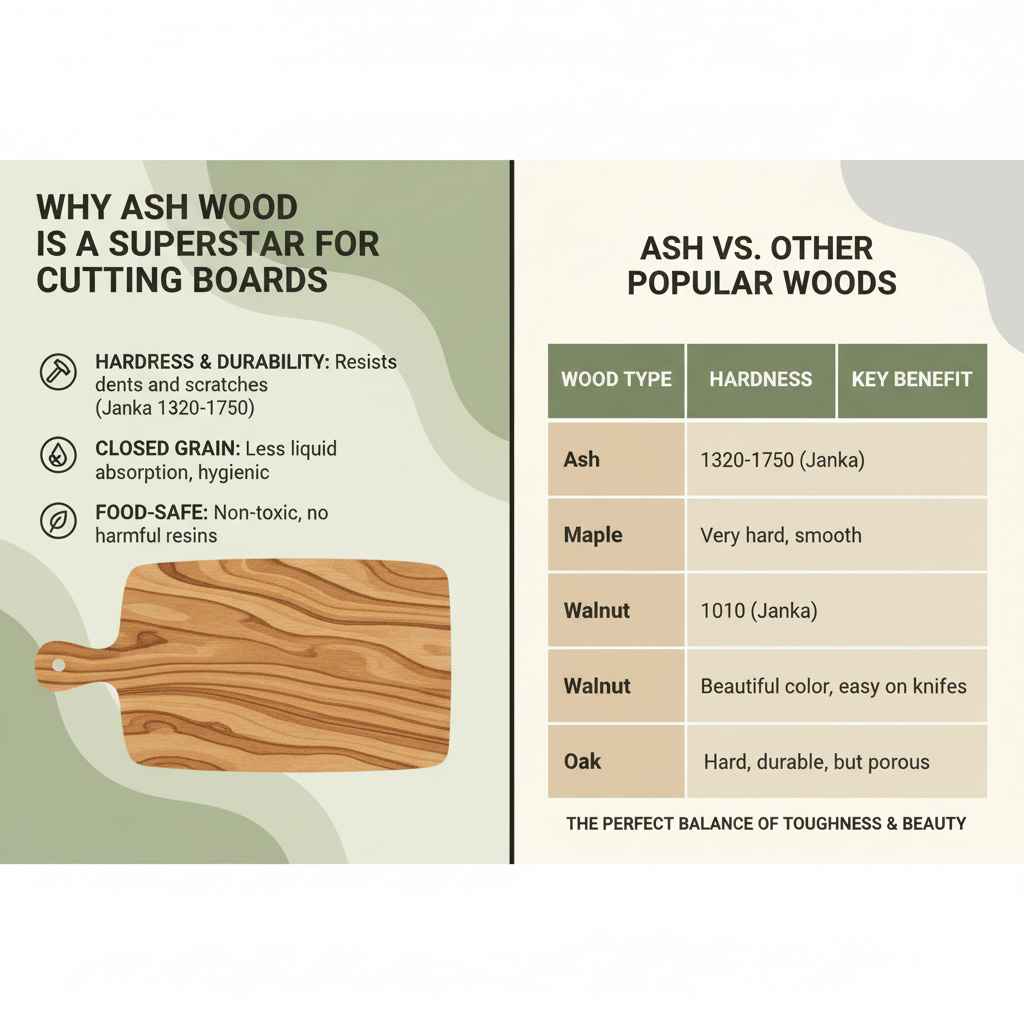
Why Ash Wood is a Superstar for Cutting Boards
When it comes to selecting wood for anything that touches your food, safety and durability are top priorities. Ash wood ticks a lot of the right boxes, making it a favorite among experienced woodworkers and those just starting out. It’s a hardwood, which means it’s tough and can stand up to a lot of use. Think about all those chopping and slicing actions your cutting board goes through – ash is built to handle it!
Beyond its strength, ash has a beautiful natural appearance. Its grain patterns are often straight and even, sometimes with a lovely wavy or curly figure that adds a touch of elegance to any project. This natural beauty means your cutting board won’t just be a tool in the kitchen; it can be a decorative piece too. Let’s dive deeper into what makes ash so special for cutting boards.
Key Qualities of Ash Wood for Kitchen Use
Ash wood possesses a unique set of characteristics that make it stand out for cutting board applications. These aren’t just fancy woodworking terms; they translate directly into real-world benefits for your kitchen projects.
Hardness and Durability: Ash is a relatively hard wood, ranking from 1320 to 1750 on the Janka hardness scale. This means it can resist dents and scratches from knives much better than softer woods. A harder surface leads to a cutting board that lasts longer and looks better over time, with fewer deep gouges.
Grain Structure: Ash has a closed-grain structure. This is important because it means fewer small pores on the surface. A closed grain is less likely to absorb liquids, preventing the wood from becoming a breeding ground for bacteria. This also helps in keeping the board cleaner and easier to maintain.
Food Safety: Naturally, any wood used for cutting boards should be safe for contact with food. Ash wood is non-toxic and doesn’t contain any harmful resins or oils that could leach into your food. This makes it a dependable choice for preparing meals.
Workability: While hard, ash carves, turns, and finishes well. This makes it accessible for DIYers. You can sand it to a smooth finish and apply food-safe finishes without much difficulty. Its consistent nature means fewer surprises when you’re shaping and preparing the wood.
Aesthetic Appeal: Ash offers a pleasing, light-colored wood with a straight, often open grain. It can have a subtle texture and can be stained or finished to showcase its natural beauty. This visual appeal can elevate your cutting board from a mere kitchen tool to a piece you’re proud to display.
Abundance and Cost: Ash is a common hardwood, especially in North America and Europe. This availability often translates into a more affordable price compared to some other hardwoods like walnut or maple. For someone looking for quality without breaking the bank, ash presents an excellent value.
A Quick Look: Ash vs. Other Popular Cutting Board Woods
To truly appreciate ash, let’s compare it briefly to some other woods you might encounter or consider for cutting boards. This comparison highlights where ash shines and what to expect.
| Wood Type | Janka Hardness (approx.) | Grain Type | Pros for Cutting Boards | Cons for Cutting Boards |
|---|---|---|---|---|
| Ash | 1320 – 1750 | Closed to moderately open | Durable, resists knife marks, food-safe, attractive grain, good value. | Can be prone to staining if not sealed properly. |
| Maple (Hard Maple) | 1450 | Closed | Very hard, durable, excellent resistance to knife marks, smooth surface, food-safe, widely available. | Can be more expensive than ash. |
| Walnut (Black Walnut) | 1010 | Moderately open | Beautiful dark color, relatively hard, good for knives (less dulling), food-safe. | Softer than maple or ash, can show knife marks more easily, can be more expensive. |
| Oak (Red/White) | 1290 (Red) / 1360 (White) | Open | Hard, durable, readily available. | Very porous (open grain), can absorb liquids and harbor bacteria more easily, requires careful sealing. |
| Cherry | 950 | Closed | Beautiful reddish hue that darkens with age, smooth grain, food-safe. | Softer than ash or maple, prone to scratching and staining. |
| Bamboo | 1440 – 1530 | Variable (stratified) | Very hard, sustainable, water-resistant. | Glue used in construction can be a concern for food safety, can be very hard on knives, can delaminate over time. |
As you can see, ash holds its own very well against popular choices like maple and walnut. It offers a great balance of toughness, safety, and looks, often at a more accessible price point.
Getting Started: What You’ll Need for Your Ash Cutting Board
Before we get our hands dirty, it’s important to gather all your materials and tools. Having everything ready makes the process smooth and enjoyable. Think of this as your workshop checklist – having the right gear ensures you can focus on the craft.
For a beginner-friendly project like a simple end-grain cutting board, you won’t need an entire professional carpentry shop. We’ll keep it simple and accessible.
Essential Materials
Ash Wood: You’ll need pieces of ash lumber. For a beginner, it’s easiest to buy pre-milled boards with straight edges. The thickness depends on the size of your board, but 3/4 inch to 1 inch is common. Look for kiln-dried lumber to ensure it’s stable. You can often find hardwood at local lumber yards or specialized woodworking stores.
Wood Glue: A high-quality, waterproof wood glue is essential. Titebond III is a popular choice for cutting boards because it’s water-resistant and food-safe once cured.
Food-Safe Mineral Oil: This is crucial for finishing your cutting board. It penetrates the wood, protects it from moisture, and prevents drying and cracking.
Beeswax (Optional but Recommended): Mixing beeswax with mineral oil creates a wood butter that provides an extra layer of protection and a lovely sheen.
Sandpaper: You’ll need a range of grits, starting from rough (like 80 or 100 grit) and moving to finer grits (up to 220 or 320 grit) for a smooth finish.
Paper Towels or Clean Cloths: For applying oil and wiping away excess.
Necessary Tools
Measuring Tape and Pencil: For accurate marking.
Safety Glasses: Always protect your eyes when working with wood.
Dust Mask: To avoid inhaling sawdust.
Saw: A handsaw can work for simple cuts if you don’t have power tools. A miter saw or circular saw makes cutting much quicker and more accurate.
Clamps: You’ll need several long, strong clamps to hold the wood pieces together tightly while the glue dries. Bar clamps or pipe clamps are ideal for cutting boards.
Sander (Optional but helpful): An orbital sander makes sanding much faster and achieves a smoother finish. You can also sand by hand.
Router with Roundover Bit (Optional): To create slightly rounded edges, making the board more comfortable to handle and less prone to chipping.
Scraper or Card Scraper (Optional): A handy tool for cleaning off dried glue.
Crafting Your Ash Cutting Board: A Step-by-Step Guide
Let’s break down the process into manageable steps. We’ll focus on a simple end-grain cutting board construction because it’s a great way to showcase the beauty of ash and its durability. End-grain boards are known for being easier on knife edges and more hygienic as the wood fibers “self-heal” small cuts.
Step 1: Prepare Your Ash Wood
First, you need to cut your ash lumber into strips. For an end-grain design, you’ll be gluing strips together edge-to-edge to form a panel, then cross-cutting this panel into shorter pieces, which are then re-glued on edge to create the checkerboard or visually appealing end-grain pattern.
1. Measure and Cut: Decide on the final dimensions of your cutting board. For this example, let’s assume you want a board that’s about 12 inches wide and 18 inches long. You’ll need to cut your ash boards into strips that are at least the length of your desired board (e.g., 18 inches) and about 3/4 inch to 1 inch thick. The width of these strips will make up the final thickness of your board. Aim for strips that are all the same width.
2. Flatten and Square: If your lumber isn’t perfectly flat, you’ll need to flatten one face and square up the edges. A jointer and planer are ideal for this, but if you don’t have them, you can get lumber milled flat by a lumberyard or carefully sand the edges.
3. Glue Up the First Panel: Apply a generous amount of waterproof wood glue to one edge of each strip. Use your clamps to bring the strips together tightly, forming a solid panel that is as wide as you want your initial strips. Ensure the panel is flat. Wipe away any excess glue that squeezes out with water. Let this glue up dry completely (usually 24 hours). This step is crucial for building the foundation of your board.
Step 2: Cross-Cutting and Second Glue Up
Once your first panel is dry and solid, it’s time to create the end-grain effect.
1. Cut the Panel: Using a table saw or miter saw, carefully cut the dried panel into shorter strips. The width of these cuts will determine the final thickness of your cutting board. For example, if you want a 1.5-inch thick board, you’d cut your panel into 1.5-inch wide strips. Ensure cuts are perfectly square.
2. Arrange for Visual Appeal: Now you have multiple strips, each showing the end grain of the ash. You can arrange these strips in various patterns to create your desired look. A classic checkerboard can be made by alternating pieces of ash with pieces of another contrasting wood, or you can create a more intricate pattern by rotating pieces. For a pure ash board, you might alternate grain directions for visual interest.
3. Second Glue Up: Apply glue to the ends of these new strips and use your clamps to bring them together into a new panel. This panel will be about as long as your initial strips were wide. Again, ensuring everything is clamped tightly and square is vital for a strong, clean board. Let this second glue up dry thoroughly.
Step 3: Shaping and Smoothing
With your end-grain panel glued up and dry, it’s time to make it look like a beautiful cutting board.
1. Flatten the Surface: The end-grain surface might not be perfectly flat after clamping. You’ll need to flatten it. If you have a planer, a few passes will do the trick. If not, you can carefully use a router with a flattening jig, or a belt sander/orbital sander with a coarse grit (like 80 or 100) works well. The goal is a smooth, level surface.
2. Trim the Edges: Use a table saw or even a hand plane to trim off any glue squeeze-out and ensure all the edges of your board are straight and square to the surface. This gives the board a finished, professional look.
3. Round the Edges (Optional): If you want to avoid sharp corners, use a router with a small roundover bit to gently round all the outside edges of the board. This makes it safer and more comfortable to handle.
4. Sand, Sand, Sand: This is where you achieve that silky-smooth finish. Start with a coarser grit (around 100 or 120) to remove any tool marks or imperfections. Then, progressively move to finer grits: 150, 180, 220, and even 320 grit. Sand with the grain for the sides and across the grain for the end-grain surface if needed, but aim for a uniform smoothness everywhere. Wipe away dust between grits.
Step 4: Finishing for Longevity and Safety
The final step is crucial for protecting your ash cutting board and making it ready for use.
1. Clean Thoroughly: Make sure all dust from sanding is removed. A shop vacuum followed by a tack cloth or a slightly damp cloth works well.
2. Apply Food-Safe Mineral Oil: Pour a generous amount of food-grade mineral oil directly onto the cutting board. Use a clean cloth or paper towel to spread it evenly over all surfaces. Let the oil soak in for at least 20-30 minutes, or even overnight. You’ll see the wood absorb the oil and darken slightly.
3. Wipe Off Excess: After the oil has soaked in, wipe off any excess oil that hasn’t been absorbed.
4. Apply Wood Butter (Optional): If you’re using a beeswax and mineral oil blend, apply a thin layer of this “wood butter.” Buff it with a clean cloth until you achieve a nice sheen. This adds an extra layer of waterproofing and a lovely feel.
5. Curing Time: Allow the finish to cure for at least 24 hours before using the board. The oil penetrates the wood, preventing moisture from getting in and out, which helps prevent warping and cracking.
By carefully following these steps, you’ll have a beautiful, durable, and functional ash cutting board that you can be proud of.
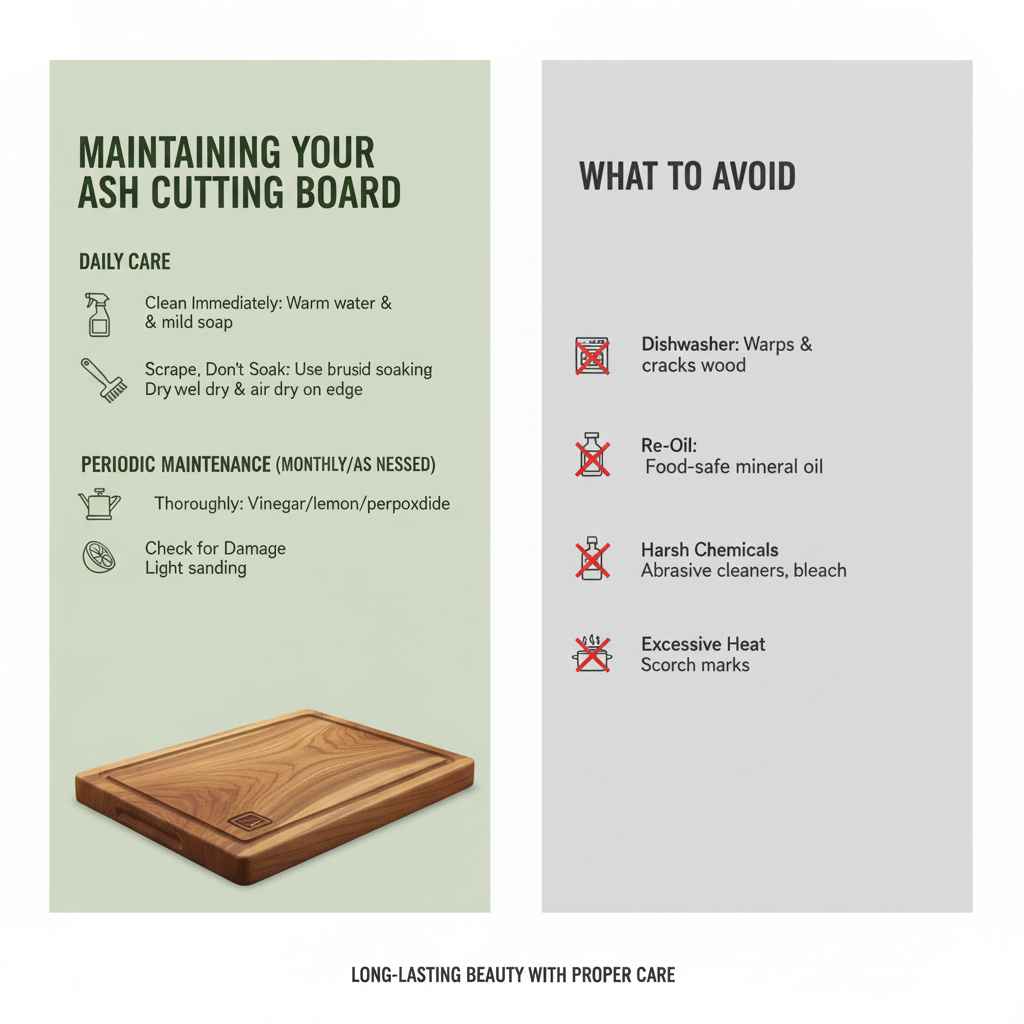
Maintaining Your Ash Cutting Board
A well-maintained cutting board, especially one made of ash, can last for many years. Regular care is key to keeping it hygienic and attractive.
Daily Care
Clean Immediately: After each use, wash your cutting board with warm water and a mild dish soap.
Scrape, Don’t Soak: Use a bench scraper or a stiff brush to remove food particles. Avoid soaking the board in water for extended periods, as this can lead to swelling and cracking.
Dry Thoroughly: Always dry your cutting board completely with a clean towel and then let it air dry standing on its edge to allow air circulation on all sides.
Periodic Maintenance (Once a Month, or as Needed)
Re-oil: When the board starts to look dry or dull, reapply food-safe mineral oil. Generously apply the oil, let it soak for 20-30 minutes, and then wipe off any excess. This replenishes the oil that seeps into the wood and keeps it from drying out.
Sanitize (Optional): For deeper sanitization without harsh chemicals, you can use a diluted vinegar solution (50/50 white vinegar and water) or lemon juice. Wipe it on, let it sit for a few minutes, then rinse and dry thoroughly. Some people also use hydrogen peroxide for sanitizing.
Check for Damage: Periodically inspect your board for any deep cuts or gouges. Light sanding with fine-grit sandpaper can help refresh the surface.
What to Avoid
Dishwasher: Never put your wooden cutting board in a dishwasher. The high heat and prolonged moisture will warp, crack, and ruin the wood.
Harsh Chemicals: Avoid abrasive cleaners or bleach, as they can damage the wood and leave a residue.
* Excessive Heat: Don’t place hot pots or pans directly on the board, as this can cause scorch marks and damage.
Frequently Asked Questions About Ash Cutting Boards
Q1: Is ash wood really safe for cutting boards?
A1: Yes, ash wood is completely safe for cutting boards. It’s a natural, non-toxic hardwood that doesn’t contain harmful chemicals or resins. Its dense structure also makes it less prone to harboring bacteria when properly maintained.
Q2: Why would I choose ash over a more common wood like maple?
A2: Ash offers a great balance of hardness, durability, and aesthetics, similar to maple. Often, ash can be more affordable and readily available than maple, providing excellent value. Its grain patterns can also offer a slightly different visual appeal.