Best Way To Dry Firewood: Proven Essential Tips
The best way to dry firewood is to stack it properly in a well-ventilated, sunny location, cover the top, and allow it to season for at least 6-12 months. This process, called seasoning, removes moisture, making the wood burn efficiently and cleanly.
Hello there, fellow DIYers and homeowners! I’m Md Meraj, and if you’ve ever tried to light a fire with damp wood, you know the frustration. It smokes more than it burns, it’s hard to get going, and it just doesn’t provide much heat. The good news is, drying firewood isn’t complicated guesswork. With a few simple, proven techniques, you can ensure your wood is perfectly seasoned and ready to provide cozy warmth or fuel your next outdoor project. Let’s unlock the secret to dry, ready-to-burn wood together, step-by-step!
Why Drying Firewood (Seasoning) Is Essential
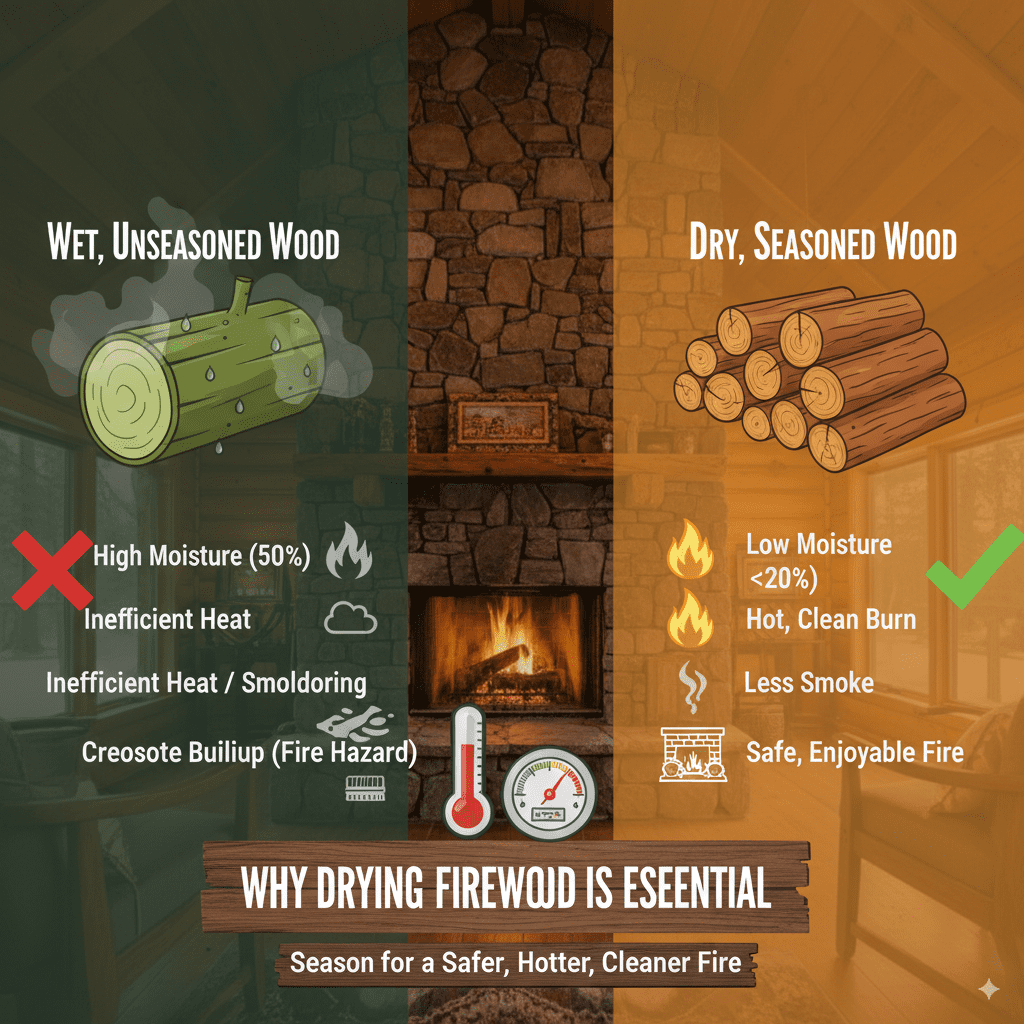
Drying firewood, often called seasoning, is the single most important step before you burn it. When wood is cut, it’s full of moisture – sometimes up to 50% or more! Burning wood that hasn’t been properly dried is like trying to cook with a wet sponge. It’s inefficient, creates a lot of smoke, and can leave creosote buildup in your chimney, which is a fire hazard. Seasoned wood, on the other hand, has a moisture content below 20%, making it burn hotter, cleaner, and with less smoke. This means more heat for your home, reduced chimney cleaning, and a more enjoyable fire experience. Understanding the principles behind seasoning will save you time, effort, and frustration in the long run.
What Happens When Firewood Isn’t Dry?
Burning unseasoned firewood leads to a cascade of problems:
- Poor Burning Performance: The wood struggles to ignite and sustain a flame. You’ll spend more time trying to keep the fire going than enjoying its warmth.
- Reduced Heat Output: A significant amount of energy is wasted boiling off the water in the wood instead of producing heat.
- Increased Smoke Production: The excess moisture turns into steam, creating thick, billowy smoke that can fill your room or be a nuisance outside.
- Creosote Buildup: This is the most dangerous consequence. Unburned smoke particles condense onto the cooler surfaces of your chimney, forming a sticky, flammable tar called creosote. Over time, this buildup can ignite, causing a chimney fire. According to the Chimney Safety Institute of America, creosote is a primary cause of house fires originating from chimneys.
- Mold and Mildew: Damp firewood stored improperly can develop mold and undesirable smells, making it less pleasant to handle and burn.
How to Tell If Your Firewood is Dry
Seasoned firewood has several tell-tale signs that you can easily spot:
- Color: Dry wood generally looks faded or grayish compared to fresh-cut wood, which is often brighter and more vibrant.
- Weight: It will feel noticeably lighter than freshly cut wood. The water content makes up a substantial part of the wood’s weight.
- Sound: When you knock two pieces of dry firewood together, they should make a clear, sharp “clack” or ringing sound. Wet wood will produce a dull “thud.”
- Cracks (Checking): The ends of seasoned logs often develop cracks, or “checks.” This is a natural part of the drying process as the wood shrinks.
- Bark: The bark may be loose and easy to peel off.
- Moisture Meter: For the most accurate reading, use a wood moisture meter. You can find affordable digital meters online and at hardware stores. Stick the prongs into the end grain of a log; a reading below 20% indicates it’s ready.
The Best Way to Dry Firewood: Proven Essential Tips
Drying firewood effectively is a matter of air circulation, protection from excess moisture, and time. Here are the proven essential tips to get your wood seasoned properly.
1. Cut Your Wood to Size
It’s best to cut and split your firewood before you begin the drying process. Smaller pieces dry much faster than large, whole logs. Aim for pieces that are roughly 16-24 inches long and split them according to how your stove or fireplace accepts wood. Splitting exposes more surface area to the air, allowing moisture to escape more readily.
2. Choose the Right Location for Stacking
Location is key to efficient drying. Here’s what to look for:
- Sunlight: A spot that receives plenty of direct sunlight will help heat the wood and speed up evaporation.
- Wind Exposure: Good airflow is crucial. A breezy location allows moisture to be wicked away from the wood. Avoid locations that are completely sheltered or enclosed.
- Elevation: Stack your wood off the ground. This prevents ground moisture from wicking up into the lower pieces and deters pests.
- Drainage: The area should drain well so rain doesn’t pool around your woodpile.
A good rule of thumb is to find an open, sunny area, preferably on a slight incline, that gets a breeze. Avoid stacking wood directly against a building, as this can sometimes restrict airflow and lead to moisture problems.
3. Stack It Right for Maximum Airflow
How you stack your wood makes a big difference. The goal is to allow air to circulate freely through the entire stack. There are several methods, but the most effective involve creating space between the logs.
Open-Face Stacking: This is a popular and effective method:
- Build a Base: Start with a sturdy base. You can use old pallets, lumber, or even concrete blocks to lift the wood off the ground. Ensure the base is level.
- Stack the First Layer: Lay the first layer of logs perpendicular to the direction you plan to stack the rest. This provides a stable foundation.
- Cross-Stacking: Stack the next layer of firewood perpendicular to the layer below. This creates a more stable structure. Alternatively, you can stack your wood parallel and use a criss-cross pattern every few layers for stability.
- Leave Gaps: Crucially, leave small gaps (about 1-2 inches) between each log within a layer. This allows air to flow through the entire stack, reaching every piece of wood.
- Maintain Lean: Stack the wood so it leans slightly backward. This helps water run off the top and away from the wood when it rains.
A-Frame Stacking: This method is also good for airflow:
- Lay logs on the ground with their ends forming an “A” shape.
- Continue building upwards, crisscrossing logs at intervals.
- This inherently creates good airflow between logs.
Your goal is to create a structure that breathes. Imagine it like a natural outdoor drying rack for your wood.
4. Cover the Top, Not the Sides
Protection from the elements is vital, but you don’t want to trap moisture. The most important part to keep dry is the top of the stack. Rain and snow falling on the wood will significantly slow down the drying process and can lead to rot.
- Use a Waterproof Cover: A tarp, corrugated metal roofing, or specialized firewood cover works well.
- Extend the Cover: The cover should extend beyond the sides of the stack by at least a foot on each side to provide adequate protection.
- Don’t Cover the Sides: It’s essential to leave the sides of the stack open and exposed to the air. Covering the sides will prevent airflow, trapping moisture and hindering the drying process. Think of it as a roof that keeps the rain off but lets the wind blow through.
5. Allow Adequate Time for Seasoning
This is where patience comes in. The seasoning time varies depending on the type of wood, the local climate, and how well you followed the previous steps. Generally, you should expect:
- Hardwoods: Oak, maple, ash, and hickory typically need 12-18 months to season properly.
- Softwoods: Pine, fir, and spruce can be ready in 6-12 months.
Always prioritize time and observe the wood’s signs. A good rule of thumb from forestry experts is to aim for a moisture content below 20%.
6. Consider Wood Type and Climate
Some wood species dry faster than others. Dense hardwoods take longer to season than lighter softwoods. Your climate also plays a role:
- Humid Climates: May require longer drying times and extra attention to airflow to prevent mold.
- Dry, Sunny Climates: Will facilitate faster drying, but adequate airflow is still crucial to prevent the exterior from drying too quickly while the interior remains wet.
Understanding the properties of the wood you’re using and the weather patterns in your area will help you estimate seasoning times more accurately.
7. What to Avoid in Firewood Drying
There are a few common mistakes that every beginner should know about to ensure their firewood dries effectively:
- Piling wood directly on the ground.
- Covering the entire woodpile, including the sides.
- Leaving large defects or whole logs un-split.
- Burning wood before it’s properly seasoned (below 20% moisture).
- Storing wood in damp, enclosed spaces.
A Comparison of Different Firewood Stacking Methods
While the principles of airflow and protection remain constant, the way you stack can affect stability and ease of access. Here’s a quick look at some methods:
| Stacking Method | Pros | Cons | Best For |
|---|---|---|---|
| Open-Face Stack (Logs parallel, leaning back) | Excellent airflow, stable with back lean, good for tarp coverage. | Requires a sturdy base and careful stacking. | Most common and recommended for general use. |
| A-Frame Stack (Logs forming an inverted V) | Good airflow, naturally stable, requires minimal base. | Can be difficult to access wood from the middle, less efficient use of space. | Smaller quantities or areas with challenging terrain. |
| Round (Cubed) Stack (Short logs stacked in a circle) | Can be very stable, visually appealing. | Variable airflow depending on tightness, can be harder to remove sections. | Bulk storage where aesthetics and extreme stability are prioritized. |
Regardless of the method you choose, the overarching goal is to maximize air exposure for each piece of wood.
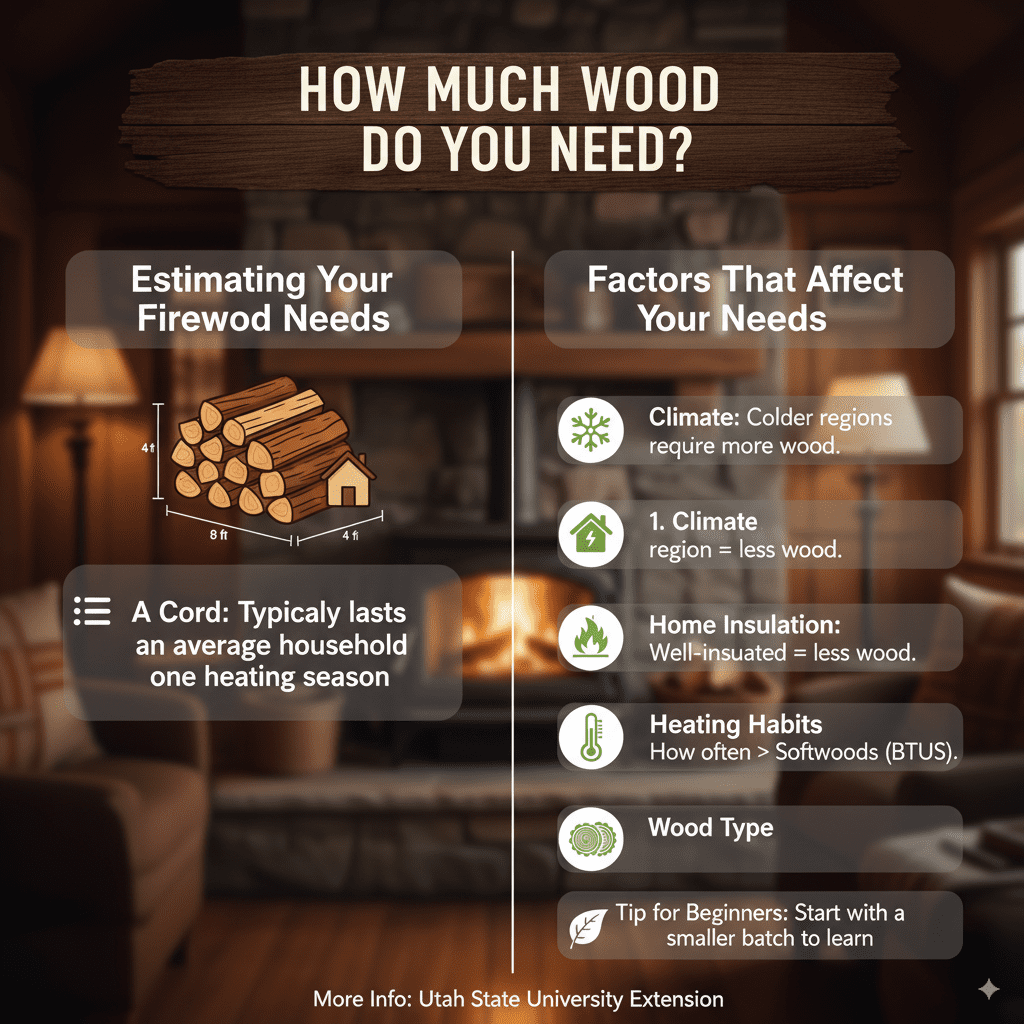
How Much Wood Do You Need?
Estimating your firewood needs is important for planning your drying space. A general guideline is that a cord of firewood (a stack measuring 4 feet high, 8 feet long, and 4 feet deep) will typically last an average household for one heating season. However, this varies greatly depending on:
- Your climate: Colder regions require more wood.
- Your home’s insulation: A well-insulated home uses less energy.
- Your heating habits: How often and at what temperature you use your fireplace or wood stove.
- The type of wood: Dense hardwoods provide more BTUs (British Thermal Units, a measure of heat energy) per cord than softwoods.
For a beginner, it’s often wise to start with a smaller batch of wood to get the hang of the drying process before committing to large quantities. You can find more detailed information on wood consumption and cord sizes from resources like the Utah State University Extension.
FAQ: Your Firewood Drying Questions Answered
Q1: How long does it typically take for firewood to dry?
It usually takes at least 6 to 12 months for firewood to season properly, with hardwoods often requiring 12 to 18 months. The exact time depends on the wood species, climate, and stacking method.
Q2: Can I use a tarp to cover my entire woodpile to protect it from rain?
No, you should only cover the top of your woodpile. Leaving the sides open allows for essential airflow, which is crucial for drying. Covering the sides will trap moisture and prevent the wood from seasoning.
Q3: What’s the best way to store firewood long-term?
The best way is to stack it off the ground in a well-ventilated area, covered on top but open on the sides. This ensures continued airflow and protection from rain, which is ideal for long-term seasoning and storage.
Q4: How do I know if my firewood is ready to burn?
Look for signs like greyish color, lighter weight, cracks on the ends, loose bark, and a hollow “clack” sound when two pieces are struck. For accuracy, use a wood moisture meter; readiness is indicated by a moisture content below 20%.
Q5: Is it okay to stack firewood near my house?
It’s generally best to stack firewood at least 10-20 feet away from your home to reduce the risk of pests and potential fire spread. Ensure the area still has good airflow and sunlight if possible.
Q6: Should I stack firewood indoors?
No, do not stack firewood indoors for drying. It needs airflow to dry properly, and storing it indoors, especially in living spaces, can lead to mold, pests, and potential fire hazards. A covered, outdoor location is ideal.
Q7: What kind of wood dries the fastest?
Softwoods like pine, fir, and spruce generally dry faster than dense hardwoods like oak, maple, or ash. This is because they have less dense grain and lower resin content, allowing moisture to escape more easily.
Conclusion
Mastering the art of drying firewood is a rewarding skill that significantly enhances your fire-burning experience. By understanding the importance of airflow, proper stacking techniques, and protection from excessive moisture, you can confidently season your wood for optimal burning. Remember, patience is a virtue here – allow ample time for your wood to dry thoroughly before you strike that first match. A well-seasoned log is the foundation of a safe, efficient, and warm fire, and by following these essential, proven tips, you’re well on your way to enjoying the full benefits of your firewood. Happy burning!