Best Way to Stain Cedar Fence: Quick & Lasting Techniques
The best way to stain a cedar fence is to clean it thoroughly and apply a high-quality, oil-based stain. This ensures longevity and enhances natural beauty.
Staining a cedar fence not only improves its appearance but also extends its lifespan. Cedar is naturally resistant to decay and insects, making it a popular choice for outdoor fencing. Proper staining protects the wood from the elements, such as rain, sun, and snow.
Before staining, clean the fence to remove dirt, mildew, and old stain residue. Choose an oil-based stain for deep penetration and long-lasting protection. Apply the stain evenly with a brush, roller, or sprayer. Regular maintenance and timely reapplication of stain will keep your cedar fence looking vibrant and strong for years.
Introduction To Cedar Fencing
Cedar fencing is popular for its natural beauty. The wood has a unique reddish color. It also has a pleasant aroma. Many people choose cedar for its look and smell. Cedar is also durable. It can last for many years. This makes it a good choice for fences. The wood is resistant to insects. It also resists decay. This adds to its longevity.
Cedar wood has a rich, warm color. This makes it attractive for fences. The grain of the wood is also very appealing. Cedar can blend well with many landscapes. It adds a rustic charm to any yard. The wood’s natural oils give it a unique scent. This makes cedar fences pleasant to be around. Cedar also ages well. The wood can develop a lovely gray patina over time.
Staining cedar helps protect the wood. It can prevent the wood from drying out. Staining also guards against UV damage. This keeps the fence looking new for longer. A good stain can enhance the wood’s natural color. It can also add a layer of water resistance. This helps keep the wood from rotting. Staining is an easy way to maintain the fence’s beauty. Regular staining can extend the fence’s life.

Preparation For Staining
Remove dirt and debris from the cedar fence with a broom. Wash the surface with a garden hose or pressure washer. Use a mild detergent if needed. Rinse thoroughly to remove soap residue. Allow the fence to dry completely before staining.
Sand the cedar fence using medium-grit sandpaper. This helps to remove rough spots and old stain. Sanding creates a smooth surface for the new stain to adhere. Wipe off the dust with a clean, dry cloth. Ensure the surface is clean and smooth before proceeding.
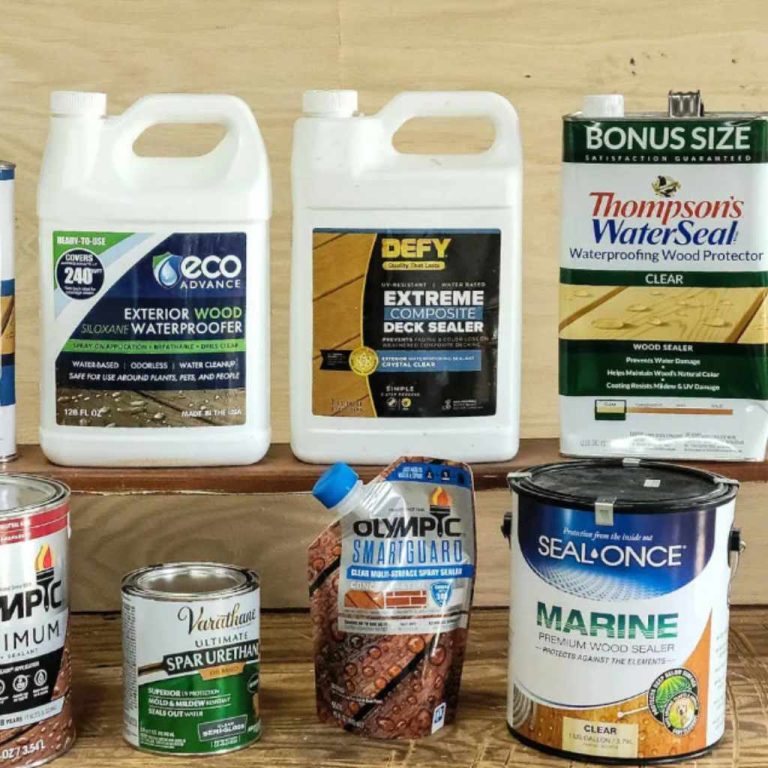
Choosing The Right Stain
Oil-based stains soak into the wood deeply. They provide a rich and long-lasting color. Water-based stains dry faster and are easier to clean up. They are also eco-friendly and less toxic. Both types have their own benefits. Oil-based stains are great for harsh weather. Water-based stains are good for quick projects. Choose the stain based on your needs and environment.
Stains come in many colors and transparency levels. Transparent stains show the natural wood grain. Semi-transparent stains add color but still show wood texture. Solid stains cover the wood completely. They offer more protection but hide the wood grain. Pick a color that matches your home. Choose the transparency based on how much wood grain you want to see.
Application Techniques For Stain
Brush application gives better control. This method ensures deep penetration of the stain. It works well on rough surfaces. Spray methods are faster. They cover large areas quickly. Sprayers might miss nooks and crannies. Brushes are better for detailed work.
Stir the stain before use. Always test on a small area first. Apply the stain in thin layers. Overlapping strokes help avoid streaks. Work in small sections. This ensures even coverage. Wipe excess stain with a cloth. Let each layer dry completely before adding another.
Weather Considerations
Sunny and dry weather ensures optimal conditions for staining a cedar fence. Avoid staining during rain or high humidity to achieve the best results.
Ideal Conditions For Staining
Staining cedar fences needs the right weather. The best days are dry and sunny. Temperatures should be between 50°F and 80°F. Humidity should be low, less than 50%. This ensures the stain dries properly. Avoid staining on rainy or windy days. Rain can wash away the fresh stain. Wind can blow dirt onto the wet stain.
Protecting Fresh Stain
Freshly stained fences need protection from the elements. Use tarps or plastic sheets to cover the fence. Keep the cover on for at least 24 hours. This keeps rain and debris off the fresh stain. Make sure the cover does not touch the wet stain. Secure the cover with weights or ties to prevent it from blowing away. Check the weather forecast before starting to stain.
Maintenance Tips
Staining a cedar fence requires proper preparation and application. Clean the wood thoroughly and ensure it’s dry before staining. Use a high-quality brush or sprayer for an even coat.
Regular Cleaning
Regular cleaning keeps your cedar fence looking new. Dirt and debris can damage the wood. Use a gentle soap and water mix. Scrub the fence with a soft brush. Rinse well with clean water. Dry the fence fully before staining. Regular cleaning prevents mold and mildew. Check the fence for damage while cleaning. Fix problems as soon as you see them. This routine helps your fence last longer.
Reapplication Frequency
Reapply stain to your cedar fence every 2-3 years. Weather and sunlight can wear down the stain. Check the fence each year. If the stain looks faded, reapply it. A fresh stain protects the wood. Follow the instructions on the stain can. Apply evenly with a brush or sprayer. Let the stain dry for the best results. Regular staining keeps the fence looking good.
Troubleshooting Common Issues
Staining a cedar fence requires proper preparation, including cleaning and sanding the surface. Ensure even application by using a quality brush or sprayer for best results.
Stain Bubbles And Peeling
Stain bubbles can occur when the wood is not clean. Always clean the wood surface before staining. Use a brush to remove dust and dirt. Peeling happens if the stain does not adhere well. Make sure the wood is dry before applying the stain. Check the weather forecast to avoid rain. Apply a thin coat of stain for better results. If bubbles still appear, gently sand the area. Reapply the stain after sanding.
Addressing Mold And Mildew
Mold and mildew can harm your cedar fence. Use a mixture of water and bleach to clean it. Scrub the affected area with a brush. Rinse with water and let it dry completely. Apply a mold-resistant stain to prevent future issues. Regular maintenance helps in avoiding mold. Keep the fence clean and dry.
Enhancing Longevity
Applying sealants can make your cedar fence last longer. Sealants protect the wood from water damage. They also help in preventing mold and mildew. Choose a high-quality sealant for the best results. Follow the instructions on the package. Apply the sealant evenly on the wood. Make sure to cover all areas well. Repeat the process every few years for extra protection.
UV inhibitors are important for protecting your fence from the sun. Sunlight can cause the wood to fade and crack. UV inhibitors block harmful rays from reaching the wood. This keeps the wood looking new for a longer time. Select a stain with UV inhibitors for the best protection. Apply the stain as directed for optimal results. Reapply as needed to maintain protection.

Frequently Asked Questions
Do You Need To Prep A Cedar Fence Before Staining?
Yes, you need to prep a cedar fence before staining. Clean the surface, remove debris, and ensure it’s dry.
Should A Cedar Fence Be Stained Or Sealed?
Stain or seal a cedar fence to protect it from weather damage. Staining enhances wood color, while sealing provides a clear, protective layer. Both options extend the fence’s lifespan. Choose based on aesthetic preference and maintenance needs. Regular maintenance is key for long-lasting protection.
What Is The Best Thing To Stain Cedar With?
The best stain for cedar is a high-quality, oil-based stain. It enhances durability and brings out natural beauty.
What Is The Best Product For Staining Cedar Fence?
The best product for staining a cedar fence is Ready Seal. It offers easy application, deep penetration, and weather resistance.
Conclusion
Staining your cedar fence enhances its beauty and longevity. Follow the steps for a professional finish. Proper preparation and quality stain ensure lasting results. Enjoy the improved appearance and protection of your cedar fence. Your efforts will pay off with a stunning, durable fence for years to come.