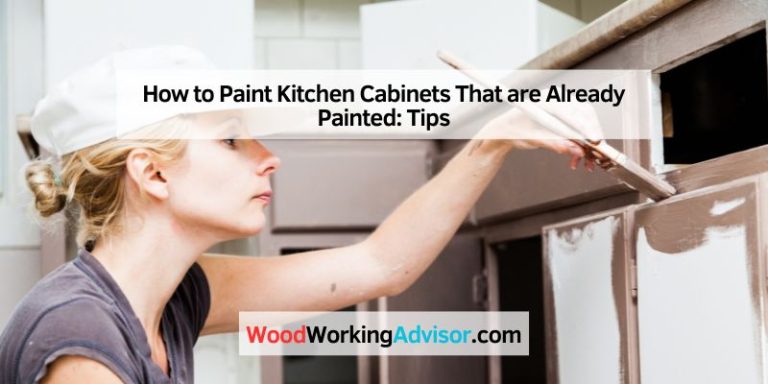
Can I Paint Aluminum The Essential, Genius Method
Yes, you can absolutely paint aluminum! The secret to a durable, professional-looking finish isn’t the paint itself, but the preparation. By properly cleaning, sanding, and using a self-etching primer to give the paint something to grip onto, you can achieve a flawless, long-lasting result on any aluminum surface.
Hello, friends! Md Meraj here, your guide in the workshop. Have you ever tried to paint an aluminum patio chair or a window frame, only to watch the paint peel and flake off a few weeks later? It’s a common frustration, and it can make you feel like aluminum is just impossible to paint. But I’m here to tell you that’s not true!
Painting aluminum isn’t difficult, it just requires a different approach than painting wood. The problem is that aluminum has a slick, non-porous surface that paint can’t easily stick to. But don’t worry! I’ve got a simple, genius method that guarantees success. We’re going to walk through the essential prep work that makes all the difference. Stick with me, and I’ll show you how to get a beautiful finish that lasts for years.
Why Is Painting Aluminum So Tricky?
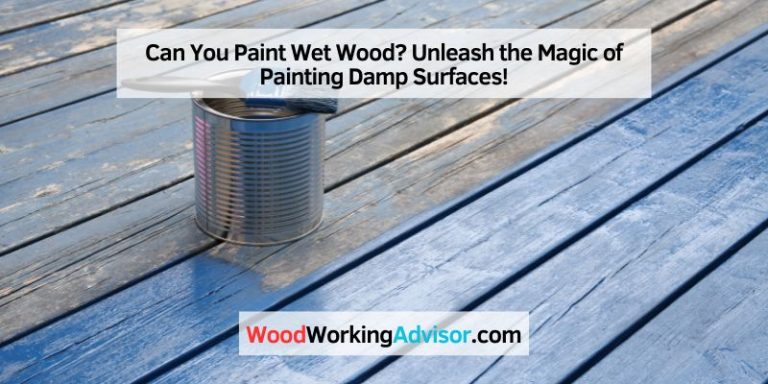
Before we jump into the steps, it helps to know what we’re up against. When aluminum is exposed to air, it almost instantly forms a very thin, hard, and invisible layer of aluminum oxide. You can think of this like a protective shield. This shield is great because it prevents rust and corrosion, which is why aluminum is so popular for outdoor items.
However, that same protective layer is super smooth and non-porous. Standard paint just can’t find anything to grab onto. It sits on the surface like water on a waxed car. Over time, with changes in temperature and humidity, the paint easily chips, flakes, and peels away. The solution? We need to gently remove that oxide layer and create a slightly rough surface that the primer can chemically and physically bond to. It’s all in the prep work!
The Essential Gear: Tools and Materials You’ll Need
Having the right tools ready will make this project go smoothly. You probably have many of these items in your workshop already. Here’s a simple checklist to get you started.
- For Safety First:
- Safety glasses or goggles
- Nitrile gloves to protect your hands from cleaners and solvents
- A dust mask or respirator, especially for sanding and spray painting
- For Cleaning:
- A bucket with warm water
- Degreasing soap (dish soap works well) or a dedicated TSP substitute cleaner
- Clean, lint-free rags or microfiber cloths
- A bristle brush or scouring pad for stubborn grime
- Denatured alcohol or mineral spirits for the final wipe-down
- For Preparation (The Most Important Part!):
- Medium-grit sandpaper (100 to 120-grit)
- Fine-grit sandpaper (300 to 400-grit) or a fine-grit sanding sponge
- Tack cloth to remove sanding dust
- For Priming and Painting:
- A high-quality self-etching spray primer (highly recommended)
- Your choice of paint suitable for metal (spray paint or brush-on acrylic latex or oil-based enamel)
- Paint brushes, rollers, or a paint sprayer depending on your paint choice
- Painter’s tape and drop cloths to protect surrounding areas
The Genius Method: Your Step-by-Step Guide to Painting Aluminum
Ready to get started? Just follow these steps carefully, and you’ll have a beautifully painted aluminum piece you can be proud of. Remember, don’t rush the preparation—that’s where the magic happens!
Step 1: Safety First!
Before you do anything else, set up your workspace and get your safety gear on. Choose a well-ventilated area, like an open garage or an outdoor space. This is especially important if you’re using spray paints or chemical cleaners. Put on your safety glasses, gloves, and dust mask. Protecting yourself is the most important part of any DIY project. The Occupational Safety and Health Administration (OSHA) provides excellent guidelines on personal protective equipment, and it’s always worth a look.
Step 2: Clean the Surface Thoroughly
Your aluminum piece needs to be completely free of dirt, grease, and grime. Mix your degreasing soap with warm water and give the entire surface a good scrub with a bristle brush or cloth. If you’re working on something that’s been outside for a while, like patio furniture, you might need to put in some extra elbow grease. Once it looks clean, rinse it completely with fresh water and let it dry thoroughly. A clean surface ensures that you’re sanding the aluminum itself, not just pushing dirt around.
Step 3: Scuff and Sand (The Critical Step!)
This is the most important step in the entire process. Sanding, or “scuffing,” does two things: it removes the invisible oxide layer and it creates microscopic grooves for the primer to bite into. Start with your medium-grit (100-120 grit) sandpaper. You don’t need to apply heavy pressure—your goal is just to dull the surface, not to remove a lot of metal. Work in gentle, swirling motions to ensure you cover every inch. The shiny, smooth aluminum should become dull and hazy. That’s how you know you’re doing it right!
Step 4: Clean Again, Then Clean Some More
Sanding creates a lot of fine dust. If you leave this dust behind, the primer will stick to it instead of the aluminum, and all your hard work will be for nothing. First, wipe the surface down with a clean, dry cloth to get most of the dust off. Follow up with a tack cloth, which is slightly sticky and designed to pick up every last particle. For the final, crucial cleaning, dampen a fresh, lint-free cloth with denatured alcohol or mineral spirits and wipe down the entire surface. This removes any lingering dust and oils from your hands. Let it evaporate completely before moving on.
Step 5: Apply the Right Primer
Now that the surface is perfectly prepped, it’s time for primer. For bare aluminum, you absolutely must use a self-etching primer. This type of primer contains a mild acid that gently etches the metal, creating an incredibly strong bond that regular primers can’t match. Shake the can well and apply a thin, even coat. It’s better to apply two light coats than one heavy one. Hold the can about 10-12 inches from the surface and use a steady, sweeping motion. Let the primer dry completely according to the manufacturer’s instructions—this can take anywhere from one to four hours.
Step 6: Paint Your Aluminum
The fun part is here! Once your primer is fully cured, you can apply your topcoat. Choose a paint that is rated for use on metal. Acrylic latex and oil-based enamels are both great choices and are available in either spray cans or liquid form for brushing. Just like with the primer, apply the paint in thin, even coats. If you’re using a brush, use long, smooth strokes to minimize brush marks. If you’re spraying, maintain that same sweeping motion. Let the first coat dry to the touch before applying a second coat. Most projects will look best with at least two coats of paint.
Step 7: Add a Clear Topcoat for Protection (Optional)
For items that will be outdoors or in high-traffic areas, adding a clear topcoat is a great idea. A clear enamel or polyurethane coat will provide an extra layer of protection against scratches, chipping, and UV rays, keeping your paint job looking fresh for much longer. Apply one or two thin coats, following the drying times on the can. Once the final coat is on, you need to let the paint fully cure. This can take several days, so be gentle with the item during this time.
Choosing the Perfect Paint and Primer for Aluminum
The primer and paint you choose will have a huge impact on the final result. Not all products are created equal when it comes to aluminum. The primer is your foundation, and the paint is your protective and decorative layer. Let’s break down the best options so you can choose with confidence.
The star of the show is the self-etching primer. It’s designed specifically for difficult-to-paint surfaces like aluminum, galvanized steel, and fiberglass. Its acidic properties create a bond that is both mechanical (by filling in the tiny scratches from sanding) and chemical (by reacting with the metal surface). This creates the perfect base for your paint.
For your topcoat, look for paint specifically labeled for use on metal. These paints contain additives that enhance adhesion and provide rust and corrosion resistance—even though aluminum doesn’t rust, it can corrode. The choice between spray and brush-on paint often comes down to personal preference and the shape of your project. Spray paint is fantastic for intricate items like chairs with many spindles, while a brush can give you more control on large, flat surfaces.
| Product Type | Best For | Pros | Cons |
|---|---|---|---|
| Self-Etching Primer | The essential first coat on bare aluminum. |
|
|
| Acrylic Latex Metal Paint | General aluminum projects, especially those that need flexibility. |
|
|
| Oil-Based Enamel Paint | High-traffic items or outdoor furniture needing maximum durability. |
|
|
| Clear Enamel Topcoat | Adding extra protection to any painted aluminum project. |
|
|
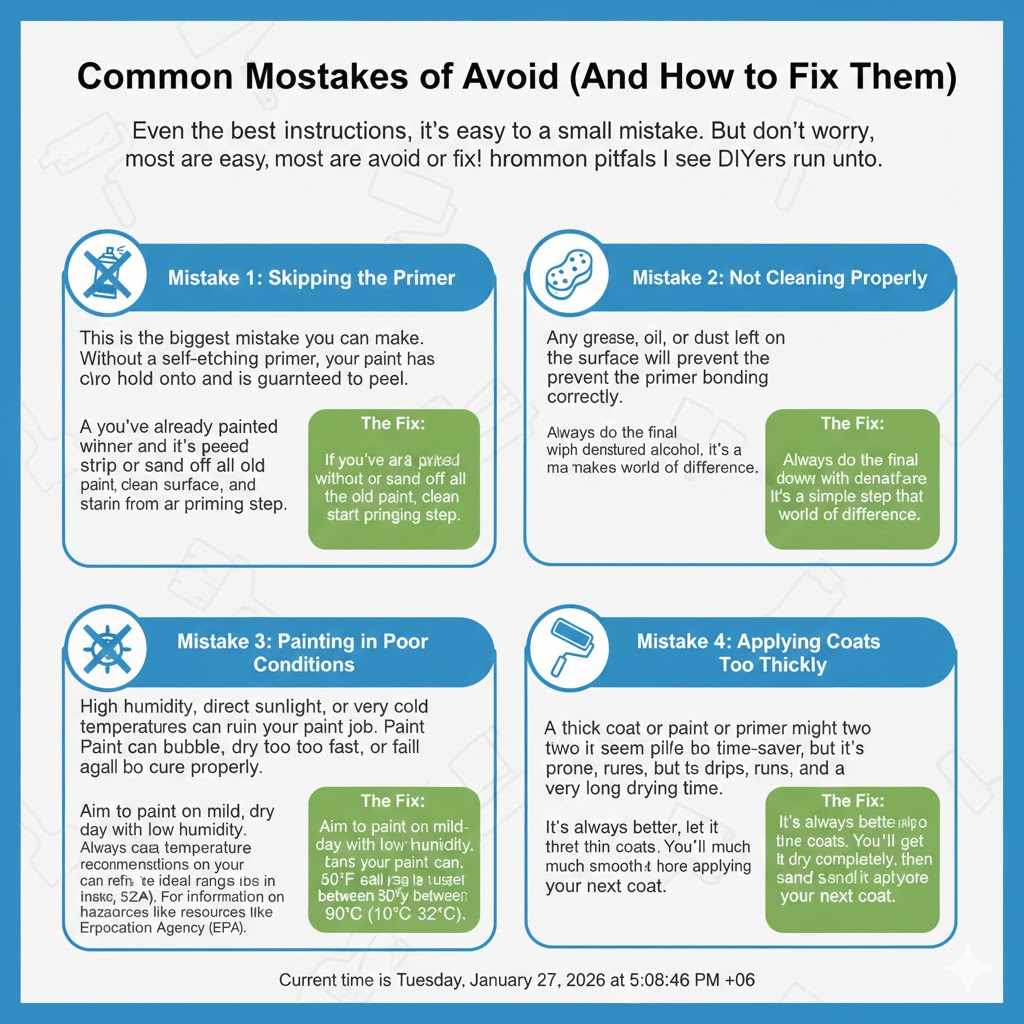
Common Mistakes to Avoid (And How to Fix Them)
Even with the best instructions, it’s easy to make a small mistake. But don’t worry, most are easy to avoid or fix! Here are a few common pitfalls I see DIYers run into.
- Mistake 1: Skipping the Primer. This is the biggest mistake you can make. Without a self-etching primer, your paint has nothing to hold onto and is guaranteed to peel.The Fix: If you’ve already painted without primer and it’s peeling, you’ll need to strip or sand off all the old paint, clean the surface, and start again from the priming step.
- Mistake 2: Not Cleaning Properly. Any grease, oil, or dust left on the surface will prevent the primer from bonding correctly.The Fix: Always do the final wipe-down with denatured alcohol. It’s a simple step that makes a world of difference.
- Mistake 3: Painting in Poor Conditions. High humidity, direct sunlight, or very cold temperatures can ruin your paint job. Paint can bubble, dry too fast, or fail to cure properly.The Fix: Aim to paint on a mild, dry day with low humidity. Always check the temperature recommendations on your paint can. The ideal range is usually between 50°F and 90°F (10°C and 32°C). For information on hazardous substances in paint, you can refer to resources like the Environmental Protection Agency (EPA).
- Mistake 4: Applying Coats Too Thickly. A thick coat of paint or primer might seem like a time-saver, but it’s prone to drips, runs, and a very long drying time.The Fix: It’s always better to apply two or three thin, even coats. You’ll get a much smoother, more professional finish. If you do get a drip, let it dry completely, then lightly sand it smooth before applying your next coat.
FAQ: Your Aluminum Painting Questions Answered
Can I use regular primer on aluminum?
It’s not recommended. Regular primer, like a standard latex primer used for drywall or wood, does not have the necessary etching properties to bond securely to aluminum’s smooth, non-porous surface. You must use a self-etching primer to ensure a long-lasting finish.
What grit sandpaper is best for aluminum?
A medium grit, somewhere between 100 and 120-grit, is perfect for the initial scuffing. It’s abrasive enough to create a good profile for the primer but not so coarse that it leaves deep scratches. You can follow up with a finer 300-400 grit paper if you want an extra-smooth finish, but it’s often not necessary for most projects.
Can I paint anodized aluminum?
Yes, you can paint anodized aluminum, but the process is the same. The anodized coating needs to be thoroughly scuffed with sandpaper to create a profile for the self-etching primer to grip. The key is to dull the entire anodized surface before priming and painting.
How long does painted aluminum last?
When prepared and painted correctly using this method, your painted aluminum should last for many years, even outdoors. Using a high-quality primer, paint, and an optional clear topcoat will give you a durable finish that resists chipping, fading, and peeling.
Can I use spray paint on aluminum?
Absolutely! Spray paint is an excellent choice for aluminum, especially for items with complex shapes. Just make sure you start with a self-etching spray primer first. Then, use a spray paint designed for metal for your color coats. Apply in thin, even layers for the best results.
Do I have to sand the aluminum before painting?
Yes, sanding is a non-negotiable step. It is the most critical part of the preparation process. Sanding removes the slick, passive oxide layer and creates the micro-abrasions that the self-etching primer needs to form a strong, permanent bond.
How do I paint aluminum that is already painted?
If the existing paint is in good condition, you can simply clean it well, lightly sand it to dull the surface, and then apply your new paint. However, if the old paint is peeling or flaking, you must remove all of it by scraping, sanding, or using a paint stripper. Once you are down to the bare aluminum, follow all the steps from cleaning to priming and painting.
Let’s Wrap It Up: You’ve Got This!
And there you have it—the essential, genius method for painting aluminum that truly works. It might seem like there are a lot of steps, but as you can see, the secret isn’t complicated. It’s all about taking the time to prepare the surface correctly. A little bit of cleaning and sanding is all it takes to turn a non-stick surface into the perfect canvas for your paint.
So, go ahead and pull out that faded patio furniture, that old aluminum mailbox, or those window frames you’ve been wanting to freshen up. With the right materials and a little bit of patience, you now have the skills to give them a durable, beautiful finish that will make them look brand new. Don’t be intimidated by aluminum ever again. You can do this!
Happy building, and as always, stay safe in your workshop!