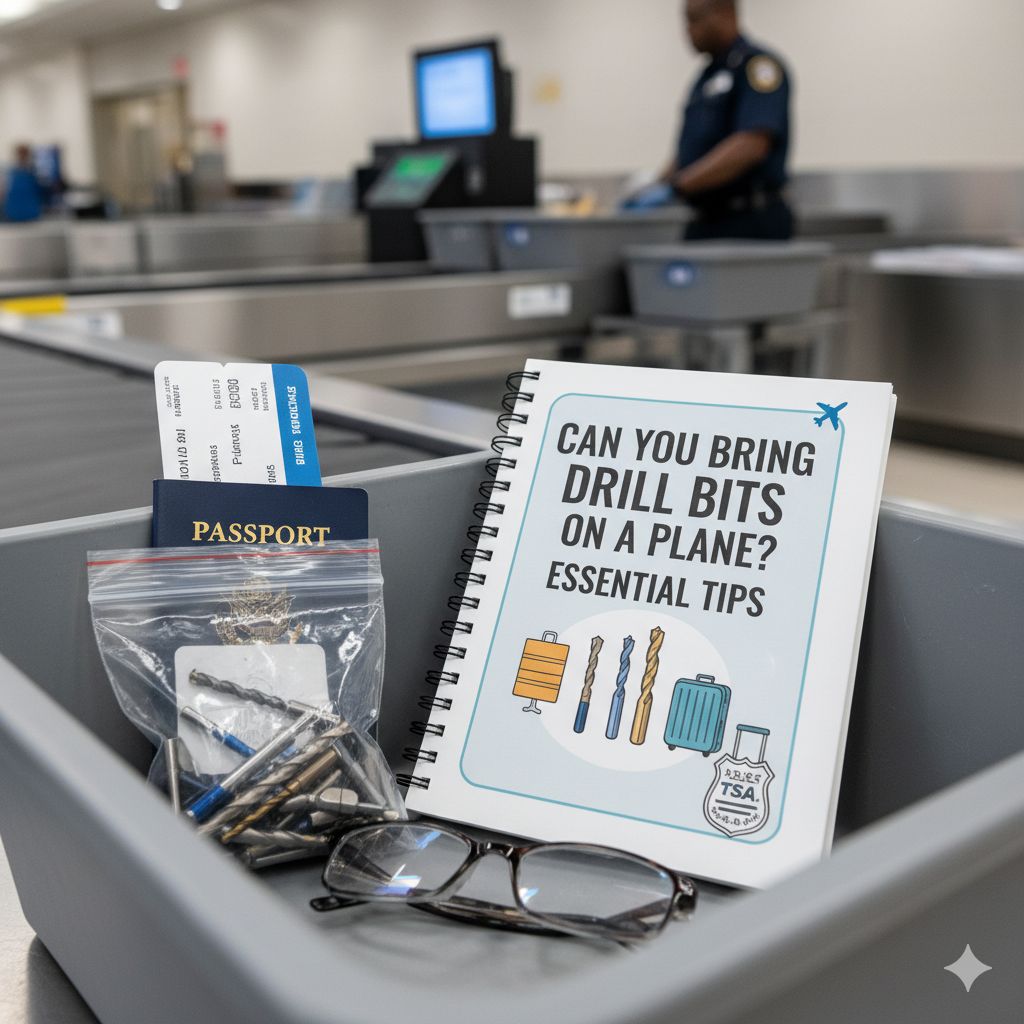
Can You Bring Drill Bits On A Plane? Essential Tips
Yes, you generally can bring drill bits on a plane, but with crucial restrictions for carry-on baggage. While not considered weapons, their sharp nature and potential for misuse lead to specific TSA guidelines. Understanding these rules is vital to avoid confiscation and ensure a smooth travel experience.
Planning a trip and wondering about your essential woodworking tools? If you’re a DIY enthusiast or a homeowner who loves projects, you might have this question: “Can you bring drill bits on a plane?” It’s a common concern for anyone who relies on these trusty companions for their home repairs and creative endeavors. The thought of having your tools confiscated at security can be a real headache, especially if you need them for a project at your destination.
Don’t worry! As your friendly woodworking mentor, I’m here to make things crystal clear. We’ll walk through the official rules and practical tips to ensure your drill bits travel safely with you. This guide will break down exactly what’s allowed and what isn’t, so you can pack with confidence and get back to building, fixing, and creating. Let’s dive into the details and make sure your tools don’t get left behind!
Understanding the TSA Rules for Drill Bits
The Transportation Security Administration (TSA) has specific regulations about what you can and cannot bring through security checkpoints. When it comes to drill bits, the core issue is their potential sharpness and the possibility of them being used as a weapon. While they are incredibly useful for construction and DIY, their pointed nature means they fall into a category requiring careful consideration.
The TSA’s primary goal is passenger safety. Therefore, any item that could potentially be used to cause harm is scrutinized. Drill bits, especially larger or sharper ones, can fit this description. The key distinction often lies in where you pack them and the specific type of drill bit.
Carry-On vs. Checked Baggage: The Big Difference
This is the most critical aspect of bringing drill bits on a plane. The TSA has different rules for items in your carry-on versus checked luggage.
Checked Baggage: Generally, you have much more freedom when packing items in your checked luggage. Tools like drill bits, along with other hardware and sharp objects, are typically permitted in checked bags without significant issue. This is because they are not accessible to passengers during the flight and are handled by baggage handlers. However, it’s always a good idea to pack them securely, perhaps in their original packaging or a sturdy container, to prevent damage to other items and ensure they don’t puncture luggage.
Carry-On Baggage: This is where things get tricky. The TSA is much stricter about what goes into the cabin with you. While small, very dull drill bits might pass, it’s generally not recommended to pack them in your carry-on. The risk of them being deemed a security threat due to their sharp points is high. The TSA officers have the final say at the security checkpoint, and they are trained to err on the side of caution. For specific guidelines on prohibited items, the TSA website is an excellent resource, providing a comprehensive list and a searchable tool for individual items. You can often find detailed information by searching for specific tool categories. They also provide general guidelines on traveling with tools, which can be helpful for all DIYers.

When in Doubt, Check It Out: How to Pack Drill Bits Safely
To ensure your drill bits make it to your destination without a hitch, following these packing tips is essential. These guidelines are designed to help you comply with TSA regulations and keep your tools in good condition.
Packing Drill Bits in Checked Luggage
Since checked baggage offers more leniency, this is the preferred method for transporting most tool accessories, including drill bits.
1. Secure Them: Place your drill bits in a sturdy container or their original packaging. This prevents them from getting lost, damaged, or poking through your luggage. A small toolbox, a hard-sided case, or even a ziplock bag placed inside a more robust bag works well.
2. Organize Your Tools: If you’re packing multiple drill bits or other tools, consider organizing them together. This makes it easier for you and potentially for security if they need to inspect your bag.
3. Place in the Middle: Pack your tool container in the central part of your suitcase, surrounded by soft items like clothing. This adds an extra layer of protection.
4. Avoid Loose Items: Don’t just toss loose drill bits into your suitcase. They can become a hazard and might be flagged.
What to Avoid in Carry-On Bags
It’s best to assume that most drill bits are not permitted in carry-on baggage. The risk of them being confiscated is simply too high. This includes:
Sharp-Pointed Bits: Any bit with a significant point, designed for drilling into harder materials.
Larger Bits: While size isn’t the only factor, larger bits are more likely to be viewed as a potential threat.
Sets of Bits: Even if individual bits are small, a collection of sharp items will likely be flagged.
If you absolutely need a drill bit for an immediate task upon arrival and cannot check luggage, your best bet is to purchase a new set at your destination. Many hardware stores and large retailers carry a wide variety of drill bits.
Types of Drill Bits and How They Might Be Perceived
The specific design of a drill bit can sometimes influence how it’s perceived by security personnel. While the TSA’s primary concern is anything sharp that can be used as a weapon, understanding the nuances can be helpful.
Twist Drill Bits: These are the most common type. Their spiraled flutes create a sharp cutting edge at the tip. Due to this pointed tip, they are generally not allowed in carry-on luggage.
Spade (Paddle) Bits: These have a distinctive flat, paddle-like shape with a sharp point. The pointed tip makes them unsuitable for carry-on.
Auger Bits: Designed for drilling deep holes in wood, these have a corkscrew design and a sharp point. They are definitely not carry-on material.
Masonry/Concrete Bits: These are heavy-duty bits with especially hard tips (often carbide). Their aggressive design and sharpness make them a clear no-go for carry-on.
Forstner Bits: These create flat-bottomed holes and have a central point and sharp outer rim. The sharp edges mean they are usually best packed in checked luggage.
Specialty Bits (e.g., Hole Saws, Forstner Bits with pilot drills): Most specialty bits, particularly those with a pointing or sharp cutting edge, should be treated as items for checked baggage only.
It’s important to remember that even if a drill bit seems dull or small, the TSA officer has the discretion to prohibit it if they perceive it as a threat. Their interpretation is what matters at the security checkpoint.
A Quick Comparison: Carry-On vs. Checked Baggage Rules for Tools
To make it even clearer, let’s look at a general comparison of what’s typically allowed in each type of luggage. This table provides a helpful overview, though it’s always wise to check the TSA’s official guidelines for the most up-to-date information.
| Item Type | Carry-On Baggage | Checked Baggage | Notes |
|---|---|---|---|
| Drill Bits (Most Types) | Generally Prohibited | Generally Permitted | Pack securely in checked bags. |
| Screwdriver Sets | Often Permitted (small, non-threatening sizes) | Permitted | Larger or industrial screwdrivers may be questioned in carry-on. |
| Small Pliers/Wrenches | Often Permitted (small tools) | Permitted | Larger or adjustable wrenches can be problematic in carry-on. |
| Utility Knives/Box Cutters | Prohibited | Permitted (blade must be sheathed/protected) | Always check TSA for specifics on blades. |
| Hand Saws (small folding) | Generally Prohibited | Generally Permitted | Sharp objects pose a risk in the cabin. |
This table is a helpful guide, but remember that the TSA has the ultimate authority. They consider the size, sharpness, and overall nature of an object.
Should You Bring Them At All? Alternatives to Traveling with Drill Bits
For many DIYers, the decision to bring drill bits on a plane boils down to necessity and convenience. Sometimes, the hassle simply isn’t worth it. Here are some alternatives to consider:
Purchase at Your Destination: As mentioned before, buying drill bits locally at your destination is often the easiest and most reliable solution. Home improvement stores, hardware shops, and even large general merchandise stores usually have a good selection. Support local businesses while you’re there!
Borrow Tools: If you’re visiting friends or family who are also handy, see if you can borrow a set of drill bits for your project. This saves you the trouble of packing and buying.
Prioritize Essential Tools: If you have other specialized tools that are absolutely necessary for your project and are difficult to replace, focus on packing those. You can always acquire drill bits relatively easily.
Consider Your Project Scope: If your project is very minor (e.g., hanging a small picture), you might be able to get by with a manual hand drill and a few basic bits. However, even these can fall under TSA scrutiny for carry-on.
The decision to bring drill bits depends on your travel plans, the importance of your tools, and the availability of replacements at your destination. For most casual DIYers or homeowners, purchasing them upon arrival or borrowing them is the most stress-free approach.
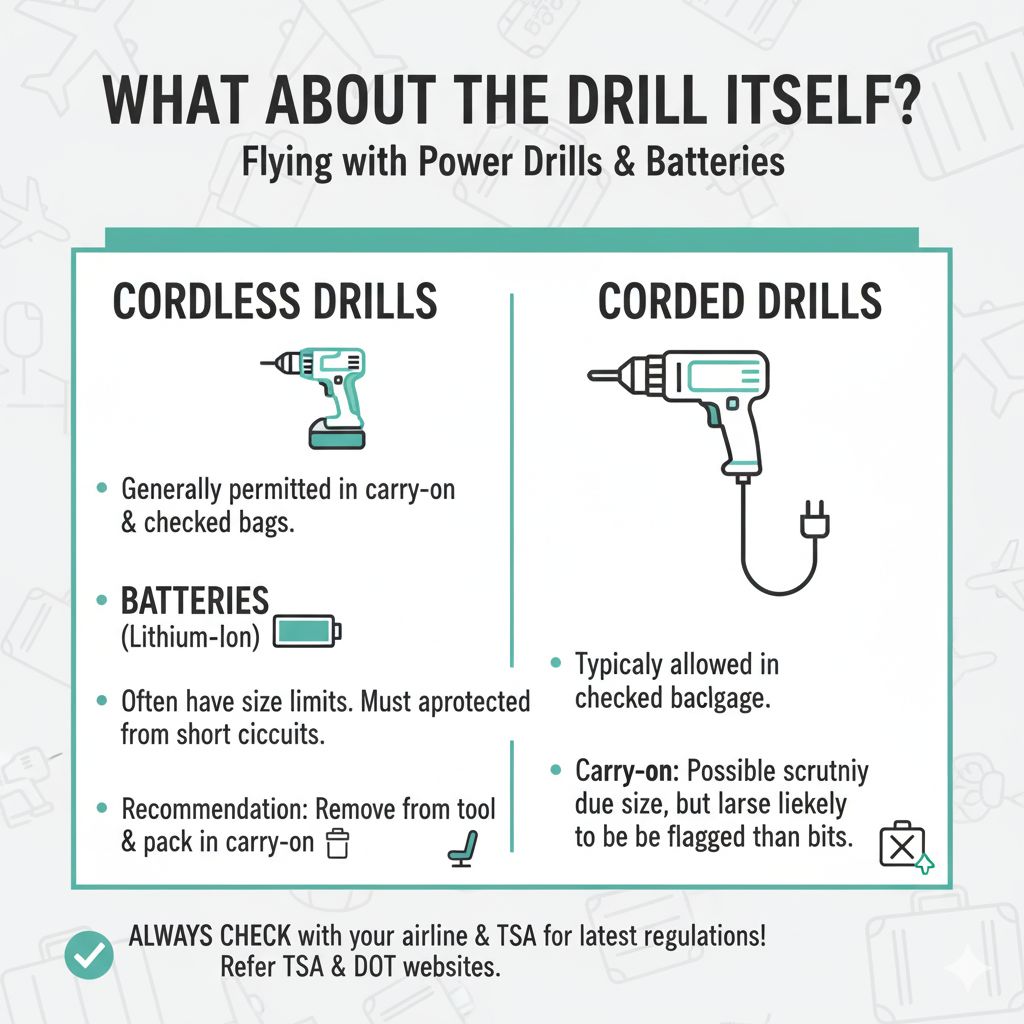
What About the Drill Itself?
This article focuses on drill bits, but you might also be wondering about the drill itself.
Cordless Drills: These are generally permitted in both carry-on and checked baggage. However, there are specific regulations regarding the batteries. Lithium-ion batteries (common in cordless tools) often have limits on size and must be protected from short circuits. For safety reasons, many airlines and the TSA recommend that lithium-ion batteries be removed from the device and carried in your carry-on luggage, protected from damage and short circuits. Check with your specific airline for their policies on batteries.
Corded Drills: These are typically allowed in checked baggage. Bringing a corded drill in carry-on might be scrutinized due to its larger size and potential to be perceived as a blunt instrument, though it’s less likely to be flagged solely for being a drill.
Always check with your airline and the TSA for the latest and most specific regulations regarding tools and batteries, as policies can be updated. The U.S. Department of Transportation website is a valuable resource for battery regulations.
FAQ: Your Drill Bit Travel Questions Answered
Let’s tackle some common questions many beginners have about bringing drill bits on a plane.
Q1: Can I bring a small container of drill bits in my carry-on bag?
It is generally not recommended. While some very small, dull metal objects might pass, drill bits typically have sharp points that the TSA considers potential threats in carry-on luggage. The risk of confiscation is high.
Q2: Are drill bits considered weapons by the TSA?
The TSA classifies items based on their potential to be used as weapons. While drill bits aren’t typically listed as firearms or knives, their sharp, piercing nature means they can be misused. Therefore, they are treated cautiously, especially in carry-on baggage.
Q3: What is the safest way to pack drill bits for air travel?
The safest and most advisable method by far is to pack your drill bits in your checked luggage. Ensure they are securely stored in a container to prevent damage and potential hazards.
Q4: Can I bring drill bits into the cabin if they are in their original packaging?
Even in original packaging, sharp-pointed drill bits are generally not advisable for carry-on luggage. The TSA’s primary concern is the item itself, not necessarily its packaging. Checked luggage remains the best option.
Q5: What if I need drill bits for a project at my destination and I can’t pack them?
Your best bet is to purchase them at your destination. Most towns and cities have hardware stores or home improvement centers where you can easily buy a set of drill bits upon arrival.
Q6: Are there any exceptions for very small or specialty drill bits in carry-on?
TSA policies are broad, and individual security officers have discretion. While a very tiny, dull bit might* slip through, it’s a gamble. Specialty bits, like those with pronounced points or cutting edges, are even less likely to be permitted. It’s safer to assume they are not allowed in carry-on.
Q7: Where can I find the most current TSA regulations on tools?
The official TSA website (tsa.gov) is the most authoritative source. They have a “What Can I Bring?” tool where you can search for specific items, and they also provide detailed guidelines on traveling with tools.
Conclusion: Pack Smart, Travel Smoothly
Navigating airline security can feel complicated, especially when you’re a DIYer with essential tools in hand. The good news is that when it comes to drill bits, the answer is generally yes, you can bring them on a plane, but with a significant key: pack them in your checked luggage.
By understanding the TSA’s focus on safety and the rules distinguishing between carry-on and checked baggage, you can make informed packing decisions. Your drill bits, with their sharp points, are much more likely to pass security without issue when placed in your checked suitcase. Opting to purchase bits at your destination is also a perfectly viable and often stress-free alternative.
Remember, a little planning goes a long way. Pack your tools securely, adhere to the guidelines, and you’ll be well on your way to your destination, ready to tackle any project that awaits you. Happy building, and safe travels!