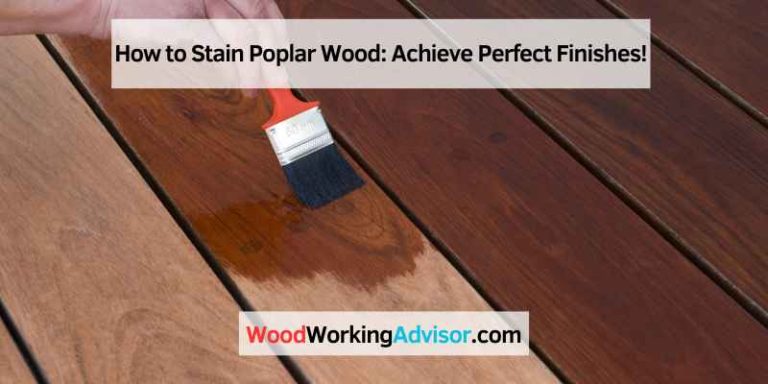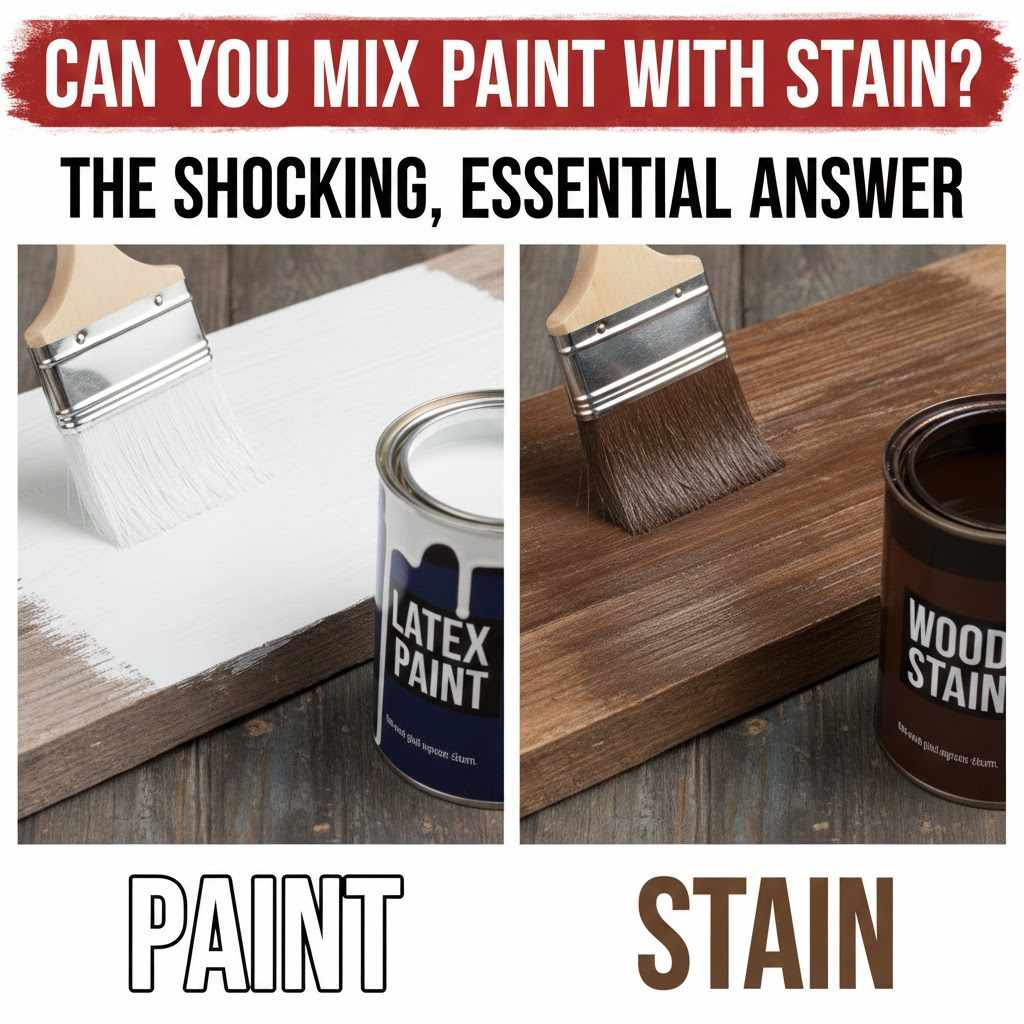
Can You Mix Paint With Stain? The Shocking, Essential Answer
No, you should not mix paint and stain directly. Their chemical bases (oil vs. water) are often incompatible, leading to a clumpy, unusable mess that won’t apply evenly or dry correctly. Instead, you can achieve a similar custom look by layering them or creating a “paint wash,” which we’ll explore below.
Welcome to the workshop! I’m Md Meraj, and today we’re tackling a question I hear all the time. You’ve got a can of paint and a can of stain. You’re thinking, “What if I mix these to get the perfect custom color?” It seems like a brilliant shortcut, right?
It’s a tempting idea, especially when you’re trying to achieve a unique finish for your project. You want the color of paint but the beautiful wood grain showing through like a stain. But before you start pouring, let’s pause. This is one of those DIY moments that can lead to big frustration. Don’t worry, though. I’m here to explain exactly why this doesn’t work and show you the right way to get the exact look you’re hoping for. Let’s get this sorted out, and you’ll be on your way to a beautiful finish in no time.
Why Paint and Stain Are Not Meant to Be Mixed
To understand why you can’t just dump a can of stain into a bucket of paint, we need to look at what they are. Think of it like trying to mix olive oil and water for a salad dressing—they just don’t want to stay together. Paint and stain have a similar problem.
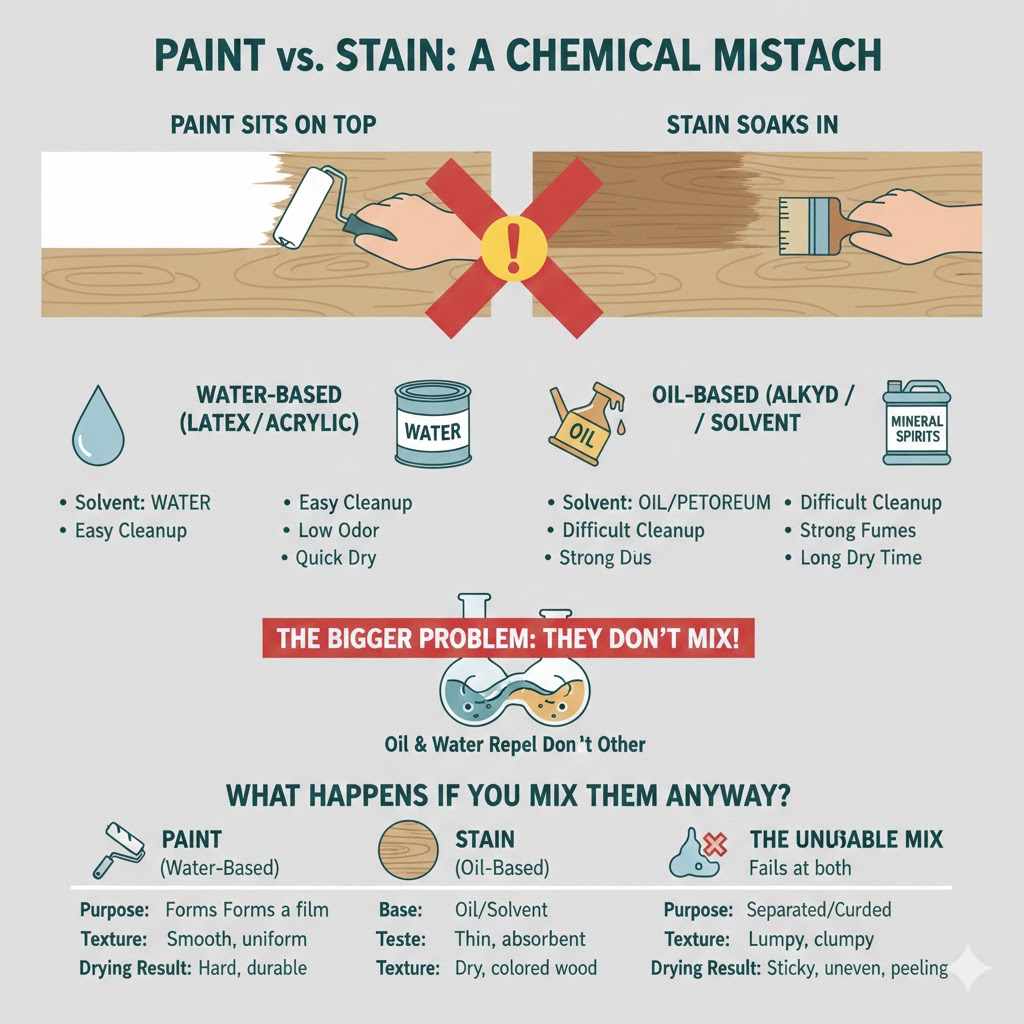
Paint Sits on Top: Paint is designed to be a surface coating. It forms a solid, opaque film over the wood. Its job is to cover the surface completely, hiding the wood grain underneath a layer of color and protection.
Stain Soaks In: Stain, on the other hand, is designed to penetrate. It has very fine pigments dissolved in a solvent that soaks into the wood fibers. Its primary job is to change the color of the wood itself while leaving the natural grain and texture visible.
Their very purposes are opposite, which is the first clue they won’t play nicely together.
The Bigger Problem: Oil vs. Water Bases
The most important reason not to mix these two is their chemical base. Most DIY products fall into two categories:
- Water-Based (Latex/Acrylic): These products use water as the solvent. They are easy to clean up, have low odors, and dry quickly. Most interior wall paints are water-based.
- Oil-Based (Alkyd): These products use mineral spirits or another petroleum-based solvent. They are known for their durability and smooth finish but have strong fumes, require chemical solvents for cleanup, and take longer to dry. Many traditional wood stains are oil-based.
When you try to mix an oil-based product with a water-based one, they repel each other. You’ll end up with a separated, lumpy concoction that is impossible to apply. Even if you manage to get it on your project, it won’t bond to the wood or dry properly, leaving you with a sticky, peeling disaster.
What Happens If You Mix Them Anyway?
Let’s say you try it. You can expect one or more of these disappointing results:
- Separation and Clumping: The mixture will curdle almost immediately. You’ll see clumps of pigment and binders that refuse to blend.
- Uneven Application: If you try to brush it on, you’ll get streaks and blobs. The color will be inconsistent, and the texture will be rough.
- Poor Adhesion: The mismatched formula won’t stick to the wood. It will be easy to scratch off, or it might bubble and peel as it tries to dry.
- Endless Drying Time: Because the chemicals are fighting each other, the mixture may never fully cure. It could remain tacky for days or even weeks.
Here’s a simple table to show you why they just don’t mix:
| Property | Paint (Water-Based) | Stain (Oil-Based) | The Unusable Mix |
|---|---|---|---|
| Purpose | Forms a film on top | Penetrates wood fibers | Tries to do both, fails at both |
| Base | Water | Oil / Solvent | Separated, will not combine |
| Texture | Smooth, uniform film | Thin, absorbent liquid | Lumpy, curdled, clumpy |
| Drying Result | Hard, durable shell | Dry, colored wood | Sticky, uneven, peeling surface |
The Right Way: How to Get a Custom Colored Finish
So, the shocking answer isn’t that you can’t get the look you want—it’s that you achieve it with a different technique, not a different mixture. If you want to color your wood while still seeing the grain, you don’t need to mix paint and stain. You need to make a paint wash.
A paint wash (also known as whitewashing or color washing) is simply thinned-down water-based paint. By adding water, you make the paint more transparent, allowing it to act like a stain. It adds color to the wood but lets the natural beauty of the grain show through. It’s easy, affordable, and gives you total control over the color.
Let’s walk through how to do it safely and effectively.
Step-by-Step Guide to Creating a Perfect Paint Wash
This is a wonderfully simple technique that gives you a beautiful, rustic, or coastal feel. Follow these steps, and you’ll be amazed at the professional-looking results.
Step 1: Gather Your Tools and Materials
You don’t need anything fancy. Most of this you might already have in your garage.
- Water-Based Latex or Acrylic Paint: Any color you like!
- Water: Plain old tap water is fine.
- Mixing Container: A clean plastic bucket or paint tray.
- Stir Stick: A scrap piece of wood or a paint stirrer.
- Sandpaper: A medium grit (like 150) and a fine grit (like 220).
- Lint-Free Rags or a Foam Brush: For applying and wiping.
- Drop Cloth: To protect your workspace.
- Protective Gear: Gloves and safety glasses are always a good idea.
Step 2: Prepare Your Wood Surface
Great projects start with great prep work. Don’t skip this step!
- Sand the Wood: Start with 150-grit sandpaper and sand in the direction of the wood grain. This opens up the wood’s pores so it will accept the wash evenly. For a super smooth finish, follow up with 220-grit sandpaper.
- Clean the Surface: Wipe away all the sanding dust with a clean, damp cloth or a tack cloth. Let the wood dry completely before you move on. Any dust left behind will get trapped in your finish.
Step 3: Mix Your Paint Wash
This is where the magic happens. You have complete control over how transparent or opaque your finish is.
- Start with a 1:1 Ratio: Pour one part water-based paint and one part water into your mixing container. For example, use one cup of paint and one cup of water.
- Stir Thoroughly: Mix until the consistency is smooth and uniform, like milk. Make sure there are no clumps of paint.
- Adjust as Needed:
- For a more transparent look (more grain shows through), add more water. A 1:2 ratio of paint to water is a good place to start.
- For a more opaque look (more solid color), add more paint. A 2:1 ratio of paint to water will give you more coverage.
Step 4: ALWAYS Test First!
I can’t stress this enough. Never apply a new finish to your main project without testing it first. Different woods absorb color differently.
Apply your paint wash mixture to a scrap piece of the same wood you’re using for your project. Let it dry to see the final color and transparency. Adjust your mixture if needed until you get the exact look you want.
Step 5: Apply the Paint Wash
This part is fun and forgiving. Work in small, manageable sections.
- Brush it On: Use a foam brush or rag to apply a thin, even coat of the wash onto the wood, moving in the direction of the grain.
- Wipe it Back: Immediately use a clean, lint-free rag to wipe off the excess wash. The longer you let it sit, the more color the wood will absorb. Wiping it back reveals the wood grain underneath.
- Repeat for Consistency: Continue this “apply and wipe” process across the entire piece, making sure to blend the sections for a uniform look. For a deeper color, you can apply a second coat after the first one is dry.
Step 6: Let it Dry and Apply a Top Coat
Patience is key for a durable finish.
- Dry Completely: Let the paint wash dry according to the paint manufacturer’s instructions. This usually takes a few hours, but I recommend letting it cure for at least 24 hours.
- Protect Your Work: A paint wash is not very durable on its own. To protect it from scratches, moisture, and everyday wear and tear, you must seal it. Apply 2-3 coats of a clear, water-based polyurethane or polycrylic. Follow the directions on the can, lightly sanding between coats with fine-grit sandpaper for an ultra-smooth finish.
Sealing not only protects the wood but also makes the color pop. When choosing a sealer, pay attention to Volatile Organic Compounds (VOCs), especially if working indoors. The U.S. Environmental Protection Agency (EPA) provides great information on understanding VOCs in household products to help you work more safely.
Choosing the Right Technique for Your Goal
Still not sure which path to take? This table breaks down common finishing goals and the best technique to achieve them.
| Your Goal | Recommended Technique | Why It Works |
|---|---|---|
| “I want to add color but still see the beautiful wood grain.” | Paint Wash | Thinned paint acts like a stain, providing color while remaining transparent enough to reveal the grain. |
| “I want a solid, opaque color that completely covers the wood.” | Standard Painting (with Primer) | Using a primer first ensures the paint adheres properly and gives you a smooth, even, and durable solid color. |
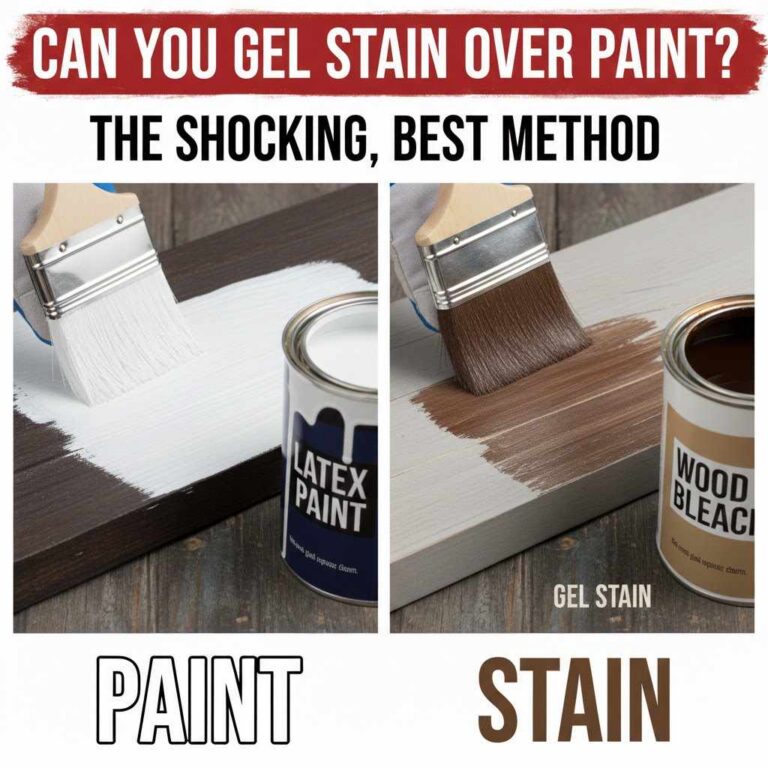
| I want to give my painted furniture an aged or antique look. | Gel Stain Over Paint | Gel stain sits on the surface, so you can apply it over paint and wipe it back to create a faux-grain or aged glaze effect. |
| “I just want to change the color of the wood itself.” | Standard Wood Stain | Stain is designed specifically to penetrate and color wood fibers, enhancing the natural grain without hiding it. |
Frequently Asked Questions (FAQ)
Can I mix oil-based paint with oil-based stain?
While they share the same base, this is still not recommended. Their formulas are designed for different purposes—one to coat, one to penetrate. Mixing them can result in a gummy substance that doesn’t dry properly and hides the wood grain you likely wanted to see. For custom colors, it’s better to mix different colors of stain together or make a paint wash.
What is the difference between a paint wash and a regular stain?
A paint wash is thinned-down paint that lightly colors the surface of the wood, allowing the grain to show through. A traditional stain uses finer pigments that soak deep into the wood fibers to color the wood from within. Stains typically enhance the grain more, while paint washes provide a softer, more muted look.
Can I put stain over paint?
Generally, no, because stain needs to soak into bare wood. However, there is one exception: gel stain. Because gel stain is very thick and sits on top of a surface, it can be used over a painted piece to create an antique glaze or a faux wood grain effect. It will not behave like a traditional stain.
What if I already mixed paint and stain? Is there any way to save it?
Unfortunately, no. If you have a separated, clumpy mixture of water-based paint and oil-based stain, the best and safest thing to do is dispose of it properly according to your local regulations. It cannot be used for any project and trying to apply it will only create a mess that’s difficult to clean up.
Do I absolutely have to use a top coat over a paint wash?
Yes, I highly recommend it. A paint wash offers color but very little protection. Without a sealer like water-based polyurethane, the finish can easily be scuffed, scratched, or damaged by moisture. A top coat protects your hard work and ensures your project looks great for years to come.
Is a paint wash durable for high-traffic items like a tabletop?
The paint wash itself is not durable, but the finish can be! The durability comes from the protective top coat you apply over it. For a high-traffic surface like a tabletop or kitchen cabinet, be sure to apply at least three coats of a high-quality, durable sealer like water-based polyurethane.
Conclusion: Craft with Confidence
So, can you mix paint with stain? The direct answer is no, but the exciting answer is that you don’t need to! By understanding how each product works, you can unlock better, more reliable techniques to achieve that perfect custom look.
Making a simple paint wash gives you unlimited color possibilities while celebrating the natural beauty of the wood. It’s an easy, budget-friendly technique that puts you in complete control. Instead of a clumpy mess from a failed experiment, you get a beautiful, professional-looking finish you can be proud of.
Remember, the best projects come from a little bit of knowledge and a willingness to try the right method. So grab your paint, water, and a piece of scrap wood to test on. You’re now equipped to create something truly special. Happy building!