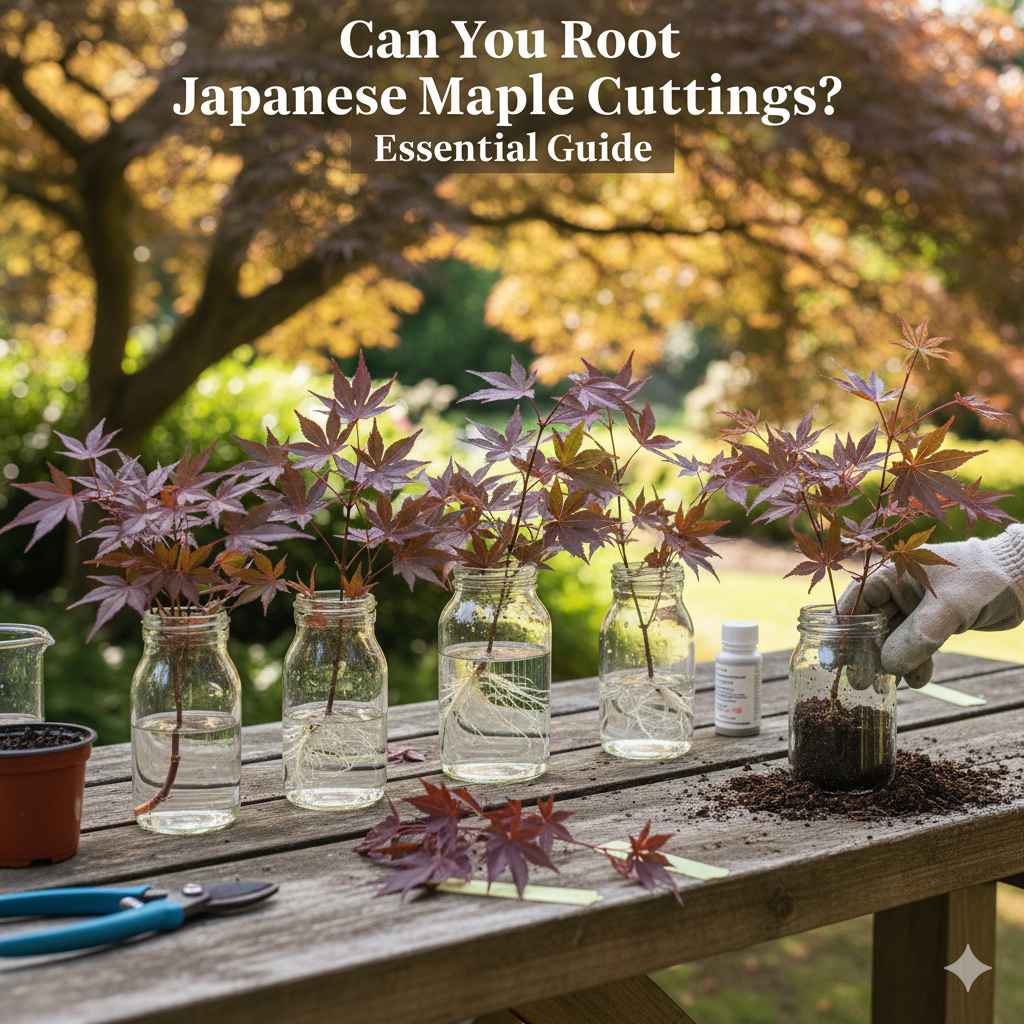
Can You Root Japanese Maple Cuttings? Essential Guide
Yes, you absolutely can root Japanese maple cuttings! With the right timing, technique, and a little patience, propagating your own beautiful Japanese maple from cuttings is an achievable and rewarding project for any home gardener. This guide will walk you through the essential steps to successfully grow new maple trees from your favorite specimens.
Japanese maples are stunning trees, admired for their intricate leaf shapes, vibrant colors, and elegant forms. If you’ve ever admired a particularly beautiful Japanese maple and wished you could have another one just like it, you might be wondering if it’s possible to grow a new tree from a cutting. The good news is, it is! While it can sometimes feel a bit daunting, propagating Japanese maples from cuttings is a very achievable goal for home gardeners. It requires a bit of know-how and some dedicated care, but the reward of nurturing a new tree from a small piece of an existing one is immense.
This guide is designed to be your simple, step-by-step companion, breaking down the process so you can confidently turn a twig into a tiny tree. We’ll cover everything you need to know, from choosing the right time to plant your cuttings to nurturing them into healthy saplings.
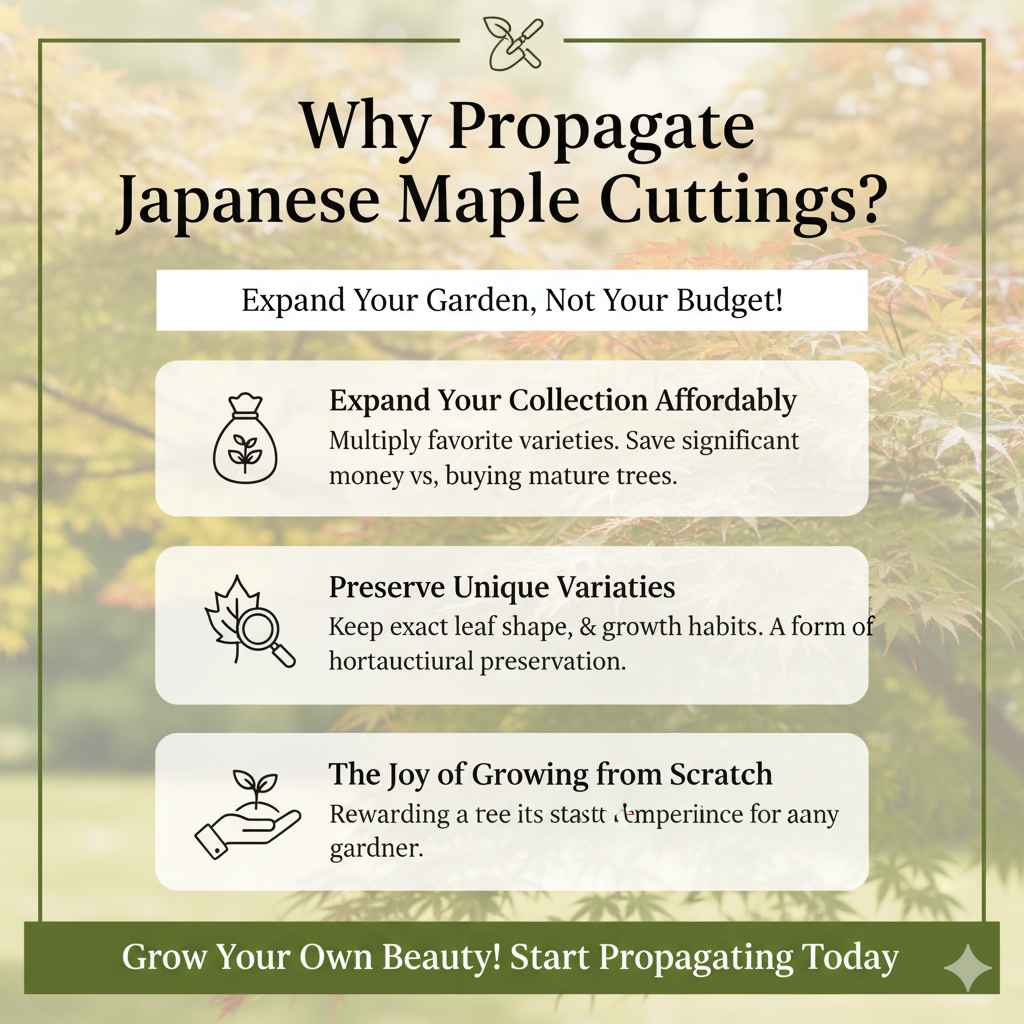
Why Propagate Japanese Maple Cuttings?
There are several fantastic reasons to try propagating Japanese maple cuttings. It’s a wonderful way to expand your garden with more of your favorite varieties, and it’s significantly more economical than buying mature trees. Plus, it’s incredibly satisfying to grow a tree from scratch!
Expand Your Collection Affordably
Japanese maples can be quite an investment, especially unique cultivars. Propagating from cuttings allows you to multiply your collection without significant expense. A single successful cutting can become a future tree, saving you a considerable amount of money.
Preserve Unique Varieties
Some Japanese maple cultivars are rare or difficult to find. Propagating from cuttings ensures that you can preserve the exact characteristics of a beloved tree, including its leaf shape, color, and growth habit. This is a form of horticultural preservationright in your backyard.
The Joy of Growing from Scratch
There’s a unique satisfaction that comes with nurturing a plant from its earliest stages. Watching a cutting develop roots and grow into a sapling is a truly rewarding experience for any gardener. It connects you more deeply to your plants and the natural process of growth.
When Is the Best Time to Take Japanese Maple Cuttings?
Timing is crucial for the success of your Japanese maple cuttings. The best times are when the plant’s growth is actively pushing energy into new shoots.
Softwood Cuttings: Late Spring to Early Summer
This is generally the most successful time to take cuttings. Look for new growth that is still flexible and green but has begun to firm up slightly. This new growth is full of hormones that encourage rooting.
Semi-Hardwood Cuttings: Mid-Summer to Early Fall
As the season progresses, the new growth will mature and become semi-hardwood. This wood is more rigid than softwood but not yet fully mature. These cuttings can also be successful, though they may take a bit longer to root.
Types of Cuttings and Their Suitability
Different types of cuttings have varying success rates. For Japanese maples, softwood and semi-hardwood cuttings are typically the most recommended for beginners.
Softwood Cuttings
These are taken from the new, flexible, green growth of the current season. They root relatively quickly but are also more delicate and prone to drying out. This is often the preferred method for many Japanese maples.
Semi-Hardwood Cuttings
Taken from wood that has started to mature and become slightly woody, these cuttings are more robust than softwood but still have a good capacity for rooting. They are a good option when softwood cuttings might be difficult to obtain or when you want a slightly hardier starting point.
Hardwood Cuttings
These are taken from dormant, mature wood in late fall or winter. While effective for many woody plants, hardwood cuttings of Japanese maples are notoriously difficult to root and are generally not recommended for beginners.
Essential Tools and Materials You’ll Need
Having the right tools makes the process smoother and increases your chances of success. Most of these are common items found in a well-equipped home or garden.
For Taking Cuttings:
- Sharp, Clean Pruning Shears or Knife: A clean cut is vital to prevent disease and aid healing. Sterilize your tools with rubbing alcohol or a bleach solution.
- Gloves: To protect your hands and keep the cuttings clean.
- A Healthy Parent Plant: Choose a vigorous, disease-free Japanese maple.
For Rooting:
- Rooting Hormone: A powdered or gel product that contains auxins to stimulate root development. Look for products specifically formulated for woody plants. You can find excellent options at most garden centers or online retailers. Some users prefer natural rooting aids, but commercially available rooting hormones are often the most reliable for beginners.
- Potting Medium: A well-draining mix is essential. A common and effective blend is 50% perlite and 50% peat moss or coco coir. This provides aeration and moisture retention without becoming waterlogged.
- Small Pots or Trays: With drainage holes. 4-inch pots are usually a good size for individual cuttings.
- Clear Plastic Bag or Dome: To create a humid environment, which is crucial for cuttings.
- Watering Can or Mister: For gentle watering.
- Labels: To identify your cuttings (variety and date taken).
Step-by-Step Guide to Rooting Japanese Maple Cuttings
Follow these steps carefully for the best results. Patience is key throughout this process!
Step 1: Prepare Your Cuttings
Gather your materials and select a healthy branch on your Japanese maple.
- Choose the Right Growth: Look for strong, non-flowering shoots from the current season’s growth. For softwood cuttings, select stems that are green and pliable but not overly soft or floppy. They should snap cleanly when bent.
- Make the Cut: Using your sterilized pruning shears or knife, make a clean cut just below a leaf node (where a leaf attaches to the stem). This node area is rich in hormones and is where roots are most likely to form. Aim for cuttings that are about 4-6 inches long. Remove any flowers or flower buds, as these draw energy away from root development.
- Prepare the Leaves: Remove the leaves from the bottom half of the cutting. If leaves are large, you can cut them in half horizontally to reduce water loss through transpiration, while still allowing the plant to photosynthesize. Leave a few leaves on the top portion of the cutting.
Step 2: Apply Rooting Hormone
This step significantly increases your chances of success.
- Moisten the Base: Lightly dampen the cut end of the stem with water.
- Dip in Hormone: Dip the moist end into the rooting hormone powder or gel. Tap off any excess. For gel, ensure the bottom inch or so is coated.
- Follow Product Instructions: Always refer to the specific instructions on your rooting hormone product, as application methods can vary.
Step 3: Plant the Cuttings
Proper planting medium and technique are vital for root development.
- Prepare the Potting Mix: Fill your pots or trays with the well-draining rooting medium. Moisten the mix thoroughly, but ensure it’s not waterlogged. It should feel like a damp sponge.
- Make a Hole: Use a pencil or your finger to create a hole in the potting mix, deep enough to accommodate the lower portion of your cutting. This prevents the rooting hormone from being brushed off when you insert the cutting.
- Insert the Cutting: Gently place the cutting into the hole. Firm the potting mix gently around the base of the cutting to ensure good contact between the stem and the medium.
- Spacing: If planting multiple cuttings in the same pot or tray, space them a few inches apart to allow for air circulation and prevent overcrowding.
Step 4: Create a Humid Environment
Japanese maple cuttings need high humidity to prevent them from drying out before they can form roots.
- Cover the Cuttings: Water the potting mix lightly again after planting. Then, cover the pot and cuttings with a clear plastic bag, supported by stakes so it doesn’t touch the leaves, or use a propagator with a clear lid. This creates a mini-greenhouse effect. Ensure the bag is sealed or the lid is fitted snugly.
- Location: Place the pots in a warm, bright location, but out of direct sunlight. Dappled light is ideal. A greenhouse, a bright windowsill, or a sheltered spot outdoors in a shaded area can work.
Step 5: Ongoing Care and Monitoring
Regular attention is needed to ensure your cuttings thrive.
- Watering: Check the moisture level of the potting mix regularly. It should remain consistently moist but not soggy. Mist the inside of the plastic bag or lift the lid occasionally to allow for air exchange and prevent fungal diseases.
- Temperature: Aim for a consistent temperature between 65-75°F (18-24°C). You can use a heat mat designed for seedlings if your environment is too cool.
- Patience: Rooting can take anywhere from 4 to 12 weeks, or even longer, depending on the variety of Japanese maple, the type of cutting, and environmental conditions.
Step 6: Checking for Roots
You’ll know your cutting has rooted when it shows signs of new growth and resists gentle tugging.
- Gentle Tug Test: After several weeks, you can gently tug on a cutting. If you feel resistance, it’s a good sign that roots have formed.
- Visible Roots: Alternatively, you can carefully ease a cutting from the potting mix to check for root development. If you see a healthy network of white roots, it’s ready to be moved.
- Signs of New Growth: New leaves or shoots emerging from the cutting are also a strong indicator that roots are developing.
Step 7: Transplanting Rooted Cuttings
Once your cuttings have developed a good root system, it’s time to move them to individual pots.
- Prepare New Pots: Use slightly larger pots (e.g., 6-inch) filled with a good quality, well-draining potting soil.
- Careful Removal: Gently remove the rooted cutting from the propagation tray. Try not to disturb the new roots too much.
- Planting: Plant the cutting in its new pot, burying the roots with soil. Water thoroughly.
- Acclimatization: Keep the newly potted saplings in a sheltered location with bright, indirect light. Gradually expose them to more sunlight and outdoors over a few weeks.
- First Year Care: Water regularly and protect them from harsh weather for their first year.
Factors Affecting Success Rates
Several variables can influence how successful your Japanese maple cuttings are. Understanding these can help you adapt your approach.
Variety of Japanese Maple
Some Japanese maple cultivars are more challenging to root than others. While many are moderately easy with the right techniques, rare or specific varieties might require more advanced methods or simply have lower success rates. Research your specific cultivar if possible.
Health of the Parent Plant
A strong, healthy, and disease-free parent tree is crucial. Cuttings taken from stressed or unhealthy plants are less likely to root successfully. Select branches from vigorous new growth.
Environmental Conditions
Temperature, humidity, and light levels all play a significant role. Consistent warmth, high humidity, and bright, indirect light are ideal. Fluctuations or extremes can hinder root formation or damage the cuttings.
Technique and Timing
Using clean tools, the correct type of cutting, appropriate rooting hormone, and a well-draining medium are vital. Taking cuttings at the right time of year also greatly improves your odds.
Nutrients and Hormones
The natural hormones within the cutting, combined with the use of rooting hormone, are key. Ensuring the parent plant has been well-fed and is in a healthy growth phase can help provide better hormonal content in the cuttings.
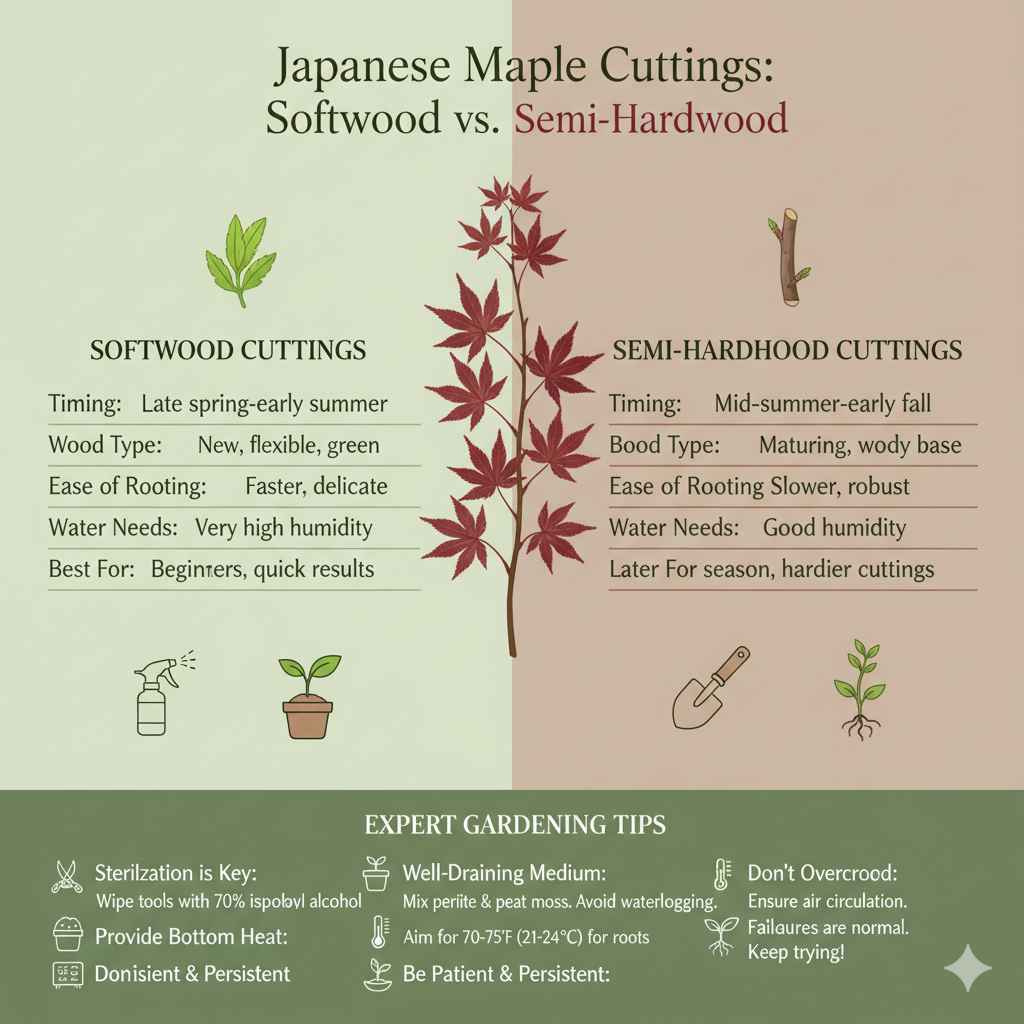
Comparing Softwood vs. Semi-Hardwood Cuttings
For Japanese maples, understanding the nuances between these two types of cuttings can help you choose the best approach.
| Feature | Softwood Cuttings | Semi-Hardwood Cuttings |
|---|---|---|
| Timing | Late spring to early summer | Mid-summer to early fall |
| Wood Type | New, flexible, green growth | Current season’s growth, starting to mature and become woody |
| Ease of Rooting | Generally faster rooting, but more delicate | Slightly slower rooting, but more robust |
| Water Needs | Require very high humidity to prevent drying | Still require good humidity but are slightly more forgiving than softwood |
| Best For | Beginners seeking quicker results from fresh growth | Those propagating later in the season or needing slightly hardier cuttings |
Tips for Success from Expert Gardeners
Many experienced gardeners have learned valuable tricks for propagating Japanese maples. Here are a few insights that can make a difference:
- Sterilization is Key: Always sterilize your cutting tools, pots, and even your hands. This prevents the transmission of fungal diseases, which can be a major killer of cuttings. A quick wipe with 70% isopropyl alcohol is usually sufficient.
- Use a Well-Draining Medium: Japanese maples, like many plants, hate sitting in waterlogged soil. A mix of perlite and peat moss (or coco coir) ensures excellent drainage while retaining enough moisture. You can even find specialized propagation mixes at garden centers. For more on soil composition and drainage, check out resources from university extension offices, like those found at UC Agriculture and Natural Resources.
- Provide Bottom Heat: If your rooting area is on the cooler side, a seedling heat mat can significantly speed up root development. Rooting hormones often work best at temperatures around 70-75°F (21-24°C).
- Don’t Overcrowd: Give your cuttings space. Overcrowding reduces air circulation, increases the risk of fungal infections, and can lead to competition for resources.
- Be Patient and Persistent: Not every cutting will root. It’s normal to have some failures. Just keep trying, adjusting your methods based on what you learn, and celebrate the successes!
Common Problems and Troubleshooting
Even with the best intentions, things can go wrong. Here are some common issues and how to address them.
Problem: Cuttings Wither and Die
- Cause: Lack of humidity, too much direct sun, or not enough moisture in the potting medium.
- Solution: Ensure the humidity dome or plastic bag is creating a moist environment and not touching the leaves. Move the cuttings to a shadier spot. Check the potting medium regularly and water if dry.
Problem: Cuttings Rot at the Base
- Cause: Overwatering, poor drainage, or insufficient air circulation leading to fungal growth.
- Solution: Use a very well-draining potting mix. Ensure pots have adequate drainage holes. Remove the plastic bag or lid for a few hours each day to allow for ventilation. If rot is evident, you may need to discard the affected cuttings and start again with new ones and a better-draining mix.
Problem: No Root Development After a Long Time
- Cause: Cuttings taken too late in the season, lack of rooting hormone, insufficient warmth, or the parent plant was not in optimal health.
- Solution: Ensure you used rooting hormone. Consider moving cuttings to a warmer location or using a heat mat. Try taking cuttings earlier next season from a healthier part of the plant. Some varieties are also naturally slow to root.
Problem: Fungal Growth on the Surface of the Medium
- Cause: Consistently damp conditions combined with organic matter.
- Solution: Increase air circulation by opening the humidity dome for short periods. Scrape off the surface mold if it’s minor and doesn’t seem to be affecting the cuttings directly. Ensure you are using a clean, sterile potting mix.
FAQ: Your Japanese Maple Cutting Questions Answered
Here are some frequently asked questions about rooting Japanese maple cuttings.
Can I root Japanese maple cuttings in water?
While some plants can be rooted in water, Japanese maples are generally not successful with this method. They need the support and unique environment that a well-draining soil medium provides to develop a strong root system. Water propagation increases the risk of rot and doesn’t encourage the right kind of root development needed for transplanting.