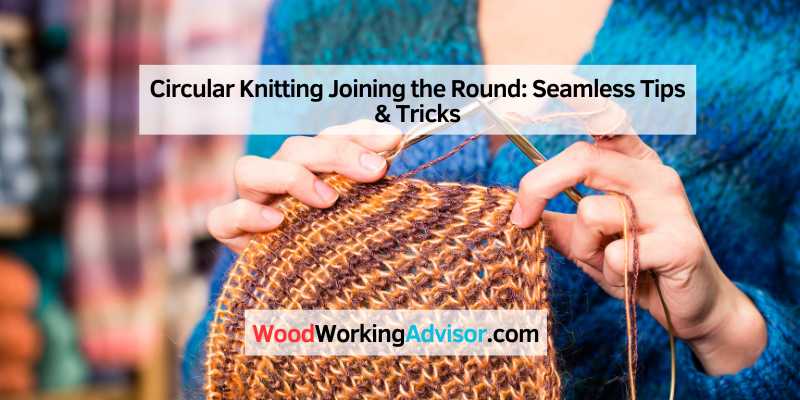
Circular Knitting Joining the Round: Seamless Tips & Tricks
Circular knitting joining in the round is the process of connecting the first and last cast-on stitches together, making circular knitting possible. By pushing both sets of end stitches to the needle tips and placing a marker to mark the beginning of the round, you can join the stitches together.
This allows you to seamlessly continue knitting in the round without any gaps. Joining the round can be done using various techniques such as the slip knot method or using a stitch marker. Additionally, weaving in ends is important to ensure a clean and finished look.
Learning how to join rounds in circular knitting is essential for creating seamless and continuous projects.
Introduction To Circular Knitting
Circular knitting is a technique that allows you to seamlessly knit in the round, creating a continuous tube of fabric. Unlike traditional flat knitting where you have to join separate pieces together, circular knitting eliminates the need for seams, resulting in a clean and professional finish.
The Basics Of Joining In The Round
When it comes to joining in the round, there are a few different methods you can use. One common technique is to cast on your stitches as usual and then use a stitch marker to mark the beginning of the round. As you knit, the first stitch you make will connect the cast-on stitches together, creating a continuous loop.
Another method involves adding an extra stitch at the beginning of the round. This extra stitch is then knit together with the last stitch of the round to create a seamless join. This technique ensures that there are no gaps or holes in your knitting.
Benefits Of A Seamless Finish
There are several benefits to achieving a seamless finish in your knitting projects. Firstly, garments and accessories made using circular knitting have a smoother and more professional appearance. The absence of seams also increases comfort, as there are no bulky or irritating edges.
Additionally, a seamless finish improves the durability of your knitted items. Without seams to potentially come undone or fray over time, your projects will maintain their structural integrity for longer.
Furthermore, circular knitting allows for greater versatility in design. You can easily create garments with intricate patterns, as there are no interruptions from seams. This opens up a world of possibilities for creative and unique projects.
In conclusion, circular knitting is a technique that offers a seamless finish and numerous benefits. Whether you’re knitting sweaters, hats, or even socks, joining in the round allows for a clean and professional result. With the basics of joining in the round and the advantages of a seamless finish in mind, you’re ready to embark on your circular knitting journey.
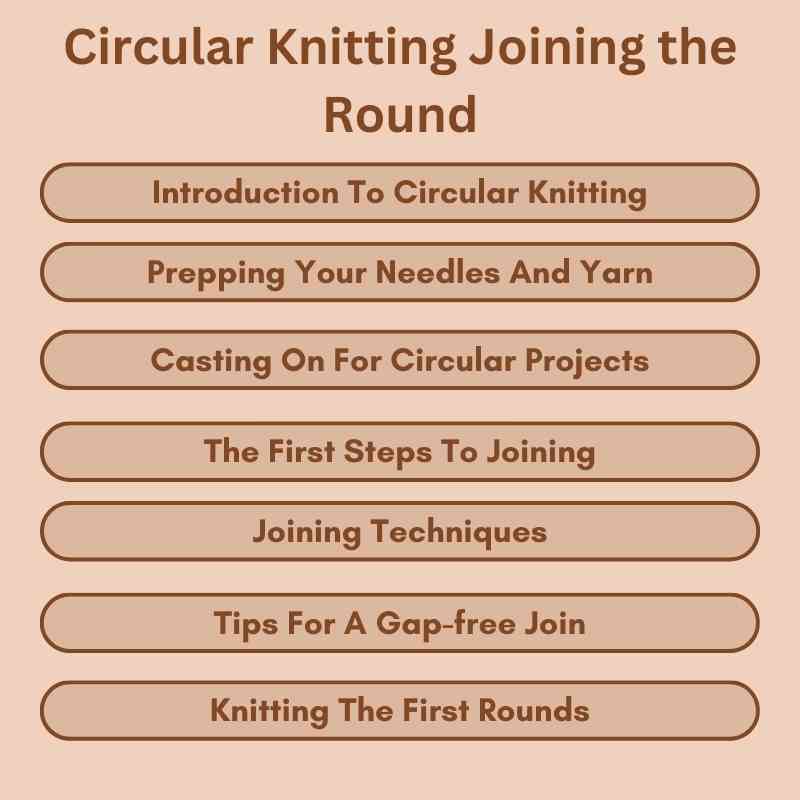
Prepping Your Needles And Yarn
Before diving into circular knitting and joining the round, it’s crucial to prepare your needles and yarn properly. This sets the stage for a smooth and enjoyable knitting experience, ensuring that your project turns out just the way you envision it. From selecting the right circular needles to choosing the ideal yarn for your project, each step in the preparation process plays a vital role in the outcome of your knitting endeavor.
Choosing The Right Circular Needles
When embarking on a circular knitting project, selecting the appropriate circular needles is paramount. Consider the material, length, and size of the needles. Opt for high-quality, smooth needles that facilitate easy movement of the yarn, preventing snags and interruptions in your knitting flow. The length of the needles should accommodate the number of stitches in your project comfortably, allowing for easy manipulation of the yarn. Additionally, ensure that the needle size corresponds to the gauge recommended for your specific project.
Selecting Yarn For Your Project
Choosing the right yarn is essential for the success of your circular knitting project. Consider the weight, texture, and color of the yarn. The weight of the yarn should align with the requirements of your pattern, ensuring that the finished piece reflects the intended drape and structure. Opt for a yarn texture that complements your knitting technique and desired outcome, whether it’s smooth and sleek or textured and cozy. Furthermore, select a color that resonates with the theme and purpose of your project, enhancing the visual appeal of your finished creation.
Casting On For Circular Projects
When it comes to circular knitting, casting on is the first step to creating a seamless project. The way you cast on for circular projects can impact the success of your knitting. In this article, we will explore different methods for casting on and ensuring the right number of stitches for your circular knitting projects.
Methods For Casting On
There are various methods for casting on when starting a circular knitting project. Some popular methods include the long-tail cast on, the cable cast on, and the knitted cast on. Each method offers its own unique advantages, so it’s important to choose the one that best suits your project.
Ensuring The Right Number Of Stitches
Ensuring that you have the correct number of stitches is crucial for the success of your circular knitting project. Before joining in the round, double-check that the number of stitches matches the pattern requirements. Counting your stitches at this stage can save you from potential issues later on.
The First Steps To Joining
Joining in the round for circular knitting is a crucial first step to create seamless and continuous projects. By knitting the first stitch together with the last cast-on stitch, you can ensure a smooth transition and avoid any gaps. There are different methods to join, such as using stitch markers or adding an extra stitch, each offering their own advantages.
Explore various tutorials and videos to find the technique that works best for you. Happy knitting!
Placing A Stitch Marker
When it comes to joining in circular knitting, one of the first steps you need to take is placing a stitch marker. This simple yet important tool helps mark the beginning of the round, ensuring you stay on track with your knitting project. Placing a stitch marker is easy, just follow these steps:
- Push both sets of end stitches to the needle tips.
- Place a marker to mark the beginning of the round.
- With the working yarn on the right, knit the first stitch on the left-hand needle tip.
- This first stitch will join the cast-on stitches together.
By placing a stitch marker, you can easily keep track of where your round begins and ends, making it easier to follow circular knitting patterns and maintain a consistent stitch count.
Avoiding Twists In Your Cast-on
To ensure a successful join in circular knitting, it’s crucial to avoid twists in your cast-on. Twists can lead to uneven tension and affect the overall appearance of your work. Here are a few tips to help you avoid twists in your cast-on:
- Before starting your cast-on, make sure your stitches are oriented correctly, with the working yarn at the back.
- Double-check that your cast-on stitches are all facing the same direction.
- When joining in the round, take a moment to carefully inspect your cast-on edge to ensure it is flat and untwisted.
- If you notice any twists, simply unravel the cast-on edge and start again.
By paying attention to your cast-on and taking the necessary precautions, you can ensure a smooth and twist-free join in your circular knitting project.
Remember, the first steps to joining in circular knitting include placing a stitch marker and avoiding twists in your cast-on. These simple techniques will set you on the right path for a successful and enjoyable circular knitting experience. Happy knitting!
(code: 6c6b)
Joining Techniques
Circular knitting joining techniques allow you to seamlessly connect the first and last cast-on stitches, enabling you to work in the round without any gaps. By following simple steps such as using an extra stitch or a stitch marker, you can easily join your knitting and create beautiful circular projects.
When knitting in the round, it is essential to join the first and last stitches together to create a seamless circle. There are various techniques for joining in circular knitting, including the slip knot method and swapping stitches for a tight join.
The Slip Knot Method
One popular technique for joining in the round is the slip knot method. To use this method, simply cast on your stitches and place a marker to indicate the beginning of the round. Then, knit the first stitch on the left-hand needle tip with the working yarn on the right. This first stitch will join the cast-on stitches together. Continue knitting in the round until you reach the marker, slip it, and carry on knitting.
Swapping Stitches for a Tight Join
Another technique to achieve a tight join is to swap the first and last stitches on the needle. After casting on, slip the first stitch from the left-hand needle tip onto the right-hand needle tip, then slip the last stitch from the right-hand needle tip onto the left-hand needle tip. This way, when you knit the first stitch, it will be the original last stitch, and when you knit the last stitch, it will be the original first stitch.
Conclusion
These two techniques are just a couple of the many ways to join in circular knitting. Experiment with different methods to find the one that works best for you. Happy knitting!
Tips For A Gap-free Join
Achieving a gap-free join in circular knitting when joining the round requires attention to detail. Start by pushing both sets of end stitches to the needle tips, place a marker to mark the beginning of the round, and knit the first stitch on the left-hand needle tip with the working yarn on the right.
This first stitch will join the cast-on stitches together. Slip the marker and continue knitting to complete the round.
Joining rounds in circular knitting can be a tricky task, especially when it comes to avoiding gaps between the stitches. But don’t worry, we’ve got you covered with some tips to ensure a gap-free join.
Using an Extra Stitch
One way to avoid gaps is to cast on an extra stitch and then knit it together with the first stitch of the next round. This creates a seamless join that blends in with the rest of the knitting. Make sure to place a marker at the beginning of the round to keep track of where it starts.
Perfecting the Invisible Join
Another technique for a gap-free join is the invisible join. After finishing the final round, cut the yarn leaving a long tail. Thread the tail onto a tapestry needle and insert it into the first stitch of the round as if to purl. Then, insert the needle into the last stitch of the round as if to knit. Pull the yarn tight to close the gap and weave in the ends.
To summarize, casting on an extra stitch or using the invisible join technique can help you achieve a gap-free join when knitting in the round. Give these tips a try and see the difference they make in your circular knitting projects.
Knitting The First Rounds
To start circular knitting and join the round, push both sets of end stitches to the needle tips, place a marker to mark the beginning of the round, and knit the first stitch with the working yarn on the right.
This first stitch will join the cast-on stitches together seamlessly.
Maintaining Even Tension
When starting your circular knitting project, it’s essential to maintain even tension throughout the first rounds. This ensures that your stitches are consistent in size and appearance. To achieve even tension, make sure to:
- Hold the needles and yarn comfortably
- Avoid pulling the yarn too tightly or loosely
- Keep your stitches uniform in size
- Practice consistent tension by knitting at a steady pace
Checking Your Work For Twists
Before you begin knitting the first rounds, it’s crucial to check that your work is not twisted. A twisted project will result in an uneven join and ultimately affect the final appearance of your knitted item. To ensure your work is not twisted, follow these steps:
- Hold the cast-on edge of your project and drape it over your hand, forming a loop.
- Make sure all the stitches are facing the same direction and that the cast-on edge is not twisted.
- Insert the needle into the first stitch, ensuring it is aligned with the cast-on edge.
- Double-check that the stitches are still facing the same direction before proceeding to knit the first round.
By maintaining even tension and checking for twists, you can start knitting the first rounds of your circular project with confidence. These initial steps set the foundation for a successful and visually appealing finished piece. Happy knitting!
Troubleshooting Common Issues
When joining in the round for circular knitting, it’s common to encounter a few issues. However, with the right techniques, you can easily address these problems and continue with your project seamlessly. Here are some common issues you might face when joining in the round, along with solutions to troubleshoot them:
Correcting Twisted Stitches
Twisted stitches can occur when the cast-on edge twists around the needles, resulting in a distorted appearance. To correct this issue, carefully ensure that the cast-on edge is not twisted before joining in the round. Additionally, double-check the orientation of your stitches to prevent twisting.
Dealing With Gaps Or Looseness
Gaps or looseness can sometimes appear when transitioning from one round to the next. To address this, make sure to snugly pull the working yarn when joining the round to eliminate any gaps. Additionally, using a smaller needle for the first few rounds can help tighten the tension and prevent gaps from forming.
Finishing Your Project
After completing the rounds in circular knitting, it’s essential to finish your project with precision. This involves seamlessly weaving in ends and blocking your finished knit to ensure a professional, polished look.
Weaving In Ends Seamlessly
When it comes to weaving in ends seamlessly, it’s crucial to use a yarn needle to carefully thread the yarn through the stitches. This creates a neat and tidy finish without any loose ends that could unravel over time. Remember to weave in the ends on the wrong side of the work to keep the right side clean and flawless.
Blocking Your Finished Knit
Blocking your finished knit is a crucial step in achieving a professional look. This process involves gently shaping the knit item to the correct measurements and allowing it to dry in that shape. Whether you opt for wet blocking or steam blocking, this step smoothens out any irregularities, evens out stitches, and enhances the overall appearance of your project.
Advanced Circular Knitting Tips
When it comes to circular knitting, mastering advanced techniques can take your projects to the next level. In this section, we will explore some tips and tricks for handling color changes and knitting stripes in the round.
Handling Color Changes
One of the joys of circular knitting is the ability to create beautiful colorwork designs. However, managing color changes can sometimes be a challenge. Here are a few tips to make the process smoother:
- When changing colors, make sure to carry the unused color loosely along the back of your work. This will prevent tightness and puckering.
- To avoid tangled yarn, consider using bobbins or separate balls of yarn for each color.
- If you’re working with a large number of color changes, it can be helpful to create a colorwork chart to keep track of the pattern.
Knitting Stripes In The Round
Stripes are a popular design element in circular knitting. Here’s how you can knit stripes seamlessly:
- When starting a new color, join the yarn at the beginning of the round and knit the first stitch with the new color. This will create a smooth transition between colors.
- When switching colors, carry the unused color up the inside of the work, twisting the yarns at the beginning of each round to prevent gaps.
- If you prefer not to carry the yarn, you can cut the yarn at each color change and weave in the ends later. However, this method can result in more finishing work.
By following these advanced circular knitting tips, you’ll be able to confidently tackle projects that involve color changes and stripes. Experiment with different techniques and unleash your creativity!
Patterns And Project Ideas
When it comes to circular knitting, the possibilities are endless. Whether you are a seasoned knitter or just starting out, there are a variety of patterns and project ideas that you can explore. From cozy hats and beanies to stylish socks and sweaters, circular knitting offers a versatile range of options for knitters of all skill levels.
Hats And Beanies
Knitting hats and beanies in the round is a popular choice for many knitters. The seamless construction and ability to easily create intricate patterns make circular knitting ideal for these projects. Whether you prefer a classic beanie or a slouchy hat, circular knitting allows for endless customization and creativity. Additionally, the absence of a seam ensures a comfortable fit and a polished finish.
Socks And Sweaters
When it comes to creating socks and sweaters, circular knitting offers a seamless and efficient approach. Knitting socks in the round eliminates the need for pesky seams, resulting in a comfortable and durable final product. Additionally, circular knitting provides the flexibility to adjust sizing and experiment with different stitch patterns, making it an ideal technique for crafting unique and personalized socks. Similarly, knitting sweaters in the round allows for a continuous and uninterrupted construction, enabling knitters to seamlessly integrate various design elements and achieve a professional-looking garment.
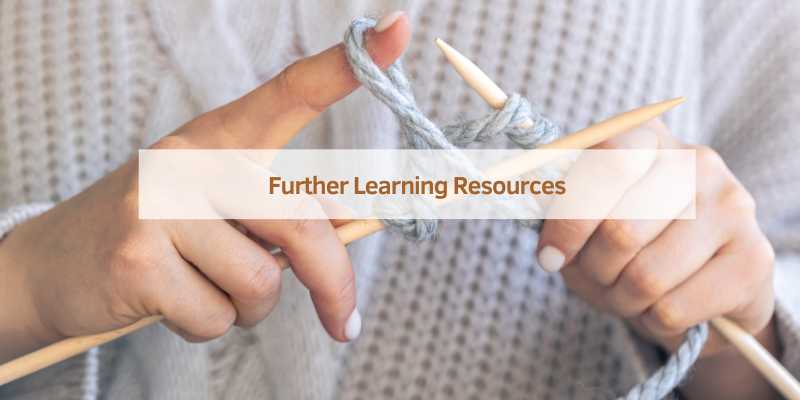
Further Learning Resources
Discover a wealth of further learning resources on the topic of Circular Knitting Joining the Round. From instructional videos on YouTube to informative tutorials, you’ll find step-by-step guidance on techniques like using an extra stitch, swapping stitches, and creating an invisible join.
Expand your knitting skills and join your stitches seamlessly in the round.
Circular knitting is a fun and versatile technique that can be used to create a wide range of projects. However, if you’re new to circular knitting, you may find the process of joining in the round a bit tricky. Fortunately, there are many resources available that can help you master this technique. Here are some recommended books, guides, online tutorials, and classes to help you on your circular knitting journey.
Recommended Books and Guides:
1. “Circular Knitting Workshop” by Margaret Radcliffe – This comprehensive guide covers everything you need to know about circular knitting, including joining in the round.
2. “The Magic Loop: Knitting in the Round on a Circular Needle” by Bev Galeskas – This book focuses specifically on the Magic Loop technique, which is a popular method for joining in the round.
3. “Circular Knitting: 100+ Creative Patterns” by Nicky Epstein – This book features a wide range of circular knitting patterns, along with helpful tips and techniques for joining in the round.
Online Tutorials and Classes:
1. Shaina Bilow’s “Joining Knitting in the Round using an extra stitch” – This video tutorial on YouTube provides a step-by-step guide for joining in the round using an extra stitch.
2. Under the Olive Tree Knits’ “Joining Stitches in the Round on a Circular Needle” – This YouTube tutorial demonstrates how to join in the round using a circular needle.
3. VeryPink Knits’ “Joining for Working in the Round” – This YouTube tutorial covers multiple techniques for joining in the round, including using a stitch marker and casting on an extra stitch.
4. WEBS – America’s Yarn Store’s “How to Join Knitting in the Round” – This video tutorial provides a clear demonstration of how to join in the round using a circular needle.
Whether you prefer to learn from books, online tutorials, or classes, there are plenty of resources available to help you master the art of circular knitting. With a bit of practice, you’ll be joining in the round with ease in no time.
Frequently Asked Questions
How Do You Join Rounds In Circular Knitting?
To join rounds in circular knitting, knit the first stitch to connect the cast-on stitches. Place a marker to indicate the round’s beginning. Continue knitting to complete the round.
How To Join Circular Knitting Without A Gap?
To join circular knitting without a gap, use an extra stitch to connect the first and last stitches. Place a marker to mark the beginning of the round and knit the first stitch to join the cast-on stitches together. This technique ensures a seamless join in the round.
How To Knit An Invisible Join In The Round?
To knit an invisible join in the round, follow these steps:
1. Push both sets of end stitches to the needle tips.
2. Place a marker to mark the beginning of the round.
3. With the working yarn on the right, knit the first stitch on the left needle tip.
4. This first stitch will join the cast-on stitches together.
5. When you reach the end of the round, slip the marker and continue knitting. For a visual demonstration, you can search for tutorials on YouTube or knitting websites.
What Does Joining In The Round Mean?
Joining in the round means connecting the first and last cast on stitches together to create a continuous loop for circular knitting. To join, push both sets of end stitches to the needle tips, place a marker to mark the beginning of the round, and knit the first stitch on the left-hand needle tip with the working yarn on the right.
This first stitch will join the cast-on stitches together. Slip the marker and continue knitting until the end of the round.
Conclusion
Joining in the round is a crucial technique in circular knitting. It ensures that your project is seamless and continuous without any unwanted gaps. By following the steps mentioned in this blog post, you can easily master the art of joining in the round.
Remember to push the end stitches to the needle tips, place a marker, and knit the first stitch to join the cast-on stitches together. With a little bit of practice, you’ll be able to seamlessly join in the round and create beautiful circular projects.
Happy knitting!