Mastering Crown Molding Angles with a Miter Saw
Hey there, fellow woodworker! If you’ve ever stood in front of a miter saw, scratching your head over crown molding angles, you’re not alone. I’ve been there, staring at those tricky cuts, wondering how to make them perfect. Installing crown molding can transform a room, but getting those angles just right is the key to a professional finish. In this guide, I’ll share everything I’ve learned from years of trial and error, so you can tackle your crown molding project with confidence. Let’s break it down step by step, as if we’re chatting over a workbench.
What Is Crown Molding and Why Are Angles So Important?
Let’s start with the basics. Crown molding is that elegant trim you see where walls meet ceilings. It adds a touch of class, hiding imperfections and giving any space a polished look. But here’s the catch: crown molding isn’t flat like baseboards. It sits at an angle, usually 38 or 45 degrees, which makes cutting it a bit tricky. Those angles are where your miter saw becomes your best friend—or your biggest challenge.
The angles matter because crown molding joints need to fit perfectly, especially at corners. Whether it’s an inside corner (where two walls meet inward) or an outside corner (where walls jut out), the cuts must align like puzzle pieces. A wrong cut means gaps, and gaps scream “amateur.” Trust me, I’ve made those mistakes, and I’m here to help you avoid them.
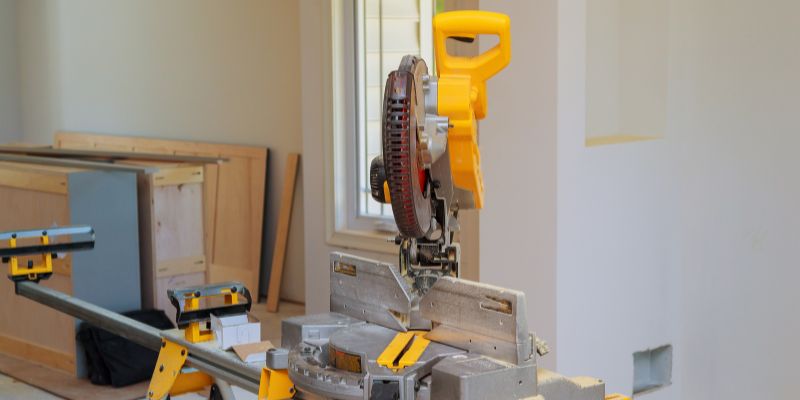
Understanding Your Miter Saw for Crown Molding
Before we dive into angles, let’s talk about your miter saw. I remember when I first got mine—a shiny new compound miter saw that felt like it could do anything. But cutting crown molding requires understanding two key settings: the miter angle (the left-to-right tilt of the blade) and the bevel angle (the up-and-down tilt). Most miter saws are compound, meaning they handle both, which is perfect for this job.
When I started, I didn’t realize how precise these settings needed to be. For crown molding, you’re often cutting at compound angles, combining miter and bevel to match the molding’s tilt against the wall. Don’t worry if that sounds complex—I’ll walk you through it.
Types of Crown Molding Angles
Let’s break down the angles you’ll encounter. Crown molding typically has a spring angle, which is the angle it makes with the wall. The most common spring angles are 38 degrees and 45 degrees, but some specialty moldings might differ. I’ve worked with both, and knowing your molding’s spring angle is critical before you touch that miter saw.
Then there are the corner angles. Most rooms have 90-degree corners, but older homes or custom designs might have odd angles, like 135 degrees for a bay window. Each corner type—inside or outside—requires specific miter and bevel settings. I learned this the hard way when I miscut a piece for an outside corner and had to start over.
Cutting Crown Molding: Flat vs. In-Position
Now, here’s where things get interesting. There are two ways to cut crown molding on a miter saw: flat or in-position. Let me explain both, based on my experience.
Cutting flat means laying the molding flat on the saw’s table, adjusting both miter and bevel angles to mimic how the molding sits on the wall. This method is precise but requires knowing the exact settings for your molding’s spring angle. I prefer this for consistency, especially on long runs.
Cutting in-position means holding the molding against the saw’s fence at the same angle it’ll sit on the wall. This feels more intuitive, like you’re mimicking the final installation. I used this method when I was new because it helped me visualize the cut, but it’s trickier to keep steady without a jig.
Miter and Bevel Settings for Common Angles
Okay, let’s get to the numbers. Below is a table I wish I’d had when I started. It shows the miter and bevel settings for common crown molding spring angles when cutting flat. These are for 90-degree corners, which you’ll find in most homes.
| Spring Angle | Corner Type | Miter Angle | Bevel Angle |
|---|---|---|---|
| 38 degrees | Inside Corner | 31.6 degrees | 33.9 degrees |
| 38 degrees | Outside Corner | 31.6 degrees | 33.9 degrees |
| 45 degrees | Inside Corner | 35.3 degrees | 30.0 degrees |
| 45 degrees | Outside Corner | 35.3 degrees | 30.0 degrees |
Here’s a tip from my workshop: always double-check your molding’s spring angle. I once assumed a piece was 38 degrees, but it was 45, and my cuts were off. If you’re unsure, measure the angle by holding the molding against a protractor or checking the manufacturer’s specs.
Step-by-Step Guide to Cutting Crown Molding
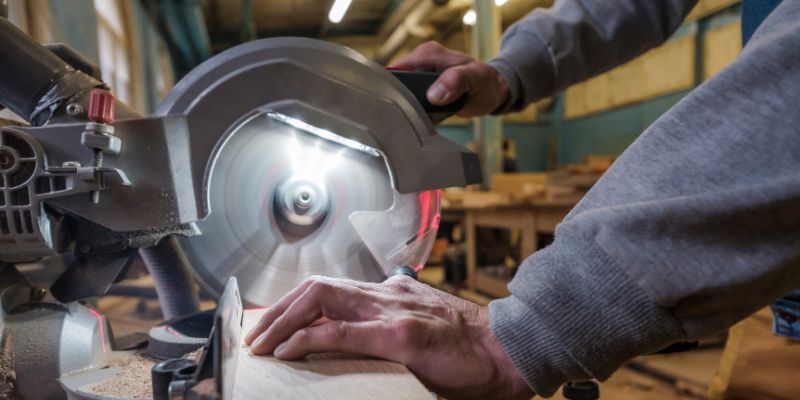
Let’s walk through how I cut crown molding using the flat method, which I find most reliable. Grab your miter saw, a tape measure, and some safety glasses, and let’s do this.
First, measure the wall length where the molding will go. I always add a couple of inches for wiggle room. Mark the molding with a pencil to show which end is the top (ceiling side) and which is the bottom (wall side). This saves headaches later.
Next, set your miter saw to the correct angles from the table above. For an inside corner with 38-degree molding, I set the miter to 31.6 degrees and the bevel to 33.9 degrees. If you’re cutting the left piece, tilt the miter right; for the right piece, tilt it left.
Place the molding flat on the saw, with the top edge against the fence. I hold it firmly and double-check the orientation. Make the cut slowly to avoid splintering. Repeat for the other piece, reversing the miter direction for the opposite corner.
For outside corners, the process is similar, but you’ll flip the molding so the bottom edge is against the fence. I messed this up once and ended up with two left pieces—lesson learned!
Coping vs. Mitering: Which Is Better?
You might’ve heard about coping crown molding instead of mitering. Coping is when you cut one piece to fit snugly against the profile of another, usually for inside corners. I tried coping early on, and while it’s great for tight joints, it’s time-consuming and requires practice with a coping saw.
Mitering, on the other hand, is faster and works well with a miter saw. I stick to mitering for most projects because it’s straightforward, especially with the right settings. However, if you’re aiming for a museum-quality finish, coping might be worth learning. It’s your call—both can look fantastic with practice.
Tips for Perfect Crown Molding Cuts
Over the years, I’ve picked up some tricks that make cutting crown molding easier. First, always make test cuts on scrap wood. I keep a pile of cheap pine just for this. It saves your expensive molding from rookie mistakes.
Second, use a stop block for repetitive cuts. I clamp a piece of wood to the saw’s fence to ensure every piece is the same length. This is a lifesaver for long walls with multiple joints.
Third, invest in a good blade. A 60-tooth or 80-tooth carbide blade gives clean cuts without tearing the molding. I learned this after ruining a piece with a dull blade—never again.
Finally, check your saw’s calibration. My miter saw was slightly off when I bought it, throwing my angles out of whack. Use a square to confirm your blade is at 90 degrees before starting.
Installing Crown Molding After Cutting
Cutting is only half the battle—installation is where your work shines. I start by dry-fitting my pieces to ensure the angles align. If there’s a small gap, I use wood filler or caulk to hide it, but tight cuts usually don’t need much.
Nail the molding to the wall studs and ceiling joists using a finish nailer. I space nails about every 16 inches, sinking them slightly below the surface for a clean look. Sand lightly, then paint or stain to match your room.
For tricky corners, I sometimes add corner blocks—decorative pieces that eliminate the need for perfect miter cuts. They’re a cheat code for beginners, and I still use them when I’m in a rush.
Common Mistakes and How to Avoid Them
I’ve made plenty of mistakes with crown molding, so let me save you some grief. The biggest is cutting the wrong angle. Always label your pieces and double-check your saw settings. Another is measuring short—measure twice, cut once, as the old saying goes.
Don’t rush the cuts. A shaky hand or a hurried cut leads to jagged edges. Take your time, and keep your miter saw clean to avoid debris messing up your work.
Finally, don’t ignore wall imperfections. Older homes rarely have perfectly square corners. I use a bevel gauge to measure the exact corner angle and adjust my cuts slightly if needed.
Tools and Materials You’ll Need
Here’s what I keep in my toolbox for crown molding projects:
- A compound miter saw (10-inch or 12-inch works great)
- A fine-tooth saw blade (60-80 teeth)
- Measuring tape and pencil
- Safety glasses and ear protection
- Finish nailer and compressor
- Wood glue, caulk, and filler for finishing
- Sandpaper for smoothing edges
I also recommend a miter saw stand for stability, especially on long pieces. It’s not mandatory, but it makes life easier.
Why Crown Molding Is Worth the Effort
Installing crown molding is a labor of love. It’s not just about aesthetics—it’s about pride in your work. Every time I walk into a room I’ve trimmed, I feel a little burst of satisfaction. It’s a skill that impresses clients, friends, and even yourself.
Plus, crown molding boosts home value. In the USA, buyers love those extra touches, and a well-done molding job can set your space apart. I’ve seen rooms go from plain to jaw-dropping with just a few well-placed pieces.
Conclusion
There you go, friend—everything I’ve learned about cutting crown molding angles with a miter saw. From setting the right miter and bevel angles to avoiding common pitfalls, you’re now armed with the know-how to make your project shine. It’s not always easy, but with practice, you’ll be cutting perfect joints like a pro. Grab your miter saw, pick up some molding, and start experimenting. The first cut is the scariest, but every one after gets easier. I can’t wait to hear how your project turns out—let’s make those rooms look amazing!
FAQs
What is the easiest way to cut crown molding?
The easiest way is using the flat method on a miter saw. Set the miter and bevel angles based on your molding’s spring angle, lay the molding flat, and cut. It’s precise and doesn’t require holding the molding at an angle.
Can I cut crown molding with a non-compound miter saw?
It’s tough but possible. A non-compound miter saw can’t tilt for bevel cuts, so you’d need to cut in-position and adjust manually. I recommend a compound saw for easier, more accurate cuts.
How do I know my crown molding’s spring angle?
Check the manufacturer’s specs or hold the molding against a protractor. Most are 38 or 45 degrees. If you’re unsure, test cuts on scrap wood can help you confirm.
What if my corners aren’t 90 degrees?
Use a bevel gauge to measure the exact corner angle. Divide it by two to get your miter angle, then adjust your miter saw accordingly. Test cuts are key here.
How do I hide gaps in crown molding joints?
Small gaps can be filled with caulk or wood filler, then sanded smooth. For larger gaps, recut the piece or use corner blocks to cover the joint. Practice makes tighter cuts.