DIY Plywood Bookshelf: Easy Steps to Build Your Own
A DIY plywood bookshelf can be a great addition to your home. It offers a practical and stylish way to organize books and decor.
Building your own bookshelf may seem daunting. But with the right guidance, it can be simple and fun. Plywood is an affordable and versatile material, perfect for DIY projects. Whether you’re a seasoned carpenter or a novice, creating a bookshelf from plywood is a rewarding task.
This guide will walk you through the steps. You’ll learn how to choose the right plywood, measure and cut it accurately, and assemble your bookshelf with ease. Get ready to transform your space with a custom-made bookshelf that reflects your style and meets your storage needs. Let’s dive into the process and make your DIY plywood bookshelf a reality!
Introduction To Diy Plywood Bookshelf
Building your own bookshelf can be a fun project. You get to choose the design and size that fits your space. It can also save you money. Plus, you get the satisfaction of creating something with your hands. A DIY bookshelf is unique and personal. It can become a special part of your home.
Making your own bookshelf has many advantages. You can customize it to fit your needs. It can be any size or color you like. You can add features like extra shelves or drawers. A DIY bookshelf is also cost-effective. You can save money compared to buying one from a store. Lastly, it gives you a sense of accomplishment. You made it yourself!
For this project, you will need some basic materials and tools. Here’s a list:
- Plywood sheets
- Screws
- Wood glue
- Sandpaper
- Paint or stain
And here are the tools:
- Measuring tape
- Saw
- Drill
- Paintbrush
- Clamps
With these materials and tools, you can start building your bookshelf. Good luck and have fun!
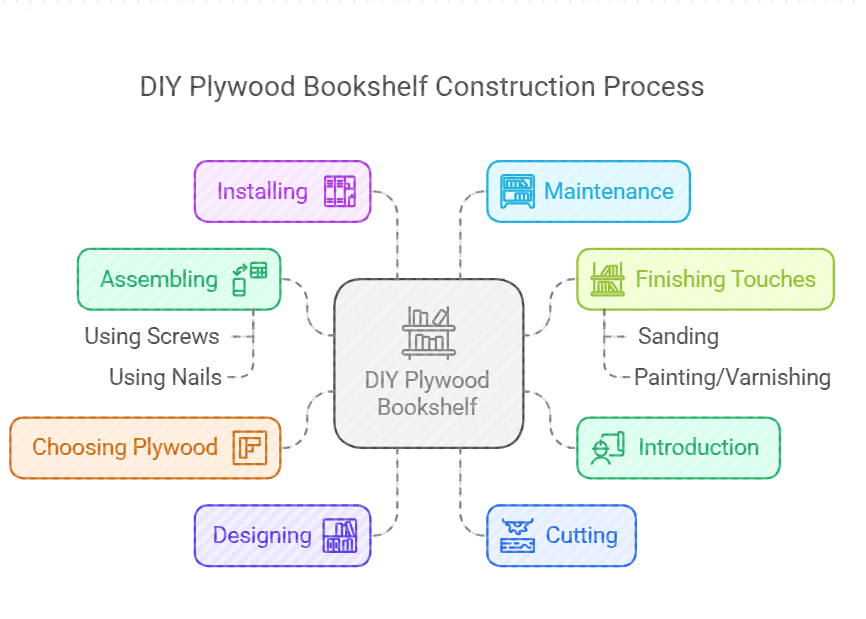
Choosing The Right Plywood
Plywood comes in many types. Some popular ones are softwood, hardwood, and marine plywood. Softwood plywood is made from pine or fir. It is less expensive. Hardwood plywood is made from oak or birch. It is strong and durable. Marine plywood is water-resistant. It is good for outdoor projects.
Always check the grade of plywood. Grades range from A to D. A-grade plywood is the best. It has a smooth surface. D-grade plywood is the cheapest. It has knots and rough patches. Look at the thickness too. Thicker plywood is sturdier. It will last longer. Inspect for voids and defects. Good plywood has fewer voids. It is more reliable.
Designing Your Bookshelf
First, measure the width and height of the area. Write down these numbers. Make sure to check the depth too. You need to know how deep the shelf can be. These measurements are crucial. They help you plan the size of your bookshelf.
Draw a simple sketch of your bookshelf. Include the measurements you took. Think about the number of shelves you want. Each shelf should be spaced evenly. This helps in keeping the design balanced. Use a ruler to make straight lines. A clear blueprint makes building easier.

Credit: learn.kregtool.com
Cutting The Plywood
Wear safety goggles to protect your eyes. Use ear protection to reduce noise. Always wear a dust mask to avoid breathing in wood particles. Ensure the work area is well-lit. Keep your workspace clean to avoid accidents. Make sure tools are in good working condition. Secure the plywood to prevent movement during cutting. Follow the tool’s manual for specific safety tips.
You need a circular saw for straight cuts. Use a jigsaw for curved cuts. A measuring tape will help with precise measurements. Clamps will keep the plywood steady. A pencil is useful for marking cut lines. Sandpaper will smooth the edges after cutting. A workbench provides a stable surface. A saw guide ensures accurate cuts.
Assembling The Bookshelf
Building a DIY plywood bookshelf is a simple and rewarding project. Measure, cut, and assemble the plywood pieces for a sturdy and stylish storage solution. Enjoy the satisfaction of your handmade creation.
Using Screws And Nails
Screws are strong and hold pieces together tightly. They are easy to use. Nails are good for quick joins. They work well in soft wood. Screws should be placed carefully. Nails can be hammered in quickly. Always use the right size.
Both screws and nails need pre-drilling. This helps to avoid splitting the wood. Countersink screws to keep the surface smooth. Use wood glue for extra strength. Let the glue dry fully before use.
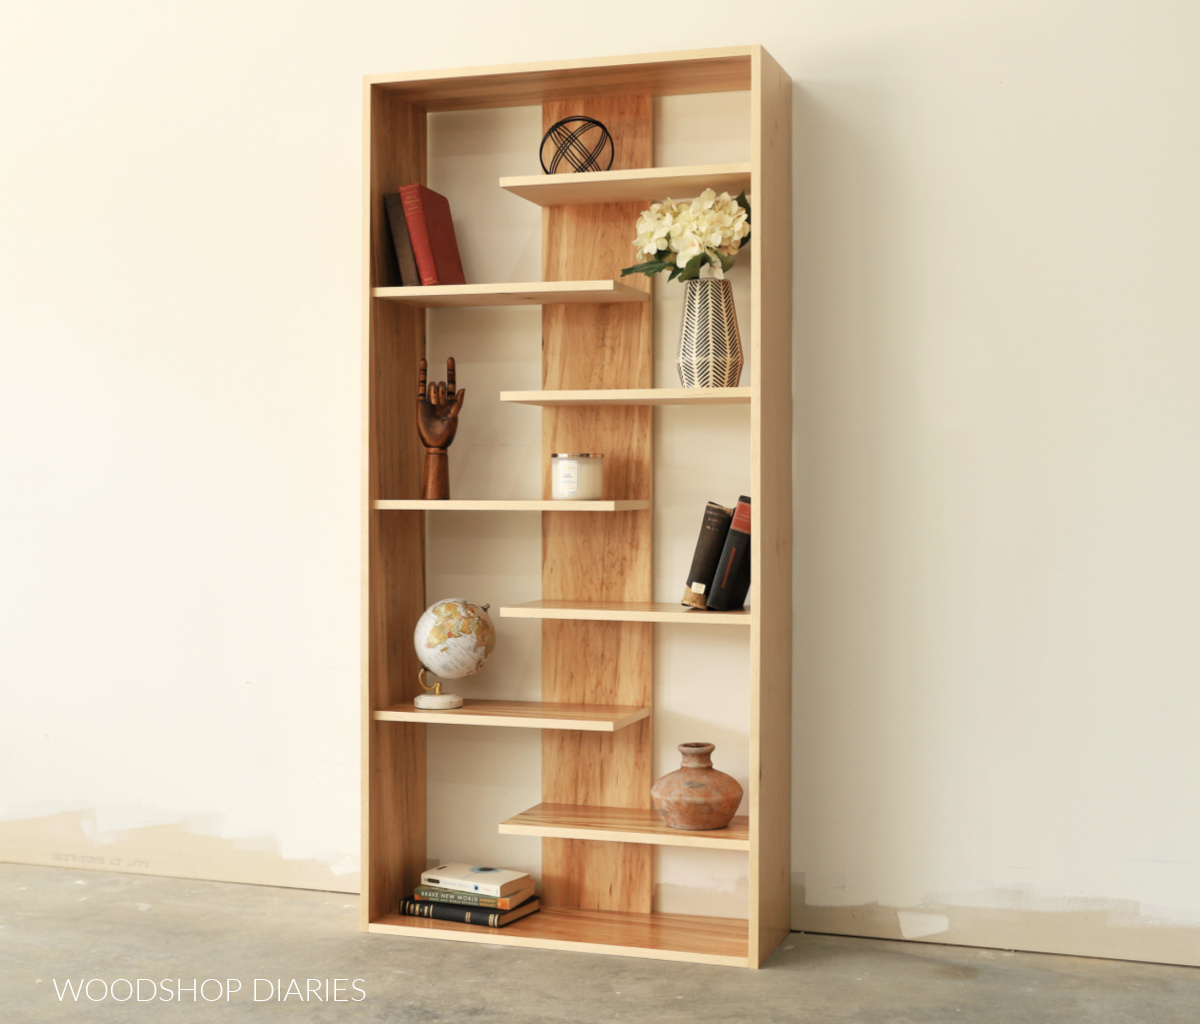
Credit: www.woodshopdiaries.com
Finishing Touches
Adding finishing touches to your DIY plywood bookshelf enhances its appearance and durability. Sand the edges smoothly. Apply a coat of wood stain or paint for a polished look.
Sanding The Surface
Start by sanding the surface of the plywood. Use a fine-grit sandpaper for a smooth finish. Sand in the direction of the wood grain. This helps to prevent scratches. Ensure all edges are smooth. Sanding removes rough spots and splinters. It makes the surface ready for paint or varnish. Wear a mask to avoid inhaling dust.
Applying Paint Or Varnish
Choose between paint and varnish. Paint gives a solid color. Varnish shows the natural wood grain. Apply a thin coat evenly. Use a brush or roller. Let it dry completely. Apply a second coat for a better finish. Ensure good ventilation while working. This helps the paint or varnish to dry quickly. Clean brushes immediately after use.
Installing The Bookshelf
First, find the studs in the wall. Use a stud finder for this. Mark the spots with a pencil. Attach the brackets to the bookshelf. Line them up with the wall studs. Drill pilot holes into the studs. Secure the brackets with screws. Make sure they are tight.
Check the bookshelf for wobbling. Adjust the brackets if needed. Use a level to make sure the shelf is straight. Add more brackets if the shelf is large. Always use strong screws. Test the shelf with books. Make sure it can hold the weight. Keep heavy items on the bottom shelf. This helps to keep it stable.
Maintenance Tips
Use a soft, dry cloth to wipe dust. Clean shelves regularly. Avoid water as it can damage plywood. If needed, use a slightly damp cloth. Dry with another soft cloth quickly. This helps keep your bookshelf looking new. Avoid harsh chemicals. They can harm the finish. Mild soap with water is safer. Always dry immediately after cleaning. This prevents any damage.
Small scratches can be fixed with wood filler. Choose a color that matches. Apply the filler with a putty knife. Let it dry completely. Sand the area smooth. Wipe away dust after sanding. For deeper scratches, use wood putty. Apply and let it dry. Sand and clean once dry. This keeps your bookshelf neat. For loose screws, tighten them with a screwdriver. Check all joints regularly. Tighten any that feel loose.

Credit: www.remodelista.com
Frequently Asked Questions
Can You Make A Bookshelf Out Of Plywood?
Yes, you can make a bookshelf out of plywood. Plywood is durable, affordable, and easy to work with.
Is Plywood Good For A Bookshelf?
Yes, plywood is good for a bookshelf. It is strong, durable, and cost-effective. Plywood resists warping and provides excellent support for books.
Is It Cheaper To Build Your Own Bookshelf?
Building your own bookshelf can be cheaper. Costs depend on materials and tools you already have.
How Thick Does Plywood Need To Be For A Shelf?
Plywood for a shelf should be at least 3/4 inch thick. This ensures adequate strength and durability.
Conclusion
Building your own plywood bookshelf is both rewarding and practical. You save money and gain a custom piece. The process is simple with the right tools and clear steps. Anyone can create a sturdy bookshelf with patience. Enjoy crafting and the personal touch it brings to your home.
Happy building!