How to Make a Table From Scratch: Cut List (60x36x30 in)
To make a table from scratch, build a 60 x 36 x 30 inch top-and-apron table from seven 2x6s, four 4×4 legs and four 2×4 aprons. Real lumber is smaller than its name, so every cut below uses actual sizes and adds up to a 30 inch surface. This guide gives the checked cut list, the height math, and how much a pine top shrinks across its width.
Lumber, Tools and Hardware for a 60 x 36 x 30 Inch Table
Best Pocket-Hole Jig Pick
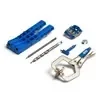 |
Kreg Pocket-Hole Jig 320 with Classic 2 Inch Face Clamp ($49.00) The cut list below joins sixteen apron ends to the legs with pocket screws, which is why the aprons are cut at 41 and 21 inches instead of longer lengths with tenons.
|
As an Amazon Associate we earn from qualifying purchases.
This plan uses construction lumber from any home center because it is cheap and easy to cut. Every dimension was added up from the actual board sizes, and none of it is a tested build, so check each number against your own boards before you cut. Buy:
- Top: seven 2×6 boards, 8 feet long (each gives one 60 inch piece)
- Legs: one 4×4, 10 feet long (four 28-1/2 inch legs use 114 inches, and the saw kerf still fits inside 120)
- Aprons: two 2×4 boards, 8 feet long (41 + 41 = 82 inches from one board, 21 + 21 = 42 inches from the other)
- Hardware: 16 pocket screws (2-1/2 inch, coarse thread for softwood), 8 figure-8 tabletop fasteners with short screws, yellow wood glue
- Finish: sandpaper in 80, 120 and 180 grit, plus a wipe-on or brush-on finish
For tools you need a circular saw or miter saw, a straightedge to guide the saw, a combination square, a tape measure, a drill, at least four bar or pipe clamps long enough to span the top, and a random orbital sander. Wear eye and hearing protection for every cut.
Nominal vs Actual Lumber: Cut From Real Sizes, Not the Label
A 2×4 is not 2 inches by 4 inches. Dried and surfaced softwood is sold under its old rough-sawn name, and the finished boards are smaller. The standard sizes that matter for this table are:
| Nominal size | Actual size (inches) | Used here for |
|---|---|---|
| 2×6 | 1-1/2 x 5-1/2 | Top boards |
| 2×4 | 1-1/2 x 3-1/2 | Aprons |
| 4×4 | 3-1/2 x 3-1/2 | Legs |
The error compounds. Treat the top as 2 inches thick, cut 28 inch legs, and the finished table is 29-1/2 inches tall because the real top is 1-1/2 inches. Count seven boards at 6 inches wide and you plan a 42 inch top that is really 38-1/2 inches before any jointing. Every number in the cut list below starts from the actual size column.
How Tall Should a Table Be? The 30 Inch Math
Standard dining tables are 28 to 30 inches high, with 30 inches the most common. The number that decides comfort is the gap between the chair seat and the tabletop: table height minus seat height should land between 10 and 12 inches. Dining chairs typically have seats 17 to 19 inches high.
| Measurement | Value | Where it comes from |
|---|---|---|
| Table surface height | 28 to 30 in (this plan: 30 in) | Common dining range |
| Chair seat height | 17 to 19 in (this plan: 18 in) | Common dining chair range |
| Surface minus seat | 10 to 12 in (this plan: 12 in) | Comfort rule above |
| Bottom of apron | 25 in above the floor | Our math: 30 minus 1-1/2 top minus 3-1/2 apron |
| Apron to seat | 7 in | Our math: 25 minus 18 |
The apron is the part people forget, because it lowers the usable knee space below the surface. Measure from your own chair seat to the lowest point under the table, not to the top. An 18 inch seat is also the height of the table stool in our DIY wooden stool plan. This is a seated-table height; a standing work surface follows different rules, covered in ideal workbench height by your height and task.
Cut List With the Arithmetic Checked
| Part | Qty | Stock | Cut size (thickness x width x length) |
|---|---|---|---|
| Top boards | 7 | 2×6 | 1-1/2 x 5-1/2 x 60 in |
| Legs | 4 | 4×4 | 3-1/2 x 3-1/2 x 28-1/2 in |
| Long aprons | 2 | 2×4 | 1-1/2 x 3-1/2 x 41 in |
| Short aprons | 2 | 2×4 | 1-1/2 x 3-1/2 x 21 in |
Check every dimension before cutting:
- Height: 28-1/2 inch leg + 1-1/2 inch top = 30 inches
- Base length: 41 inch apron + two 3-1/2 inch legs = 48 inches, leaving a 6 inch overhang at each end of the 60 inch top
- Base width: 21 inch apron + two 3-1/2 inch legs = 28 inches, leaving a 4 inch overhang on each long side of the 36 inch top
- Top width: seven boards at 5-1/2 inches = 38-1/2 inches; jointing the six seams can take up to about 3/4 inch, so trim the glued panel to 36 inches
- Square check: the 48 x 28 inch base has diagonals of about 55-9/16 inches (the square root of 48 squared plus 28 squared is 55.57)
If you prefer mortise and tenon joints, add the tenon length to each apron end. With 1-1/2 inch tenons the long aprons become 44 inches and the short aprons 24 inches. For an apron-free design, see how to attach legs to a table without an apron.
How to Build the Table, Step by Step
- Acclimate the lumber: store the boards flat in the room where the table will live until they stop losing moisture (see the wood movement section).
- Cut the parts: cut legs, aprons and top boards to the cut list with square ends, labeling each piece.
- Glue up the top: straighten the mating edges, dry-fit all seven boards, then spread glue, clamp across the width and keep the faces flush.
- Trim and flatten: after the glue cures, trim the panel to 36 inches wide and 60 inches long and sand it flat, starting at 80 grit only if boards are uneven.
- Drill the pocket holes: two per apron end on the inside face, staggered between adjacent aprons so screws from two sides do not meet inside the leg.
- Assemble the base: join each short apron to two legs to make two end frames, then connect them with the long aprons and confirm both diagonals match at about 55-9/16 inches. Square 4×4 legs can look heavy, and tapering the table legs lightens them.
- Attach the top: flip the base onto the upside-down top, center it and fasten with figure-8 fasteners as described below.
- Sand and finish: sand to 120 then 180 grit, wipe off the dust and apply the finish in thin coats.
Wood Movement: Why Tabletops Crack and How to Fasten the Top
Wood shrinks and swells most along the growth rings, about half as much across them, and only slightly along the grain. The USDA Forest Products Laboratory Wood Handbook puts lengthwise change at only 0.1 to 0.2 percent from green to ovendry. Your 60 inch top barely changes in length, but its 36 inch width moves a lot.
The Handbook gives a simple estimate for plainsawn boards: movement equals the width, times the tangential shrinkage percentage divided by 100, times the moisture change in points divided by 30, since shrinkage is assumed to start near 30 percent moisture content. Applied to a 36 inch wide top, it gives:
| Species | Tangential shrinkage, green to ovendry | 36 in top, 4-point seasonal swing | 36 in top, 19% down to 8% |
|---|---|---|---|
| Eastern white pine | 6.1% | 0.29 in (about 9/32 in) | 0.81 in (about 13/16 in) |
| Douglas-fir (coast) | 7.6% | 0.36 in (about 3/8 in) | 1.00 in (about 1 in) |
| Black walnut | 7.8% | 0.37 in (about 3/8 in) | Not applicable |
| Northern red oak | 8.6% | 0.41 in (about 13/32 in) | Not applicable |
| Sugar (hard) maple | 9.9% | 0.48 in (about 15/32 in) | Not applicable |
The 4-point swing is our own illustrative assumption for a heated home. The last column applies only to construction softwood: lumber labeled dry can still be as wet as 19 percent under the American Softwood Lumber Standard, and the Handbook gives about 8 percent as the average interior moisture content for most of the United States, 6 percent in the arid southwest and 11 percent along the coasts. Hardwood is normally bought drier than 19 percent, so that column is not shown for it.
Data point: a pine top glued straight from 19 percent lumber and then dried to 8 percent can narrow by about 13/16 inch across 36 inches. Real boards vary: the Handbook puts shrinkage variability near 15 percent, and commercial lumber is rarely perfectly plainsawn.
That movement is why a top screwed or glued rigidly to the aprons splits. The Forest Products Laboratory specifically warns that furniture made at 11 percent moisture and moved to a region at 4 percent can split or open its joints. Three habits prevent it:
- Never glue the top to the base. Fasten it with hardware that slides or pivots.
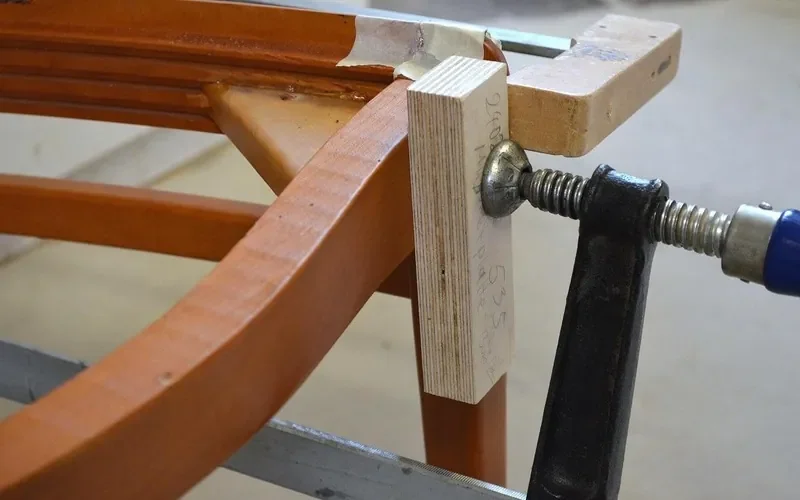
- Use 8 figure-8 fasteners: three on each long apron and one centered on each short apron, set in shallow recesses in the apron edges, with short screws that stop well short of the top surface.
- Plan the travel: the long aprons sit 14 inches from the top centerline, so over a 4-point seasonal swing the top slides about 0.11 inch (pine) to 0.14 inch (Douglas-fir) past each fastener, and about 0.31 inch (pine) to 0.39 inch (Douglas-fir) if the lumber dries 11 points. Calculated: 14 in x shrinkage x 11/30.
Sanding and Finishing a Tabletop
Sand with the grain, finish at 180 grit and vacuum the dust before the first coat. A film finish such as polyurethane or varnish resists spills better on a dining table, while an oil finish is easier to touch up but protects less. Apply thin coats, follow the recoat time on the can and sand lightly between coats. Softwoods like pine can stain unevenly, so test the stain on an offcut first.
Frequently Asked Questions
How tall should a homemade dining table be?
Between 28 and 30 inches, with 30 inches the most common. Subtract your chair seat height (17 to 19 inches is typical) from the table height and aim for a 10 to 12 inch gap. Remember the apron lowers the usable space, so measure to its bottom edge.
Can you use 2×6 construction lumber for a tabletop?
Yes, if you let it dry to your room first. Lumber sold as dry can be up to 19 percent moisture, and a pine top that dries from 19 to 8 percent can shrink about 13/16 inch across 36 inches. Edge-glue straightened boards, fasten the top so it can move, and expect a softer surface than hardwood.
How do you attach a tabletop so it does not crack?
Use figure-8 fasteners, wooden buttons or slotted screw holes so the top can slide as it changes width. Never glue the top to the aprons, and keep screws short enough to stay inside the top. On this plan, use three fasteners on each long apron and one centered on each short apron.
How much lumber do I need for a 60 x 36 inch table?
Seven 2×6 boards 8 feet long for the top, one 4×4 10 feet long for the legs and two 2×4 boards 8 feet long for the aprons. The top boards have 36 inches of offcut each, so the lengths are not tight.
Sponsored / affiliate links. As an Amazon Associate I earn from qualifying purchases. I may earn additional commission from eligible campaigns.