DIY Wooden Ornaments: Craft Your Own Festive Treasures
Creating your own wooden ornaments is a fun and rewarding project. These ornaments add a personal touch to your home decor.
Diving into DIY wooden ornaments offers a blend of creativity and craftsmanship. Whether for the holiday season or year-round decor, these handmade pieces can brighten any space. Plus, making wooden ornaments allows you to express your unique style. From simple shapes to intricate designs, the options are endless.
This activity is not only enjoyable but also a great way to spend quality time with family. Imagine the satisfaction of seeing your creations hanging proudly. In this blog, we’ll explore various ideas and tips to help you craft beautiful wooden ornaments. Let’s get started and bring your artistic vision to life.
Credit: www.houseonlongwoodlane.com
Introduction To Diy Wooden Ornaments
The charm of wooden ornaments is timeless. They add a rustic and natural feel to any space. Wooden ornaments can be simple or intricate. They often tell a story. Each piece is unique. Crafting your own wooden ornaments is fun and rewarding. It allows you to express your creativity. You can make them for your home or as gifts. Friends and family will appreciate the personal touch.
The benefits of crafting your own wooden ornaments are many. Firstly, you can save money. Store-bought ornaments can be expensive. Secondly, it is a relaxing activity. Working with wood can be soothing. Thirdly, you can customize your designs. Choose your own shapes, colors, and finishes. Lastly, it is a sustainable choice. Using reclaimed wood helps the environment. Making your own ornaments is a rewarding experience.
Materials And Tools Needed
Pine is a great choice. It is easy to work with. Birch is also good. It has a nice, smooth surface. Balsa wood is very light. It is perfect for beginners. Each of these woods is affordable. They can be found at most craft stores.
A good saw is essential. A coping saw works well. Sandpaper is needed too. It makes wood smooth. Wood glue is important. It holds pieces together. Paintbrushes are necessary. They help add color. Small clamps are useful. They keep pieces steady. Rulers and pencils are needed. They help with measurements.
Design Inspiration
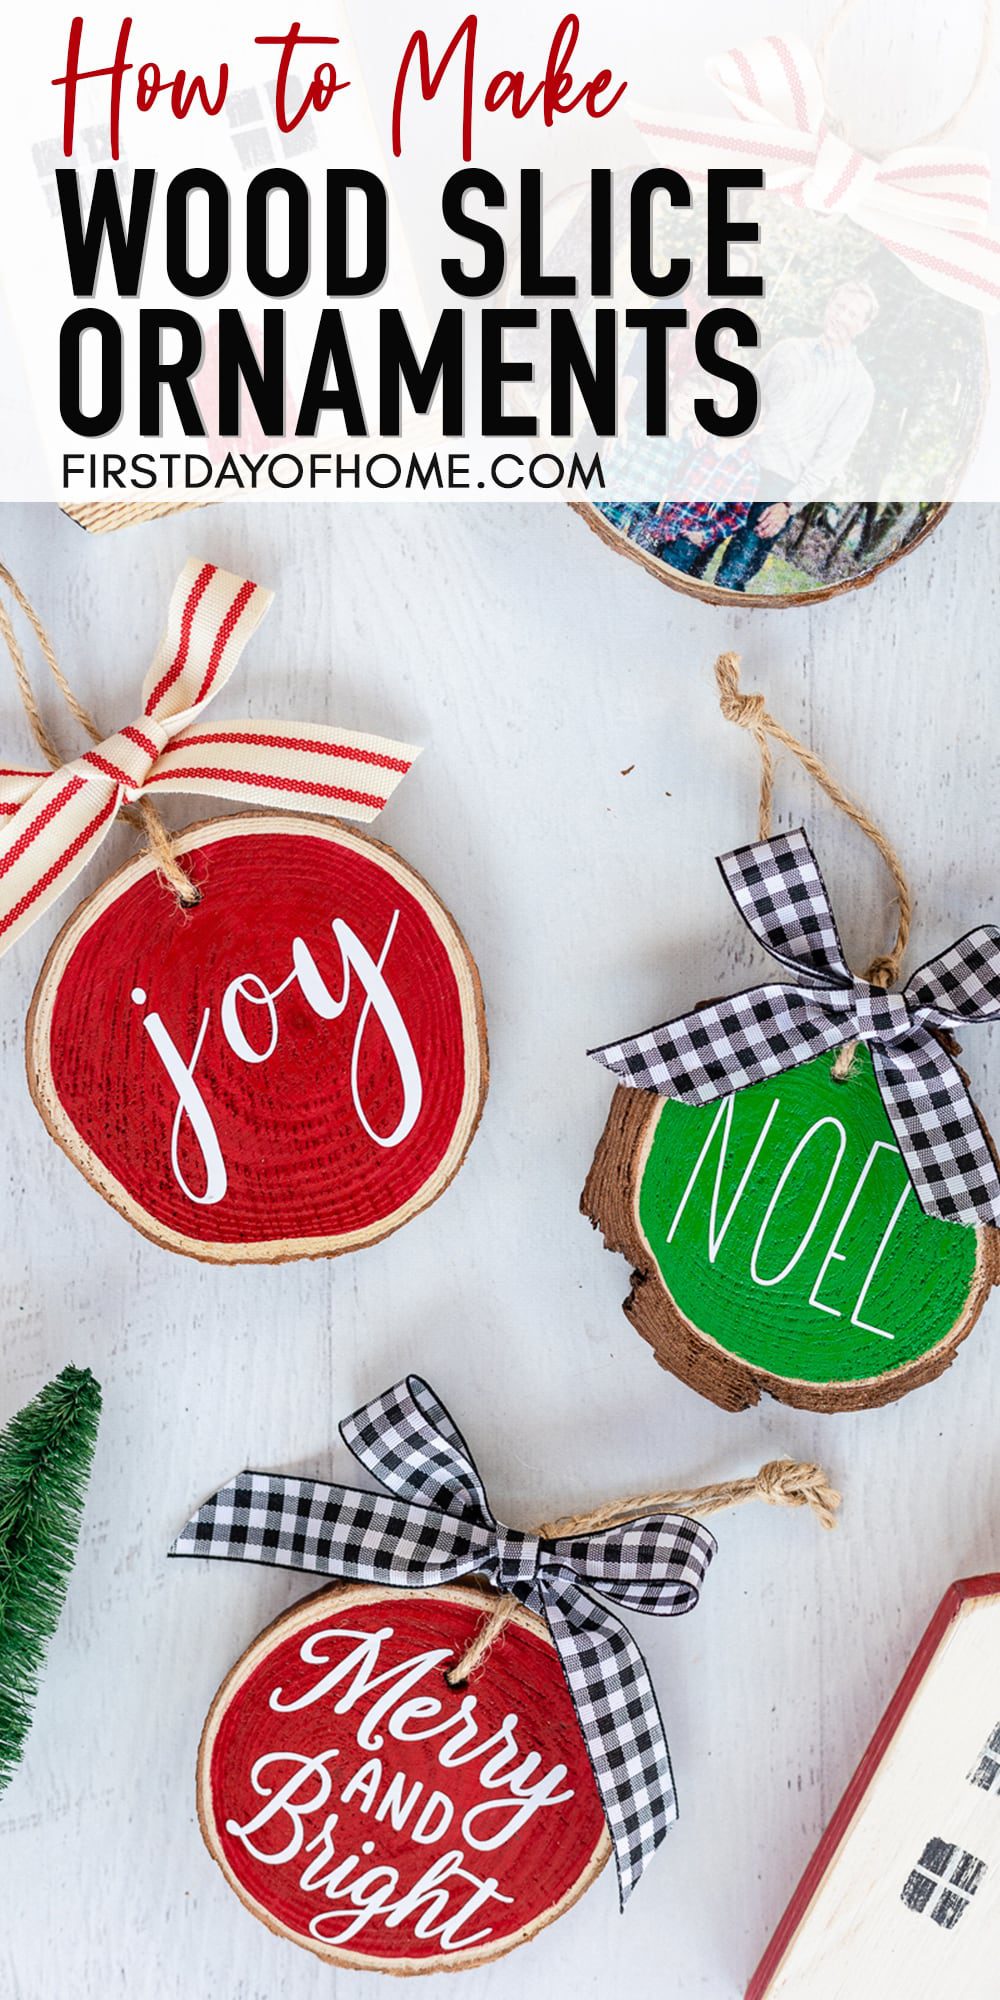
Wooden stars and hearts are timeless. They bring warmth to any setting. Paint them in red or gold for a festive touch. Add glitter for extra sparkle. Snowflakes are another classic choice. They look beautiful on any tree.
Geometric shapes are in style. Think triangles, circles, and hexagons. Keep them simple or paint them bold colors. Personalized ornaments are also popular. Write names or dates on them. This makes them special and unique.
Credit: craftwarehouse.com
Step-by-step Crafting Guide
Choose good quality wood. Pine or cedar work well. Clean the wood. Remove any dirt or rough spots. Sand it for a smooth finish. Use fine-grit sandpaper. Make sure the wood is dry. Wet wood can warp. Measure your pieces carefully. Use a pencil and ruler. Mark your cuts clearly.
Use a sharp saw for clean cuts. A small handsaw is perfect. Hold the wood steady. Avoid wobbly cuts. For curves, use a jigsaw. Move slowly for smooth edges. Sand the edges after cutting. Use medium-grit sandpaper first. Finish with fine-grit for smoothness. Safety first. Wear gloves and goggles. Protect your eyes and hands.
Painting And Decorating Tips
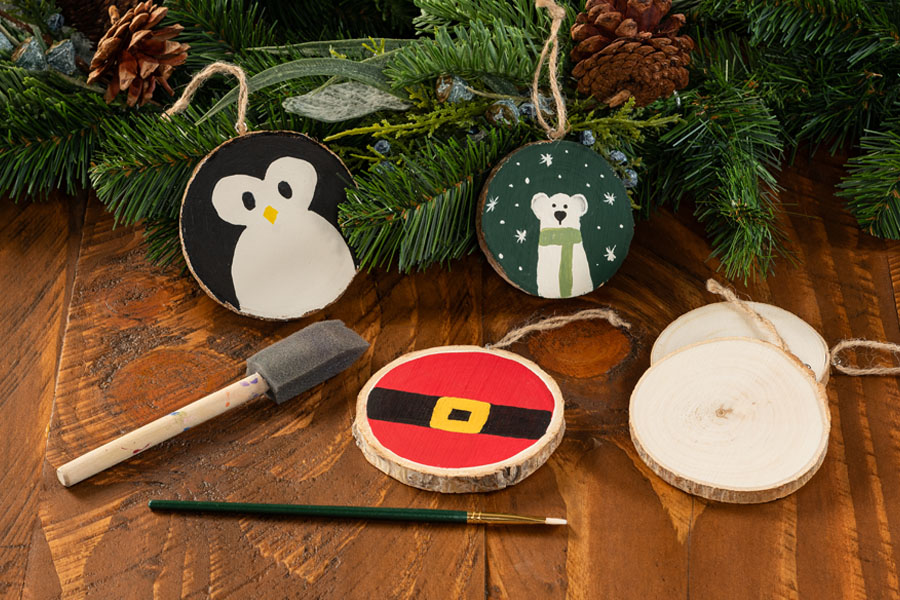
Pick water-based paints for easy clean-up. These paints dry quickly. Acrylic paints are also a good choice. They offer vibrant colors. Always use non-toxic paints. Safety is important. Test paints on small wood pieces first. This helps you see the real color. Don’t forget to shake paint cans well.
Use stencils for neat designs. They make your work look professional. Glitter glue adds sparkle. Kids love it. Paint small dots with the end of a brush. Simple but pretty. Try adding tiny beads. They stick well with craft glue. Ribbons can add a special touch. Wrap them around the ornament. Stickers are easy to use. They come in many designs. Mix and match for fun effects.

Credit: www.amazon.com
Finishing Touches
Apply a clear sealant to your wooden ornaments. This will protect them from moisture and dirt. Choose a non-toxic sealant for safety. Spray or paint the sealant evenly. Let it dry completely. This step makes the ornaments last longer. It also keeps the colors bright.
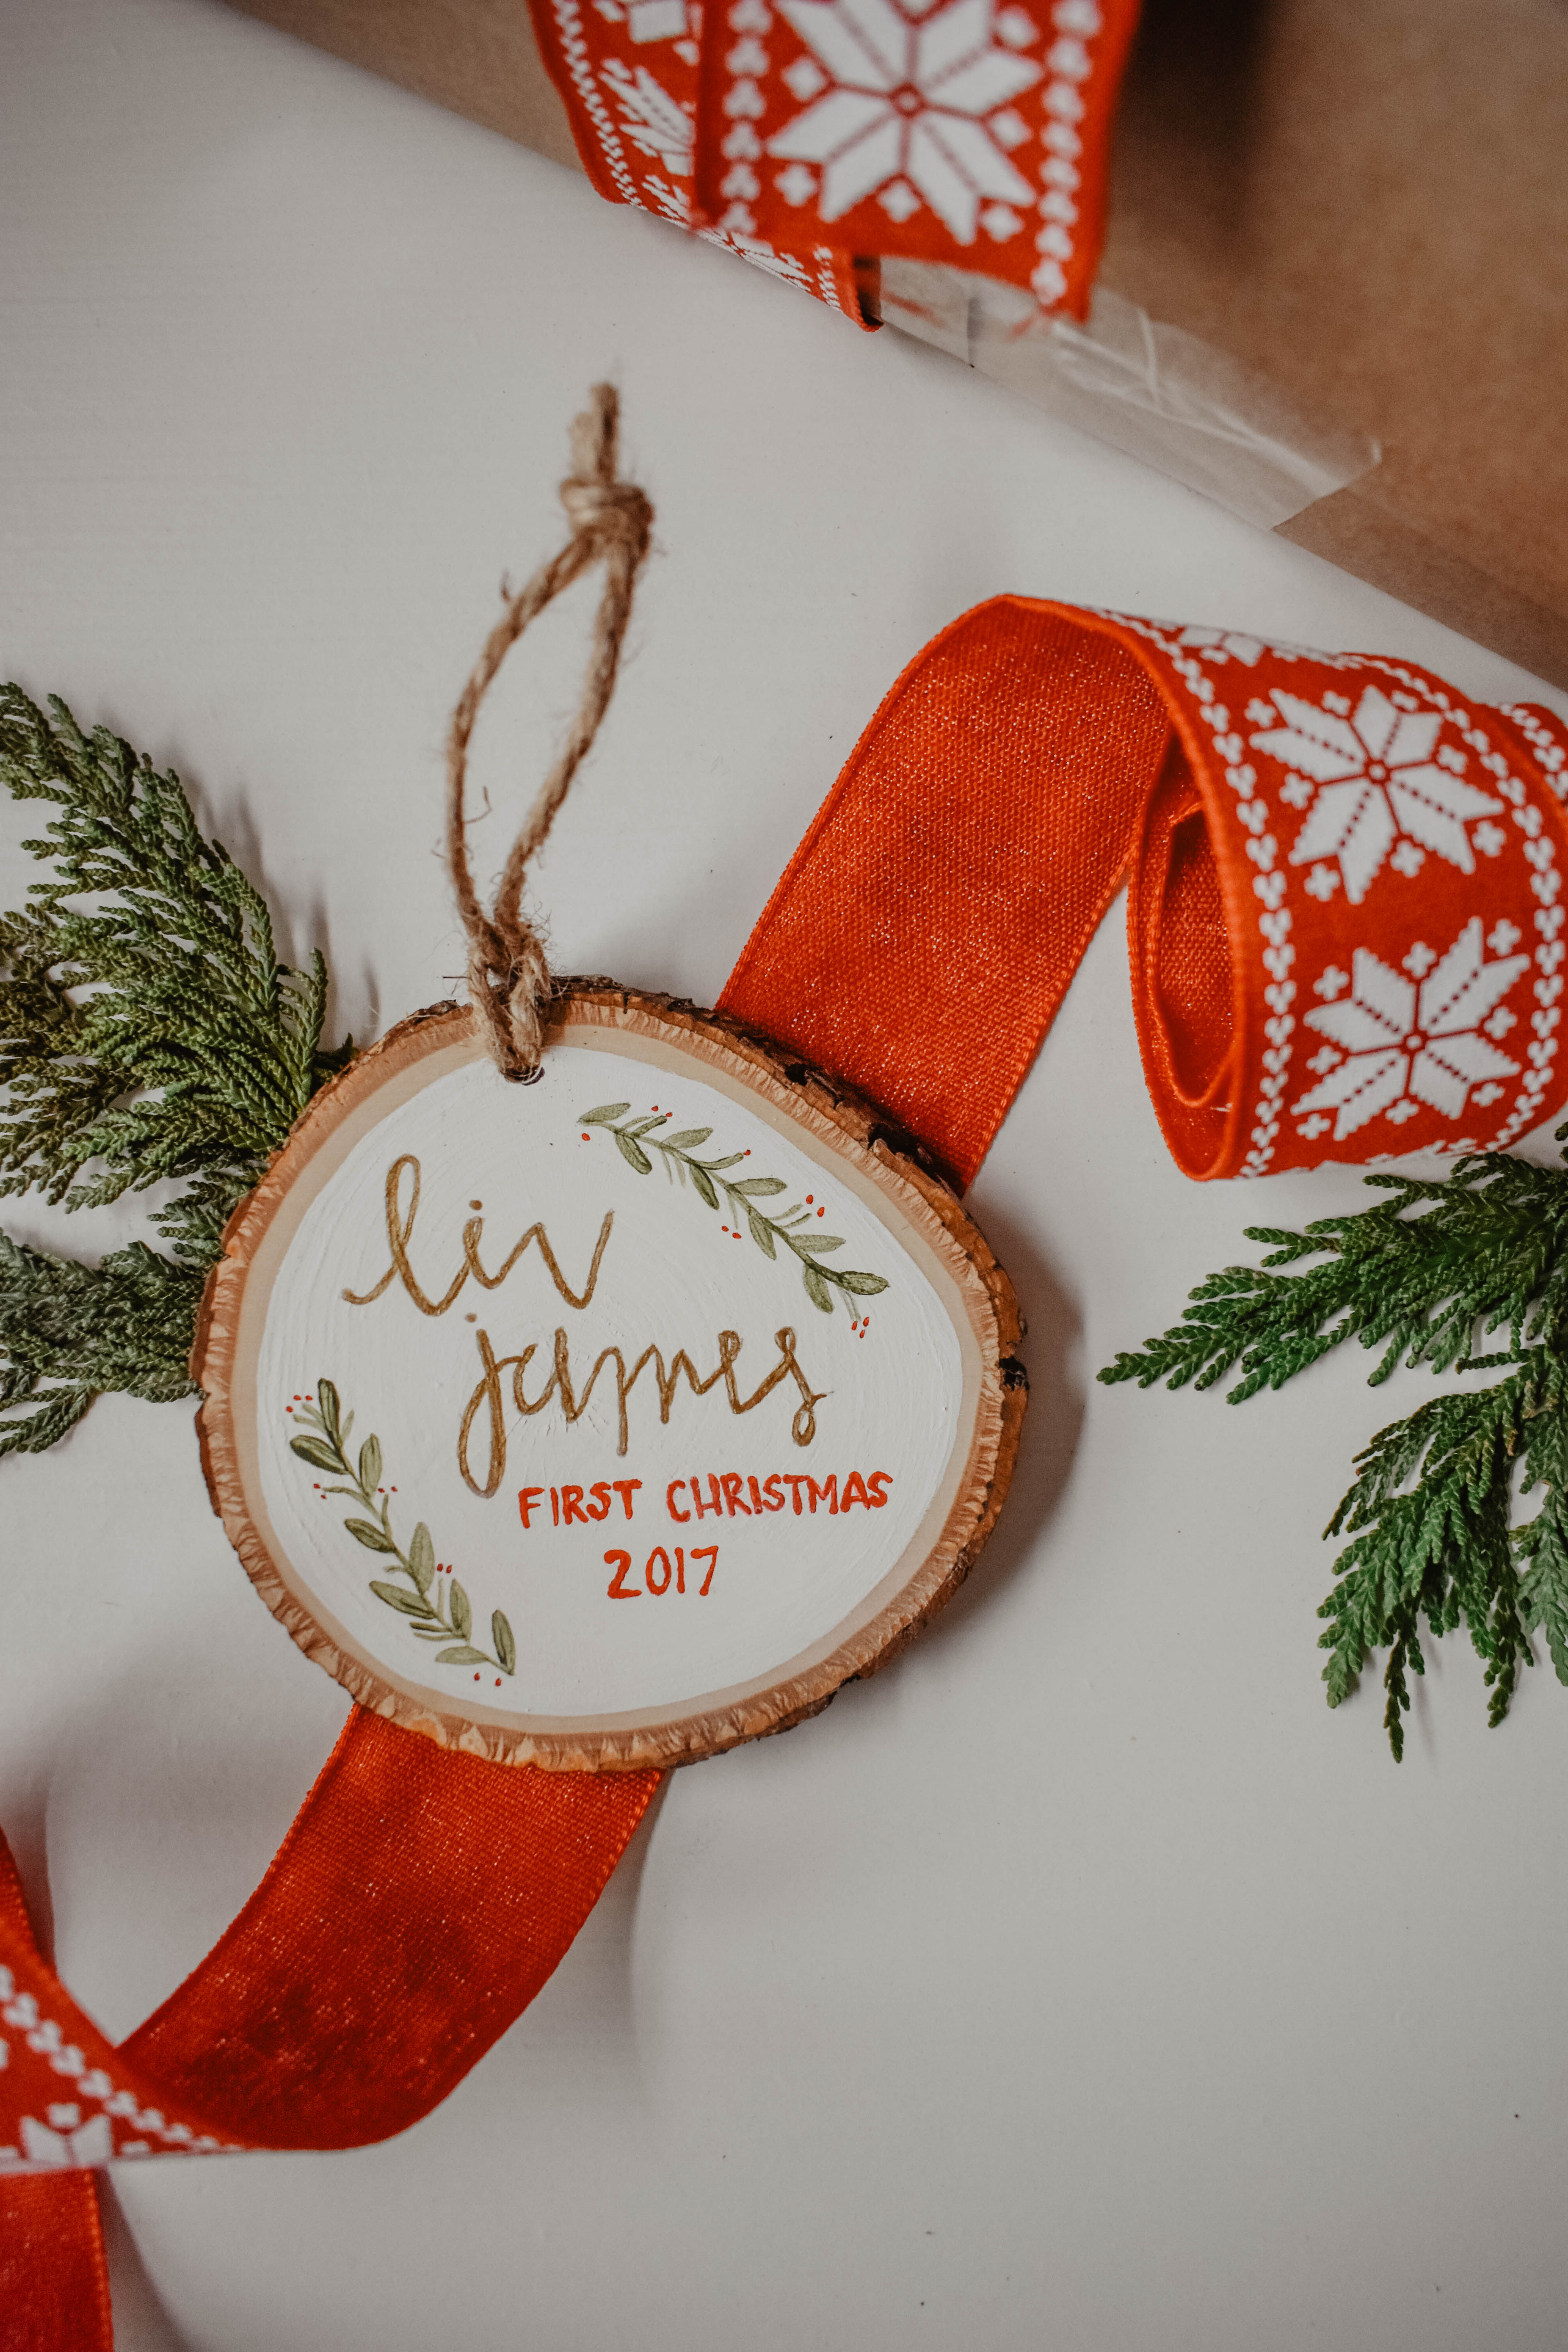
Add names or dates to your ornaments. Use a fine-tipped marker for precision. You can also glue small decorations on them. Glitter, beads, or tiny buttons work well. Personal touches make each ornament unique. They become special keepsakes for loved ones.
Displaying Your Creations
Find unique ways to hang your wooden ornaments. Use colorful ribbons for a festive touch. Attach a small hook or loop to the top of each ornament. This makes it easy to hang them on the tree.
Place your ornaments on different branches for a balanced look. Mix them with other decorations to create a beautiful display. Make sure each ornament is secure. This prevents them from falling.
Add lights around your ornaments to make them shine. Your tree will look magical with your handmade decorations.
Gift Ideas With Wooden Ornaments
Create a custom wooden ornament with a loved one’s name. A simple design can add a special touch. Paint or engrave a meaningful date on it.
Choose shapes that reflect the receiver’s interests. Animals, stars, or even initials. This makes the gift unique.
Use a small box with soft padding. This keeps the ornament safe. Add a ribbon for a festive look.
Include a handwritten note inside the box. This adds a personal touch. Your words will make the gift even more special.
Frequently Asked Questions
What Do You Seal Wood Ornaments With?
Seal wood ornaments with clear varnish, polyurethane, or wood sealer. These protect against moisture and enhance durability.
How Do I Transfer A Picture To A Wooden Ornament?
Print your picture on regular paper. Apply Mod Podge to the wood. Press the image onto the wood, face down. Let it dry overnight. Dampen the paper with a sponge and gently rub off the paper. Your picture will transfer to the wooden ornament.
What Kind Of Paint Do You Use For Wooden Ornaments?
Use acrylic paint for wooden ornaments. It dries quickly, offers vibrant colors, and is easy to clean up.
How Many Ornaments Do I Need For A 3 Foot Tree?
You need about 20-30 ornaments for a 3-foot tree. This ensures a balanced and festive look.
Conclusion
Creating your own wooden ornaments is both fun and rewarding. You get to personalize each piece, making them unique. These ornaments add a special touch to your home during the holidays. Plus, they can be great gifts for loved ones.
So, gather your materials and start crafting today. Enjoy the process and the beautiful results. Happy crafting!