Drill Bit vs Driver Bit: What’s the Real Difference?
Figuring out the difference between a Drill Bit vs Driver Bit: What’s the Difference? can be tricky when you’re starting with DIY projects. It’s super common to get confused! Don’t worry, everyone starts somewhere. This guide will help you sort it out step by step. We’ll explore the tools, how they work, and what they’re best for. You’ll soon know which one to pick for your next task. Let’s get started!
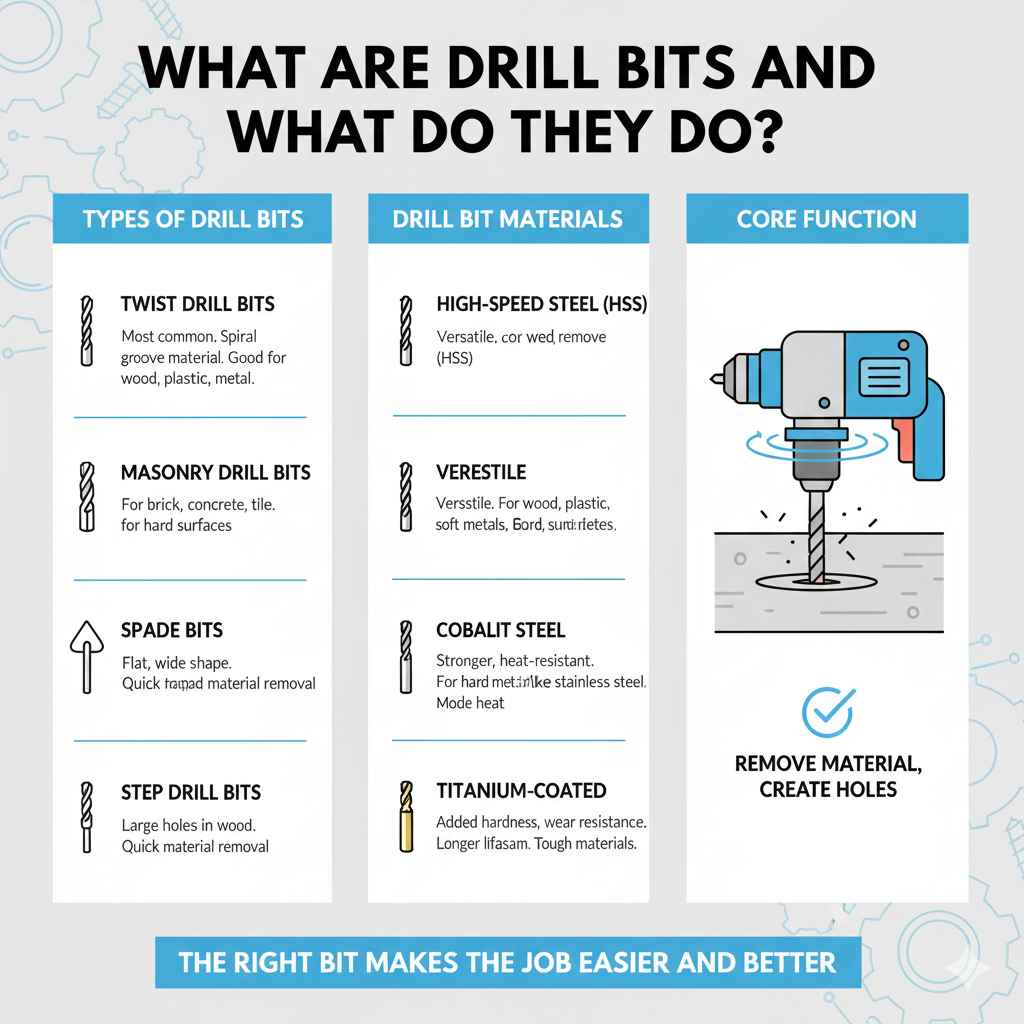
What are Drill Bits and What Do They Do?
Drill bits are designed for creating holes. They come in various shapes and sizes, each serving a specific purpose. Think of them as the primary tool when you need to bore through materials like wood, metal, or plastic. They’re essential for everything from hanging pictures to building furniture. Knowing the right type of drill bit for your material makes the job easier and prevents damage.
The core function of a drill bit is to remove material, creating a circular opening. They achieve this by rotating at high speeds, while the sharp cutting edges of the bit slice into the material. The design of the drill bit, including its angles and flutes, is engineered to efficiently remove the debris (the material shavings) as it cuts. This debris clears the hole and keeps the bit from getting clogged. The overall shape determines the type of hole it produces and the materials it’s suitable for. So, choosing the correct drill bit means getting the job done right and making your project a success. Let’s explore some types.
Types of Drill Bits
Different materials need different types of drill bits. Using the wrong bit can lead to a messy, inaccurate hole or even damage the bit or the material. Let’s examine a few common types.
- Twist Drill Bits: These are the most common type and are perfect for general use. They have a spiral-shaped groove (the flute) that helps remove material as the bit spins. They’re good for wood, plastic, and metal. The angles and design allow the bit to cut through materials with efficiency.
The versatility of twist drill bits is very useful for beginners.
- Masonry Drill Bits: If you are drilling into brick, concrete, or tile, a masonry drill bit is what you need. These bits have a wide, hardened tip.
Masonry bits are specifically made to withstand the impact and abrasion involved in drilling into harder surfaces.
- Spade Bits (Paddle Bits): These are flat and wide. They are excellent for drilling large holes in wood. They can quickly remove material.
Spade bits are ideal for projects that involve creating openings for wiring or pipes.
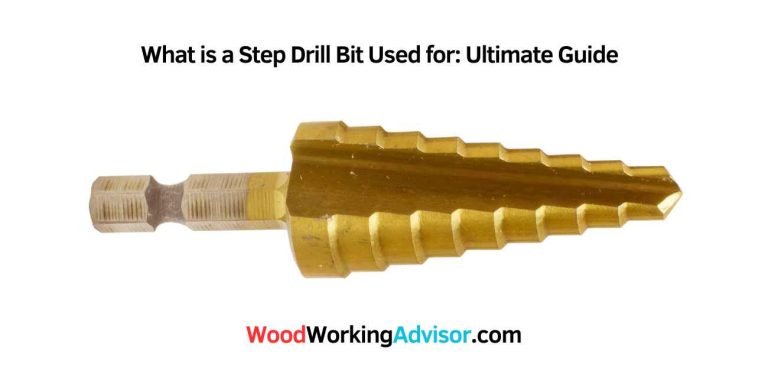
- Step Drill Bits: These bits have a conical shape with several steps, creating holes of different diameters with a single tool.
Step bits are great for drilling into thin metal sheets, such as those used in automotive work or sheet metal projects.
Drill Bit Materials
Drill bits are made from several materials. The material determines the bit’s durability, cutting ability, and how it handles heat and wear. Knowing these materials helps you pick the right tool for your project.
- High-Speed Steel (HSS): This is the most common material for drill bits. HSS is versatile and suitable for wood, plastic, and softer metals. It can handle moderate heat.
HSS bits are a good starting point for most DIY projects.
- Cobalt Steel: Cobalt drill bits are stronger and more heat-resistant than HSS. They are excellent for drilling into hard metals like stainless steel.
These bits are ideal for more demanding applications.
- Titanium-Coated: These bits have a coating that adds hardness and wear resistance. This increases the bit’s lifespan and cutting performance, especially when working with tough materials.
Titanium-coated bits are often used in commercial settings where tool longevity and efficient drilling are important.
Unpacking Driver Bits and Their Uses
Driver bits are designed to drive screws. Unlike drill bits, they don’t create holes, but are used to tighten or loosen screws. They come in different shapes to match the head of the screw. They work in a power drill or screwdriver.
The tip of a driver bit is shaped to engage with the screw head. When the power tool spins, the bit transfers the rotational force to the screw, pushing it into the material. The variety of bits ensures they fit different screw types, from simple flat-head screws to more complex designs like Phillips or Torx screws. Using the correct driver bit prevents stripping the screw head and makes the job much easier. The right bit ensures a secure and clean installation. Let’s explore the common types of driver bits.
Varieties of Driver Bits
Driver bits come in a wide range of shapes. It is essential to choose the correct driver bit that fits the screw head. This ensures efficient screw driving and prevents damage.
- Phillips Driver Bits: These bits have a cross-shaped tip and are used with Phillips head screws. They are very common and used in many applications.
They are designed to provide a secure grip, reducing the risk of the bit slipping during use.
- Flathead Driver Bits: These have a flat, single-slot tip, perfect for flathead screws. They are a classic choice for many DIY projects.
Flathead bits are versatile and useful when installing hardware.
- Square Driver Bits (Robertson): These bits feature a square tip. They provide a secure connection and are less likely to cam out (slip out) compared to Phillips.
Square drive systems are popular in woodworking and offer better torque transfer.
- Torx Driver Bits (Star): Torx bits have a star-shaped tip. They provide a very secure fit and are common in automotive and electronics.
The unique design of Torx bits allows for greater torque application with reduced chance of stripping the screw head.
Materials and Features of Driver Bits
Driver bits are made from various materials to improve their lifespan and performance. Choosing the right material for your driving job is key.
- Steel: Most driver bits are made from steel because it is strong. Steel provides the necessary durability to withstand high torque and repeated use.
Steel bits are a cost-effective option for general use.
- Titanium-Coated: Titanium-coated bits offer additional strength and wear resistance. They are helpful in applications where the bits experience high friction or require long life.
This coating increases the bit’s resistance to wear, making it a good choice for professional use.
- Magnetic Tips: Some driver bits have magnetic tips. This is especially helpful for holding screws. They keep the screw in place.
Magnetic bits are a convenient feature for users, preventing dropped screws and allowing one-handed operation.
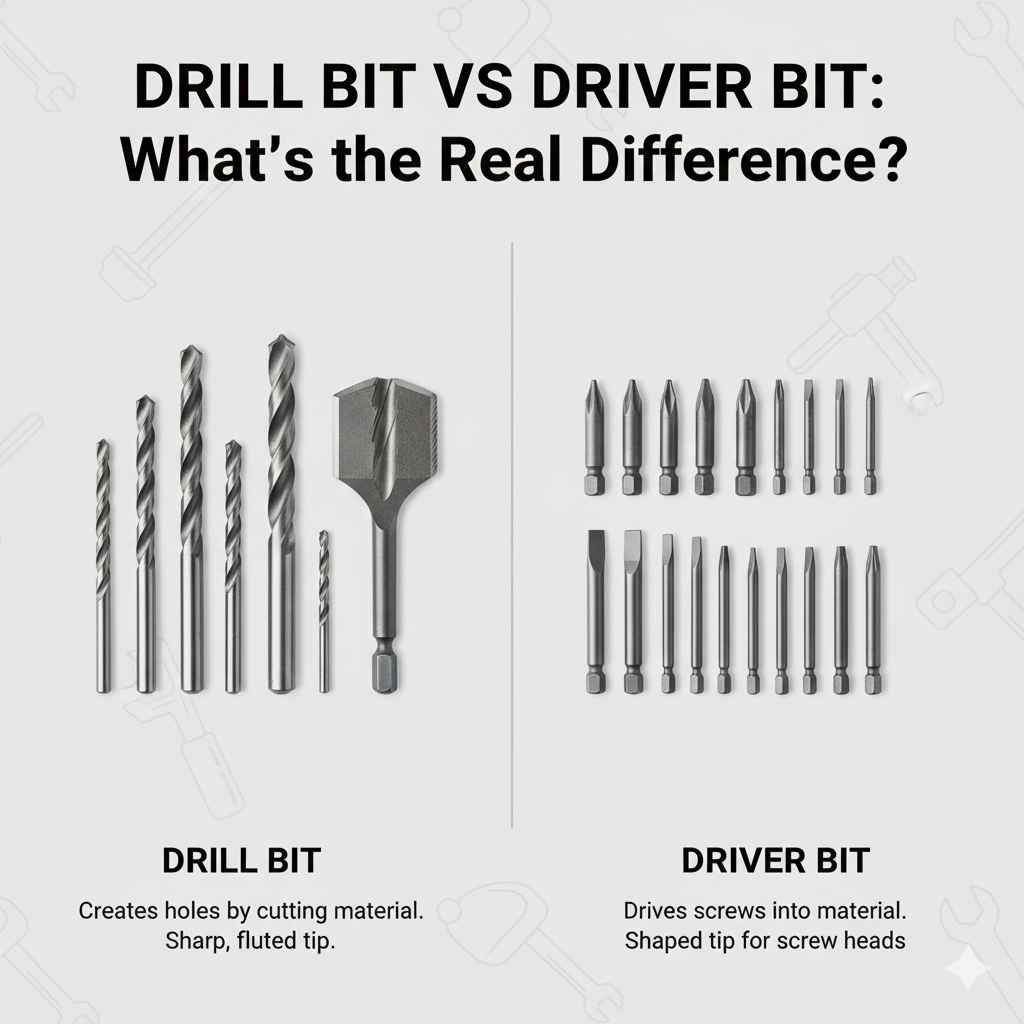
Comparing Drill Bits vs Driver Bits
The most important difference between drill bits and driver bits is their function: one makes holes, the other drives screws. However, the differences go beyond just their purpose. Understanding these differences can improve your results.
Drill bits have a pointed tip and are designed to cut through material. They are used to create the initial opening. Driver bits, on the other hand, have a specialized shape to engage with screw heads. They deliver the torque required to tighten or loosen screws. The construction materials also differ, depending on the job at hand. By knowing the differences, you can choose the correct tool for your project.
Key Differences Summarized
Let’s sum up the key differences between a drill bit and a driver bit.
| Feature | Drill Bit | Driver Bit |
|---|---|---|
| Function | Creates holes | Drives screws |
| Tip | Pointed/Cutting edges | Various shapes (Phillips, Flathead, Torx, Square) |
| Use | For drilling into materials | For tightening or loosening screws |
When to Use Each Type
Knowing when to use a drill bit versus a driver bit is very important for DIY projects.
- Use a Drill Bit: When you need to create a hole. For example, if you’re hanging a picture, you’ll need a drill bit to make a hole in the wall for the screw. Also, when you’re building furniture and need holes to join pieces together, you’ll use a drill bit.
- Use a Driver Bit: When you need to drive or remove a screw. When assembling flat-pack furniture, you’ll use a driver bit to screw the pieces together. Also, if you need to replace a door hinge or tighten a screw, you’ll use a driver bit.
Real-Life Examples and Scenarios
Let’s look at a few examples of how drill bits and driver bits are used in practice. These scenarios demonstrate the specific functions of each tool and what you can achieve with them.
- Scenario 1: Assembling a Bookshelf: You’re building a new bookshelf. First, you’ll use a drill bit to pre-drill holes. This is particularly helpful in wood to prevent splitting. Then, you’ll use a driver bit to screw the various components together, using a matching bit for the screws provided. The drill bit makes the holes and the driver bit does the fastening.
- Scenario 2: Hanging a To hang a picture, you must first mark where you want the hook. Then, use a drill bit to drill a small pilot hole. This hole makes it easier to drive in the screw. Then, you will use a driver bit to screw the hook into the wall.
Here’s a look at how using the right tool gives you the best results:
- Result: Pre-drilled holes make screwing easier. According to a study, pre-drilling holes before driving screws reduces the chance of wood splitting by up to 80%. This highlights the value of using a drill bit for this step.
- Result: The right driver bit saves time. Proper matching of a driver bit to the screw head prevents stripping and increases work speed. Studies show that using the right driver bit can reduce assembly time by as much as 15%. This shows how important it is to match your tools to your projects.
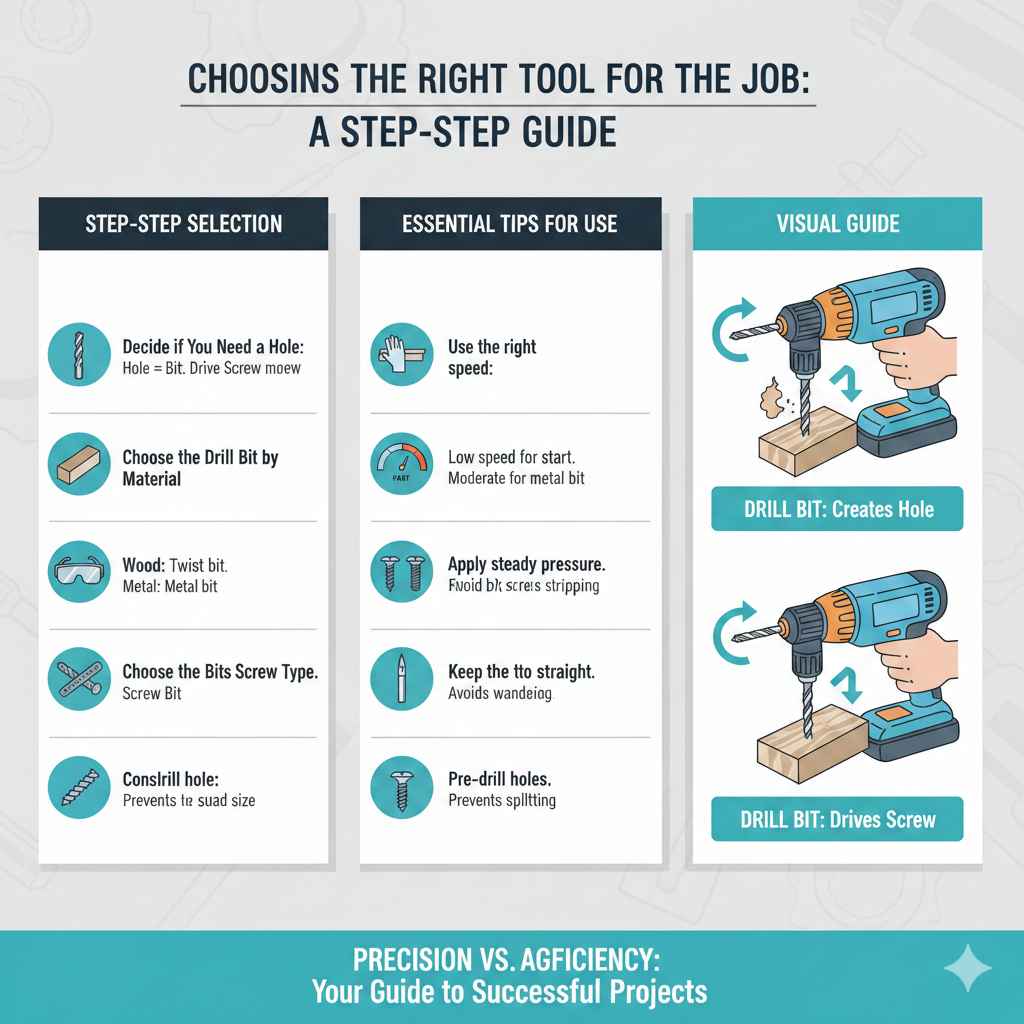
Choosing the Right Tool for the Job: A Step-by-Step Guide
Choosing the correct tool will make your work more efficient. Here’s a simple guide to choosing between a drill bit and a driver bit.
Step-by-Step Selection
- Decide if You Need a Hole: If you need to make a hole, you need a drill bit. If you need to drive a screw, you need a driver bit. This is your first step. It guides the remainder of the choices.
- Choose the Drill Bit by Material: If you’re drilling, pick the right drill bit for the material. For wood, use a twist drill bit. For metal, use a drill bit made for metal.
- Choose the Driver Bit by Screw Type: If you’re driving screws, choose the driver bit that matches the screw head. Phillips for Phillips screws, square for square-drive screws, and so on. Make sure the bit fits the screw exactly.
- Consider the Size: Always match the size of the bit to your needs. Drill bits must match the diameter of the hole you want. Driver bits must match the size of your screw head.
Essential Tips for Use
- Use the right speed: For drill bits, use a lower speed when starting. You can increase the speed once the bit has a good grip. For driver bits, a moderate speed is usually enough. This prevents stripping the screw head.
The correct speed minimizes damage to the material and increases accuracy.
- Apply steady pressure: When drilling, apply firm but consistent pressure. Too much pressure can break the bit. Too little pressure can make the bit wander.
Consistent pressure leads to clean holes and screw-driving.
- Keep the drill bit straight: Make sure the drill bit is perpendicular to the surface. This helps create straight, accurate holes.
Straightness affects the quality of your finished project.
- Pre-drill holes when necessary: In hardwood or when using large screws, always pre-drill. This prevents the wood from splitting.
Pre-drilling helps avoid damage.
Frequently Asked Questions
Question: Can I use a driver bit as a drill bit?
Answer: No, you should not use a driver bit as a drill bit. Driver bits are not designed to cut into materials. They are made to drive screws and don’t have the features needed to drill holes. Doing so could damage the driver bit and not create a hole.
Question: Can I use a drill bit as a driver bit?
Answer: No, you should not use a drill bit as a driver bit. Drill bits do not have the proper shape to fit into the screw heads. They are only designed for drilling. Trying to use it to drive a screw would be ineffective.
Question: Are there drill bits that also work as driver bits?
Answer: No, not really. Some bits combine drilling and driving functionality, such as a countersinking bit for screw heads. But for distinct tasks, you need dedicated bits.
Question: What do I do if my driver bit keeps stripping the screw head?
Answer: Ensure you’re using the right driver bit that matches the screw head. Make sure the bit is in good condition, and that you’re applying sufficient pressure. Slow down the drill’s speed to minimize stripping. Consider pre-drilling if the material is hard.
Question: How do I know what size drill bit to use?
Answer: The size of the drill bit depends on what you are doing. The diameter must match the size of the screw or the hole you need to make. Consult a screw size chart or the project’s instructions to pick the correct size.
Final Thoughts
Understanding the difference between a Drill Bit vs Driver Bit: What’s the Difference? is a key skill for any DIY enthusiast. You’ve now explored how each tool is built, the materials used, and the specific jobs they are designed for. You now understand the key distinctions. Knowing when to use each, from pre-drilling holes with a twist bit to tightening screws with a Torx bit, will help you do your projects more efficiently. You’re better equipped to select the right tool for each task. The knowledge gained here can help you tackle any project with confidence. Now go forth, get those tools ready, and make something amazing!