DIY Drill-Powered Wire Stripping Machine: How to Build One Safely
A drill-powered wire stripping machine turns any cordless or corded drill into the motor for a small stripping rig, so you can strip insulation off scrap wire in seconds instead of pulling it off by hand with a utility knife. It’s a genuinely popular scrap-metal side project, since bare stripped copper brings a better price per pound at a recycling yard than the same wire still wrapped in insulation. This guide covers how the mechanism actually works, what you need to build one, and the safety rules that a lot of quick build tutorials skip over – especially the one about where your scrap wire is actually coming from.
How a Drill-Powered Wire Stripper Works
Every version of this tool, whether it’s a $30 benchtop unit or a rig built from scrap wood and a salvaged blade wheel, uses the same basic idea. A small frame holds a set of blade wheels or a fixed cutting channel sized to the wire’s insulation diameter. A shaft on that assembly connects to your drill’s chuck, so the drill spins the wheels instead of you turning a hand crank. As you feed wire through, the blades score and peel the outer insulation while the copper core underneath passes through mostly undisturbed. Most designs, DIY and commercial alike, have an adjustable blade gap so the same machine can handle a range of wire gauges – too tight and you nick the copper, too loose and the insulation doesn’t fully separate.
Best Drill-Powered Pick for Scrap Copper
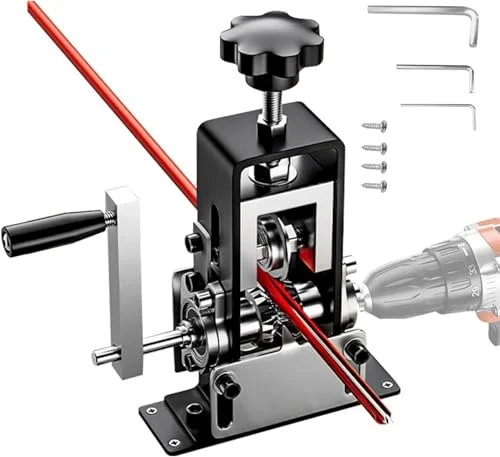 |
Hizmivos Manual/Drill-Powered Wire Stripping Machine – $29.99 If you’d rather skip the fabrication, this is the same drill-or-hand-crank stripping concept described above, already built and adjustable out of the box.
|
Materials and Tools You’ll Need
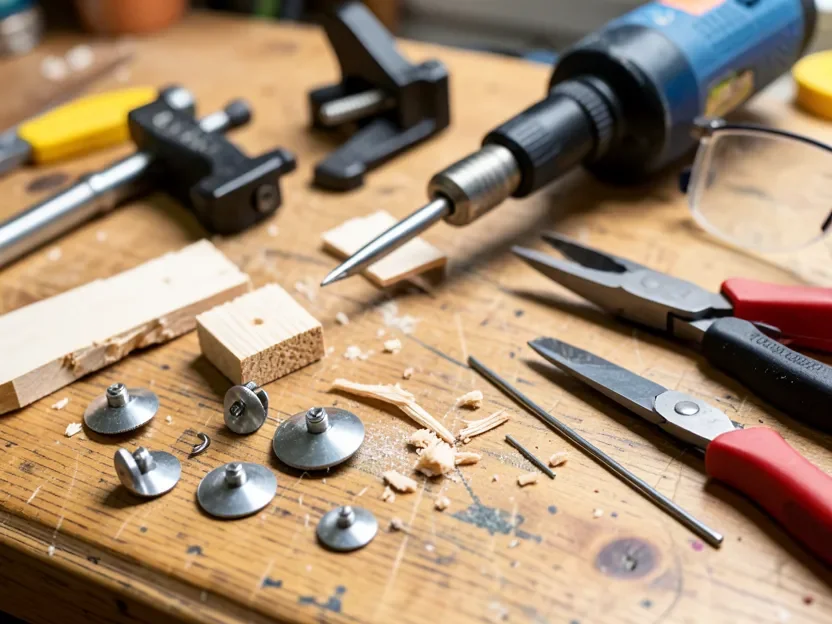
You don’t need a fully stocked metal shop for this build. Most of what goes into a working stripper is either scrap you already have lying around or a single small parts kit.
The Stripping Mechanism
This is the one part worth buying rather than improvising. A salvaged blade-wheel assembly from an old manual stripper, or a low-cost replacement-parts kit sold for exactly this purpose, gives you a mechanism that’s already sized and hardened for the job. Trying to fabricate blade wheels from scratch is possible but rarely worth the time compared to a $15-20 parts kit.
The Frame and Base
A block of scrap hardwood or a short length of 2×4 makes a solid mounting base. It needs to be heavy and wide enough that the drill’s torque doesn’t walk it across the bench or twist it out of position the first time you feed a stiff wire through.
Drill Connection Hardware
You’ll need a hex shaft, bolt, or adapter that your drill’s chuck can grip securely and that mates with the stripping mechanism’s drive shaft. If you’re converting a hand-crank stripper, this usually means removing the crank handle and replacing it with a hex bolt or shaft stub.
Round out the build with C-clamps or lag bolts to secure the base to a workbench, a variable-speed corded or cordless drill, safety glasses, work gloves, and a bundle of scrap wire to test on once the machine is assembled.
Step-by-Step: Building the Machine
These are general build principles rather than exact measurements – the right dimensions depend on the specific blade mechanism and drill you’re using, so treat each step as a checklist rather than a fixed spec sheet.
- Build and secure the base. Cut a stable wood base wide enough that the assembly can’t tip or spin when the drill applies torque, and drill mounting holes so it can be clamped or bolted to a workbench.
- Mount the stripping mechanism. Fix the blade-wheel assembly to the base so the wire feeds through level and centered. If you’re converting a hand-crank unit, swap the crank handle for a hex shaft or bolt stub your drill chuck can grip.
- Set the blade gap to your wire gauge. Most mechanisms have an adjustable screw or nut that controls how deep the blades bite. Set it to score through the insulation without nicking the copper strand underneath.
- Connect the drill and add a guard. Chuck the drive shaft into the drill, then fit a shield or cover, even a scrap piece of wood or sheet plastic, over the rotating blade wheels before you power anything on. This is the step most quick tutorials skip, and it’s the one that actually prevents an injury.
- Test on known scrap wire at low speed. Feed a few feet of wire you know is dead through the machine on the drill’s lowest speed setting. Check that the strip comes off clean, then adjust blade depth or speed as needed before running longer lengths.
Safety Rules That Actually Matter
A drill-powered stripper is a genuinely useful shop tool, but it has real hazards that are worth taking seriously rather than glossing over.
- Guard the pinch point. The rotating blade wheels are the main hazard on this build. A shield or cover over that mechanism isn’t optional – it’s the difference between a shop project and a trip to urgent care.
- Clamp the base down. A drill’s torque can walk an unsecured base across the bench or twist the whole rig out of your hands the moment a wire catches. Bolt or clamp it before the first test run.
- Wear real eye protection. Insulation shavings and small copper fragments fly off as wire feeds through. Safety glasses rated for impact, not reading glasses, and gloves that still let you keep a firm grip.
- Only strip wire you know is dead. This is the rule most build guides leave out entirely. Scrap pulled from a demolition job, a retired appliance cord, or leftover ends from a spool are all fine – those are genuinely dead wire. A length of wire you’re not certain has been disconnected from its power source is a completely different situation. Never cut into or feed wire that might still be connected to live building wiring or any energized circuit. A drill-powered stripper has no way to tell the difference between dead scrap and a live wire – that judgment call is entirely on you, before the wire ever touches the machine.
- When in doubt, test first. If you’re not 100% sure where a piece of wire came from, check it with a non-contact voltage tester before handling or feeding it, and trace it back to its source rather than assuming it’s dead just because it isn’t currently plugged into anything.
Build It or Buy One?
Building your own makes the most sense if you already own a suitable drill and can source the blade-wheel mechanism cheaply, since the frame and hardware are mostly scrap-bin parts. The tradeoff is time: fitting the blade gap, aligning the shaft, and building a guard that doesn’t get in the way of feeding wire usually takes a few tries to get right.
Ready-made drill-powered stripping machines, like the one above, are inexpensive enough that building one mostly pays off if you enjoy the fabrication itself, or you already have the parts sitting around. If you just need stripped wire and don’t want to spend an afternoon on setup and troubleshooting, buying one is the faster route to the same result.
Applications: Where This Tool Actually Gets Used
The most common use for a drill-powered stripper is prepping scrap copper for recycling – stripped bare wire sells for more per pound than insulated wire at most scrap yards, so pre-stripping a bucket of pulled Romex or extension cords before a scrap run can meaningfully raise the payout. Electronics hobbyists use the same tool to prep wire for circuit boards and small builds, and small repair shops use it to speed up cable assembly and bulk wire prep. In every case, the wire going into the machine should already be scrap – disconnected, dead, and headed for either a project or a recycler, never a live circuit.
Frequently Asked Questions
Can I use any drill to power a wire stripping machine?
Most variable-speed corded or cordless drills work, as long as the chuck can grip the stripper’s drive shaft or hex bit. A lower speed setting gives you more control while you’re still dialing in the blade gap.
What wire is safe to strip with a homemade machine?
Only wire you know is dead and disconnected from any power source, such as scrap cut during a demolition, a retired appliance cord, or leftover ends from a spool. Never feed wire that might still be connected to a live circuit.
Do I need to guard the blades on a DIY stripper?
Yes. The rotating blade or wheel mechanism is a real pinch and cut hazard, and a simple cover or shield over that point is a basic safety requirement, not an optional add-on.
Is it cheaper to build a wire stripper than buy one?
It can be, if you already own a suitable drill and can source the stripping mechanism cheaply. Ready-made drill-powered stripping machines are inexpensive too, so building one mostly pays off if you enjoy the fabrication itself.
Conclusion
A drill-powered wire stripping machine is a straightforward build once you have the blade mechanism sourced: a solid base, a secure drill connection, a guard over the pinch point, and a blade gap set for your wire. The mechanical part is the easy half. The part worth taking seriously is making sure every foot of wire that goes into the machine is genuinely dead scrap, not something that might still be connected to power. Get both halves right and it’s a fast, low-cost way to prep wire for recycling or your next project.
Want a head start on the drill itself? See our guide to choosing between a 12-volt and 20-volt drill, and check out these DIY drill holder plans for keeping your drill organized between projects.
Sponsored / affiliate links. As an Amazon Associate I earn from qualifying purchases. I may earn additional commission from eligible campaigns.