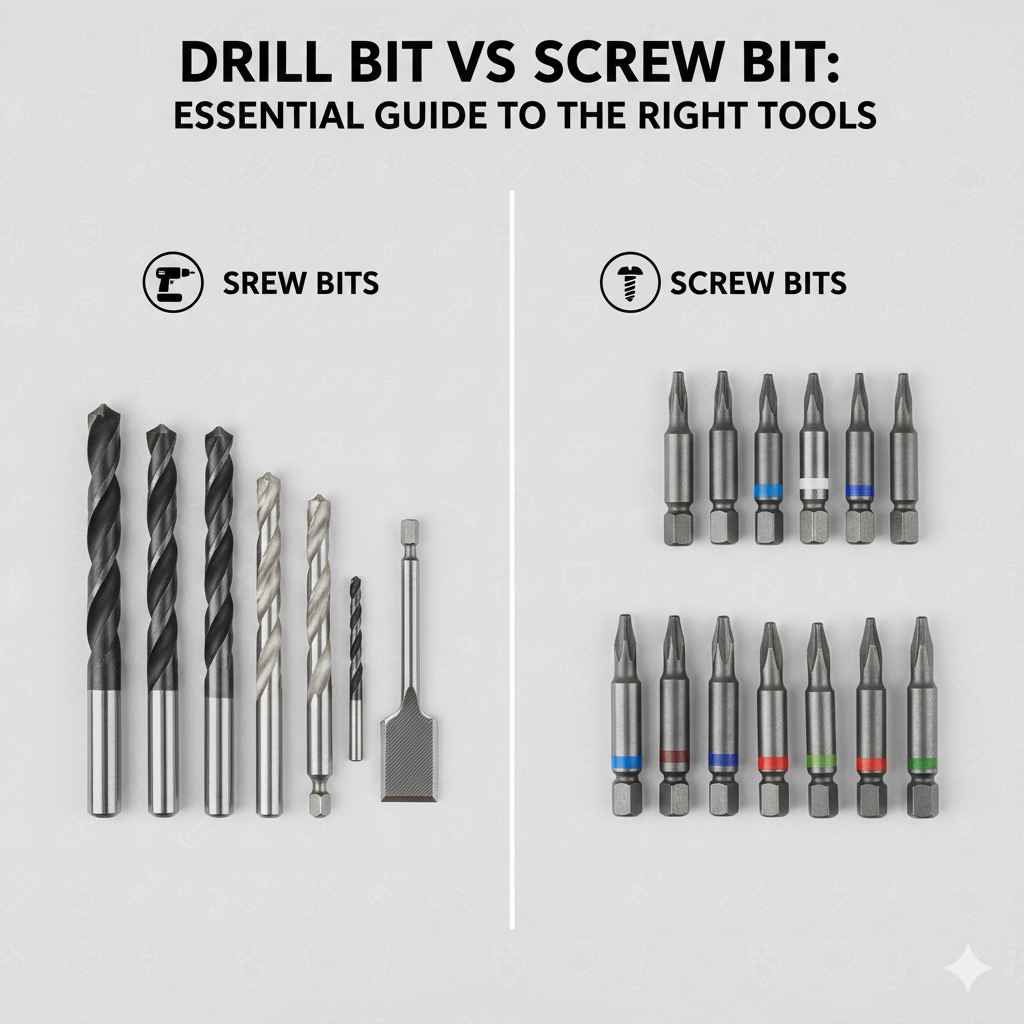
Drill Bit vs Screw Bit: Essential Guide to the Right Tools
Choosing the right tool can feel tricky, especially when you’re just starting with home improvement or any project that involves fastening things together. The topic of Drill Bit vs Screw Bit: Proper Tool Explained is super common because it’s easy to get confused! Don’t worry, it’s simpler than you think. This post will break down the differences and show you exactly when to use each one. We’ll explore everything step by step, making sure you know what you need to get the job done right. Get ready to learn!
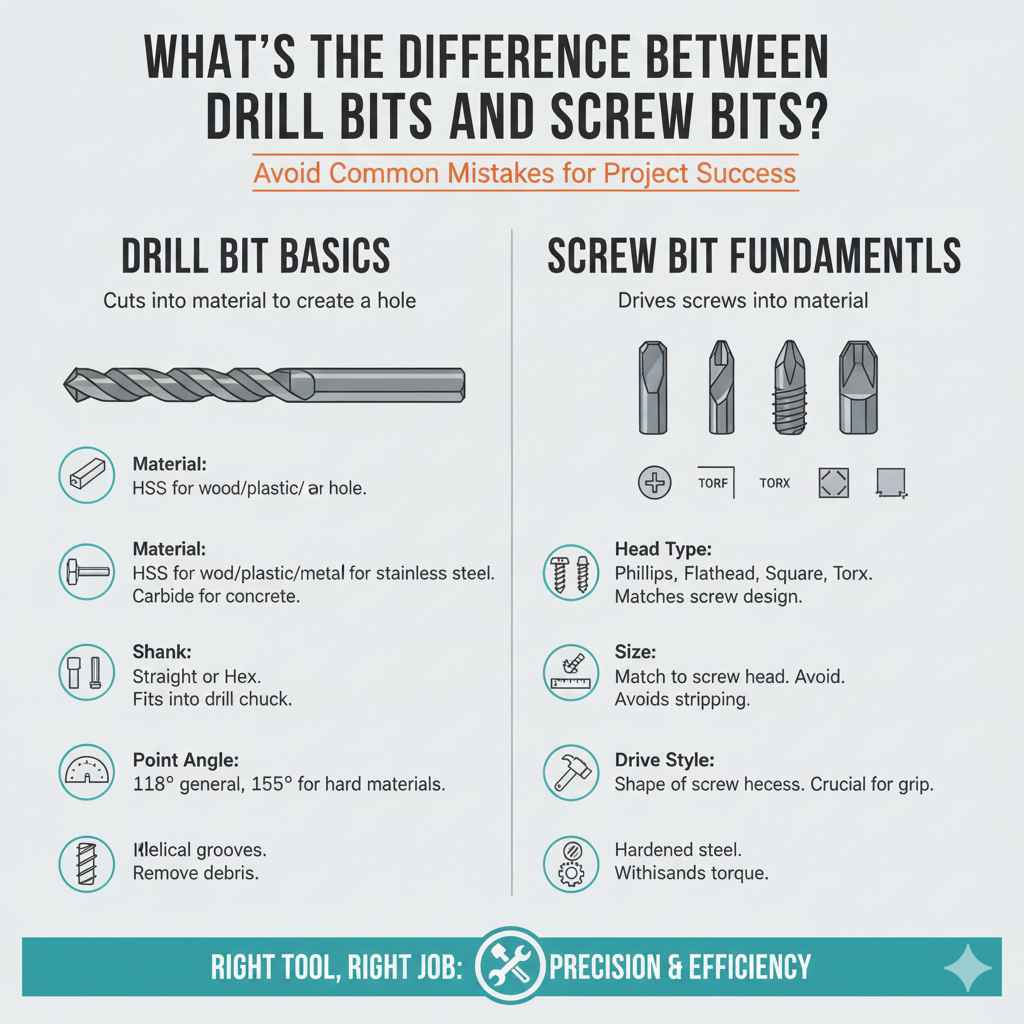
What’s the Difference Between Drill Bits and Screw Bits?
The core function of these two types of bits is quite different, making them suitable for different tasks. A drill bit is designed to create holes, whereas a screw bit is for driving screws. While this seems straightforward, the nuances of these tools, including their design, materials, and application, are vital for project success. Understanding these distinctions avoids common mistakes like stripping screw heads or damaging the material. This distinction matters because using the wrong tool leads to problems.
Drill Bit Basics
Drill bits are designed to cut into a material and remove the material to create a hole. They come in various sizes, measured by diameter, and are often used before driving a screw. The sizes you pick will depend on your project. The flutes, or grooves, on a drill bit are essential. They help to remove debris as the bit spins, preventing the hole from getting clogged. There are many different types of drill bits for various materials, from wood to metal to masonry.
- Material: Drill bits are made from high-speed steel (HSS), cobalt, or carbide. HSS bits work well for wood, plastic, and some metals. Cobalt bits are tougher and suitable for stainless steel. Carbide bits are the most durable and can drill through the hardest materials, like concrete.
- Shank: The shank is the part of the drill bit that fits into the drill chuck. It can be straight or hex-shaped. Straight shanks are most common, while hex shanks are used with impact drivers and quick-change chucks.
- Point Angle: The point angle affects how the drill bit cuts. Common angles are 118 degrees (general-purpose) and 135 degrees (for harder materials, providing a self-centering action).
- Flutes: These helical grooves remove debris as the bit spins. The design of the flutes affects the speed and efficiency of drilling.
Screw Bit Fundamentals
Screw bits are designed to grab onto the screw head and turn the screw into a material. They come in different shapes and sizes to fit various screw heads. These bits have specific shapes that match the screw head’s design. This ensures the bit can grip the screw securely without slipping. These screw bits are often made of hardened steel for increased durability and to handle the torque involved in driving screws. There are various head styles.
- Head Type: Screw bits come in several head types to match different screw head designs. Common types include Phillips, flathead, square (Robertson), and Torx (star).
- Size: The size of a screw bit is determined by the screw head size. Using the right size is very important to avoid stripping the screw head.
- Drive Style: The drive style dictates the shape of the recess in the screw head. Understanding these styles is crucial for using the correct bit.
- Material: Screw bits are typically made of hardened steel or tool steel to withstand the twisting force of driving screws. Impact-rated bits are available for use with impact drivers.
Choosing the Right Tools for Your Project: Drill Bit vs Screw Bit
Deciding which tool is right depends on the task. A good rule of thumb is that if you’re making a hole, you need a drill bit. If you’re driving a screw, you need a screw bit. It is usually best to pilot drill the material before inserting a screw. This helps the screw go in straight, especially in hardwoods. Using a drill bit will make the process easier and prevent the material from splitting. Knowing when to use each one is important for quality projects.
Selecting a Drill Bit
The right drill bit makes all the difference when creating holes. It’s important to match the drill bit to the material you are working with. For wood, use a brad point bit or a twist drill bit. A brad point bit is helpful because it starts the hole precisely. For metal, use an HSS bit, and for concrete, a masonry bit. Also, selecting the correct diameter is important. The hole size should match the screw’s diameter. This will allow the screw to move straight. Using the wrong bit will mean more problems and less quality work.
- Material Type: Consider the material. Choose a bit made for wood, metal, or concrete.
- Diameter: Select the right diameter to match the screw’s body, for pilot holes, and for the material’s properties.
- Bit Type: Use a brad point bit for wood for a clean entry.
- Drill Speed: Adjust the drill speed based on the material. Slower speeds for hard materials, faster speeds for soft materials.
Choosing a Screw Bit
When selecting a screw bit, it’s all about matching the screw head. The screw bit must fit the screw head to avoid stripping or damaging the screw or the material. Phillips and flathead bits are common, but they can be less effective than other styles. Square (Robertson) and Torx (star) bits give better grip and reduce slippage. Select a bit that matches the screw head. Using an incorrect size will cause problems. Consider the bit’s material and any features, such as impact-rated bits. Quality screw bits are usually made of hardened steel for durability.
- Screw Head Type: Match the bit to the screw head (Phillips, flathead, square, Torx).
- Size: Ensure the bit fits the screw head precisely.
- Material: Select bits made of hardened steel for durability.
- Impact-Rated: If using an impact driver, choose impact-rated screw bits for better performance.
Understanding Pilot Holes
A pilot hole is a small hole drilled before inserting a screw. The drill bit must be the correct size. Pilot holes are especially important for wood. They reduce the chance of splitting the wood. They make it easier to drive the screw straight. This can improve the final look of a project. Using a pilot hole is a simple step, but one of the most effective things you can do to get good results. This will make your project easier, as well.
The Purpose of a Pilot Hole
Pilot holes help screws go in straight and prevent wood from splitting. They relieve pressure, making the screw insertion easier. The pilot hole ensures the screw threads can get a proper grip. This results in a stronger, more secure joint. Using a pilot hole saves time and reduces the risk of project failure. It also means less work and fewer chances of a mistake.
- Preventing Wood Splitting: The pilot hole creates space for the screw, reducing pressure.
- Easier Insertion: Screws go in easier and straighter.
- Stronger Joints: Pilot holes provide better grip and a solid bond.
- Accuracy: Improves the accuracy and alignment of your project.
How to Drill a Pilot Hole
Drilling a pilot hole is a simple process, but using the right tools and techniques makes the process smooth. First, select the correct drill bit. The bit size should be slightly smaller than the core diameter of the screw. Place the drill bit at the spot where you want to insert the screw. Apply firm, even pressure to begin drilling at a low speed. Increase the speed as you proceed. Make sure the hole is straight. Stop drilling when the pilot hole is slightly deeper than the screw’s length. This allows the screw to seat properly.
- Bit Size: Use a drill bit slightly smaller than the screw’s core diameter.
- Placement: Mark the spot for your screw.
- Drilling Technique: Apply steady, even pressure.
- Depth: Drill the hole slightly deeper than the screw’s length.
Specialty Bits and Their Uses
There are many specialty bits for different tasks. These bits are designed for specific projects. Using the correct specialty bit can make a challenging job much simpler. For example, countersink bits create a beveled recess, which allows the screw head to sit flush with the material’s surface. Step bits are great for drilling multiple hole sizes. These specialty bits can also save time.
Countersink Bits
Countersink bits make a cone-shaped recess that allows the screw head to sit flush with the material surface. This produces a clean, finished look. Countersink bits are often used in woodworking and cabinet building. They are also helpful when working with metal. By recessing the screw head, you can get a smooth, level surface. Choose the right size countersink bit for your screw. Using this specialty bit can make the project look a lot more professional.
- Function: Create a beveled recess for flush screw placement.
- Materials: Suitable for wood and some metals.
- Application: Used in woodworking and general construction.
- Benefits: Provides a clean and professional finish.
Step Bits
Step bits, also known as unibits, are great for drilling holes of various sizes. They have a conical shape. Each step increases the hole diameter. This makes them ideal for drilling holes in thin metal sheets, such as those used in HVAC work. Step bits offer versatility. They eliminate the need to switch out drill bits. Step bits drill cleaner holes. They also help prevent the metal from deforming. Using these special bits makes drilling holes easier and faster.
- Function: Drill holes of different sizes in one go.
- Materials: Suitable for thin metals.
- Application: Often used in electrical and HVAC.
- Benefits: Versatile and time-saving.
Examples of Use: Putting It All Together
Let’s look at a few examples to see how to use drill bits and screw bits in everyday projects. These examples will show you how to choose the right tools for the job. These examples will give you confidence.
Building a Wooden Deck
Imagine you’re building a wooden deck. First, you’ll need to prepare the wood for the screws that hold the deck boards to the frame. The first thing to do is to determine the correct size drill bit for a pilot hole. A pilot hole helps reduce splitting. This also ensures that the screws go in straight. Once the pilot holes are drilled, use a screw bit with the right head to drive the deck screws. The use of the correct tools will make the process easier and the deck last longer.
- Drilling Pilot Holes: Use a drill bit that is smaller than the diameter of the screws to pre-drill the holes in the deck boards and the frame. This will help prevent the wood from splitting.
- Driving Screws: Select a screw bit that matches the head of your deck screws (e.g., Torx or square). Use this bit to drive the screws into the pilot holes.
- Fastening the Boards: Ensure the deck boards are properly aligned, and then drive the screws at regular intervals to secure the boards to the deck frame.
Assembling a Bookshelf
Let’s say you’re putting together a bookshelf. The instructions will likely tell you to use screws to attach the shelves to the side panels. First, you might need to pre-drill holes. Use a drill bit that matches the screw size. Once the holes are ready, select the appropriate screw bit, matching the head style of the screws. Place the screw bit into the screw head and insert the screw into the pre-drilled holes. Tighten until snug. Following this procedure ensures the bookshelf is stable and sturdy.
- Assembling the Frame: First, attach the side panels to the top and bottom of the bookshelf frame using screws. Use a drill bit to create pilot holes if necessary.
- Inserting Shelves: Place the shelves at the desired height. Drill pilot holes if required, then drive screws to secure the shelves to the frame.
- Securing the Back Panel: Attach the back panel to the frame using small screws and the correct screw bit.
Safety and Best Practices
Using these tools comes with some safety rules. Safety always comes first when working with power tools. Also, good work practices make your projects easier, and safer, and can ensure that your projects turn out well. Knowing and following best practices helps you avoid accidents and make your projects better. Always put safety first.
Safety Guidelines
The safety guidelines apply to working with both drill bits and screw bits. Wear eye protection to shield your eyes from flying debris. When using a drill or impact driver, wear safety glasses. Also, wear gloves to protect your hands. Ensure the material is securely clamped or held in place. Use the right tool for the job. Do not force the drill or screw gun. Use the correct drill and screw bits.
- Eye Protection: Always wear safety glasses or goggles.
- Gloves: Wear gloves to improve your grip and protect your hands.
- Secure Material: Make sure the material is stable.
- Tool Selection: Use the proper tools for the job.
Best Practices for Efficiency
Using best practices helps improve project results and makes work easier. Use the correct drill bit and screw bit for the job. Start slowly and let the tool do the work. Also, apply even pressure and maintain a steady pace. Keep the tools clean. This helps them work better. Having sharp, properly maintained bits makes the process easier. These steps will make projects easier and produce a better end result.
- Proper Bit Selection: Use the right drill bit or screw bit for each task.
- Steady Pressure: Apply even pressure.
- Tool Maintenance: Keep the tools clean and sharp.
- Adjust Speed: Use the appropriate speed.
Common Mistakes and How to Avoid Them
Making mistakes is a normal part of learning. Some errors are more common than others. Understanding these mistakes can help you prevent them. Knowing what to watch out for helps you avoid problems. Common mistakes include using the wrong bit, not using pilot holes, and using too much force. These errors can be avoided by following a few simple tips.
Using the Wrong Bit
A common error is using the wrong bit for a job. This can lead to stripped screws, damaged materials, and frustrating projects. Using a screw bit for drilling will likely cause the bit to slip and round out the screw head. Using a drill bit to drive screws will not work. Make sure the bit matches the screw type. Also, select the proper drill bit. Taking the time to select the right bit will help you avoid problems.
- Incorrect Bit Type: Ensure the bit matches the material and screw head.
- Material Compatibility: Use bits designed for wood, metal, or concrete.
- Research: Learn about different bit types.
- Review: Recheck the bit before starting your project.
Skipping Pilot Holes
Skipping pilot holes, especially in wood, is another common mistake. Not using a pilot hole can lead to splitting the wood. Screws might be hard to drive in straight. Always pre-drill holes. The time saved is not worth the potential damage to the wood or frustration. Pilot holes will make your project better. Also, you will save time.
- Wood Splitting: Pre-drill pilot holes to prevent wood from splitting.
- Screw Alignment: Pilot holes help screws go in straight.
- Ease of Use: Pilot holes make it simpler to drive screws.
- Preparation: Plan your work and make pilot holes where needed.
Maintenance and Care
Taking care of your tools makes them last longer and work better. Proper maintenance keeps them in top shape. Regularly cleaning and inspecting your drill bits and screw bits can help you extend their life and improve your project results. You will want to take the time to clean the tools after use. You should also inspect the bits regularly. Proper care is good for the tools, and it is a good idea to maintain the tools.
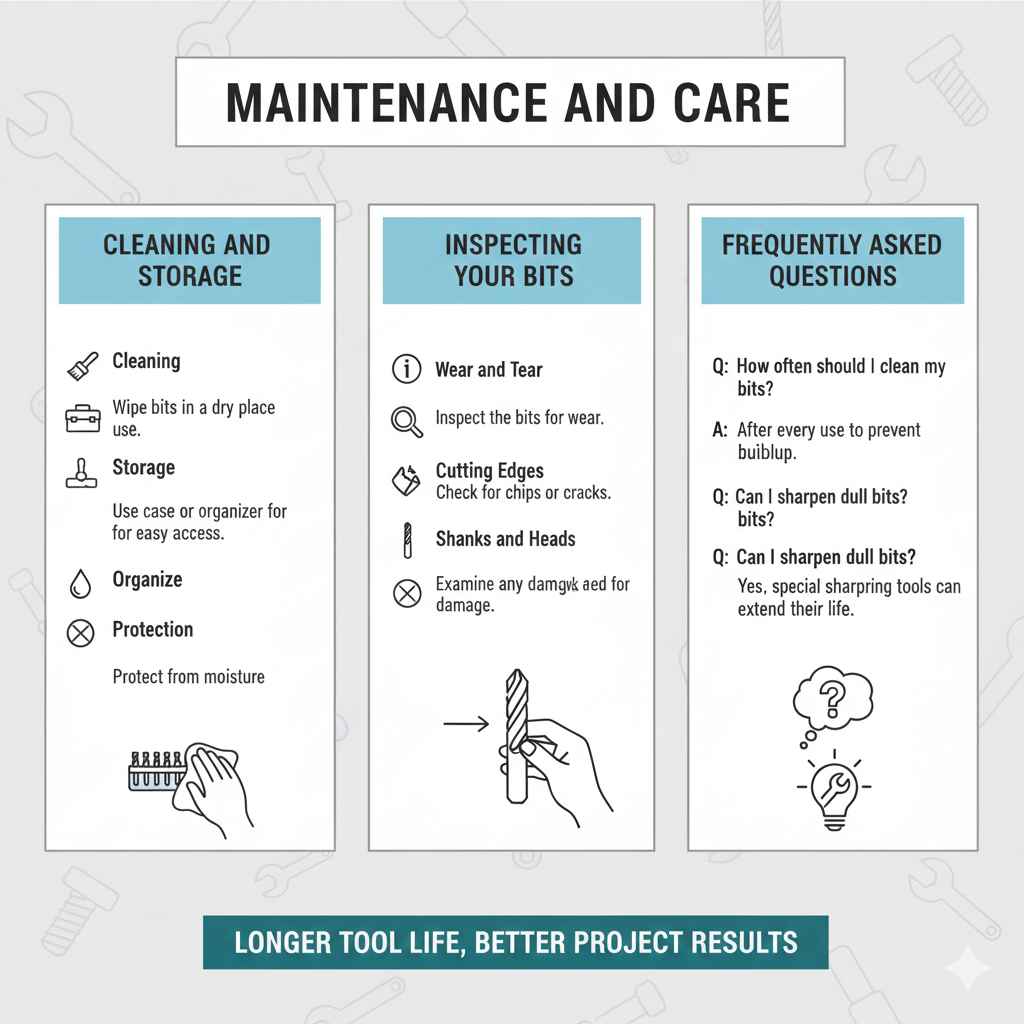
Cleaning and Storage
Keeping your drill bits and screw bits clean will improve their performance. After each use, wipe off any debris. Use a brush to get rid of dust and wood shavings. Store the bits in a dry place. Protect them from moisture. Consider using a case or organizer. Proper storage keeps the bits safe and easy to find. Proper cleaning will help the bits last.
- Cleaning: Wipe bits after use.
- Storage: Store bits in a dry place.
- Organize: Use a case or organizer for easy access.
- Protection: Protect from moisture.
Inspecting Your Bits
Regularly inspect your drill bits and screw bits for damage. Check for wear or damage on the cutting edges. Inspect the shanks and the heads. If you find chips or cracks, replace the bit. Dull bits make your work harder and less efficient. Replacing the worn bits will make your work much easier. Inspection is part of the maintenance process.
- Wear and Tear: Inspect the bits for wear.
- Cutting Edges: Check for chips or cracks.
- Shanks and Heads: Examine the shank and head for damage.
- Replacement: Replace any damaged bits.
Frequently Asked Questions
Question: What’s the main function of a drill bit?
Answer: A drill bit is mainly used to create holes in materials by cutting away material.
Question: What is a pilot hole?
Answer: A pilot hole is a small hole drilled before inserting a screw. It helps guide the screw and prevent wood from splitting.
Question: Why do I need to match a screw bit to a screw head?
Answer: Matching the screw bit to the head ensures a secure grip and prevents the bit from slipping, which helps to avoid damage to the screw or the material.
Question: What is the benefit of a countersink bit?
Answer: A countersink bit creates a beveled recess, which allows the screw head to sit flush with the material’s surface, providing a clean finish.
Question: Are specialty bits necessary?
Answer: Yes, specialty bits can make your job a lot easier and produce better results. They are made for specific tasks and projects.
Final Thoughts
Knowing the difference between a drill bit and a screw bit is a key skill for any home project or any work that involves fastening parts together. You’ve now explored their individual functions, materials, and various uses. You also explored the important role of pilot holes and learned about specialty bits that can make your work easier. You have been given examples of how to apply this knowledge to common projects, like building a deck or assembling a bookshelf. Remember the importance of safety and proper tool maintenance. With this knowledge, you are ready to tackle projects more confidently. So, get out there and build something!