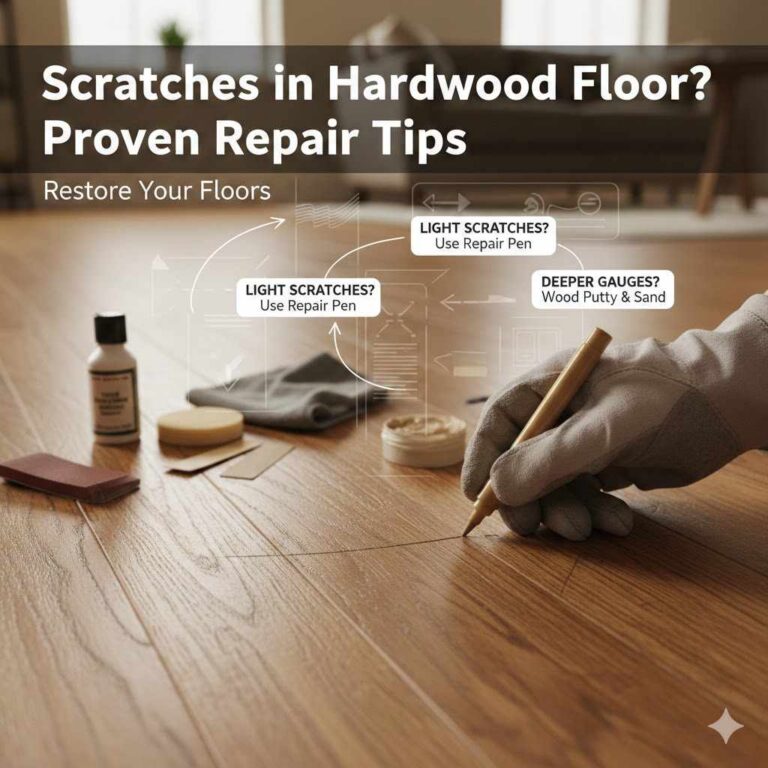
Fixing Scratches on Hardwood Floors: A Comprehensive Guide
Hey there! If you’re reading this, chances are you’ve noticed a scratch or two on your beautiful hardwood floors, and your heart sank a little. I get it—hardwood floors are a stunning feature in any home, but they’re not immune to wear and tear. Scratches can happen from a pet’s claws, furniture dragging, or even a rogue pebble stuck in your shoe. But don’t worry! I’ve spent years experimenting with ways to fix scratches on hardwood floors, and I’m here to share everything I’ve learned. Whether it’s a tiny surface mark or a deeper gouge, I’ll walk you through practical, tried-and-true methods to restore your floors to their former glory. Let’s dive in and get those floors looking amazing again!
Why Scratches Happen on Hardwood Floors
Before we jump into fixing scratches, let’s talk about why they happen. Understanding the cause can help you prevent future damage. Hardwood floors, while durable, have a finish that protects the wood underneath. Scratches occur when something harder than that finish—like sand, metal, or even a dog’s nails—scrapes across it.
In my own home, I noticed scratches near the front door where dirt tracked in from outside. My dog, Max, also left his mark when he’d sprint across the living room. Furniture without felt pads is another culprit. Once, I moved a chair without lifting it, and the result was a long, ugly scratch that made me cringe. Knowing these causes helped me take steps to protect my floors, and I’ll share those tips later.
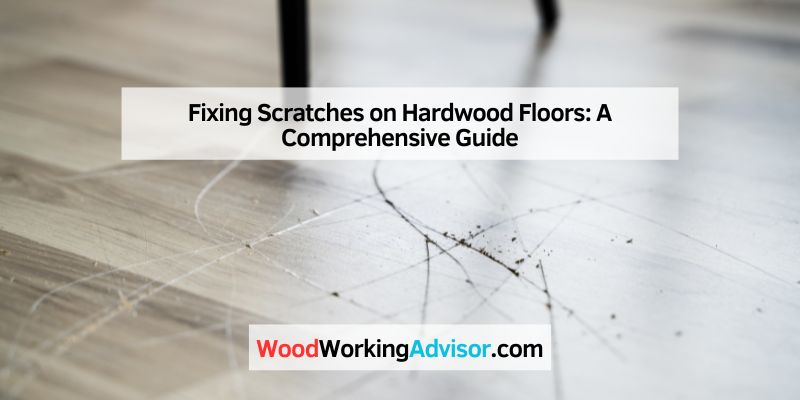
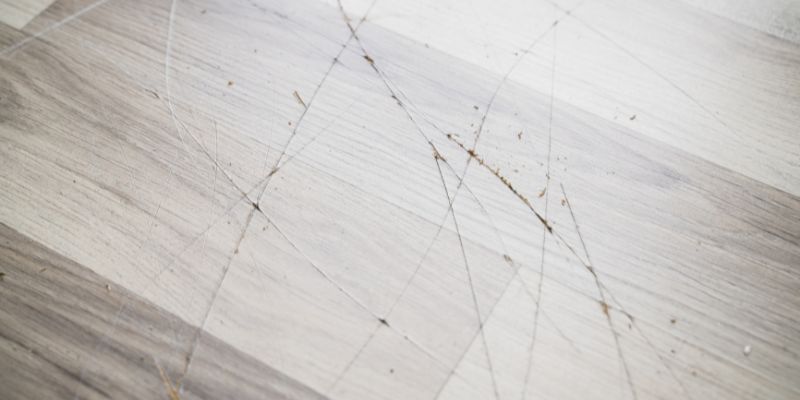
Assessing the Scratch: Surface or Deep?
Not all scratches are the same, and fixing them depends on how deep they are. I always start by assessing the damage. Here’s how I do it:
- Surface Scratches: These are shallow marks that only affect the floor’s finish. They look like faint white lines or scuffs. If you run your fingernail over the scratch and barely feel it, it’s likely surface-level.
- Deep Scratches: These cut into the wood itself. They’re darker, more noticeable, and you can feel a groove when you touch them.
To check, I grab a flashlight and shine it at an angle across the scratch. This highlights the depth. If it’s just in the finish, I breathe a sigh of relief—it’s an easier fix. Deep scratches take more work, but they’re not impossible to repair. Let’s break down how to handle both.
Fixing Surface Scratches on Hardwood Floors
Surface scratches are the most common, and I’ve had great success fixing them with simple methods. Here are my go-to techniques:
Using a Walnut
This might sound odd, but rubbing a walnut over a surface scratch works wonders. The natural oils in the nut fill in the scratch and blend it with the wood’s color. I discovered this trick when I noticed a faint scratch on my oak floor. I grabbed a walnut from my pantry, cracked it open, and rubbed the meaty part over the scratch in a circular motion. After a minute, I wiped away the excess with a soft cloth, and the scratch was nearly invisible. This works best on light to medium-toned floors.
Olive Oil and Vinegar Mix
Another kitchen staple fix is a mix of olive oil and white vinegar. I mix equal parts (about a tablespoon each) in a small bowl. Then, I dip a soft cloth into the mixture and gently rub it over the scratch. The oil moisturizes the wood, while the vinegar cleans and helps the finish blend. After letting it sit for a few minutes, I buff the area with a dry cloth. This method is great for multiple small scratches, like those from my cat’s playful skids.
Commercial Scratch Repair Products
When home remedies don’t cut it, I turn to commercial products like scratch repair pens or polishes. These are designed for hardwood floors and come in various shades to match your wood. I used a repair pen on a scuff near my coffee table. I cleaned the area first, applied the pen in short strokes, and buffed it with a cloth. The scratch faded beautifully. Just make sure to test the product in a hidden spot first to match the color.
Repairing Deep Scratches on Hardwood Floors
Deep scratches are trickier, but I’ve tackled plenty in my home. These require filling the gouge and refinishing the area. Here’s how I do it:
Cleaning the Scratch
Before any repair, I clean the scratch thoroughly. Dust or debris can ruin the finish. I use a damp cloth with a drop of mild dish soap to wipe the area, then dry it completely. Once, I skipped this step in a rush, and the repair looked patchy. Lesson learned—don’t skip cleaning!
Filling the Scratch with Wood Filler
For deep scratches, wood filler is my best friend. I choose a filler that matches my floor’s color (most hardware stores have sample cards to help). Using a plastic putty knife, I press the filler into the scratch, slightly overfilling it. After it dries (usually 30 minutes), I sand the area lightly with fine-grit sandpaper (220-grit works well). This smooths the surface and blends it with the surrounding wood. I repaired a deep scratch under my dining table this way, and you’d never know it was there.
Applying a Finish
Once the filler is smooth, I apply a matching polyurethane finish. I use a small artist’s brush for precision and apply thin layers, letting each dry for a few hours. Two or three coats usually do the trick. I learned to work in a well-ventilated area after getting a headache from the fumes early on. If your floor has a wax finish, use paste wax instead of polyurethane. This step seals the repair and protects the wood.
When to Sand and Refinish the Entire Floor
Sometimes, scratches are so widespread that spot repairs aren’t enough. In my old house, years of wear left my floors looking dull and scratched. I decided to sand and refinish them, and it was a game-changer. Sanding removes the top layer of finish and wood, erasing scratches. Then, a new finish restores the shine.
This is a big job, so I rented a floor sander from a local hardware store. I started with coarse sandpaper (60-grit) to remove scratches, then moved to finer grits (120-grit and 220-grit) for a smooth surface. After vacuuming and wiping down the floor, I applied three coats of water-based polyurethane, sanding lightly between coats. The result was stunning, but it took a weekend of hard work. If you’re not up for it, hiring a professional is worth the cost.
Preventing Future Scratches on Hardwood Floors
Fixing scratches is great, but preventing them is even better. Here are my top tips for keeping your floors scratch-free:
- Use Furniture Pads: I stick felt pads under all my furniture legs. They’re cheap and prevent scratches when moving chairs or tables.
- Rugs and Mats: I place rugs in high-traffic areas like hallways and entryways. A mat near the front door catches dirt before it scratches the floor.
- Trim Pet Nails: My dog Max gets regular nail trims, which has reduced scratches significantly.
- Sweep Regularly: I sweep daily to remove grit that can scratch the finish. A microfiber mop works great for this.
- No Shoes Indoors: I ask guests to remove shoes at the door. This cuts down on dirt and pebbles that cause scratches.
Here’s a quick table summarizing prevention tips:
| Prevention Method | How It Helps | Cost |
|---|---|---|
| Furniture Pads | Stops furniture scratches | $5–$20 |
| Rugs and Mats | Protects high-traffic areas | $20–$100 |
| Pet Nail Trims | Reduces pet-related scratches | $10–$30 |
| Regular Sweeping | Removes abrasive dirt | Free |
| No-Shoes Policy | Prevents dirt tracking | Free |
Common Mistakes to Avoid When Fixing Scratches
Over the years, I’ve made some blunders while fixing scratches. Here’s what to watch out for:
- Using the Wrong Color Filler: A mismatch can make the repair stand out. Always test the filler color first.
- Skipping Sanding: If you don’t sand wood filler smooth, the repair will look bumpy.
- Applying Too Much Finish: Thick layers of polyurethane can look cloudy. Thin coats are better.
- Not Cleaning First: Dirt trapped in a scratch can ruin the repair. Always clean thoroughly.
- Ignoring Deep Scratches: Trying a surface fix on a deep scratch won’t work. Assess the depth first.
When to Call a Professional
I love DIY projects, but some floor repairs are best left to pros. If your scratches cover a large area, involve water damage, or require matching a unique finish, a professional can save time and stress. I called a pro when I found scratches in a rental property with a custom-stained floor. The cost was around $500 for a small room, but the results were flawless. Get quotes from a few companies and check reviews to find a reliable contractor.
My Personal Journey with Hardwood Floor Repairs
Fixing scratches on my hardwood floors has been a learning curve. When I first noticed scratches in my living room, I panicked, thinking I’d need to replace the entire floor. But with some research and trial-and-error, I discovered these methods. Each repair made me more confident, and now I see scratches as fixable challenges, not disasters. My floors aren’t perfect, but they tell the story of my home—Max’s playful dashes, dinner parties with friends, and cozy nights by the fire. I hope my tips help you feel the same way about your floors.
Conclusion: Restoring Your Hardwood Floors with Confidence
Fixing scratches on hardwood floors doesn’t have to be daunting. Whether it’s a quick walnut rub for a surface mark or a full sand-and-refinish for deeper damage, you’ve got options. I’ve shared my favorite methods, learned from years of trial and error, to help you restore your floors without stress. Start by assessing the scratch, choose the right fix, and take steps to prevent future damage. Your hardwood floors are an investment in your home’s beauty, and with a little care, they’ll shine for years to come. Grab your tools, put on some music, and let’s get those scratches gone—you’ve got this!
Frequently Asked Questions
Can I fix scratches on hardwood floors without sanding?
Yes, you can! For surface scratches, try rubbing a walnut or using an olive oil and vinegar mix. Commercial repair pens also work well. Deep scratches need wood filler, but sanding is only required for large areas or severe damage.
How long does it take to fix a scratch on a hardwood floor?
It depends on the scratch. Surface scratches take 5–10 minutes with a walnut or repair pen. Deep scratches, including cleaning, filling, and finishing, can take 1–2 hours per scratch. Sanding and refinishing a whole floor might take a weekend.
Will fixing scratches damage my floor’s finish?
If done carefully, no. Use matching products and apply finishes in thin layers. Test products in a hidden area first to avoid discoloration. Skipping cleaning or using the wrong filler can harm the finish, so follow the steps closely.
How often should I refinish my hardwood floors?
It depends on wear. In my home, with moderate traffic, I refinish every 7–10 years. High-traffic areas may need it every 3–5 years. Regular maintenance like sweeping and using rugs can extend the time between refinishes.
Can I prevent scratches from pets on hardwood floors?
Yes, but it takes effort. Trim your pet’s nails regularly—I do Max’s every two weeks. Use rugs in areas where your pet runs or plays. Training pets to avoid certain areas can also help.