How Deep To Drill A Maple Tap: The Best Proven Depth
Tapping a maple tree for syrup starts with a single question that trips up more beginners than any other: how deep should I drill? Drill too shallow and you miss the sapwood. Drill too deep and you damage the heartwood. The answer is simpler than you think — and getting it right makes the difference between a steady flow and an empty bucket.
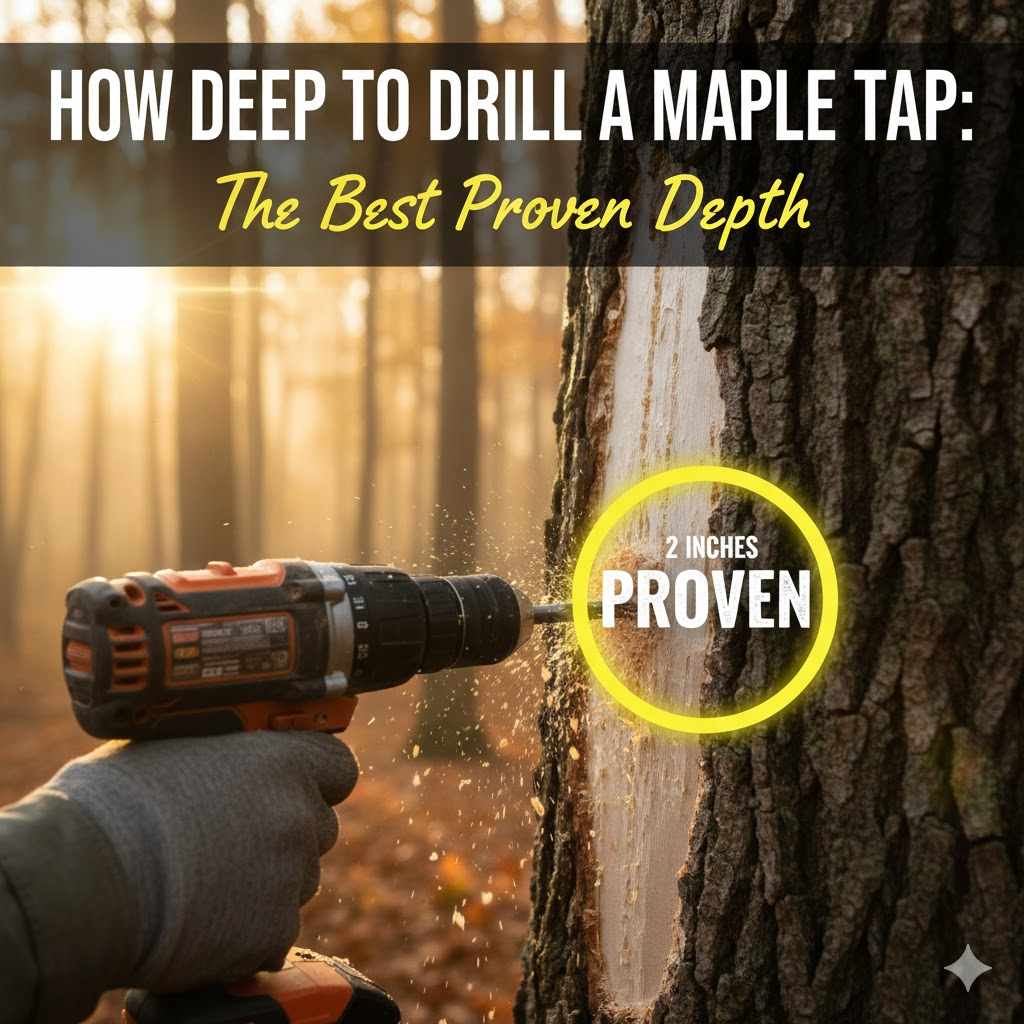
Drill your maple tap hole 1.5 to 2 inches deep into the white sapwood, past the outer bark. For older trees with thick bark (2+ inches), go up to 2.5 inches. Use a 7/16-inch spile bit at a slight upward angle (5–10°) to help sap flow down toward the tap. Never exceed 2.5 inches — deeper drilling enters the heartwood and stops sap flow entirely.
Why Tap Depth is So Important
Getting the depth right isn’t just a technical nicety — it’s the entire foundation of successful sap collection. The maple tree’s internal structure is divided into distinct layers: bark, cambium, sapwood, and heartwood. Sap flows exclusively through the sapwood (also called xylem). Tap too shallow and your spile sits in the bark layer with no sap access. Tap too deep and you enter the dry, dense heartwood that carries no sap at all.
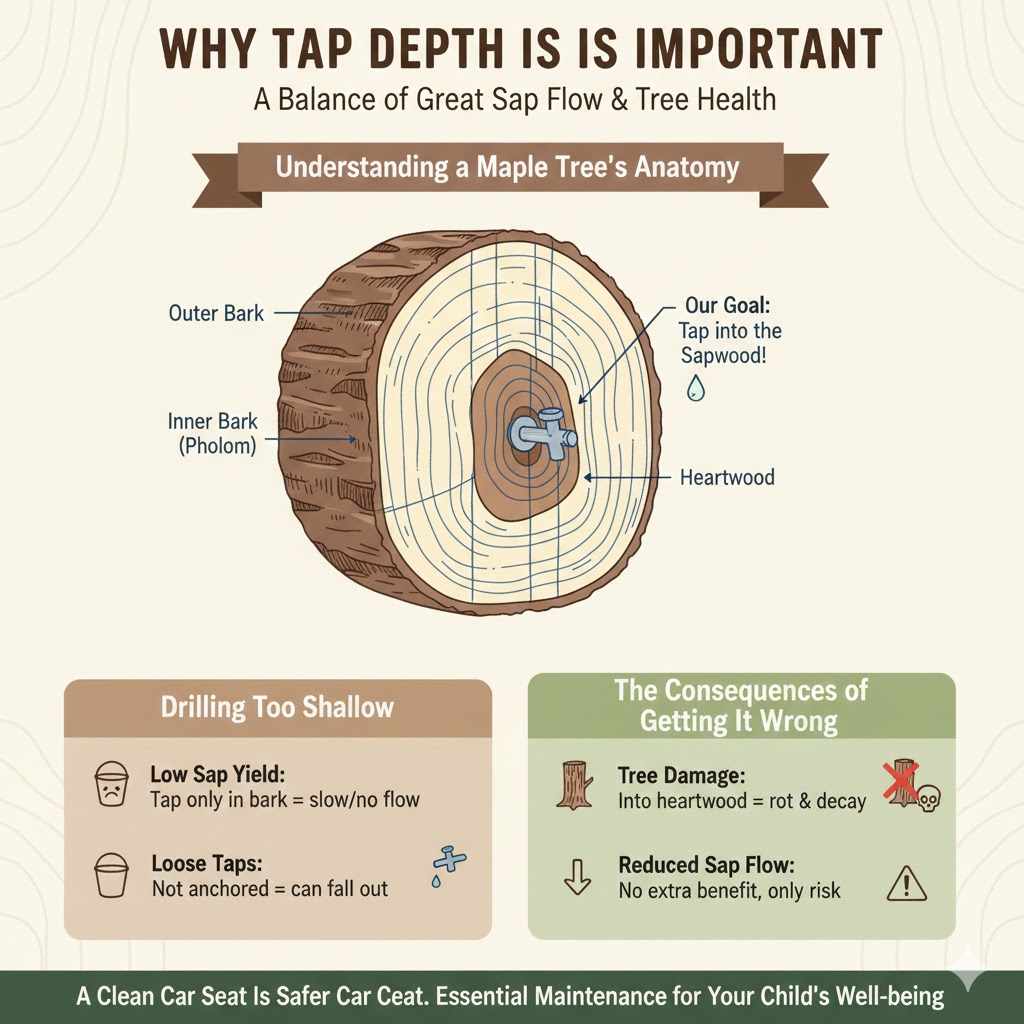
Understanding a Maple Tree’s Anatomy
From outside to center, a maple trunk consists of:
- Outer bark: Rough protective layer, 0.5–2 inches thick on mature trees
- Inner bark (phloem): Thin layer that carries sugar down from leaves
- Cambium: Very thin growth layer — the tree’s “engine”
- Sapwood (xylem): Light-colored wood 1–3 inches thick — this is where sap flows up in early spring
- Heartwood: Dark center wood — older, dry, carries no sap
Your target zone is the sapwood. On a standard sugar maple with average bark thickness, drilling 1.5–2 inches total depth from the outer bark surface puts your spile squarely in the sapwood.
The Consequences of Getting It Wrong
Too shallow (under 1 inch into total depth): The spile sits in bark and cambium tissue. No sapwood is accessed, so sap flow is minimal or absent. The tap may also be loose and fall out. Too deep (over 2.5 inches on average trees): You’ve entered the heartwood, which carries no sap. You’ve also created a larger wound for the tree to compartmentalize, and the heartwood can contaminate your sap with an off-flavor. The optimal 1.5–2 inch depth minimizes wound size while maximizing sap flow.
The Proven Depth: Finding the Sweet Spot
The 1.5–2 inch standard has been validated by generations of maple syrup producers and confirmed by university extension programs in Vermont, New York, and Canada. Cornell University’s maple program specifically recommends drilling no deeper than 2 inches into the sapwood. The Vermont Maple Sugar Makers’ Association advises 1.5 inches as the minimum for reliable sap flow in most sugar maple stands.
How Tree Size Affects Drilling Depth
Bark thickness varies significantly with tree age and species. Young sugar maples (10–12 inch diameter) have bark roughly 0.5–0.75 inches thick. Older trees (18+ inch diameter) may have bark 1.5–2 inches thick. The total drilling depth accounts for bark thickness plus sapwood penetration:
| Tree Diameter | Bark Thickness | Recommended Drill Depth | Max Taps Allowed |
|---|---|---|---|
| 10–17 inches | ~0.5 in. | 1.5–2 inches | 1 tap |
| 18–24 inches | ~0.75–1 in. | 2–2.25 inches | 2 taps |
| 25+ inches | ~1–2 in. | 2.25–2.5 inches | 3 taps |
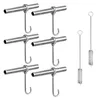
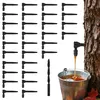
Tools You’ll Need for the Job
You need very little equipment to tap a maple tree correctly:
- Drill: Cordless drill with fresh batteries (cold weather drains them fast)
- Drill bit: 7/16-inch spile bit (matches standard spile diameter) — mark depth at 1.75 inches with tape
- Spile (tap): Stainless steel or food-safe plastic — stainless is more durable and reusable
- Collection bucket or bag: 1–2 gallon capacity with a cover to keep debris out
- Mallet: To gently seat the spile without splitting the bark
Best Overall Maple Tapping Kit
Codesteel Stainless Steel Maple Syrup Tapping Kit, Maple Tree Taps, Spiles for T
Professional stainless steel spiles with food-grade tubing and collection bags — everything needed to tap maple trees and harvest sap.
- Best for: Backyard maple syrup making with 1–5 trees
- Why we picked it: Stainless steel resists rust and lasts multiple seasons
- Main drawback: Collection bags require daily monitoring during heavy flow
Compare more maple syrup tapping options
 Option 1 31pcs Maple Syrup Tapping Kit, Birch Tree Taps with Matching
|
 Option 2 20 Sets Maple Syrup Tapping Kit Include 20 Maple Tree Taps S
|
 Option 3 Maple Syrup Tapping Kit, Upgrade Maple Taps Set Include (30)
|
As an Amazon Associate we earn from qualifying purchases.
A Step-by-Step Guide to Drilling the Perfect Tap Hole
Step 1: Choose a Healthy, Mature Tree
Select a sugar maple (Acer saccharum) or red maple at least 10 inches in diameter at chest height. The tree should show no signs of disease, dead branches, or previous tap hole damage in the intended drilling zone. Healthy cambium is bright green just under the bark — scratch a small spot with a fingernail to check.
Step 2: Find the Best Spot on the Trunk
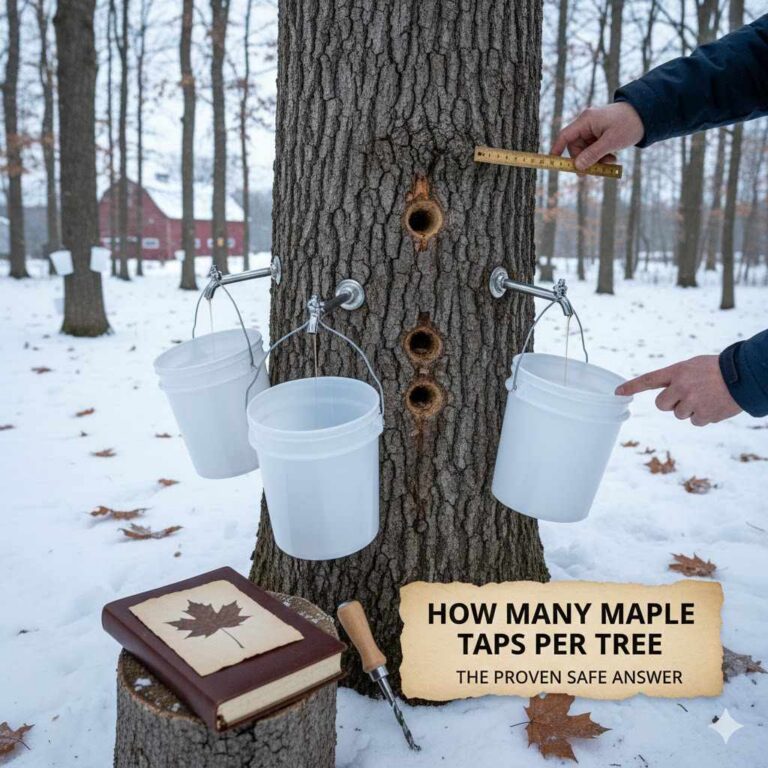
Tap on the south side of the tree where solar warming promotes sap flow. Drill at least 6 inches away from any previous tap holes — fresh sapwood heals around old holes in 3–5 years, but drilling directly into a previous wound reduces sap flow by up to 40%. Ideal height is 2–4 feet from the ground for easy bucket access.
Step 3: Mark Your Drill Bit
Wrap electrical tape around your 7/16-inch bit at exactly 1.75 inches from the tip. This is your depth stop. If drilling an older tree with thick bark, measure bark thickness first (use a nail to probe) and add that to your 1.5-inch sapwood target depth.
Step 4: Drill the Hole
Hold the drill at a slight upward angle — approximately 5–10 degrees above horizontal. This slope helps sap drain downward toward the tap by gravity. Drill smoothly at medium speed. Stop when the tape marker reaches the bark surface. Clean, light-colored wood shavings confirm you’ve entered the sapwood correctly.
Step 5: Clean the Hole and Insert the Tap
Blow out any wood chips from the hole with a quick puff of air. Insert the spile by hand first to check alignment, then seat it firmly with 2–3 light mallet taps. The spile should be snug but not driven in so hard that it splits the surrounding bark. A small amount of sap may begin dripping immediately — that’s a good sign.
Step 6: Hang Your Bucket and Wait
Attach your collection bucket or sap sack to the spile hook. Check daily — a good tap on a productive day can yield 1–2 gallons of raw sap. Sap runs best when nights drop below freezing and days warm to 40–50°F. This freeze-thaw cycle is what drives pressure and pulls sap up from the roots.

Common Mistakes and How to Avoid Them
- Drilling at a downward angle: Sap flows toward the tap by gravity — tilt up 5–10° instead
- Using a too-large bit: Anything wider than 7/16″ creates an oversized wound the tree struggles to heal
- Tapping too early in the season: Cold temperatures below 25°F stop sap flow — wait for consistent freeze-thaw cycles
- Leaving taps in too long: Remove all taps by mid-April before leaves emerge — late sap turns bitter and “buddy”
- Tapping the same spot two years in a row: Old wound wood (callus) blocks sap — always move to fresh wood 6+ inches from the previous hole
Frequently Asked Questions (FAQ)
What size drill bit is best for tapping maple trees?
Use a 7/16-inch (0.4375″) drill bit — this is the standard size that matches most commercial spiles and produces a hole that seals properly when the tap is removed. Some older spile designs use a 5/16-inch bit; always match the bit to your spile diameter.
What happens if I drill too deep?
Drilling past 2.5 inches enters the heartwood, which carries no sap. Sap flow stops, the deeper wound takes longer for the tree to compartmentalize, and heartwood shavings can off-flavor your collected sap. If you realize you’ve drilled too deep, remove the tap, plug the hole with a clean wooden dowel, and select a new location at least 6 inches away.
Does tapping hurt the maple tree?
Done correctly, tapping causes minimal long-term harm. Maple trees are resilient — a properly sized tap hole heals in 3–5 growing seasons. Studies at the University of Vermont show that trees tapped for decades using correct methods show no measurable reduction in growth or health compared to untapped trees. Never tap trees under 10 inches in diameter, and limit taps to one per 10 inches of trunk diameter.
When is the best time to tap maple trees?
The maple sap season runs roughly late January through March in most of North America, depending on latitude. Tap when nighttime temperatures consistently drop below 32°F and daytime temperatures climb to 40–50°F. In Vermont and New York, this typically means February. In colder regions like Quebec or northern Minnesota, March is more common.
Can I reuse the same tap hole next year?
No — never reuse the same hole. The tree forms wound wood (callus) around the previous tap hole that blocks sap flow. Always drill a fresh hole at least 6 inches away from any previous tap hole. After 3–5 years, the old site has healed enough to tap again if you wish.
What if no sap comes out after I tap the tree?
If sap doesn’t flow within a day of tapping, check the temperature — sap only flows during freeze-thaw cycles. If temperatures are right, verify your drill depth (you may have missed the sapwood) and check that the spile is fully seated and not blocked by bark chips. You may also have tapped into dead or diseased wood — check for dark discoloration in the wood shavings.
What are the light-colored wood shavings I see when drilling?
Light-colored, slightly moist shavings confirm you’ve reached the sapwood — exactly where you want to be. If shavings are dark brown or dry, you’ve entered the heartwood and drilled too deep. Clean white shavings with a slight moisture content mean your depth is correct and sap flow should begin when conditions are right.
Conclusion: Tap with Confidence and Enjoy the Sweet Reward
The perfect maple tap depth — 1.5 to 2 inches into the sapwood — is one of the most well-tested standards in traditional woodcraft. Mark your drill bit, aim for the south side of a healthy mature maple, tilt your drill slightly upward, and stop at 1.75 inches for most trees. Follow these steps and you’ll be rewarded with a steady flow of fresh sap ready to boil down into pure maple syrup.