How Do You Remove Shellac From Wood: Effortless Guide
Removing shellac from wood is a straightforward process. Generally, a denatured alcohol solvent is the most effective and least damaging method for dissolving and lifting shellac finishes, ensuring your wood is prepped for its next life.
Hey there, fellow wood enthusiasts! Md Meraj here. Ever found a beautiful piece of furniture with a lovely, but perhaps worn or outdated, shellac finish? Maybe you’re looking to refinish it or simply want to see the natural grain shine through. Whatever your reason, knowing how to remove shellac from wood is a super handy skill in your DIY toolkit. It might sound a bit daunting at first, but trust me, with the right approach, it’s much simpler than you think. We’ll walk through it together, step-by-step, so you can achieve a clean, smooth surface ready for your next creative project. Get ready to uncover the beauty beneath that old finish!
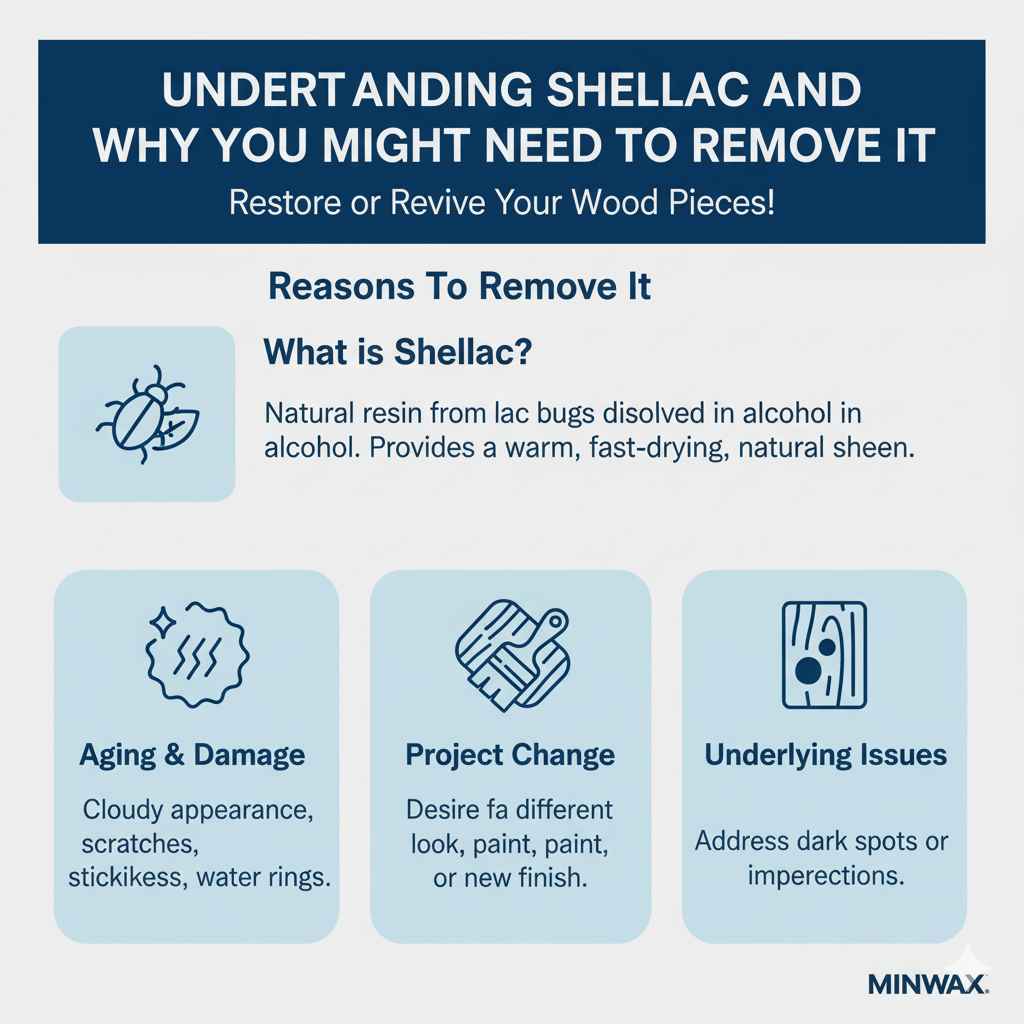
Understanding Shellac and Why You Might Need to Remove It
Shellac is a fascinating natural resin secreted by the tiny lac bug. When dissolved in alcohol, it creates a beautiful, fast-drying finish that provides a warm glow and decent protection. It’s been a popular choice for wood finishing for centuries, known for its easy application and natural sheen. You’ll often find it on antique furniture, musical instruments, and even some food products (though that’s a different grade!).
So, why would you want to remove it? Well, like any finish, shellac can age. It might develop a cloudy appearance, get scratched, or become sticky over time. Perhaps the existing finish isn’t what you want for a new project, or you’ve discovered dark spots or water rings that you need to address before applying a new coating. Sometimes, you might inherit a piece with a shellac finish and simply prefer a different look, like natural wood or a modern paint. Whatever the reason, knowing how to effectively and safely remove it is key to restoring or changing the look of your wood pieces.
Safety First: Preparing Your Workspace and Yourself
Before we dive into the nitty-gritty of removal, let’s talk safety. This is crucial, not just for you but also for the longevity of your project. Working with solvents requires a little preparation to ensure a smooth and safe experience.
Ventilation is Key
Most shellac removers, especially alcohol-based ones, emit fumes. It’s absolutely vital to work in a well-ventilated area. Open windows wide, use fans to circulate air, and if you’re working indoors and can’t get enough airflow, consider investing in a mask with organic vapor cartridges. A stuffy environment is not only unpleasant but can also be unhealthy. Think of it as giving your project—and yourself—plenty of fresh air to breathe!
Protect Yourself
Your skin and eyes are precious. Always wear chemical-resistant gloves, like nitrile or neoprene, to protect your hands from drying out or irritation. Safety glasses or goggles are a must to prevent any splashes from reaching your eyes. A long-sleeved shirt and pants will also offer an extra layer of protection.
Protect Your Surroundings
Shellac removers can damage or discolor surfaces they come into contact with, so protect your workspace. Lay down old newspapers, drop cloths, or plastic sheeting on the floor and any nearby stable furniture. This will catch drips and spills, making cleanup much easier and preventing accidental damage.
Fire Safety
Denatured alcohol is flammable. Keep all flammable removers away from open flames, sparks, pilot lights, and excessive heat. Extinguish any open flames in the vicinity. It’s a good practice to have a fire extinguisher handy, though with proper precautions, the risk is very low.
Gathering Your Tools and Materials
To successfully remove shellac from wood, you’ll need a few essential items. Having everything ready before you start will make the process much smoother. Here’s a checklist of what you’ll likely need:
- The Remover: Denatured alcohol is the go-to solvent for shellac. You can find this at most hardware stores.
- Scrapers: Plastic or metal putty knives (a flexible one is great for curves) for gently lifting softened finish.
- Abrasive Pads: Fine-grade steel wool (0000 is usually best for delicate finishes) or synthetic abrasive pads.
- Rags: Plenty of clean, lint-free rags for wiping and applying.
- Gloves: Chemical-resistant gloves (nitrile or neoprene).
- Eye Protection: Safety glasses or goggles.
- Drop Cloths/Newspaper: To protect your work area.
- Optional: Mineral spirits (for cleaning up afterwards if needed), a small brush or toothbrush (for crevices).
Choosing the right grade of steel wool is important. For shellac, which is relatively soft, 0000-grade steel wool is usually sufficient. It’s fine enough not to scratch most hardwoods while still being effective at lifting the dissolved shellac. If you’re unsure, test on an inconspicuous area first!
Step-by-Step: How to Remove Shellac from Wood
Now for the fun part! Let’s get that shellac off. This method focuses on using denatured alcohol, which is generally the most recommended and least damaging way to tackle shellac.
Step 1: Test in an Inconspicuous Area
Before you start on the main surface, find a hidden spot—like the underside of a table or the back of a leg—and test your chosen method. Apply a small amount of denatured alcohol and see how it reacts with the finish. This helps you gauge how long to let it soak and if your tools are working effectively without damaging the wood underneath.
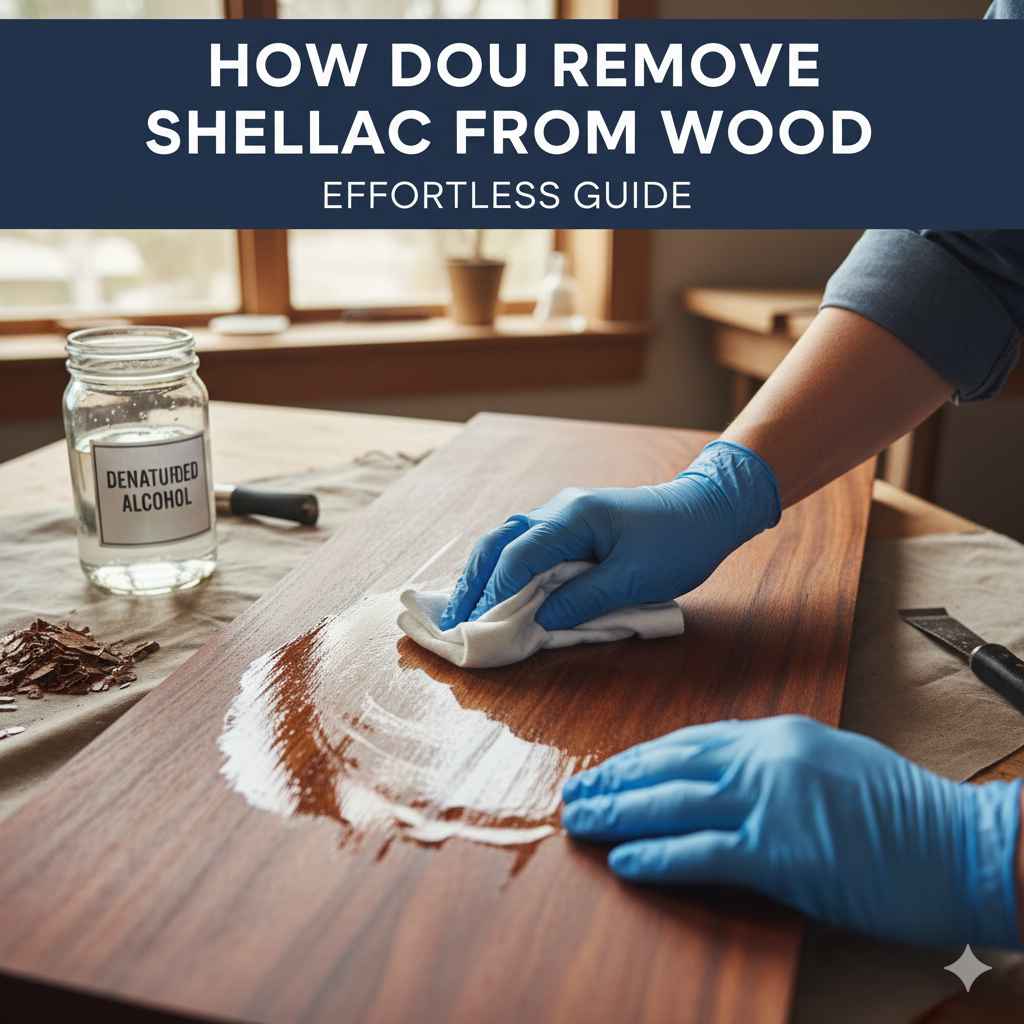
Step 2: Apply the Denatured Alcohol
Dampen a clean, lint-free rag with denatured alcohol. You don’t want it dripping, just nicely saturated. Gently wipe it onto a section of the shellac finish. Don’t scrub vigorously at this stage; you’re just wetting the surface to start dissolving the shellac.
Step 3: Let the Alcohol Work
This is where patience comes in! Allow the denatured alcohol to sit on the shellac for a few minutes. You’ll start to see the shellac soften and become slightly sticky or gummy. The exact time will depend on how many coats of shellac are present and how old it is. You might need to reapply alcohol to keep the area moist if it starts to dry out.
Step 4: Gently Scrape or Rub
Once the shellac has softened, take your plastic scraper or a bundle of 0000-grade steel wool. Gently scrape or rub the softened shellac away. Work with the grain of the wood. The shellac should lift off relatively easily. If it’s still hard, apply more alcohol and let it sit longer. For intricate areas or carvings, a toothbrush or a small, pointed tool can be helpful.
Here’s a little tip: If using steel wool, you can dampen it with denatured alcohol. This helps the steel wool glide more smoothly and aids in lifting the dissolved shellac, creating a slurry that you can wipe away.
Step 5: Wipe Away Residue
As you remove the shellac, use clean rags to wipe away the softened finish and any alcohol residue. This prevents the dissolved shellac from redepositing onto the wood surface. Keep turning your rag to a clean section to effectively pick up the residue.
Step 6: Repeat and Progress
Work in small sections, repeating steps 2 through 5. Tackle one manageable area at a time to ensure you’re effectively removing all the shellac without letting it dry and harden again. Check your progress frequently. You might be surprised at how quickly it dissolves!
Step 7: Final Cleaning and Inspection
Once you’ve removed the bulk of the shellac, give the entire piece a thorough wipe-down with a clean rag dampened with denatured alcohol. This removes any lingering traces of shellac and alcohol. Look closely for any missed spots or stubborn areas. If you find any, you can spot-treat them with more alcohol and a bit more scraping or steel wool. Ensure the surface is smooth and free of any residue before proceeding to the next step (like sanding or applying a new finish).
Alternative Methods and Considerations
While denatured alcohol is the star player for shellac removal, there are a couple of other things to keep in mind, especially for tougher spots or different scenarios.
When Alcohol Isn’t Enough (Rarely)
In very rare cases, if the shellac has been heavily overcoated or seems unusually resistant, you might consider a more aggressive chemical stripper. However, this is usually not necessary for shellac and can potentially damage the wood or surrounding finishes if not handled with extreme care. Always perform a spot test first. For most applications, denatured alcohol is sufficient and much safer.
Dealing with Built-Up or Damaged Areas
If you have very thick, peeling, or uneven layers of shellac, you can start by gently using a scraper or even a heated scraper (used with extreme caution and expertise) to lift off the most prominent layers before applying alcohol. This can save you some solvent and time. However, for beginners, sticking to denatured alcohol is the safest bet.
What About Other Wood Finishes?
It’s important to know that denatured alcohol is specifically effective for shellac. It won’t typically dissolve finishes like lacquer, varnish, or polyurethane. If you encounter a piece with an unknown finish, testing with denatured alcohol first is wise. If it doesn’t dissolve the finish, you’ll need to research methods for removing those specific types of coatings. Identifying the finish can sometimes be tricky, but a good resource like Wood Database’s Finishing and Refinishing section can offer clues.
Post-Removal: Preparing for Your Next Step
Once you’ve successfully stripped the shellac, your wood is likely ready for its next transformation. But before you apply that beautiful new finish, a little more attention is needed.
Sanding for Smoothness
Even after careful removal, there might be minor imperfections, rough spots, or remnants of old finish. Light sanding is usually the next crucial step. Start with a medium-grit sandpaper, perhaps 120 or 150, to get the surface truly smooth and even. Follow up with finer grits, like 180 and then 220, to prepare the wood for any new finish. Sanding with the grain is paramount to avoid unsightly scratches.
A good example of a quality sandpaper to consider is from brands like 3M’s Pro Grade series. They offer consistent grit and performance that’s great for DIYers.
Cleaning Off Sanding Dust
After sanding, you’ll have a layer of fine dust. This must be completely removed before applying a new finish, or it will be trapped under your new coating, ruining the smooth appearance. Use a brush, a vacuum with a brush attachment, and then a tack cloth to pick up every last bit of dust. A tack cloth is a sticky cloth designed specifically for this purpose and is incredibly effective.
Assessing the Wood
With the old finish gone, take a good look at the exposed wood. You might discover beautiful grain patterns you couldn’t see before. Check for any repairs or damage that you might need to address now that the surface is clean. This is also the perfect time to decide on your new finish – be it stain, paint, oil, or a new varnish. Your wood is now a blank canvas!
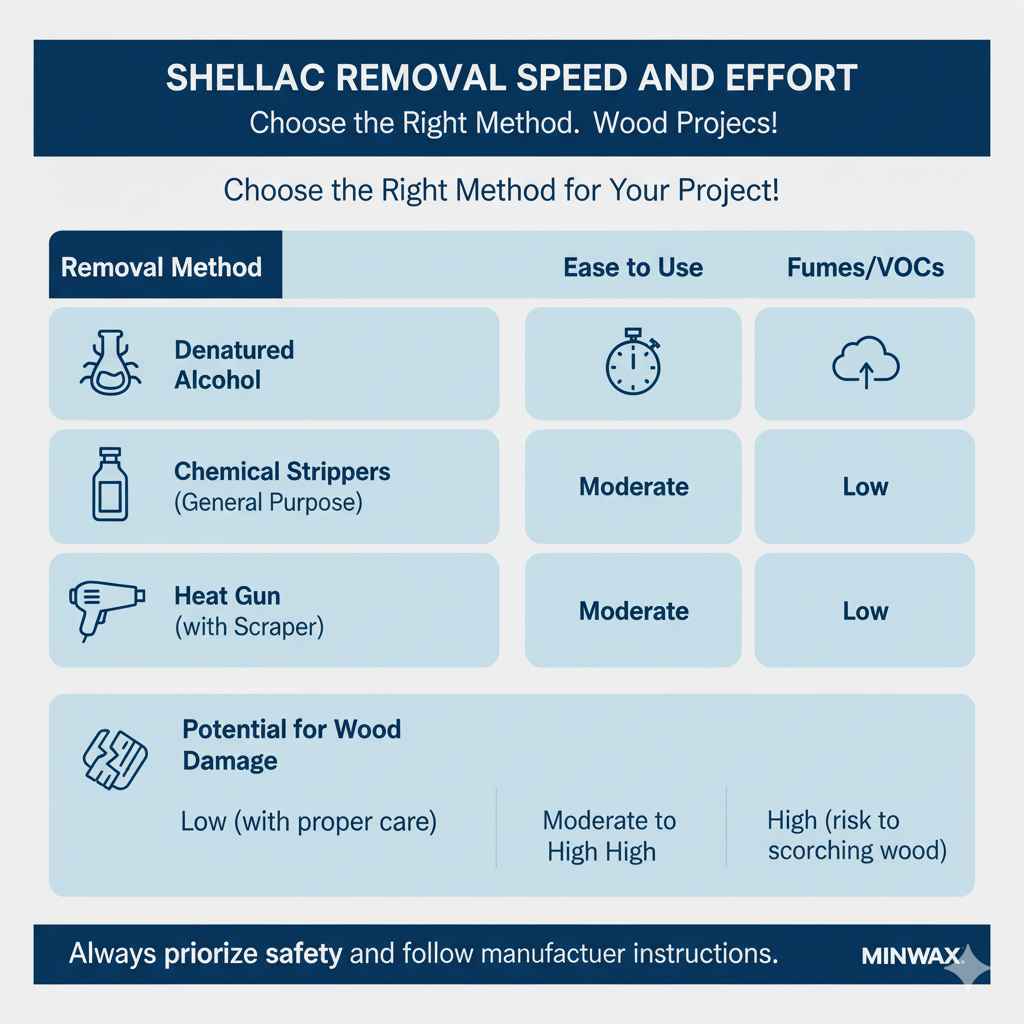
Table: Shellac Removal Speed and Effort
| Removal Method | Key Solvent | Ease of Use (Beginner) | Speed | Potential for Wood Damage | Fumes/VOCs |
|---|---|---|---|---|---|
| Denatured Alcohol | Denatured Alcohol | High | Moderate | Low (with proper care) | Moderate |
| Chemical Strippers (General Purpose) | Varies (e.g., Methylene Chloride – use with extreme caution) | Moderate to Low (requires more care) | Fast to Moderate | Moderate to High (depending on stripper and application) | High |
| Heat Gun (with Scraper) | N/A | Low (requires skill and caution) | Moderate | High (risk of scorching wood) | Low |
Note: Always prioritize safety and follow manufacturer instructions, especially when using chemical strippers or heat guns. Denatured alcohol is generally the safest and most effective method for shellac.
Frequently Asked Questions (FAQ)
Q1: Can I use regular rubbing alcohol to remove shellac?
A: While rubbing alcohol (isopropyl alcohol) can sometimes soften shellac, denatured alcohol is much more potent and effective for complete removal. Denatured alcohol is specifically designed to be a solvent for shellac and other finishes.
Q2: How do I know if my furniture has a shellac finish?
A: Shellac is often described as having a warm, amber tone and a fast-drying, somewhat soft finish. If you apply denatured alcohol to a small, inconspicuous area and the finish becomes sticky or dissolves, it’s likely shellac. Other finishes like lacquer or polyurethane will typically not react the same way.
Q3: Will removing shellac damage or discolor the wood underneath?
A: When using denatured alcohol and gentle scraping or steel wool, the risk of damaging the wood itself is very low. However, if you scrub too aggressively, you could potentially dull the wood grain. Always use light pressure and work with the grain. Discoloration is usually not an issue with alcohol removal, but always test first.
Q4: How long does it take to remove shellac?
A: The time it takes can vary significantly depending on the number of shellac coats, how old it is, and the size of the piece. Small items might take an hour or two, while larger furniture pieces could take an entire afternoon or longer. Working in small sections helps manage the process.
Q5: What’s the best way to clean shellac out of intricate carvings or corners?
A: For detailed areas, use a smaller tool like a toothbrush or a pointed wooden skewer dipped in denatured alcohol. You can also tightly wadding up a bit of steel wool and using tweezers to get into tight spots. Be patient and work carefully.
Q6: Do I need to sand after removing shellac with denatured alcohol?
A: Yes, it’s almost always recommended. Even after careful removal, light sanding is usually necessary to smooth out the surface, remove any last traces of shellac, and prepare the wood for a new finish. Plan on sanding from a medium grit (like 120-150) down to a fine grit (like 220).
Q7: What if the shellac is really thick?
A: If you have very thick, built-up layers of shellac, you can sometimes gently scrape away the bulk of it with a plastic scraper or a metal scraper (used carefully) before applying denatured alcohol. This can speed up the process. However, always proceed with caution and test the scraper method first to avoid gouging the wood.
Conclusion
There you have it! Removing shellac from wood doesn’t have to be a mystery or a chore. By using denatured alcohol, working patiently in well-ventilated spaces, and protecting yourself and your surroundings, you can effectively lift that old finish and reveal the beautiful wood beneath. It’s a rewarding process that opens up a world of possibilities for your furniture and woodworking projects. Remember, practice makes perfect, and with each piece you tackle, you’ll become more confident and skilled.
This technique is tried and true, and it’s a fundamental skill that will serve you well in your DIY journey. Now that your wood is prepped and ready, you can move on to applying that stain, paint, or protective topcoat that will give your piece a new lease on life. So go ahead, gather your supplies, and enjoy the satisfaction of a successful refinishing project. Happy woodworking!