Wood French Cleat: 45° Angle, Stud Mounting & Sizing
A wood French cleat locks two 45-degree beveled strips together by gravity – one screwed to the wall, one to the back of a cabinet, shelf, or mirror. Screw the wall-side cleat into studs, not just drywall anchors, or a heavy load can tear loose. This guide covers the exact bevel angle and cleat dimensions, stud-mounting rules, step-by-step installation, and the best wood to rip cleats from.
Insert your Affiliate Disclosure reusable block here
What Is a Wood French Cleat?
A wood French cleat is a two-piece hanging system cut from a single board at a 45-degree bevel. One strip is screwed to the wall with the angled edge facing up and toward the wall; the matching strip is screwed to the back of whatever you’re hanging with its angled edge facing down and away. Set the two together and the bevels wedge against each other – gravity does the locking, so no clips, brackets, or extra hardware are needed.
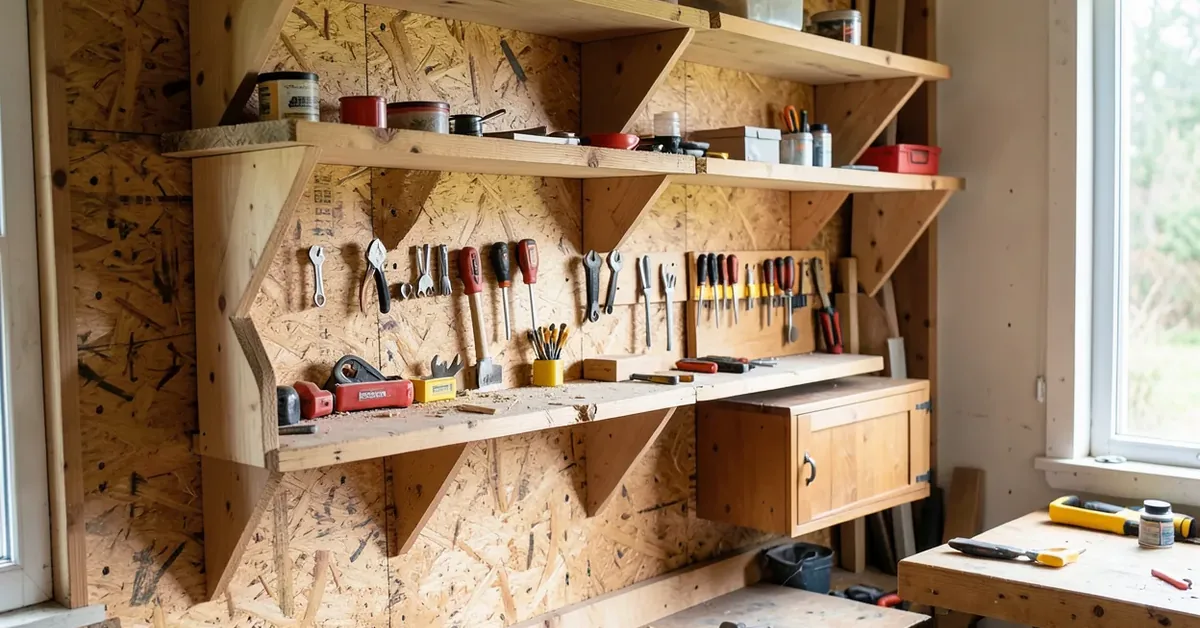
Because the wall-side strip can run the full width of a cabinet or shelf, the load is carried along the entire length of the cleat instead of concentrating on one or two screws. That’s the main reason French cleats show up on so many shop tool-storage builds as well as kitchen cabinets and gallery walls – they hold real weight and let you lift the piece straight off to rearrange or repair it.
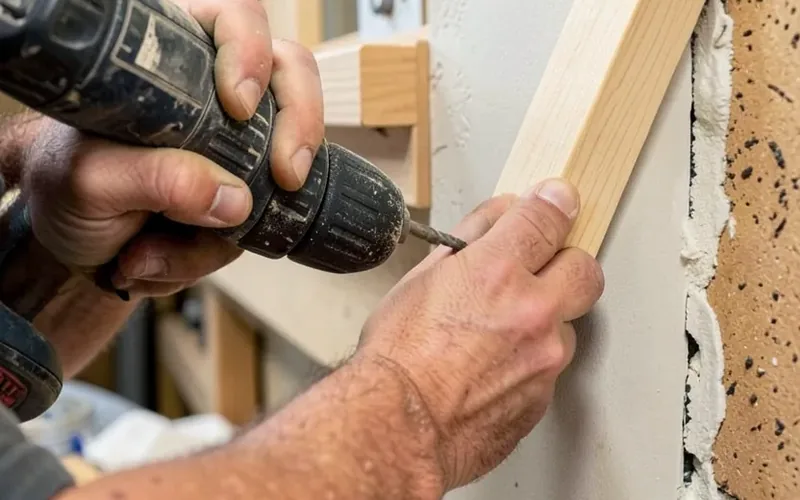
The 45-Degree Angle and Cleat Dimensions
The bevel is cut at 45 degrees on a table saw – tilt the blade, rip a board down its length, and the two resulting edges are a matched pair. A shallower angle lets the pieces slide apart too easily under load; a steeper angle shrinks the locking surface. 45 degrees is the standard because it balances holding strength against how easy the cut is to make accurately.
| Spec | Typical Range | Why It Matters |
|---|---|---|
| Bevel angle | 45° (industry standard) | Maximizes the friction-locking surface without an overly fussy cut |
| Cleat width | 2.5″ – 3″ | Wide enough to spread the load, narrow enough to rip cleanly in one pass |
| Material thickness | 5/8″ – 3/4″ | Thicker stock resists snapping at the thin bevel tip under weight |
| Preferred material | 3/4″ Baltic birch plywood | Holds screws well at the cut edge and won’t split along the grain the way solid wood can |
For exact width recommendations by project type and load, see our dedicated breakdown on how wide French cleats should be.
Mounting to Studs: Why Drywall Anchors Aren’t Enough
The wall-side cleat is the connection that carries the entire load, and drywall alone isn’t rated for it. For anything heavier than a light picture frame – a wall cabinet, a loaded tool-storage panel, a bookshelf – run a stud finder along the mounting line first and drive the cleat’s screws into at least two studs, three or more for a full shop wall. Drywall anchors can hold for a while, then pull out gradually as the load flexes the wall over months of use.
📊 Most U.S. wall framing is spaced 16 inches on center (24″ in some newer construction), which is why a cleat cut to at least 32″-48″ long makes it realistic to catch two or three studs in one mounting line – Source: Family Handyman, 2026.
If you can’t land two full studs at the height you want, screw a full sheet of 3/4-inch plywood to the studs first and mount the cleats to that instead – it turns the whole wall into solid backing and lets you position cleats anywhere, which is exactly how most modular DIY tool storage walls are built. For the stud layout itself, see how far apart wall studs typically are.
“In our shop we always dry-fit the two cleat halves before the final screw-down – if there’s a hair of gap at the bevel tip, the fit loosens over months of taking the load on and off. A clean, tight 45-degree cut matters more than most people expect.”
|
Best French Cleat Hardware Pick
|
As an Amazon Associate we earn from qualifying purchases.
How to Build and Install a Wood French Cleat
- Set the table saw blade to 45°: Tilt the table saw blade to 45 degrees and rip a length of 3/4-inch plywood down its center, producing two matching beveled strips from one board.
- Mark and level the wall cleat: Hold a 4-foot level against the wall at mounting height and mark a straight guideline, then locate at least two wall studs with a stud finder and mark their centers.
- Screw the wall cleat into studs: Drive 2.5- to 3-inch wood screws through the wall-side cleat, angled edge up and toward the wall, and into the studs – not just drywall.
- Attach the mating cleat to the item: Screw the second beveled strip to the back of the cabinet, shelf, or panel with the angled edge facing down and away from the surface.
- Hang and check the fit: Lower the item onto the wall cleat so the two 45-degree edges interlock, then confirm it sits level and doesn’t rock before loading it.
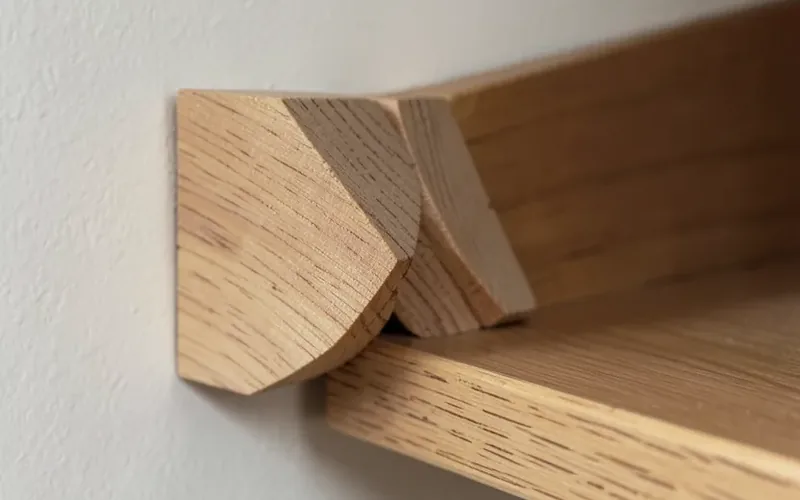
Best Wood and Materials for French Cleats
3/4-inch Baltic birch plywood is the material most shop-built cleats are cut from: it’s dimensionally stable, holds screws well right at the cut edge, and the cross-laminated layers won’t split the way solid wood can when the thin bevel tip takes a hard knock. Solid hardwoods like oak or maple work too and can be finished to match furniture, but the bevel’s grain direction needs care – a bevel ripped parallel to short grain is the most common place a wood cleat cracks under load.
- 3/4" Baltic birch plywood – the default choice for shop walls and tool storage; strong, cheap, and consistent
- Oak or maple – better where the cleat will be visible, at the cost of extra care around grain direction on the bevel
- Pine – fine for lightweight decor and picture frames, not recommended for cabinets or a loaded tool wall
Where French Cleat Systems Shine
A single style of cleat is the backbone of most commercial modular shop-wall systems – the same 45-degree interlock lets you build a wall of interchangeable shelves, bins, and tool-holding panels that snap on and off without a screwdriver. That’s the real advantage over a fixed shelf: once the wall cleats are up, reconfiguring the whole layout is a matter of lifting panels off and moving them, not re-drilling anything.
It’s worth comparing this to lighter-duty options before committing shop space to a full cleat wall – see what a sawtooth hanger is for a simpler, lower-weight alternative, or our DIY tool rack build plan if you want a project that pairs directly with a cleat wall.
Maintenance Tips for a Wood French Cleat
Wipe cleats down with a dry or lightly damp cloth – standing moisture is what actually causes warping and rot, not routine dusting. Once a year, pull one hung item and check the bevel edges for cracking or splintering, especially on solid-wood cleats, and re-seat anything that rocks or sits unevenly before it gets worse.
Frequently Asked Questions About Wood French Cleats
What is a wood French cleat?
A wood French cleat is a two-piece mounting system cut from wood at a 45-degree bevel. One strip is screwed to the wall with the angled edge facing up, and the matching strip is screwed to the back of the item being hung with the angled edge facing down. Setting the second piece onto the first locks the two by gravity.
How do you use a wood French cleat?
Screw the wall-side cleat level and into at least two studs, angled edge up and toward the wall. Screw the matching cleat to the back of the cabinet, shelf, or frame, angled edge down. Lower the item so the two bevels interlock – no additional hardware holds it in place, so it lifts straight off for repositioning.
What are the advantages of a wood French cleat?
A French cleat spreads an item’s weight along the full length of the wall cleat instead of a single screw point, self-levels because the beveled edges seat flush, and lets you lift heavy cabinets or shelves off the wall without unscrewing anything – useful for reconfiguring a shop wall or swapping seasonal decor.
What types of objects can be hung with a wood French cleat?
Cabinets, floating shelves, mirrors, pegboard and tool-storage panels, headboards, and artwork are the most common uses. Because the load rides on a full strip of wood rather than a single bracket, French cleats handle heavier and larger items – wall cabinets, workbenches, and modular shop-storage panels – better than a single picture hook or sawtooth hanger.
What angle are French cleats cut at?
45 degrees. Tilting a table saw blade to 45 degrees and ripping a board down its length produces two matching beveled edges from one piece of stock. A steeper or shallower angle either reduces the locking surface or makes the two halves slide apart too easily under load.
Do French cleats need to be screwed into wall studs?
For anything heavier than light decor, yes. Drywall anchors alone can pull out under sustained weight, especially with a cabinet or loaded tool wall. Locate studs with a stud finder, mark them on the level guideline, and drive the wall cleat’s screws into at least two studs – three or more for a full shop-wall system.
Conclusion
A wood French cleat comes down to three things: a clean 45-degree bevel, the right stock width and thickness for the load, and a wall-side cleat that’s actually screwed into studs. Get those right and the same simple interlock that holds a cabinet also lets you build a reconfigurable shop storage system you can rearrange for years without patching a single extra hole.
Sponsored / affiliate links. As an Amazon Associate I earn from qualifying purchases. I may earn additional commission from eligible campaigns.