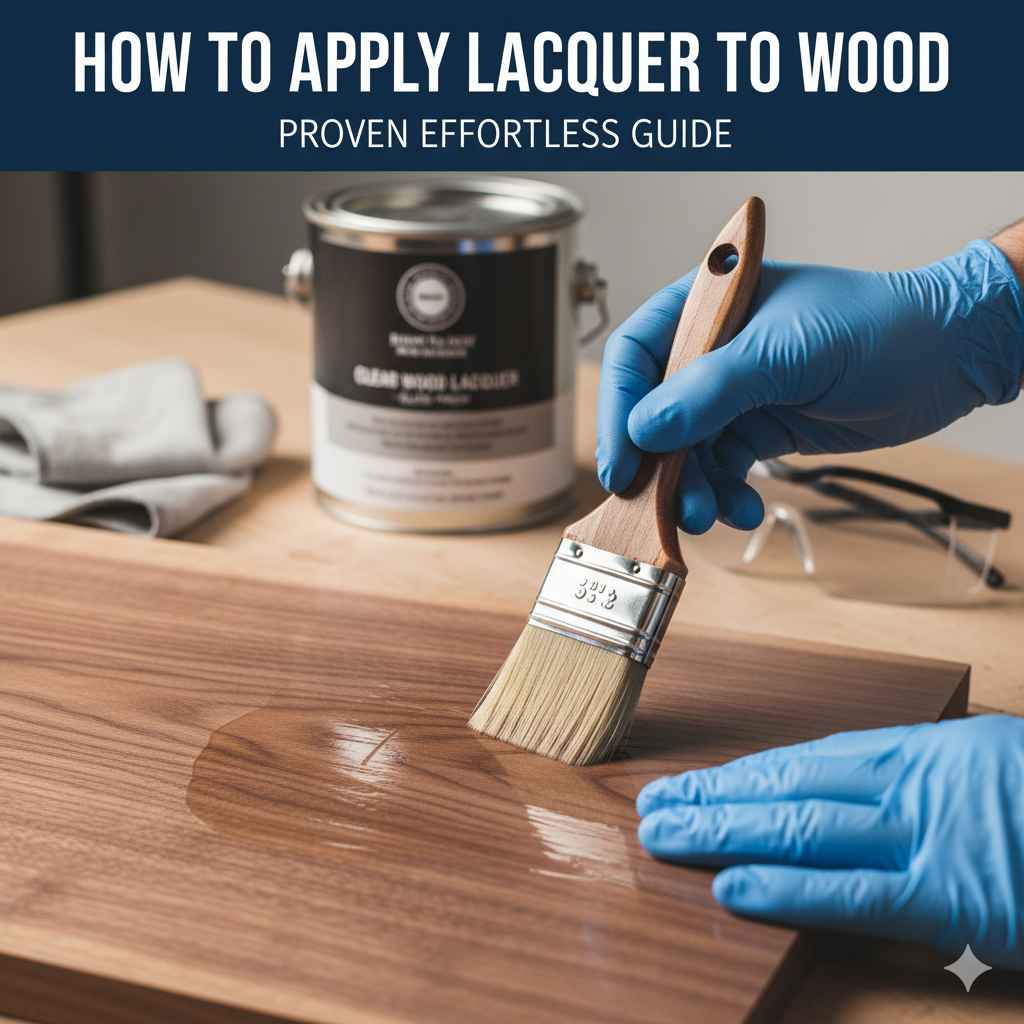
How to Apply Lacquer to Wood: Brush, Spray & Finish Guide
Lacquer gives wood a hard, protective finish in 3–5 coats — but brush on too thick or skip sanding between coats, and you’ll end up with orange-peel texture or trapped bubbles that ruin the surface. This guide covers every step: surface prep, brush vs. spray application, lacquer types, drying times, and the exact technique pros use to get a flawless lacquered wood finish the first time.
Insert your Affiliate Disclosure reusable block here
To apply lacquer to wood: sand to 220-grit, wipe with a tack cloth, then apply 3–4 thin coats using a natural-bristle brush or HVLP spray gun. Let each coat dry 30–60 minutes, sand lightly with 320-grit between coats, then allow the final coat to cure 24–48 hours before use.
What Is Lacquered Wood?
Lacquered wood is wood that has been coated with lacquer — a fast-drying, solvent-based finish that hardens by evaporation to form a protective film on the surface. The result is a hard, clear coating that can be glossy, satin, or matte depending on the product used.
Lacquered wood is a category of finished wood surface where one or more coats of lacquer — a resin dissolved in a volatile solvent — have been applied and allowed to dry into a hard, protective film. Unlike varnish, lacquer cures by solvent evaporation rather than chemical oxidation, making it fast-drying and repairable.
You’ll find lacquered wood on kitchen cabinets, furniture, musical instruments, and decorative boxes. The finish is prized for its clarity — it doesn’t significantly amber or darken the wood’s natural color — and for its speed: multiple coats can often be applied in a single day.
Why Choose Lacquer for Your Wood Projects?
Lacquer is one of the most popular wood finishes for DIYers and professionals alike. It dries incredibly fast, which means you can apply multiple coats in a day. It also creates a hard, durable surface that’s resistant to water, alcohol, and general wear and tear — making it ideal for kitchen cabinets, tabletops, and decorative pieces.
Its clarity is another major advantage: lacquer won’t significantly darken the natural color of your wood, letting its grain shine through. Applied correctly, it delivers a beautiful high-gloss or satin sheen that other finishes struggle to match for sheer speed of build.
Tools and Materials You’ll Need
Before starting, gather all your supplies. Having everything ready makes the process smoother and reduces the chance of rushed mistakes.
Essential Supplies
- Lacquer — Choose based on your project (see lacquer types section below). Pre-catalyzed lacquer is the best all-around choice for beginners.
- Sandpaper — 100–150 grit for initial sanding, 220 for first prep, 320 between coats, 400+ for final buffing.
- Tack cloths — Essential for removing fine dust before each coat.
- Natural bristle brush — For brush application on larger flat surfaces.
- Foam brush — For small projects or touch-ups without brush marks.
- HVLP spray gun or aerosol lacquer — For the most even, professional finish.
- Lacquer thinner — For cleanup and thinning if needed.
- Nitrile gloves and respirator — Lacquer fumes are strong and flammable. A respirator is mandatory, not optional.
- Safety glasses and drop cloths — Protect yourself and your workspace.
🛒 Recommended Lacquer
Deft Interior Lacquer Sanding Sealer — Fast-drying, water-clear nitrocellulose lacquer ideal for furniture, cabinets, and trim. Dries in 30 minutes and sands easily between coats.
Check Price on Amazon →Preparing Your Wood: The Foundation for a Flawless Finish
This is the most critical step. Lacquer highlights everything underneath it — dust, grease, and tiny sanding mistakes all become visible through the finish. Rushing prep will show in your final result no matter how carefully you apply the lacquer.
Step 1: Sanding Your Wood
Start with 100–150 grit to smooth out rough spots, glue residue, or imperfections. Always sand with the grain. Progress to 220 grit for the final prep sand. The surface should feel silky smooth to the touch — run your hand across it to check for any remaining rough spots.
Step 2: Cleaning Off the Dust
After sanding, vacuum the surface with a brush attachment, then wipe down with a dry rag. Finish with a tack cloth — these slightly sticky cloths pick up even the finest dust particles that rags miss. Dust embedded under lacquer is one of the top causes of a bumpy, unprofessional finish.
Step 3: Inspect Your Work
Under good lighting, check for nicks, dents, or remaining imperfections. Use wood filler for any deep spots, let it dry fully, re-sand with fine grit, and wipe clean again with a tack cloth before proceeding.
Applying the Lacquer: Step-by-Step Guide
Patience is key. Aim for thin, even coats — multiple thin coats always beat one thick coat for smoothness and durability.
Step 4: Stir, Don’t Shake!
Gently stir the lacquer before use. Shaking introduces air bubbles that create imperfections in the finish. If the lacquer is too thick, add a small amount of lacquer thinner per the manufacturer’s instructions and stir thoroughly until smooth.
Step 5: First Coat Application
Using a brush: Dip about one-third of the bristles into the lacquer. Tap off excess. Apply in long, even strokes following the wood grain, overlapping each stroke slightly. Hold the brush at a 90° angle and use just the bristle tips to “tip off” the surface — this knocks down brush marks and blends passes together. Use a lacquer-specific natural bristle brush; foam brushes also work well on small surfaces and won’t leave brush marks.
Using an aerosol can: Hold the can 10–12 inches from the surface. Spray in long, sweeping back-and-forth strokes with a 50% overlap on each pass. Don’t stop mid-stroke — pausing creates uneven buildup. Keep the can moving at all times.
Goal for coat 1: A light, even mist over the entire surface. Don’t try for full coverage yet — that comes with subsequent coats.
Step 6: Drying Time
Lacquer dries to the touch in 30–60 minutes. Most products allow recoating in 1–2 hours — check the label. Ensure good ventilation and avoid working in conditions above 70% humidity, which causes blushing (a cloudy, milky appearance). A fan on low helps circulate air without blowing dust onto the wet surface.
Step 7: Light Sanding Between Coats
Once the coat is dry to the touch, lightly sand between coats with 320 grit. The goal isn’t to remove lacquer — it’s to knock down dust nibs, minor ridges, and any slight imperfections. After sanding, wipe off all dust with a tack cloth before applying the next coat.
Step 8: Applying Subsequent Coats
Repeat Steps 5–7 for 3–4 coats total. Each coat builds depth and durability. As coats accumulate, the wood surface becomes richer, deeper, and smoother. For high-wear surfaces like tabletops, 4–5 coats is standard.
Step 9: The Final Coat and Curing
Apply the final coat carefully and evenly. You can optionally do a very light scuff with 400 grit after it dries, then buff with a clean cloth for extra sheen. Lacquer cures fully in 24–48 hours depending on temperature and humidity — treat the piece gently during this window. Full hardness develops over several days.
Spraying Lacquer on Wood: Technique Deep Dive
Spraying lacquer produces the most even, professional finish — no brush marks, no lapping lines. Here’s what you need to get it right with either an HVLP gun or aerosol can.
HVLP Spray Gun Setup
- Pressure: Set your compressor to deliver 4 CFM at 100 PSI for consistent atomization.
- Distance: Hold the gun 6–8 inches from the surface — closer for finer atomization, farther for broader coverage.
- Overlap: Use a 50% overlap on each pass — half the fan pattern on the wet edge, half on fresh wood. This builds even film thickness without thick stripes.
- Speed: Move the gun at a steady pace. Too slow = runs and sags. Too fast = thin, dry-looking coat.
- Thinning: Most lacquers spray best when thinned 10–15% with lacquer thinner for HVLP use. Test on scrap first.
Temperature and Humidity
Ideal conditions for spraying lacquer: 65–75°F and below 70% relative humidity. In humid conditions, the solvent evaporates too slowly and moisture gets trapped in the film, causing blushing. In very hot conditions, the solvent flashes off before the film levels out, creating orange-peel texture.
Common Spray Mistakes to Avoid
- Overspray dust: Lacquer mist can dry in the air before it hits the surface, leaving a white powdery deposit. Keep the gun moving and work in calm air.
- Orange peel: Caused by improper distance, wrong pressure, or overly thick material. Sand back with 400 grit and respray with better technique.
- Drips and runs: Result from spraying too slowly or too close. Let dry completely, sand smooth, respray.
- Blushing: Milky cloudiness from humidity. Apply a light coat of lacquer thinner or use a retarder additive to slow drying.
Tips for a Pro-Level Finish
- Work environment is key: Use a dust-free, well-ventilated area. Avoid direct sunlight and temperatures outside 60–80°F.
- Thin coats always: Multiple thin coats dry faster, are less prone to runs, and build a smoother finish than one thick coat.
- Always follow the grain: Whether brushing or spraying, keep strokes parallel to the wood grain to hide minor imperfections.
- Don’t forget the edges: Edges show wear first — coat them fully and build them up slightly more than flat faces.
- Fix runs after drying: Let any run dry completely, sand smooth with fine grit, then reapply a thin coat.
- Safety first: Lacquer is flammable. Ensure excellent ventilation, wear your respirator and gloves, and keep away from open flames. According to OSHA, proper respiratory protection is mandatory when working with solvent-based finishes.
Lacquer Types and When to Use Them
| Lacquer Type | Key Characteristics | Best For | Beginner-Friendly? |
|---|---|---|---|
| Nitrocellulose | Fast-drying, easy to repair, can yellow over time | Guitars, antique furniture, vintage projects | Moderate — requires good technique |
| CAB-Acrylic | Water-white (no yellowing), more durable than nitro | Light-colored woods, modern furniture | Good — fewer yellowing issues |
| Pre-Catalyzed | Best balance of durability and ease; good moisture/chemical resistance | Cabinets, tabletops, high-traffic furniture | Very good — best all-around choice |
| Water-Based | Low VOCs, less odor, slower drying, may not match solvent depth of gloss | Children’s furniture, low-odor environments | Good — easier cleanup, less hazardous |

Troubleshooting Common Lacquer Problems
- Runs and sags: Applied too thick or moved too slowly. Let dry completely, sand smooth with 320 grit, reapply in thinner coats.
- Blushing (milky/cloudy finish): Moisture trapped during drying. Improve ventilation, reduce humidity, or apply a thin coat of lacquer thinner to the affected area.
- Orange peel: Gun too far away, pressure too low, or material too thick. Thin the lacquer slightly, adjust gun distance, and sand back before respraying.
- Brush marks: Over-brushing or poor-quality brush. Use a natural bristle brush, tip off with bristle ends, and apply long smooth strokes. Foam brushes eliminate this entirely on small surfaces.
- Dust nibs: Dust in the air settling on wet lacquer. Work in a clean environment, use tack cloths before every coat, and sand out with 400+ grit on the final coat.
FAQ: Your Lacquer Questions Answered
How many coats of lacquer should I apply?
For most projects, 3–4 thin coats are sufficient. High-wear surfaces like tabletops and kitchen cabinets may benefit from 4–5 coats. Always apply thin coats with light sanding between coats — don’t try to build thickness in a single pass.
What is the difference between lacquer finish and varnish?
Lacquer dries by solvent evaporation — the finish hardens almost immediately once the solvents flash off. Varnish cures through a chemical oxidation reaction, which takes much longer. Lacquer is easier to repair because new coats partially re-dissolve previous ones. Varnish creates a harder, more moisture-resistant film that is more difficult to fix if damaged.
How long does lacquer take to dry?
Lacquer dries to touch in 30–60 minutes and can be recoated in 1–2 hours. Full cure takes 24–48 hours for normal handling and up to 2 weeks for maximum hardness. Temperature and humidity affect both times significantly.
Can I apply lacquer over an existing finish?
Do not apply solvent-based lacquer over oil-based finishes like polyurethane or varnish without full stripping first. Lacquer’s solvents will attack those finishes and cause softening or wrinkling. You can apply lacquer over an existing well-cured lacquer finish — this is one of lacquer’s best repair properties.
Is lacquer flammable?
Yes, solvent-based lacquers are highly flammable. Work in a well-ventilated area away from all ignition sources. Store lacquer and lacquer thinner in approved flammable-liquid containers away from heat. Water-based lacquers have significantly lower flammability.
How do I know what finish is already on my wood?
Apply a drop of lacquer thinner to an inconspicuous spot. If the existing finish softens or becomes sticky, it’s likely lacquer or shellac. If it has no effect, the finish is probably polyurethane or varnish. This test helps you decide whether you can recoat directly or need to strip first.
How do I clean brushes after using lacquer?
Clean brushes immediately after use with lacquer thinner. Work the thinner through the bristles until all lacquer is removed, rinse with clean thinner, then wash with soap and water. Let dry fully before storing. For lacquered wood surfaces already finished, use only mild soap and water for cleaning — solvents will damage the cured film.
Conclusion
Applying lacquer to wood comes down to two things: thorough prep and thin coats. Sand to 220 grit, remove every dust particle, apply 3–4 light coats with sanding between each, and give the final coat time to cure. Whether you’re brushing on a brushing lacquer or spraying with an HVLP gun, the technique is the same — patience and thin layers produce the smoothest lacquered wood finish every time.