How to Clean Wooden Toilet Seat: A Step-by-Step Guide
To clean a wooden toilet seat, start by using mild soap and warm water. Gently scrub the surface with a soft cloth or sponge.
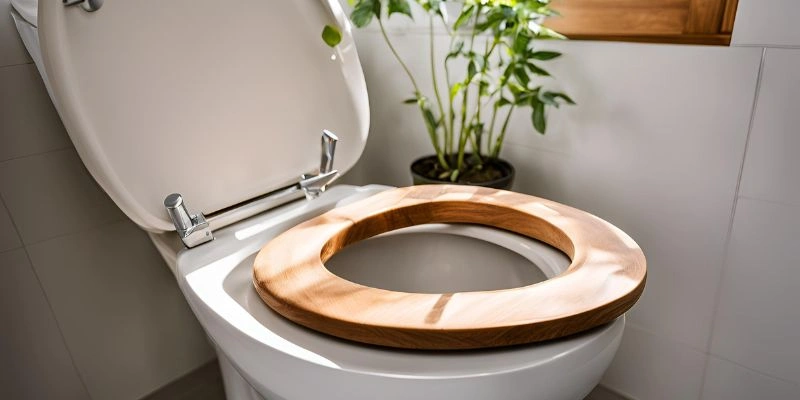
Dry the seat completely to prevent damage. Wooden toilet seats add warmth and elegance to any bathroom. But they need special care to stay looking their best. Unlike plastic or ceramic, wood can absorb moisture and stain. Proper cleaning ensures the seat remains hygienic and attractive.
This guide will teach you the best methods to clean a wooden toilet seat. You’ll learn how to protect the finish and avoid common mistakes. Keep reading to discover easy steps for maintaining your wooden toilet seat.
Materials Needed
Cleaning a wooden toilet seat might seem like a daunting task, but with the right materials, it can be a breeze. Whether you are a seasoned cleaner or a newbie, having the correct supplies will ensure your wooden toilet seat stays pristine and lasts longer. Let’s dive into what you’ll need to get the job done efficiently.
Cleaning Supplies
First things first, you’ll need some basic cleaning supplies. Here’s a list to get you started:
- Mild Soap: Avoid harsh chemicals. A gentle soap will clean without damaging the wood.
- Warm Water: Lukewarm water works best for dissolving soap and grime.
- Soft Cloth: A microfiber cloth is ideal to prevent scratches.
- White Vinegar: Useful for disinfecting and removing odors.
- Baking Soda: Great for tackling stubborn stains.
These supplies are easy to find and gentle on wooden surfaces. Now, let’s talk about protecting yourself while you clean.
Protective Gear
Cleaning might not be the most glamorous task, but it’s important to stay safe and protect yourself. Here’s what you’ll need:
- Rubber Gloves: These will protect your hands from any cleaning agents and grime.
- Face Mask: If you’re sensitive to cleaning odors, a mask will help you breathe easier.
- Apron: Keep your clothes clean and free from splashes with a simple apron.
Think of this gear as your cleaning armor. It might seem a bit much, but it’s worth the extra effort to stay safe and comfortable.
In conclusion, having the right materials can make all the difference when cleaning your wooden toilet seat. With these supplies and protective gear, you’re ready to tackle the task with ease. Happy cleaning!
Preparation Steps
Cleaning a wooden toilet seat might seem like a daunting task, but with the right preparation steps, it can be a breeze. Before diving into the actual cleaning process, it’s crucial to make sure that your workspace is set up correctly. This not only ensures the best results but also keeps the area safe and hygienic. Let’s go through some important preparation steps to get started.
Remove Seat
The first step in preparing to clean your wooden toilet seat is to remove the seat. This makes it easier to clean all the nooks and crannies. Here’s how you can do it:
- Locate the screws at the back of the seat where it attaches to the toilet.
- Use a screwdriver to carefully loosen and remove these screws.
- Gently lift the seat off the toilet.
- Place the seat on a flat, stable surface such as a table covered with an old towel or newspapers.
Removing the seat might seem unnecessary, but it allows you to clean both the top and bottom thoroughly, ensuring no hidden grime is left behind. Plus, it’s much easier to work on a stable surface!
Ventilate Area
Next, you’ll want to ventilate the area. Trust me, you do not want to be stuck in a stuffy bathroom with cleaning fumes. Proper ventilation keeps the air fresh and prevents inhalation of any strong odors from cleaning products. Here are a few tips:
- Open all the windows in the bathroom.
- Turn on the exhaust fan if you have one.
- If possible, keep the bathroom door open to allow for better air circulation.
Good ventilation is essential for your comfort and safety. It also helps the wooden seat dry faster after cleaning, which prevents mold and mildew buildup.
These preparation steps are simple but crucial. They ensure that your cleaning process is both effective and safe. Once you’ve removed the seat and ventilated the area, you’re ready to move on to the actual cleaning. Stay tuned for our next section where we dive into the cleaning process itself.
Dust And Debris Removal
Cleaning a wooden toilet seat might seem like a daunting task, but it doesn’t have to be! The first step in this process is to get rid of all the dust and debris. This ensures that when you move on to deeper cleaning, you’re not just spreading dirt around. Here’s how you can do it efficiently:
Brush Off Dust
Start by using a soft-bristled brush, like the one you use for dusting furniture. Gently brush off any visible dust and debris from the surface of the wooden toilet seat. This initial step is crucial as it prevents scratches on the wood from larger particles. A little elbow grease goes a long way here!
Wipe With Damp Cloth
Once you’ve brushed off the dust, take a clean cloth and dampen it slightly with water. Make sure it’s not too wet, as excess moisture can damage the wood. Wipe the seat gently, ensuring you remove any remaining dust or debris. Don’t forget the nooks and crannies—those corners can hide a lot of grime! You might be surprised at how much dust can accumulate in those tiny spots.
Applying Cleaner
Cleaning a wooden toilet seat might seem like a daunting task, but with the right approach, it can be a breeze. One of the most crucial steps in this process is applying the cleaner properly. This ensures that your toilet seat not only looks sparkling clean but also remains in good condition for a long time. Let’s dive into the nitty-gritty of applying cleaner to your wooden toilet seat.
Choose Suitable Cleaner
Before you start cleaning, it’s essential to choose a cleaner that is suitable for wooden surfaces. Harsh chemicals can damage the wood, stripping it of its natural oils and causing it to crack or warp. Opt for a mild detergent or a cleaner specifically designed for wood. If you’re unsure, a mixture of water and vinegar can be a safe and effective alternative.
- Mild Detergent: Gentle on wood, effective against dirt.
- Wood-Specific Cleaner: Tailored for wooden surfaces, ensuring no damage.
- Water and Vinegar: Natural, safe, and effective for most wooden surfaces.
Apply Evenly
Once you’ve chosen your cleaner, it’s time to apply it. Make sure to apply the cleaner evenly across the surface of the toilet seat. You don’t want to miss any spots or over-saturate certain areas. Here’s how to do it:
- Use a Soft Cloth: Dampen a soft cloth with your chosen cleaner. A microfiber cloth works well as it is gentle on wood and effective at picking up dirt.
- Wipe Gently: Wipe the cloth over the seat in a gentle, circular motion. This helps to lift dirt and grime without scratching the surface.
- Cover All Areas: Make sure you cover all areas, including the edges and underside of the seat. These spots often get neglected but can harbor bacteria.
Applying the cleaner evenly not only ensures a thorough clean but also protects the wood from damage. So, take your time and do it right!
And there you have it! Applying cleaner to your wooden toilet seat doesn’t have to be a chore. With the right approach, you can keep your seat looking clean and fresh, extending its lifespan and ensuring it remains a pleasant part of your bathroom.
Scrubbing Techniques
Clean a wooden toilet seat gently using a mild soap solution and a soft cloth. Avoid harsh chemicals to prevent damage. Regular maintenance ensures a lasting finish and hygiene.
Cleaning a wooden toilet seat requires gentle, effective scrubbing techniques. This ensures the wood stays in good condition. Here are two important techniques to keep in mind.
Use Soft Brush
A soft brush is ideal for scrubbing a wooden toilet seat. Hard brushes may scratch the wood. Use gentle pressure while scrubbing. Move the brush in small circles. This helps remove dirt without damaging the surface.
Focus On Stains
Stains on a wooden toilet seat need extra attention. First, apply a mild cleaner to the stained area. Let it sit for a few minutes. Next, use the soft brush to scrub the stain gently. Rinse with water and dry with a soft cloth. Repeat if the stain persists. This method will help keep your wooden toilet seat looking clean and fresh.
Rinsing Process
Cleaning your wooden toilet seat is crucial for maintaining hygiene. The rinsing process is an important step to ensure that all cleaning agents are properly removed, leaving your toilet seat fresh and safe. Let’s dive into the steps involved in this process.
Rinse With Water
After scrubbing your wooden toilet seat with a mild cleaner, it’s essential to rinse it thoroughly. Use warm water to rinse off any soap or cleaner residue. Here’s how you can do it:
- Fill a bucket with warm water.
- Gently pour the water over the toilet seat.
- Use a clean, soft cloth to wipe the seat, ensuring all cleaner is removed.
Remember, wooden seats need gentle handling. Avoid using high-pressure water, as it can damage the wood or seep into any cracks.
Check For Residue
Once you’ve rinsed the seat, it’s crucial to check for any remaining residue. This ensures that no cleaner is left behind, which could damage the wood over time. Follow these steps:
- Inspect the seat closely for any soap or cleaner spots.
- If you find any, rinse the seat again with warm water.
- Wipe the seat with a clean, dry cloth to ensure it’s completely dry.
Leaving residue on the wooden seat can lead to discoloration and deterioration. So, it’s worth taking a few extra minutes to do a thorough check.
Cleaning a wooden toilet seat might seem like a daunting task, but with these simple steps, you can keep it looking beautiful and hygienic. Remember to rinse carefully and check for residue. Your bathroom will thank you!
Drying The Seat
Once you’ve scrubbed and rinsed your wooden toilet seat, it’s time to dry it properly. Drying the seat is a crucial step to prevent water stains and damage. Let’s dive into the best methods for drying your wooden toilet seat, ensuring it stays in great shape for years to come.
Pat Dry With Towel
First things first, grab a clean, dry towel. You can use a small hand towel or a larger bath towel, whatever you have on hand. Gently pat the wooden seat dry. Be sure not to rub too hard; you don’t want to scratch the surface. This method is quick and effective, removing most of the moisture instantly.
- Use a soft towel to avoid scratches.
- Pat gently, don’t rub vigorously.
- Ensure you dry all the nooks and crannies.
Remember, the goal is to absorb the water, not to spread it around. Think of it like blotting a spill on your favorite shirt. You don’t want to ruin the fabric (or in this case, the wood). Simple, right?
Allow Air Drying
After patting the seat dry, it’s a good idea to let it air dry completely. This step ensures any remaining moisture evaporates. Open a window or turn on a fan to speed up the process. Fresh air can work wonders, don’t you think?
- Open a window for ventilation.
- Use a fan if possible.
- Leave the seat up to allow air circulation.
Patience is key here. Rushing this step can lead to trapped moisture, which might cause the wood to warp or develop mold. And nobody wants that! So, give it time, and your wooden toilet seat will thank you.
In conclusion, drying your wooden toilet seat properly is not just a final touch; it’s a vital part of the cleaning process. By patting it dry with a towel and then allowing it to air dry, you ensure the wood remains in top condition. It might seem like an extra step, but trust me, it’s worth it.
Reattaching The Seat
Reattaching the toilet seat might seem like a daunting task, but with a bit of patience and some basic tools, it can be done efficiently. Here, we’ll walk you through the steps to reattach your wooden toilet seat properly. This part of the process ensures that your seat is secure and functional for everyday use. Let’s dive into the details!
Inspect Hinges
Before you start reattaching the seat, it’s crucial to inspect the hinges. Are they in good condition? Are there any visible cracks or damages? If the hinges are worn out, you might need to replace them. Here’s a simple checklist to help you:
- Check for rust or discoloration.
- Ensure that the hinges move smoothly.
- Look for any signs of wear and tear.
Inspecting the hinges will help you determine whether you can use the existing ones or need new replacements.
Secure Screws
Once you’re sure the hinges are in good shape, it’s time to secure the screws. This step is crucial for the stability of your toilet seat. Follow these steps:
- Align the seat and lid with the bowl.
- Insert the screws through the hinges and into the holes on the bowl.
- Hand-tighten the screws to ensure the seat is positioned correctly.
- Use a screwdriver to fully tighten the screws, but be cautious not to over-tighten as this can crack the wood.
Remember, securing the screws properly is key to preventing wobbling and ensuring a comfortable seat.
Feeling like a DIY pro yet? Reattaching a wooden toilet seat doesn’t have to be complicated. Just inspect those hinges and secure the screws, and you’re all set. Happy fixing!
Frequently Asked Questions
How Do You Get Urine Stains Out Of A Wooden Toilet Seat?
Clean urine stains from a wooden toilet seat using a mixture of vinegar and water. Gently scrub with a soft cloth.
Can You Use Clorox Wipes On Wooden Toilet Seat?
Yes, you can use Clorox wipes on a wooden toilet seat, but avoid excessive moisture. Wipe gently and dry thoroughly.
Can You Use Bleach On A Wooden Toilet Seat?
Avoid using bleach on a wooden toilet seat. Bleach can damage the wood and ruin its finish. Instead, use a mild soap and water solution for cleaning.
How To Clean Enameled Wood Toilet Seat Stains?
Clean enameled wood toilet seat stains with mild soap and water. Gently scrub using a soft cloth. Rinse thoroughly and dry. For stubborn stains, use a mixture of baking soda and water. Avoid abrasive cleaners to prevent damage.
Conclusion
Keeping your wooden toilet seat clean is essential for hygiene. Regular cleaning with mild soap keeps it looking new. Avoid harsh chemicals to prevent damage. Dry the seat thoroughly after cleaning. This prevents moisture buildup and keeps it in great condition.
By following these simple steps, your wooden toilet seat will last longer and stay spotless. Your bathroom will also remain a pleasant place. So, make cleaning a regular habit and enjoy a clean, fresh bathroom space.