How to Build Shoe Cubbies: Sizes, Plywood vs. MDF & Steps
Shoe cubbies work best when each compartment is cut to the shoes you actually own — about 13" wide by 8" deep for sneakers, taller for boots — not a one-size grid copied from a photo. Undersized cubbies get skipped by the whole household within a month. This guide covers real compartment dimensions by shoe type, plywood vs MDF, and a 7-step pocket-hole build.
Tools and Materials You’ll Need
You don’t need a full shop to build a set of shoe cubbies — a circular saw or table saw, a drill, and a pocket-hole jig cover the whole project. If open cubbies aren’t the right fit for your entryway, a enclosed shoe holder or a closet-built shoe organizer use similar tools and joinery. Here’s the full list for the cubby build.
- 3/4" plywood (or MDF — see the comparison below) — one 4×8 sheet builds a 3-cubby-wide, 3-shelf unit
- Pocket-hole jig and 1-1/4" coarse-thread pocket screws
- Wood glue
- Circular saw or table saw, plus a straightedge guide
- Drill/driver
- Tape measure and a combination square
- 120-grit and 220-grit sandpaper
- Paint, stain, or clear polyurethane
- Safety glasses and a dust mask
What Size Should Shoe Cubbies Be?
A shoe cubby compartment is a small open shelf slot sized to one pair of shoes with an inch of clearance on each side — too tight and shoes won’t slide in, too loose and they tip over. Kreg’s own published shoe-cubby plan uses a 7" wide x 6" tall x 9-1/4" deep interior compartment as its baseline for adult sneakers, and that’s a solid starting point if you don’t want to measure your whole household’s shoe collection first.
Different shoe types need different depth and height, though — a slot built for sneakers will crush a pair of tall boots or leave heels rattling around loose. Measure your longest and tallest pair in each category and add about an inch before you cut anything.
| Shoe Type | Interior Width | Interior Height | Interior Depth |
|---|---|---|---|
| Sneakers / flats | 7” | 6” | 9–10” |
| Men’s dress shoes | 7” | 6” | 11” |
| Ankle boots | 8” | 9” | 11” |
| Tall boots (standing upright) | 8” | 14–16” | 12” |
📊 7" W x 6" H x 9-1/4" D is the interior compartment size used in Kreg’s own published shoe-cubby build plan for standard adult sneakers — a reasonable default if you’re not measuring shoes first. Source: Kreg Tool Company, Simple Shoe Cubby Plan
Plywood or MDF for Shoe Cubbies?
Plywood is the better material for shoe cubbies in almost every case — it’s lighter, holds screws without splitting, and shrugs off the moisture that wet boots and snowy sneakers track in. MDF costs less and paints to a smoother finish, but it’s heavy, and it swells and crumbles if it stays damp for long, which is exactly the condition an entryway cubby lives in.
| Factor | 3/4″ Plywood | 3/4″ MDF |
|---|---|---|
| Moisture resistance | Good — tolerates occasional damp shoes | Poor — swells and crumbles when wet |
| Screw/pocket-hole holding | Strong, resists splitting | Weaker — can bulge if pocket screws are overtightened |
| Weight (4×8 sheet) | ~55–70 lbs | ~90–100 lbs |
| Paint finish | Grain shows through unless filled | Very smooth, paints like glass |
| Best for | Entryways, mudrooms, garages — anywhere shoes are wet or muddy | Dry closets, painted built-ins that won’t see moisture |
Pocket-hole joinery works on either material, but use coarse-thread screws on both and add wood glue at every joint — MDF in particular has no wood grain to grip, so the glue is doing more of the structural work than the screw. A pocket-hole jig (our pick is below) keeps every joint hidden on the inside face, so the cubby fronts stay clean.
Best Pocket-Hole Jig Pick
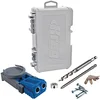 |
Kreg R3 Pocket-Hole Jig System – $34.00 Hides every joint on the inside face of the cubby, exactly the joinery method this guide uses for the sides, shelves, and dividers.
|
As an Amazon Associate we earn from qualifying purchases.
How to Build Shoe Cubbies: Step-by-Step
Once you’ve picked a material and sized your compartments from the table above, the build itself is a straightforward box-and-shelves project. Cut once, dry-fit everything before you drive a single screw, then assemble.
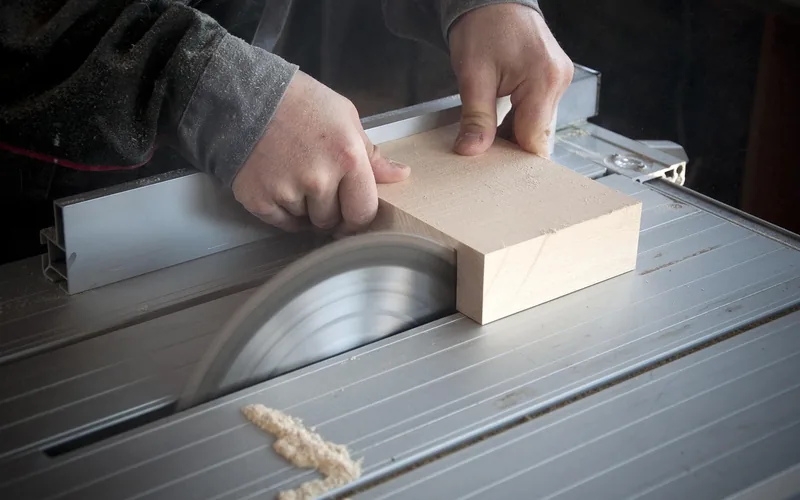
- Cut the top, bottom, and two sides: rip your plywood or MDF to the overall outer dimensions first, using a straightedge guide for a straight edge on every cut.
- Cut the shelves and vertical dividers: shelves run the full inner width; dividers are cut to the compartment height from the sizing table.
- Drill pocket holes: set the jig for your material thickness and drill pocket holes on the underside of each shelf and the back edge of each divider, where they won’t be visible.
- Assemble the outer box: glue and screw the top, bottom, and sides together first, checking the frame is square with a combination square before the glue sets.
- Install shelves and dividers: glue and pocket-screw the shelves in from the sides, then space dividers evenly (6" apart is the standard spacing for sneaker-width compartments) and secure them top and bottom.
- Sand every surface: start with 120-grit to knock down rough spots, finish with 220-grit, and pay extra attention to the front edges shoes will slide past.
- Finish and mount: apply paint, stain, or polyurethane in thin coats and let each coat cure fully, then anchor the unit to a wall stud if it’s taller than it is wide so it can’t tip.
Common Mistakes to Avoid
- Building one compartment size for every shoe type. A sneaker-sized slot will jam a tall boot; measure the tallest shoe in each category before cutting dividers.
- Skipping wood glue on MDF joints. MDF has no long grain for a screw to bite into — glue is what actually holds the joint, especially at pocket screws.
- Overtightening pocket screws in MDF. MDF bulges and cracks around the screw head if you drive it past flush; snug is enough.
- Not anchoring a tall, narrow unit to the wall. A cubby taller than it is wide can tip forward once shoes are loaded in the top row — a couple of L-brackets into a stud fix this permanently.
- Finishing before sanding the front edges. Rough plywood edges catch shoe fabric and fray laces; a pass of 220-grit on every edge shoes will contact is worth the extra ten minutes.
“I size every cubby compartment about half an inch deeper than the actual shoe, never exact — a slot cut tight to the measurement looks right on paper but makes slip-ons catch on the front lip every single time you reach for them.”
Frequently Asked Questions
What size should each shoe cubby compartment be?
Most adult sneaker compartments work well at 7" wide, 6" tall, and 9–10" deep. Boots need more height — plan on 14–16" tall if the boots will stand upright rather than lie on their side.
Is plywood or MDF better for shoe cubbies?
Plywood is the better choice for most shoe cubbies because it resists the moisture that wet shoes and snow boots bring in. MDF is fine for a dry closet build that will be painted, but it swells and crumbles if it gets damp.
Do I need pocket holes to build shoe cubbies, or can I use screws and nails?
Pocket holes aren’t required, but they hide every joint on the inside face so the front of the cubby looks clean. Regular wood screws with glue work structurally, they’ll just show as visible screw heads unless you plug them.
How many pairs of shoes fit in a shoe cubby?
A standard build with 6"-spaced dividers across a 4×8 sheet of plywood yields roughly 12–15 compartments, each holding one pair. Stack two rows of shelves to roughly double that count in the same footprint.
How thick should shoe cubby shelves be?
3/4" plywood or MDF is thick enough for shelves up to about 12" deep without sagging under normal shoe weight. If you’re spanning wider than 24" between supports, add a center divider so the shelf isn’t carrying that whole span unsupported.
Conclusion
Shoe cubbies only earn their spot in the entryway if the compartments actually fit what your household wears — measure sneakers, boots, and dress shoes separately before you cut anything, pick plywood if there’s any chance of wet shoes, and glue every pocket-hole joint. Follow the seven steps above and you’ll have a cubby unit that holds up for years, not a wobbly shelf that gets replaced next season. Building for a garage instead of an entryway? See our garage shoe storage builds for layouts sized to boots and work shoes.
Sponsored / affiliate links. As an Amazon Associate I earn from qualifying purchases. I may earn additional commission from eligible campaigns.