
How to Countersink a Screw: A Step-by-Step Guide
Countersinking a screw is a valuable skill in woodworking and DIY projects. It ensures screws sit flush with or below the surface.
This helps in creating a smooth finish. When you want to achieve a professional look, knowing how to countersink a screw is essential. It prevents wood from splitting and hides screw heads, giving your project a clean appearance. In this guide, you will learn the steps to countersink a screw properly.
Whether you’re a novice or an experienced DIY enthusiast, mastering this technique will enhance your craftsmanship. Let’s dive in and explore the simple steps to countersink screws effectively.
Credit: www.artofmanliness.com
Introduction To Countersinking
Countersinking helps screws sit flush with the material. This makes surfaces smooth.
Countersinking is common in wood and metal projects. It gives a clean, professional look.
Drilling a conical hole allows the screw head to fit well. Countersink bits create these holes.
Be careful to match the bit size with the screw head.
Countersinking prevents material damage. Screws won’t stick out and cause injury.
Countersunk screws look better than regular screws. Projects last longer with proper countersinking.
Less wear and tear on materials. Countersunk holes guide screws straight.
Safety improves with flush screws. Aesthetic appeal increases in projects.
Durability of materials is enhanced. Alignment of screws is more accurate.
Professional finish gives pride in work. Better grip for screw heads.
Stress reduction on materials.
Tools Required
To countersink a screw, you need a drill, countersink bit, and screwdriver. Ensure these tools are within reach.
Essential Tools
First, you need a screwdriver. Make sure it’s the right size for your screw. You will also need a drill. Choose one that fits your hand well. Next, get a countersink bit. This bit creates a space for the screw head. Lastly, you need screws. Pick screws that match your project.
Optional Tools
A clamp can be helpful. It holds your wood steady. You might also want a measuring tape. This helps you mark the exact spot. A pencil is useful for marking. A sandpaper can smooth the area after drilling. These tools make the job easier.
Safety Precautions
Wearing protective gear is very important. Always use safety glasses to protect your eyes. Wear gloves to keep your hands safe. Ear protection can help reduce noise damage. A dust mask can protect your lungs. Ensure your gear fits well.
Keep your workspace clean. Remove any clutter from the area. Make sure there is good lighting. Have a stable work surface. Check your tools for damage before use. Ensure your electric tools are in good condition. Unplug tools when not in use. Keep a first aid kit nearby. Follow these steps for a safe work environment.
Choosing The Right Screw And Bit
Wood screws are for wood. Metal screws are for metal. Drywall screws work with drywall. Each screw type has a purpose. Use the right screw for the job. This makes the work easier.
First, look at the screw head. If it’s flat, use a flat bit. If it’s a cross, use a Phillips bit. Match the bit size to the screw size. This is very important. Using the wrong bit can damage the screw.
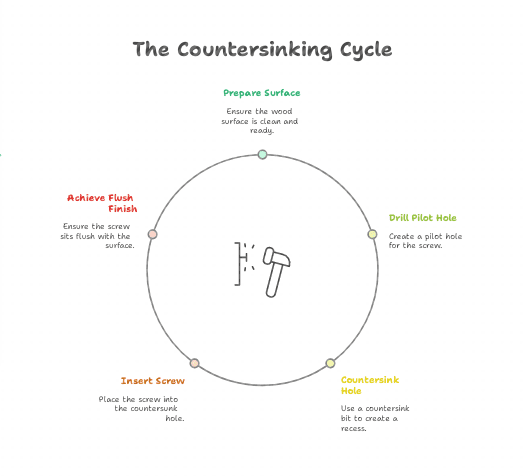
Preparing The Surface
First, get a pencil and ruler. Draw a small dot where the screw will go. This is your mark. Make sure the mark is clear and easy to see. Accuracy is important here.
Remove any dirt or debris around the mark. Use a cloth to wipe the surface. This ensures a clean area for the screw. A clean surface helps the screw to go in smoothly. This step is quick but very important.
Drilling The Pilot Hole
Selecting the right drill bit is important. Choose a bit that matches the screw size. This helps the screw fit snugly. Measure the screw’s diameter. Pick a bit with the same diameter. This prevents the wood from splitting.
Hold the drill steady. Start at a slow speed. Increase speed slowly as you drill. Keep the drill straight. This ensures a clean hole. Use steady pressure. Do not push too hard. Let the bit do the work. Pull the bit out slowly when done.
Creating The Countersink
Creating the perfect countersink ensures screws sit flush with the surface. Drill a pilot hole slightly smaller than the screw diameter. Use a countersink bit to widen the hole’s top, matching the screw head’s angle.
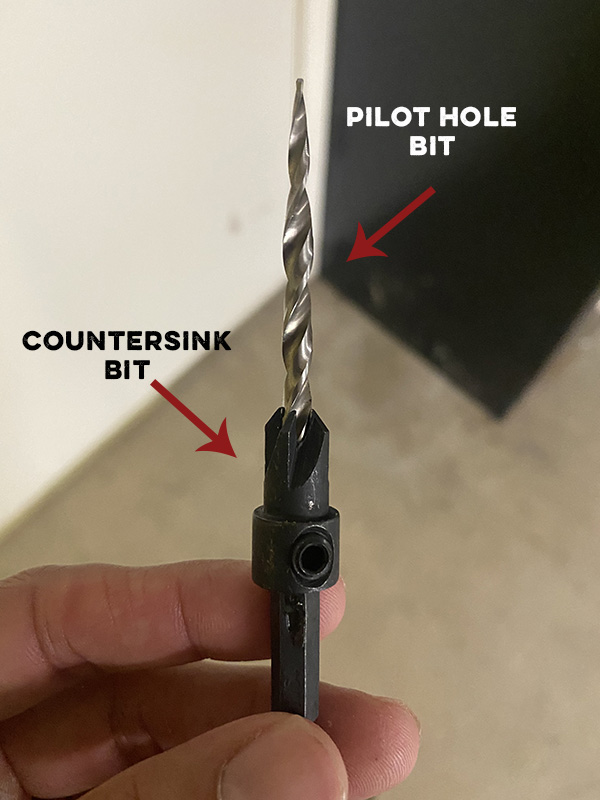
Setting The Countersink Bit
Choose the right countersink bit for the screw size. Insert the bit into the drill and tighten it. Adjust the depth by moving the bit up or down. Lock it in place. This step ensures the screw head sits flush or slightly below the surface.
Drilling The Countersink
Mark the drilling spot with a pencil. Hold the drill steady and start drilling slowly. Increase speed gradually while keeping the drill straight. Stop once the desired depth is reached. Test with the screw to make sure it fits well.
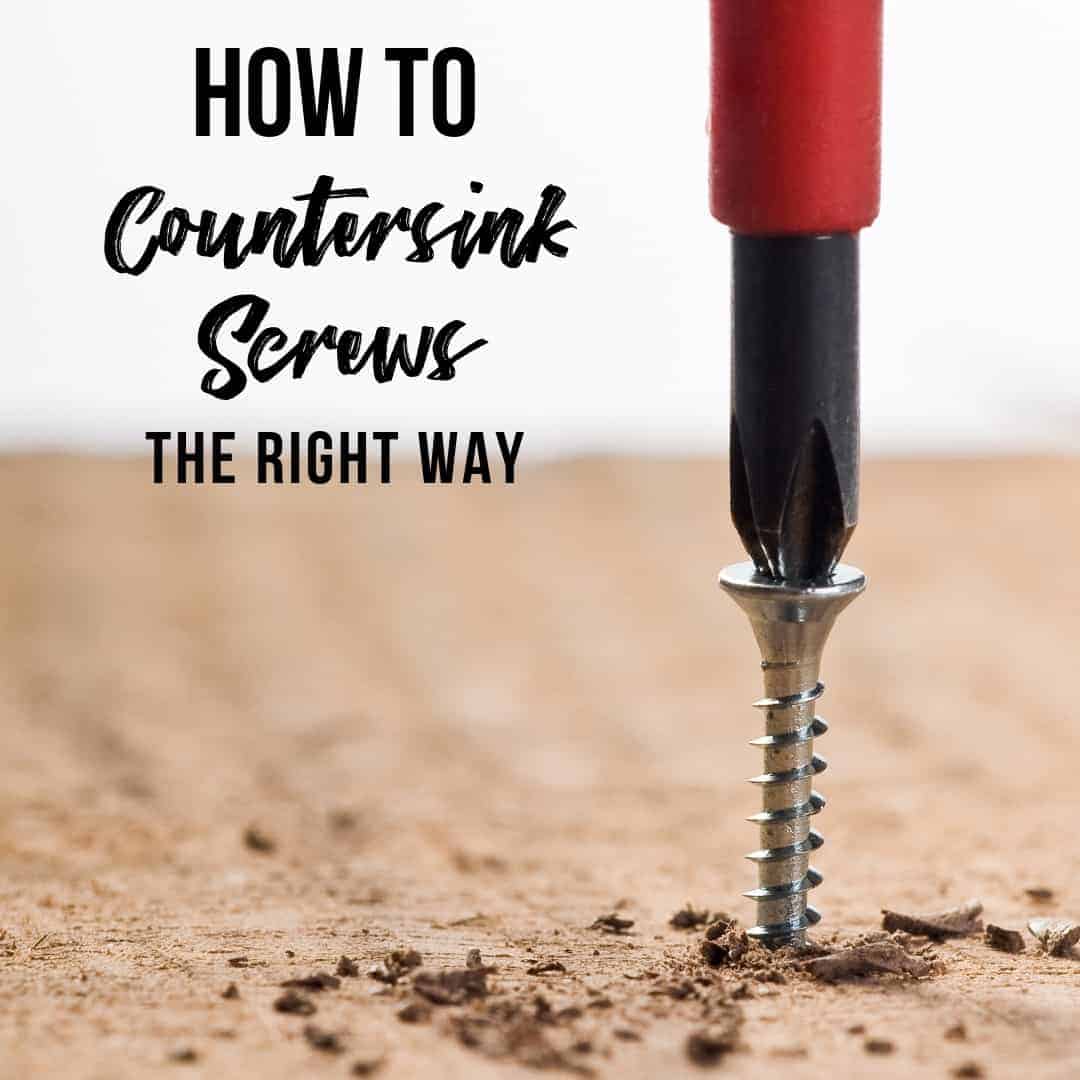
Inserting The Screw
Hold the screw with one hand. Use your other hand to steady the tool. Ensure the screw is aligned with the hole. This will help prevent any damage. If the screw is not straight, it may not go in properly.
Place the tip of the screwdriver on the screw head. Turn the screwdriver slowly. Apply gentle pressure. Keep the screw straight as you drive it in. If you feel resistance, stop. Check the alignment again. Continue turning until the screw is flush with the surface.
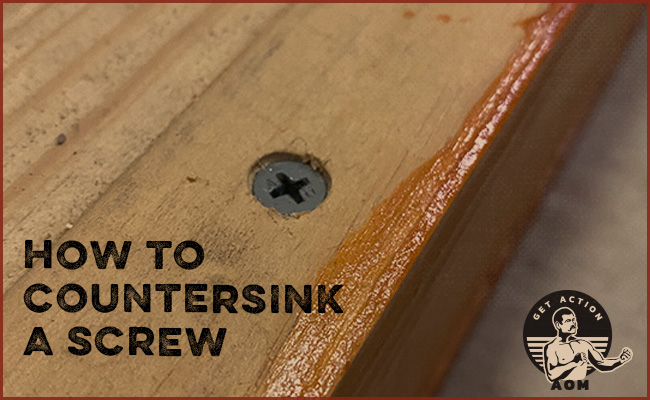
Finishing Touches
Use wood filler to fill the hole. Apply it with a putty knife. Make sure the filler is smooth. Let it dry. Check the instructions for drying time. Sand the surface after it dries. This will make it even.
Start with coarse sandpaper. Sand the area until it is level. Then use fine sandpaper. Smooth the surface more. Wipe away dust with a cloth. Ensure the surface is clean. Finally, check for any rough spots. Smooth them out if needed.
Credit: www.artofmanliness.com
Common Mistakes
Over-drilling creates a hole that is too deep. This can weaken the material. Screws might not hold well. They can become loose over time. Always check the depth of the hole. Use a depth stop if needed. This helps to avoid over-drilling.
Using the wrong bit size is a common error. A bit too small will not fit the screw. A bit too large makes the screw loose. Always match the bit size with the screw size. Check the package for the right size. This ensures a secure fit.
Tips For Perfect Countersinking
Keep the depth of the countersink even. Measure the depth each time. Use a depth stop if you have one. This helps to avoid going too deep. Too deep can weaken the material. Practice on scrap material first. This helps to get the right depth. Check your work often. This ensures you stay on track.
Use the right speed for your drill. Too fast can cause burning. Too slow can cause chipping. Start at a low speed. Increase if needed. Different materials need different speeds. Wood needs a slower speed than metal. Read the drill’s manual for speed settings. This helps to avoid mistakes. Practice makes perfect.
Credit: www.thehandymansdaughter.com
Frequently Asked Questions
How Do You Properly Countersink A Screw Head?
To properly countersink a screw head, first drill a pilot hole. Next, use a countersink bit to create a conical hole. Ensure the hole matches the screw head size. Finally, drive the screw in until it sits flush with the surface.
What Tool Do You Use To Countersink Screws?
Use a countersink bit or a combination drill bit to countersink screws. These tools create a conical hole for screw heads.
Can You Countersink With A Regular Drill Bit?
Yes, you can countersink with a regular drill bit, but it’s not ideal. Use a dedicated countersink bit for best results.
What Can I Use If I Don’t Have A Countersink Bit?
Use a larger drill bit to create a shallow hole. Alternatively, use a flat head screw to create a countersink effect.
Conclusion
Countersinking a screw is a useful skill. It ensures a smooth finish. It prevents wood from splitting. Start with the right tools. Follow the steps carefully. Practice makes perfect. Soon, you will countersink like a pro. Your projects will look better.
Screws will fit perfectly. Keep learning and improving. Happy woodworking!