How to Cut a Board in Half Thickness: A Step-by-Step Guide
To cut a board in half thickness, use a table saw or circular saw. Set the blade depth to match the board’s thickness for a clean cut.
Cutting a board in half thickness is a common woodworking task. Whether you’re crafting furniture or making repairs, knowing how to do this accurately is essential. Proper techniques ensure safety and precision, resulting in clean edges that fit seamlessly into your projects.
Tools like a table saw, circular saw, or even a hand saw can achieve this, depending on your preference and skill level. Understanding the right method helps you avoid mistakes and wasted material. This guide covers the best practices for cutting boards in half thickness while keeping safety a priority. Get ready to enhance your woodworking skills with these straightforward tips!
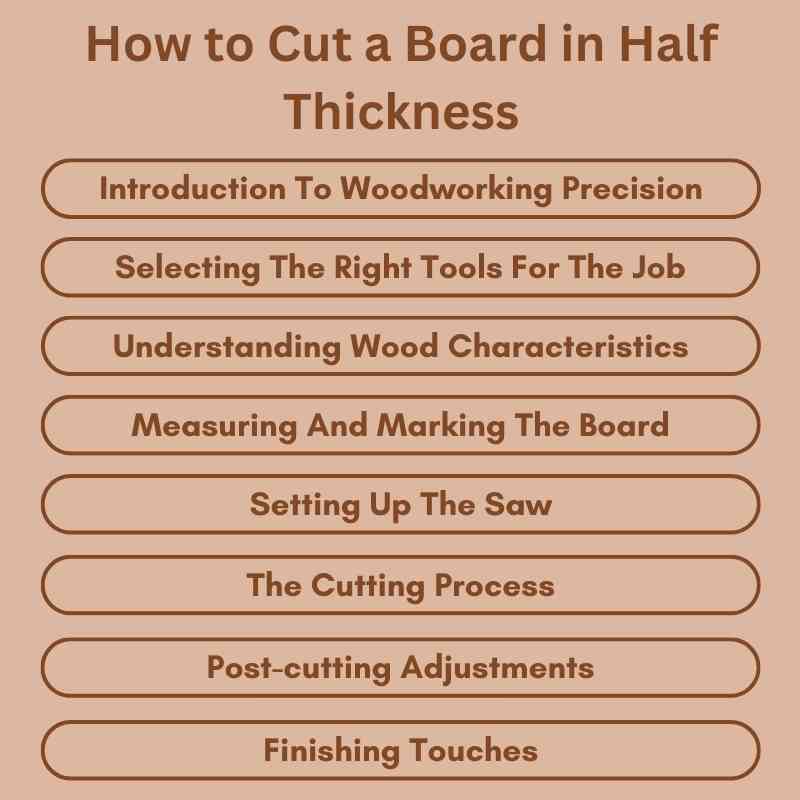
Introduction To Woodworking Precision
Woodworking requires precision for great results. Cutting a board in half thickness demands accuracy. A clean cut enhances the final product’s quality. This guide helps you master the art of precise cutting.
The Importance Of Accurate Cuts
Accurate cuts are essential in woodworking. They ensure pieces fit together seamlessly. Here are key reasons why precision matters:
- Quality: Neat cuts improve the overall appearance.
- Functionality: Properly cut pieces function better.
- Safety: Accurate cuts reduce the risk of accidents.
Inaccurate cuts can lead to waste. They may require extra time and materials. Always strive for precision in every cut.
Safety First: Preparing Your Workspace
Safety is crucial in woodworking. A well-prepared workspace minimizes risks. Follow these steps for a safe environment:
- Clear the area of clutter.
- Ensure all tools are in good condition.
- Wear safety gear like goggles and gloves.
- Use a stable work surface.
- Check the measurements before cutting.
Follow these guidelines to create a safe workspace. Your safety ensures a better woodworking experience.
Selecting The Right Tools For The Job
Choosing the right tools is crucial for cutting a board in half thickness. The right tools ensure accuracy and safety. This section covers the best saws and essential accessories.
Choosing The Best Saw
Different saws serve different purposes. Here are the top choices:
- Table Saw: Ideal for precise cuts. Great for thick boards.
- Band Saw: Good for curves and thick materials. Versatile option.
- Circular Saw: Portable and easy to use. Perfect for quick cuts.
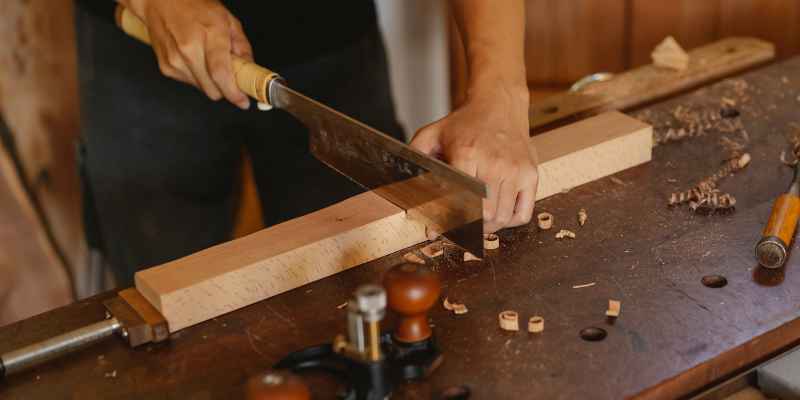
- Hand Saw: Best for small projects. Requires more effort.
Consider your project needs. Each saw has strengths and weaknesses. Choose one that fits your skill level and project type.
Essential Accessories For Thickness Cutting
Using the right accessories enhances your cutting experience. Here are some essentials:
| Accessory | Purpose |
|---|---|
| Measuring Tape | Ensures accurate measurements before cutting. |
| Clamps | Stabilizes the board during cutting. |
| Safety Goggles | Protects your eyes from debris. |
| Dust Mask | Prevents inhaling sawdust. |
These accessories improve safety and efficiency. Invest in quality tools for better results.
Understanding Wood Characteristics
Knowing wood characteristics is crucial for cutting boards correctly. Wood behaves differently based on its properties. Understanding these traits helps achieve better results.
Grain Direction And Its Impact
Grain direction affects strength and appearance. It can change how wood cuts and finishes. Here’s how grain direction impacts your project:
- Longitudinal grain: Runs along the length. Strongest direction.
- Radial grain: Cuts through the growth rings. Provides stability.
- Tangential grain: Runs along the growth rings. More prone to warping.
When cutting, align the blade with the grain. This reduces tear-out and splintering. Always inspect the grain pattern before starting.
Moisture Content And Wood Movement
Moisture content affects wood’s size and shape. Wood expands and contracts based on humidity. Here are key points about moisture:
| Moisture Level | Effect on Wood |
|---|---|
| Below 6% | Very dry; prone to cracking. |
| 6% – 12% | Ideal for indoor use. |
| Above 12% | May warp or swell. |
Check moisture levels before cutting. Use a moisture meter for accuracy. Proper moisture levels ensure stability and durability.
Measuring And Marking The Board
Measuring and marking the board correctly is vital. Accurate measurements help ensure a precise cut. Follow these steps for the best results.
Tools For Accurate Measurement
- Measuring Tape: Use a reliable measuring tape for accurate lengths.
- Square: A carpenter’s square ensures straight and precise angles.
- Marking Gauge: This tool helps create consistent lines.
- Pencil: A sharp pencil marks clearly without confusion.
- Ruler: A metal ruler offers straight edges for fine measurements.
Techniques For Clear Marking
- Measure Twice: Always double-check your measurements before marking.
- Use a Straight Edge: Align your ruler or square for straight lines.
- Lightly Mark: Start with light pencil marks to adjust if needed.
- Highlight Cut Line: Use a darker line or highlight the final cut line.
- Check Alignment: Ensure all marks align before proceeding.
These techniques help produce clean cuts. Careful measuring and marking save time and material.
Setting Up The Saw
Properly setting up your saw is crucial for cutting a board in half thickness. Accurate adjustments lead to clean cuts and safe operation. Follow these steps to ensure your saw is ready for use.
Adjusting Blade Height And Angle
Start by adjusting the blade height. The blade should rise just above the board’s surface. This ensures a smooth cut.
- Turn the height adjustment knob clockwise to raise the blade.
- Check with a ruler or tape measure.
- Make sure the blade isn’t too high; safety first!
Next, adjust the blade angle. Most cuts require a 90-degree angle. Ensure the blade is perpendicular to the table.
- Use a protractor for accurate angle measurement.
- Make adjustments slowly for precision.
- Double-check before starting your cut.
Fence Alignment For Consistent Cuts
The fence guides your board during the cut. Proper alignment is key for consistent results. Follow these steps for correct alignment:
- Loosen the fence adjustment knobs.
- Align the fence parallel to the blade.
- Lock the fence in place once aligned.
Use a square tool to confirm alignment. This ensures the fence is straight and true.
| Step | Action |
|---|---|
| 1 | Loosen the fence knobs |
| 2 | Align with the blade |
| 3 | Lock the fence |
With the blade height and angle set, and the fence aligned, your saw is ready. Follow these steps to achieve accurate cuts every time.
The Cutting Process
Cutting a board in half thickness requires careful planning. The right tools and techniques ensure a clean cut. Follow these steps to achieve success.
Step-by-step Cutting Guide
- Gather your tools: You need a saw, measuring tape, and clamps.
- Measure the board: Use a measuring tape to find the midpoint.
- Mark the cut: Draw a straight line across the board.
- Secure the board: Use clamps to hold the board in place.
- Choose your saw: A circular saw or table saw works best.
- Cut along the line: Follow the marked line carefully.
- Finish the edges: Sand any rough spots for a smooth finish.
Tips For Maintaining Control
- Stay focused: Keep your eyes on the cut line.
- Use both hands: Hold the saw firmly with both hands.
- Work slowly: Take your time for better accuracy.
- Check your grip: Ensure your hands are positioned safely.
- Use a guide: A straight edge can help keep the cut straight.
| Tool | Purpose |
|---|---|
| Saw | To cut the board |
| Measuring Tape | To measure the midpoint |
| Clamps | To secure the board |
| Sander | To smooth the edges |
Post-cutting Adjustments
After cutting a board in half, adjustments are vital. These adjustments ensure the board is usable and visually appealing. Focus on two main areas: smoothing the surfaces and checking for uniform thickness.
Smoothing The Surfaces
Smoothing is essential for a clean finish. Follow these steps:
- Sand the Edges: Use sandpaper to smooth the edges. Start with a coarse grit, then progress to a finer grit.
- Use a Router: A router can create rounded edges. This adds a professional touch.
- Inspect for Splinters: Remove any splinters. They can cause injuries.
- Finish with a Sealant: Apply a sealant for protection. It enhances the wood’s appearance.
Checking For Uniform Thickness
Uniform thickness is crucial for stability. Use these methods:
- Caliper Measurement: A caliper provides accurate thickness readings.
- Straightedge Method: Place a straightedge across the board. Look for gaps beneath it.
- Feeler Gauge: Use a feeler gauge to find inconsistencies.
Ensure adjustments keep the board safe and ready for use. Regular checks maintain quality and improve durability.
Finishing Touches
After cutting a board in half, finishing touches enhance its look and feel. Proper finishing makes the wood smooth and protects it from damage. Let’s explore effective methods for sanding and sealing.
Sanding Techniques
Sanding is essential for a smooth surface. Use these steps for effective sanding:
- Start with coarse grit sandpaper (60-80 grit).
- Move to medium grit sandpaper (120-150 grit).
- Finish with fine grit sandpaper (220 grit or higher).
Follow these tips while sanding:
- Sand in the direction of the grain.
- Apply even pressure.
- Keep the surface clean from dust.
Sealing And Protecting The Wood
Sealing protects the wood from moisture and wear. Choose the right sealant:
| Type of Sealant | Best For | Drying Time |
|---|---|---|
| Polyurethane | Durability | 2-4 hours |
| Varnish | Outdoor projects | 1-2 hours |
| Linseed Oil | Natural finish | 24 hours |
Apply the sealant using a brush or cloth. Follow these steps:
- Ensure the surface is clean.
- Apply a thin coat.
- Let it dry completely.
- Sand lightly between coats for smoothness.
Advanced Techniques
Cutting a board in half thickness requires precision. Mastering advanced techniques can elevate your skills. These methods ensure clean cuts and consistent results.
Using A Planer For Final Thickness
A planer is a powerful tool. It helps achieve a uniform board thickness. Follow these steps:
- Set the Planer: Adjust the thickness setting.
- Feed the Board: Insert the board into the planer.
- Check the Output: Measure the thickness after each pass.
- Repeat: Continue until desired thickness is achieved.
Benefits of using a planer:
- Creates a smooth finish.
- Reduces manual sanding time.
- Consistent thickness across all boards.
Jig And Guide Setups For Repetitive Cuts
Using jigs and guides improves accuracy. These setups help with repetitive cuts. Here’s how to create one:
| Step | Description |
|---|---|
| 1 | Measure and mark the cut line on the board. |
| 2 | Build a jig that supports the board. |
| 3 | Attach a guide to the saw for straight cuts. |
| 4 | Secure the board to prevent movement. |
| 5 | Make the cut along the guide. |
Advantages of jigs and guides:
- Enhances safety during cuts.
- Reduces the risk of mistakes.
- Allows for multiple identical pieces.
Implementing these advanced techniques will improve your woodworking skills. Enjoy the process and achieve professional results!
Troubleshooting Common Issues
Cutting a board in half thickness can lead to some common problems. Knowing how to troubleshoot these issues helps achieve a clean cut. Here are two main issues you might face: blade burn and uneven thickness.
Dealing With Blade Burn
Blade burn occurs when the saw blade overheats. This can leave dark marks on your board. Here’s how to fix it:
- Check the blade speed. Use the right speed for your material.
- Ensure the blade is sharp. Dull blades create more friction.
- Use proper feed rate. Don’t push too hard or too fast.
Follow these tips to reduce blade burn:
| Tip | Benefit |
|---|---|
| Use a high-quality blade | Better cuts and less heat |
| Lubricate the blade | Reduces friction and heat |
| Adjust the cutting angle | Minimizes contact with the board |
Correcting Uneven Thickness
Uneven thickness can ruin your project. Follow these steps to fix it:
- Measure the thickness at multiple points.
- Identify the thinnest and thickest areas.
- Use a planer to even out the board.
- Check the thickness again after planing.
Common causes of uneven thickness include:
- Inconsistent feed rate during cutting
- Incorrect blade height
- Uneven surface of the board
Address these issues to ensure your board is uniform. A consistent thickness leads to better results.
Maintenance And Care For Your Tools
Proper maintenance ensures your tools last longer and perform better. Regular care keeps them in top shape. This section covers essential tips for cleaning, sharpening, and storing your tools.
Cleaning And Sharpening Blades
Clean blades remove dirt and resin. This helps maintain sharpness. Follow these steps:
- Use a soft cloth to wipe the blade.
- Apply mineral spirits to remove sticky residues.
- Dry the blade thoroughly to prevent rust.
Sharpening tools is key for effective cutting. Follow these methods:
- Use a sharpening stone or file.
- Maintain a consistent angle of 20 degrees.
- Test sharpness by cutting through paper.
Proper Storage Practices
Store tools correctly to prevent damage. Follow these tips:
| Tool Type | Storage Method |
|---|---|
| Hand Saws | Hang on a wall or use a protective case. |
| Power Saws | Store in a dry, cool place. |
| Chisels | Keep in a drawer with protective covers. |
Keep tools dry. Moisture can cause rust. Label storage areas for easy access. Regular checks ensure everything is in good condition. Proper care leads to better performance.
Further Learning Resources
Enhancing your skills in woodworking is essential. Numerous resources can help you master the art of cutting boards and more. Explore books, online communities, and guides. These tools provide valuable insights and techniques.
Recommended Books And Guides
Books offer detailed information and step-by-step instructions. Here are some top recommendations:
- The Complete Manual of Woodworking – Covers tools, techniques, and projects.
- Woodworking Basics – Great for beginners, with clear illustrations.
- Basic Woodworking – Focuses on essential skills and tips.
Guides and tutorials can also be helpful. Look for resources that cover:
- Types of saws and their uses.
- Measuring and marking techniques.
- Safety tips while cutting wood.
Online Woodworking Communities And Forums
Joining online communities can connect you with fellow woodworkers. Here are some popular forums:
- Woodworking Talk – A friendly place for sharing ideas.
- Reddit’s r/Woodworking – A vibrant community for tips and projects.
- WoodNet – A forum for discussing techniques and tools.
These platforms allow you to:
- Ask questions and receive advice.
- Share your projects and receive feedback.
- Learn from experienced woodworkers.
Engaging with these resources will enhance your woodworking skills.
Frequently Asked Questions
How Do I Prepare A Board For Cutting?
Before cutting a board in half, ensure it’s clean and free of debris. Use clamps to secure the board to your work surface. Measure and mark the cutting line clearly. This preparation helps achieve a straight cut and reduces the risk of accidents.
What Tools Do I Need To Cut A Board?
To cut a board in half, you can use a table saw, circular saw, or handsaw. Each tool has its advantages. A table saw offers precision, while a circular saw provides portability. Ensure you have safety gear, like goggles and gloves, for protection during the cutting process.
Can I Cut A Board Without A Saw?
Yes, you can cut a board without a saw using a utility knife and a straightedge. Score the board deeply along your marked line. Then, apply pressure to break it along the score. This method works best for thinner boards or softer materials.
What Safety Measures Should I Take When Cutting?
Always wear safety goggles and gloves when cutting wood. Keep your fingers away from the blade and use push sticks for stability. Ensure your workspace is clutter-free to avoid tripping hazards. Following these safety measures protects you from potential injuries during the cutting process.
Conclusion
Cutting a board in half thickness is a simple task with the right tools and techniques. Following the steps outlined can help you achieve clean and precise cuts. Practice makes perfect, so don’t hesitate to try it out. With patience and care, you’ll master this essential woodworking skill.
Happy cutting!