How to Cut Crown Molding With a Compound Miter Saw: Expert Tips for Clean Cuts
To cut crown molding with a compound miter saw, you need to set the saw to the correct angles for the corners and bevel cuts. Start by positioning the molding against the miter saw fence and cutting the compound angles on the ends.
If you’ve been thinking about adding an elegant touch to your home decor, cutting crown molding with a compound miter saw is a great way to achieve professional-looking results. Crown molding enhances the visual appeal of any room by introducing a touch of sophistication and charm.
By following precise cutting techniques with the compound miter saw and taking the necessary precautions, you can skillfully create intricate angles and seams. Here, we will guide you through the step-by-step process of cutting crown molding with a compound miter saw, ensuring perfect angles and a seamless finish for your home improvement project.
Essential Tools For Crown Molding Cuts
For cutting crown molding with a compound miter saw, it’s essential to have the right tools and materials. Proper preparation and the use of the correct tools are crucial for achieving precise and professional-looking cuts. Below, you’ll find essential information on understanding compound miter saws and the additional tools and materials required for successful crown molding cuts.
Understanding Compound Miter Saws
Compound miter saws are incredibly useful for cutting crown molding due to their ability to make bevel and miter cuts simultaneously, ensuring the perfect fit for corners and joints. With their adjustable angles and precise cutting capabilities, compound miter saws are indispensable for creating seamless crown molding installations.
Additional Tools And Materials Required
Aside from a compound miter saw, there are several other tools and materials you’ll need for cutting crown molding effectively. These include a sturdy workbench or saw stand, safety goggles, ear protection, a tape measure, a pencil for marking, and clamps to secure the molding in place during cutting. Furthermore, having a quality blade specifically designed for crown molding cuts is crucial for achieving clean and accurate results.
Preparing The Workspace
Before starting the cutting process, it’s important to prepare the workspace properly. Ensuring a clean, clutter-free environment allows for better focus and safety during the cutting process. Secure the workpiece firmly to the workbench or saw stand using clamps to prevent any movement during cutting. Additionally, always wear appropriate safety gear such as goggles and ear protection to safeguard against flying debris and loud noise generated by the saw.
In conclusion, having a clear understanding of compound miter saws, along with the additional tools and preparation guidelines, is vital for successful crown molding cuts. By equipping yourself with the necessary knowledge and tools, you’ll be ready to achieve precise and professional results for your crown molding projects.
Safety First: Pre-cut Precautions
When it comes to the cutting process, safety should always be the top priority. Pre-cut precautions are essential to ensure a smooth and accident-free crown molding cutting experience. Before diving into the intricacies of using a compound miter saw for cutting crown molding, it’s critical to understand the safety measures that need to be in place. In this section, we’ll explore the crucial precautions that should be taken before operating a compound miter saw to cut crown molding.
Personal Protective Equipment (ppe) Usage
Prior to commencing any work with a compound miter saw, it’s imperative to equip yourself with the necessary personal protective equipment (PPE) to safeguard against potential hazards. This includes wearing safety goggles to protect your eyes from wood dust and debris, using ear protection to minimize the impact of the saw’s noise, and donning a dust mask to prevent inhalation of airborne particles.
Familiarizing With Saw Mechanisms
Before embarking on the cutting process, it’s paramount to familiarize yourself with the intricate saw mechanisms of the compound miter saw. Ensure that the saw is powered off and unplugged when making any adjustments or changing blades. Familiarization with the saw’s functions and features will facilitate safe and efficient operation.
Checking The Material For Defects
Prior to making any cuts, it’s essential to thoroughly check the material for defects such as warping, cracks, or knots. Inspecting the crown molding for any imperfections will not only guarantee a smoother cutting process but also contribute to the overall safety of the operation.
Measuring And Marking Precision
Cutting crown molding with a compound miter saw requires precision in measuring and marking to ensure a perfect fit. This is a crucial step that sets the foundation for a successful molding installation. By following the right techniques for accurate measurements and marking, you can achieve seamless joints and a professional finish.
Step-by-step Guide For Accurate Measurements
To start, accurately measuring the wall and ceiling angles is essential for the right cuts. Use a protractor to determine the exact angle where the two surfaces meet. Measure both the inside and outside corners as well as the length of each wall where the molding will be installed. Record these measurements for reference when cutting the molding.
Tips For Perfect Alignment And Marking
Next, ensure that the compound miter saw is properly set up for the specific angles of the crown molding. Use a cutting jig to hold the molding at the correct angle and position for cutting, minimizing errors due to misalignment. Prior to cutting, mark the molding with a pencil according to the measurements taken, indicating the exact points where the saw blade will make contact. This step is critical for maintaining precision throughout the cutting process.
The Significance Of Angles In Crown Molding, Ensuring Each
Angle cuts are crucial in crown molding as they allow the pieces to fit seamlessly in corners and along walls. Make sure the miter and bevel angles on the compound miter saw are correctly configured based on the measurements taken. A slight deviation in angles can result in poorly fitting joints and visible gaps in the molding installation.
Expert Tips For Clean Cuts
When it comes to cutting crown molding with a compound miter saw, achieving clean and precise cuts is essential. Here are some expert tips to help you optimize your cutting process and achieve professional-quality results.
Selecting The Right Blade For Crown Molding
Choosing the appropriate blade for cutting crown molding is crucial for achieving clean cuts. A high-quality carbide-tipped or fine-toothed blade is recommended for crown molding to ensure smooth and accurate cuts. These blades are designed to handle the intricacies of crown molding, resulting in clean edges and reduced tear-out.
Fine-tuning The Saw For Precise Cuts
Before making cuts, it’s essential to fine-tune your compound miter saw to ensure precision. Calibrate the saw for accurate bevel and miter angles. Confirm that the saw blade is perpendicular to the table and fence, and make any necessary adjustments to ensure precise cutting angles. Proper alignment is key to achieving clean and precise cuts.
Techniques To Optimize Cutting Angles
When cutting crown molding, optimizing cutting angles is essential for achieving clean and seamless joints. Use the proper cutting techniques, such as coping or mitering, based on the molding profile. Additionally, consider creating custom cutting jigs or using hold-down clamps to stabilize the molding during cutting, ensuring precise angles and clean cuts.
Cutting Crown Molding: Step By Step
When it comes to cutting crown molding, a compound miter saw is an essential tool for achieving clean and precise cuts. Understanding the process step by step can help you tackle this task with confidence and accuracy. Let’s delve into the specifics of how to cut crown molding with a compound miter saw, covering positioning the crown molding on the saw, angles and bevels for inside and outside corners, and the sequential process for cutting common angles.
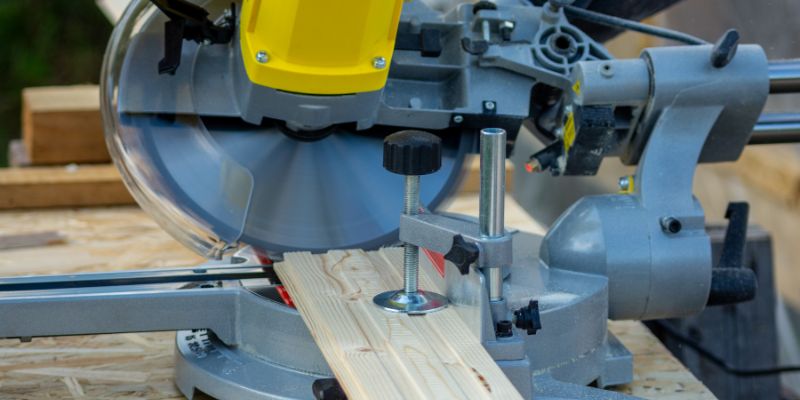
Positioning The Crown Molding On The Saw
- Start by placing the crown molding upside down on the miter saw, positioning it as it would be installed on the wall and ceiling.
- Ensure the bottom edge of the molding is against the fence, mimicking how it will sit when installed.
- Secure the molding in place to prevent any movement during the cutting process.
Angles And Bevels For Inside And Outside Corners
When cutting crown molding for inside corners, the molding should be placed against the fence and beveled to the left for a right inside corner and to the right for a left inside corner. For outside corners, the opposite applies – bevel to the right for a right outside corner and to the left for a left outside corner.
Sequential Process For Cutting Common Angles
- Set the miter angle to the required measurement for the specific corner (e.g., 45 degrees for a standard inside or outside corner).
- Adjust the bevel angle according to the type of corner you are cutting, ensuring the molding sits securely against the fence.
- Make the cut, keeping a steady hand to maintain accuracy and prevent any tearing or chipping of the molding.
- Repeat the process for each section of crown molding, maintaining the correct angle and bevel adjustments as needed.
Achieving Seamless Joints
Cutting crown molding with a compound miter saw is a skilled task that requires precision and attention to detail. Achieving seamless joints in crown molding can elevate the overall look of a room and create a professional finish. To ensure perfectly seamless joints, it’s essential to follow best practices when cutting, sanding, coping, joining, and finishing the molding.
Sanding Techniques Post-cutting
Once the crown molding pieces have been cut to the desired angles, sanding plays a crucial role in achieving seamless joints. Use fine-grit sandpaper to gently sand the cut edges to remove any roughness or imperfections. This will ensure that the joints fit together seamlessly, creating a smooth and flawless transition between the pieces.
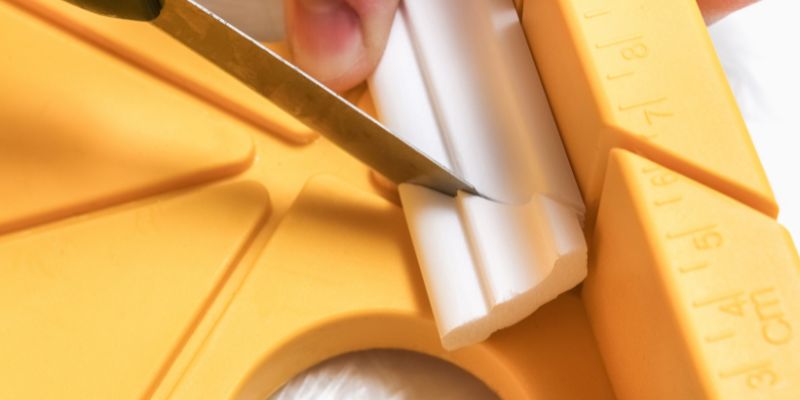
Advice On Coping And Joining Pieces
When it comes to coping and joining crown molding pieces, precision is key. Coping involves cutting one piece of molding to fit the profile of the adjacent piece, ensuring a tight and seamless joint. To achieve this, use a coping saw or a miter saw equipped with a coping jig. After coping the pieces, ensure a snug fit by test-fitting them together before securing them with a high-quality wood glue. This technique will guarantee a seamless joint that enhances the overall appearance of the crown molding installation.
Best Practices For Fixing And Finishing
- During assembly, use clamps to hold the joints together tightly while the glue sets, ensuring a secure and seamless bond.
- Ensure that the miter cuts are accurately aligned, and any gaps are filled with wood filler to create a cohesive and uniform appearance.
- After the glue has dried, carefully sand the joints and any filled gaps to create a seamless transition between the molding pieces.
- Finish the crown molding with a high-quality primer and paint to further unify the pieces, ensuring a flawless and professional appearance.
Final Touches For Flawless Installation
Correct Use Of Adhesives And Nailers
One of the keys to ensuring a successful crown molding installation is the correct use of adhesives and nailers. Using adhesive can help secure the molding to the wall and ceiling, providing additional support for a long-lasting installation. When using nailers, it’s important to choose the right size and type of nails to prevent splitting or damaging the molding. Proper placement and angle of the nailer are also essential for a secure and professional-looking finish
 .
.
Mitigating Gaps And Imperfections
Mitigating gaps and imperfections is crucial for achieving a flawless crown molding installation. Applying wood filler to any gaps or joints can help create a seamless appearance, concealing any imperfections and ensuring a smooth transition between pieces of molding. Careful measurement and precise cutting can also help minimize the presence of gaps, ensuring a polished and professional result.
Staining And Painting For A Professional Look
After the installation is complete, staining and painting can provide the final touch for a professional look. Selecting the right stain or paint color can enhance the elegance of the crown molding and complement the overall aesthetic of the room. Applying multiple coats of stain or paint evenly and allowing sufficient drying time between each coat is crucial for achieving a smooth and seamless finish.
Frequently Asked Questions Of How To Cut Crown Molding With A Compound Miter Saw
What Safety Precautions Should I Take When Cutting Crown Molding?
When cutting crown molding with a compound miter saw, always wear safety goggles and a dust mask to protect your eyes and lungs from sawdust and debris. Use clamps to secure the molding and a sharp blade to ensure clean, precise cuts.
What Angle Should I Set My Compound Miter Saw For Cutting Crown Molding?
For cutting crown molding with a compound miter saw, set the saw at a 31. 6-degree angle for the spring angle of 38 degrees. Adjust the bevel angle to 33. 9 degrees and the miter angle to 31. 6 degrees.
Always double-check your measurements before cutting.
How Do I Measure And Mark Crown Molding For Accurate Cuts?
To measure and mark crown molding accurately, use a protractor to determine the spring angle and calculate the compound angles for the miter and bevel cuts. Mark the measurements directly on the molding before cutting to ensure precision and minimize errors.
Can I Use A Compound Miter Saw To Create Different Crown Molding Layouts?
Yes, a compound miter saw is versatile and can be used to create various crown molding layouts. By adjusting the bevel and miter angles, you can achieve inside and outside corners, as well as complex angles for custom designs. Experiment with different settings for unique results.
Conclusion
Mastering the art of cutting crown molding with a compound miter saw opens up new possibilities for home improvement projects. By following the step-by-step guide, you can achieve professional results. With practice, patience, and the right equipment, you can elevate your interior design and create a polished and sophisticated finish in any room.