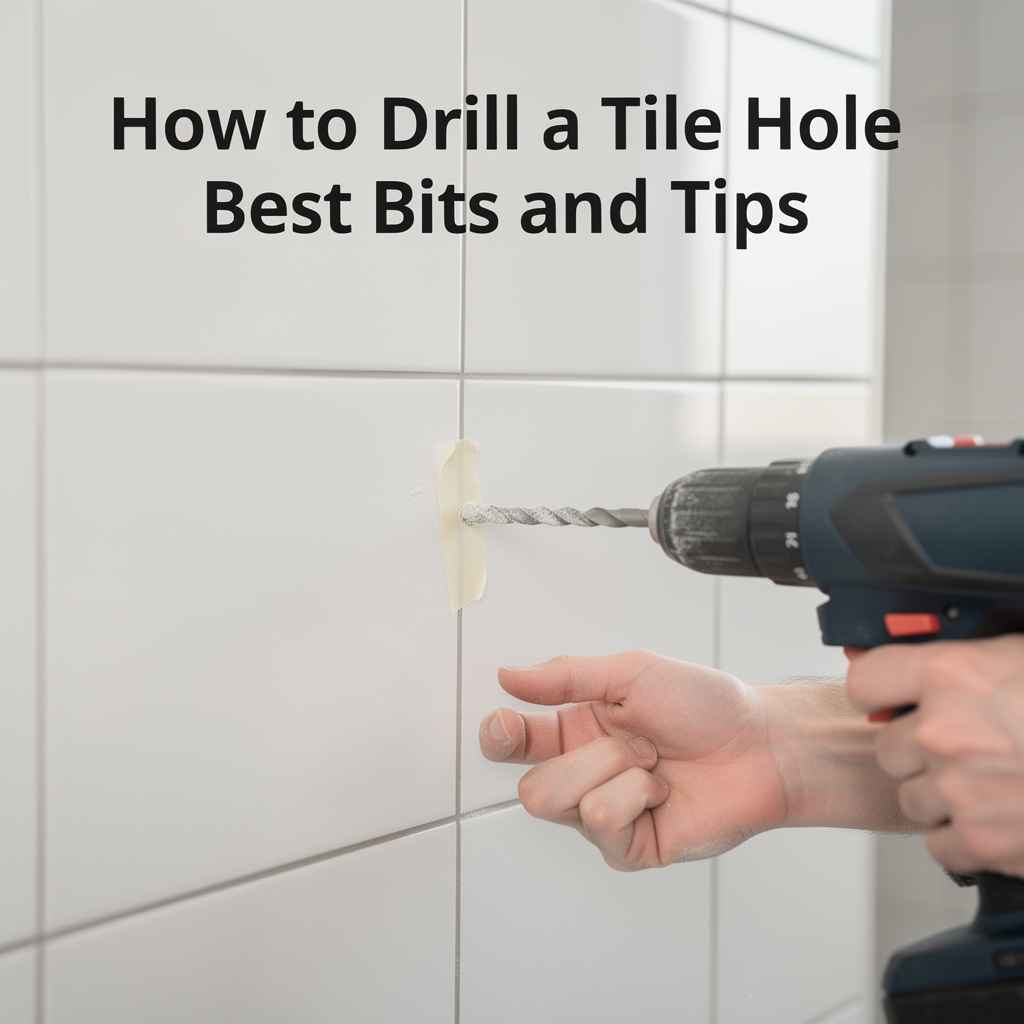
How to Drill a Hole in Tile: Best Bits and Local Secrets
Drilling a hole in tile can seem tricky, especially if you’re new to DIY projects. You might worry about cracking the tile or making a mess. But don’t let that stop you!
Learning How to Drill a Hole in Tile: Best Bits and Local Secrets is actually quite simple with the right tools and a few easy steps. This guide will walk you through everything you need to know, making it a breeze to get that perfect hole.
Choosing the Right Drill Bit for Tile
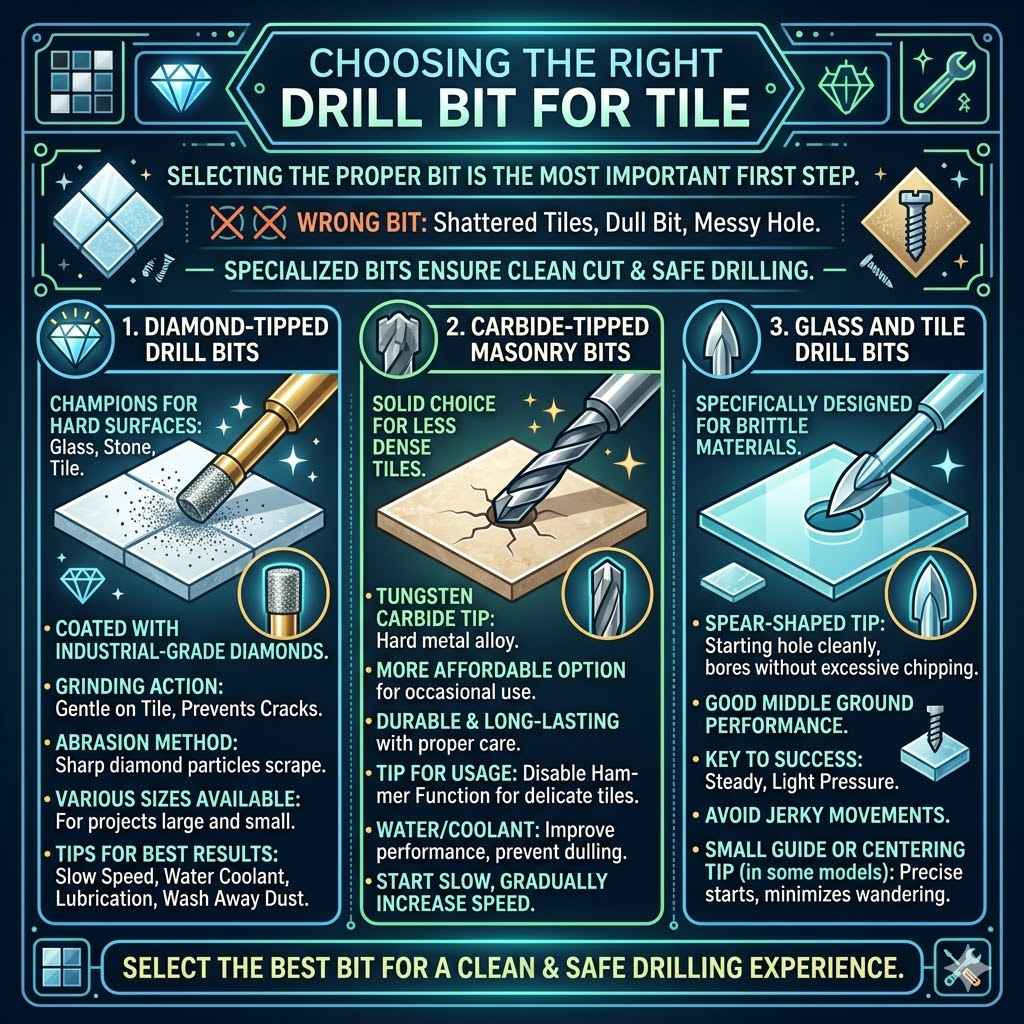
Selecting the proper drill bit is the most important first step when you want to drill a hole in tile. Using the wrong type of bit can lead to shattered tiles, a dull bit, or a hole that looks messy. There are specialized bits made just for hard surfaces like tile and ceramic, ensuring a clean cut and a safe drilling experience.
Let’s look at the best options available.
Diamond-Tipped Drill Bits
Diamond-tipped drill bits are the champions for drilling through tile and other hard materials like glass and stone. Their tips are coated with industrial-grade diamonds, which are the hardest known substance. This makes them incredibly effective at cutting through tough surfaces without much effort.
They are designed to grind away at the material rather than just pierce it, which is key for preventing cracks.
- Diamond bits work by abrasion. The sharp diamond particles scrape away at the tile’s surface, creating a gradual opening. This method is much gentler on the tile than a standard drill bit, which might chip or shatter it.
- They come in various sizes, so you can choose the exact diameter you need for your project, whether it’s for a faucet, a light fixture, or decorative purposes.
- To get the best results and extend the life of your diamond bit, it’s crucial to use them with a slow drill speed and keep them cool. Water is your best friend here; it lubricates the bit and washes away dust, preventing overheating.
Carbide-Tipped Masonry Bits
Carbide-tipped masonry bits are another solid choice, especially for less dense tiles or when you might be drilling into the substrate beneath the tile. These bits have a tip made of tungsten carbide, a very hard metal alloy. While not as hard as diamonds, carbide is still much harder than standard steel bits and can handle ceramic and porcelain tiles effectively.
- These bits are often more affordable than diamond bits, making them a good option for occasional DIY use or for projects where budget is a concern. They are very durable and can last a long time with proper care.
- When using a carbide-tipped bit, it’s important to use a hammer drill setting if your drill has one, as this provides a percussive action that helps break through the material. However, for delicate tiles, you might want to disable the hammer function.
- Similar to diamond bits, keeping them cool with water or a coolant can significantly improve performance and prevent the bit from dulling quickly. Start with a slow speed and gradually increase as you gain confidence.
Glass and Tile Drill Bits
Specifically designed for drilling glass and tile, these bits often have a spear-shaped tip, much like a carbide-tipped bit, but are engineered for the specific stresses of drilling brittle materials. They are designed to start the hole cleanly and then bore through without causing excessive chipping.
- These bits are a good middle ground, offering decent performance at a reasonable price. They are a step up from basic masonry bits when working with tile.
- The key to using them successfully is to apply steady, light pressure and avoid jerky movements. Allowing the bit to do the work is essential for a smooth outcome.
- Some glass and tile bits come with a small guide or centering tip to help you start the hole precisely where you want it, minimizing the chance of the bit wandering.
Preparing Your Tile for Drilling
Proper preparation before you even pick up your drill can save you a lot of trouble and ensure a successful hole. This involves marking your spot, protecting the tile, and setting up your workspace. Taking these extra steps means less risk of mistakes and a much cleaner final result.
Marking the Spot Accurately
Precision is key when you need to drill a hole in tile. You need to know exactly where the center of your hole should be before you start. A misplaced mark can lead to a tile that is ruined or a hole in the wrong place.
- Use a pencil or a marker that is easy to see on your tile surface. For darker tiles, a white or silver marker works best. For lighter tiles, a dark pencil line is usually visible.
- Measure twice, mark once. Double-check your measurements using a tape measure or ruler to ensure the mark is in the exact location required by your project plans.
- Consider using a piece of painter’s tape over the marked spot. This tape can help prevent the drill bit from slipping when you first start and will also give you a clear surface to make your mark on.
Using Painter’s Tape
Painter’s tape is a simple but highly effective tool for drilling tile. It adds a layer of grip and prevents the drill bit from skittering across the smooth tile surface. This is especially helpful when you are starting the hole.
- Apply a strip of painter’s tape over the area where you plan to drill. Make sure the tape is smooth and adheres well to the tile.
- Once the tape is in place, you can mark your drilling spot directly on the tape. This mark will be very clear and stable, giving your drill bit a solid starting point.
- The tape also helps to catch some of the tile dust that is created during drilling, making cleanup a bit easier. It’s a small step that makes a big difference in the overall drilling process.
Securing the Tile (If Necessary)
If you are drilling a tile that is not yet installed, it’s vital to secure it firmly. A tile that moves while you’re drilling is much more likely to crack or break. This is where some local secrets come into play for a stable base.
- Place the tile on a non-slip surface, such as a rubber mat or a piece of carpet. This will prevent it from sliding around.
- For extra security, you can clamp the tile to your workbench or a sturdy piece of wood. Make sure the clamps are not directly over the spot where you plan to drill, but rather on the edges.
- Some pros use a bit of construction adhesive or a damp cloth under the tile to give it extra grip and stability, especially on smooth surfaces like a workshop bench. This adds an extra layer of friction.
The Step-by-Step Process for Drilling Tile
Now that you have the right tools and your tile is prepped, it’s time to get drilling! Following these steps carefully will help you achieve a clean hole without damaging your tile. It’s a methodical process, and patience is your best friend.
Setting Up Your Drill
Before you start drilling, make sure your drill is set up correctly. The right settings prevent the bit from overheating and the tile from cracking. This part is all about control and making sure your tool is ready for the job.
- Choose the correct drill mode. For drilling tile, you generally want to use a standard drilling setting, NOT the hammer drill setting. The hammer function provides percussive blows that can shatter tile.
However, some carbide-tipped bits might benefit from a gentle hammer action on very hard tiles, so research your specific bit.
- Select a slow speed. Tile drilling requires a slow, steady speed. Most modern drills have variable speed settings.
Start on the lowest setting and gradually increase if needed, but never use high speeds, as this creates excessive heat and friction.
- Ensure the drill is set to drill forward (clockwise rotation). This is the standard setting for most drilling tasks.
Starting the Hole
The very beginning of the drilling process is often the most critical. A little care here makes all the difference. You want the bit to bite into the tile without slipping or causing damage.
- Hold the drill perpendicular to the tile surface. Keep it as straight up and down as possible. Any angle can cause the bit to bind or skate.
- Begin drilling at a very slow speed. Apply light, steady pressure. You’re not trying to force the bit through the tile; you’re letting the bit do the grinding work.
- Once a small indentation is made, you can slowly increase your drill speed slightly, but always maintain light pressure. If you feel the bit struggling or the tile is vibrating excessively, slow down again.
Drilling Through the Tile
As you move through the tile, maintaining consistency is important. The goal is a smooth passage without breaks or chips. Keep these tips in mind as you progress.
- Maintain consistent, light pressure. Avoid pushing down too hard, as this can cause the bit to overheat or chip the tile edges. Let the bit’s cutting edges do the work.
- Periodically pull the drill bit out of the hole. This helps clear out tile dust and debris, which can prevent the bit from overheating and allows you to check your progress. It also lets you add more water for cooling.
- Keep the area cool and lubricated. For diamond or carbide bits, periodically dip the bit in water or spray water onto the drilling area. This is vital for preventing the bit and the tile from overheating, which can cause cracks.
Some people use a sponge soaked in water around the drilling site.
Finishing the Hole
Once you’ve broken through the tile, the job isn’t quite done. A few finishing touches will ensure the hole is clean and safe to use.
- Ease up on the pressure as you feel the bit about to break through the back of the tile. This reduces the chance of chipping the exit point, which is often more fragile than the entry point.
- Once the hole is complete, let the drill bit spin for a moment after it has passed through. This helps to smooth the edges of the hole and remove any loose bits of tile.
- Carefully remove the drill bit. Clean up any dust and debris from the tile surface using a damp cloth.
Cooling and Dust Control Techniques
Drilling tile generates heat and dust. Managing these two elements is key to a safe and clean job. These methods are often shared as local secrets because they make a big difference in the outcome.
The Water Trick
Water is your best friend when drilling tile. It cools the bit and the tile, preventing overheating, and it also helps to keep the dust down. This is a universally recommended technique.
- Use a spray bottle filled with water to periodically mist the drilling area. This keeps the bit and tile lubricated and cool.
- For a more continuous flow of water, you can create a small dam around the drilling site using plumber’s putty or a wet sponge. This allows the water to pool and keeps the bit submerged.
- Always remember to have a shop vacuum or a bucket ready to collect the water and tile slurry. Safety first, especially with water and electricity!
Dust Management
Tile dust can be harmful to your lungs and can make a big mess. Controlling it is an important part of the process, especially when drilling inside.
- A shop vacuum with a fine dust filter is ideal. You can position the vacuum hose near the drilling area to suck up dust as it’s created.
- If you don’t have a vacuum, you can use the water method described above, as the water will mix with the dust to form a paste, making it easier to clean up.
- Always wear a dust mask and safety glasses, even when using dust control methods. It’s better to be safe than sorry.
Maintaining the Drill Bit
Taking care of your drill bits ensures they perform well and last longer. This is especially true for specialized bits like diamond or carbide-tipped ones.
- Clean your bits after each use. Remove any dust or debris that might be stuck to them. A wire brush can be helpful for this.
- Allow bits to air dry completely before storing them. Storing wet bits can lead to rust or damage, especially for metal components.
- Inspect bits for wear and tear. If a bit seems dull or damaged, it’s time to replace it. Using a worn-out bit can lead to poor results and a higher risk of damaging your tile.
Common Problems and Solutions
Even with the best preparation, things can sometimes go wrong. Knowing how to fix common issues can save your project and your sanity. These are the problems most DIYers face and how to solve them.
Cracked or Chipped Tile
This is the most feared outcome for many. A cracked tile can sometimes be salvaged, but prevention is always better.
- If you notice a small chip, stop drilling immediately. You might be able to smooth the edges with fine-grit sandpaper or a diamond file. Sometimes, a tile repair kit can also fill small chips.
- For larger cracks, the tile might be unsalvageable. If this happens, you’ll need to carefully remove the cracked tile and
- Prevention is key: use the right bit, go slow, use light pressure, and keep the area cool.
Drill Bit Slipping
When the drill bit doesn’t catch on the tile surface, it can slide around, making it hard to start the hole and potentially causing damage.
- Ensure you’re using painter’s tape over the spot. This gives the bit a much better grip to start with.
- Start the drill on its slowest speed. Apply just enough pressure to let the bit engage without moving. Once a small divot is formed, you can increase speed slightly.
- If the bit continues to slip, consider scoring the tile surface with a sharp utility knife where you want the hole. This creates a small groove for the bit to catch.
Overheating Bit or Tile
Too much heat can ruin both your drill bit and your tile. It’s a common problem that’s easy to fix with water.
- Immediately stop drilling and let the bit and tile cool down. Adding water is the quickest way to cool them. Continue to mist or pour water on the area as you drill.
- Ensure you are using a slow drill speed. High speeds generate more heat.
- Pull the bit out of the hole frequently to let air circulate and to reapply coolant. This allows for better heat dissipation.
Real-World Examples and Scenarios
Seeing how others have successfully drilled holes in tile can offer practical insights. These examples show the versatility and application of these techniques in everyday projects.
Scenario 1: Installing a Towel Bar in a Bathroom
Sarah wanted to install a towel bar in her bathroom. The wall behind it was tiled with ceramic. She needed to drill two holes for the mounting brackets.
- Sarah marked the exact spot for each hole using a pencil and then applied painter’s tape over the marks.
- She chose a carbide-tipped drill bit and set her drill to a slow speed, with the hammer function turned off.
- She started drilling slowly, keeping the drill perfectly straight. She sprayed water on the area frequently to keep it cool.
- Once the holes were drilled, she cleaned up the dust and was ready to install her towel bar.
This method ensured clean holes without any damage to her bathroom tiles.
Scenario 2: Hanging a Mirror on a Tiled Kitchen Backsplash
John needed to hang a decorative mirror on his kitchen backsplash, which was made of glass tiles. He was worried about the glass cracking.
- John carefully measured and marked the two spots where the mirror hooks would go.
- He used a diamond-tipped drill bit specifically designed for glass and tile. He covered the area with painter’s tape and then made his marks on the tape.
- He set his drill to its lowest speed and applied very gentle, consistent pressure. He used a small amount of water to lubricate the bit.
- He pulled the bit out often to clear debris and cool the area. The slow, controlled process prevented any chips or cracks in the glass tiles.
The result was two perfectly drilled holes, allowing him to hang his mirror securely.
Factors Affecting Drilling Difficulty
Not all tile drilling jobs are the same. Several factors can make the process easier or harder. Understanding these can help you prepare better.
Type of Tile Material
The material of the tile plays a huge role in how easy or hard it is to drill. Softer tiles like ceramic are generally easier to work with than harder ones.
- Ceramic tiles are often softer and more porous. They are usually the easiest to drill through with standard carbide-tipped bits. They can be prone to chipping if too much force is applied.
- Porcelain tiles are much denser and harder than ceramic. They require diamond-tipped bits or very good quality carbide bits. Drilling porcelain takes more patience and a cooler operation.
- Glass tiles require specialized bits, like diamond-tipped ones. They are very brittle and can crack easily if not drilled with extreme care and the right technique. Overheating is also a major concern.
Tile Thickness and Glaze
Beyond the material itself, the thickness of the tile and the type of glaze can also affect drilling.
- Thicker tiles will naturally take longer to drill through and require more patience. You’ll need to ensure your drill bit is long enough to pass through the entire thickness.
- A very hard or thick glaze can be challenging. Some glazes can be very brittle and might chip away if the drill bit isn’t sharp or if too much pressure is used. Starting with a slow speed helps the bit to score the glaze cleanly.
Surface Condition
The condition of the tile’s surface can also influence the drilling process, especially at the start.
- A perfectly smooth and clean tile surface is ideal. If there is any grease, dirt, or debris, it can cause the drill bit to slip.
- Textured tiles can be tricky. The pattern might make it hard to get the drill bit perfectly centered or to keep it from wobbling. Painter’s tape is particularly helpful here.
Local Secrets for a Professional Finish
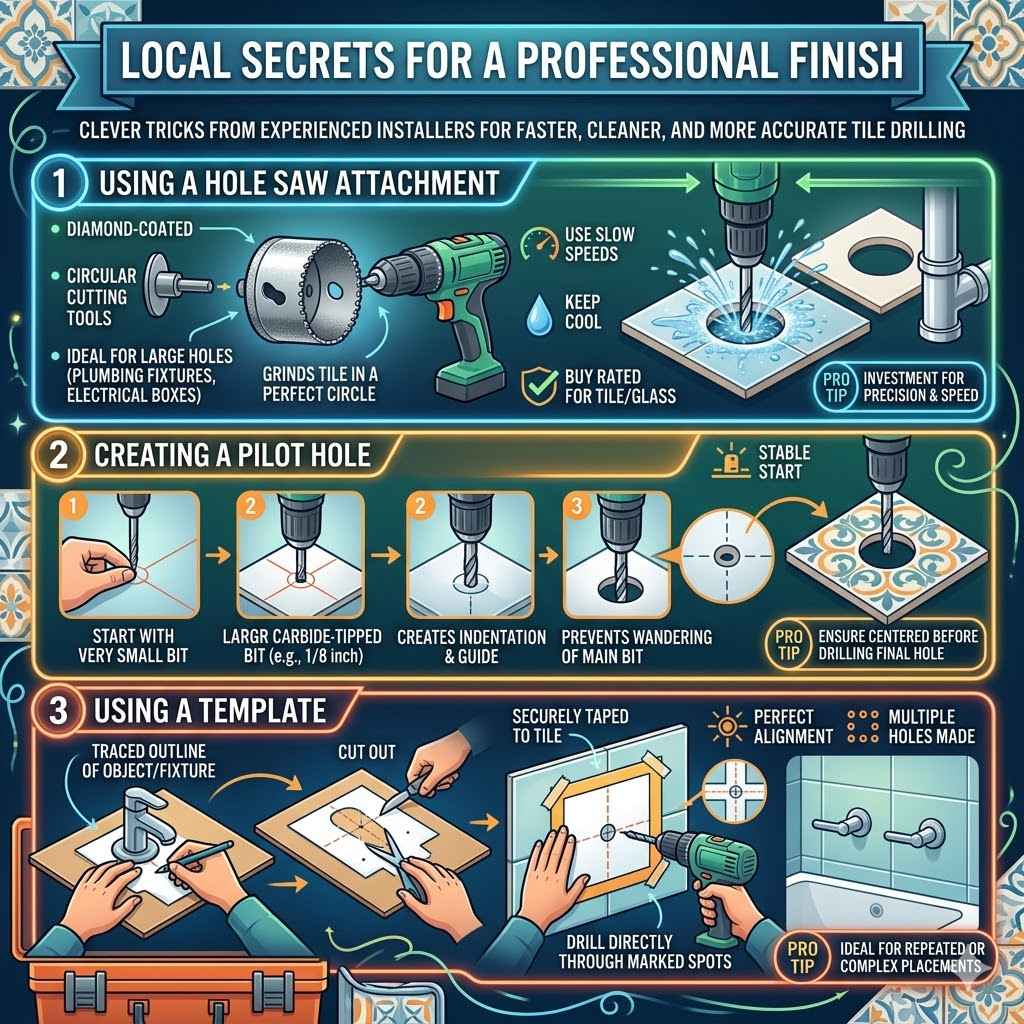
Many experienced installers have developed clever tricks over the years to make drilling tile faster, cleaner, and more accurate. These are the kinds of tips that make a big difference.
Using a Hole Saw Attachment
For larger, perfectly round holes, a hole saw attachment can be a professional’s best friend. These are often diamond-coated.
- Hole saws are circular cutting tools that attach to your drill. They are excellent for creating larger diameter holes, like those needed for plumbing fixtures or electrical boxes.
- They work by rotating a circular blade with diamond grit. This grinds away the tile in a perfect circle. You still need to keep them cool and use slow speeds.
- Be sure to get a hole saw rated for tile or glass. They can be more expensive than standard drill bits, but for specific jobs, they are invaluable.
Creating a Pilot Hole
Sometimes, starting with a very small hole can help guide the larger bit.
- If you’re drilling a larger hole, you can first drill a small pilot hole with a very small bit (e.g., 1/8 inch). This creates a small indentation and a guide for your main drill bit.
- This technique is especially useful if you’re worried about the main bit wandering. Make sure the pilot hole is perfectly centered where you want the final hole.
Using a Template
For multiple holes or precise placement, a template is invaluable.
- You can create a template by tracing the outline of an object or fixture onto a piece of cardboard or thin plywood. Cut out the shape, and then mark the center of your holes on the template.
- This template can then be taped securely to your tile. You can drill directly through the marked spots on the template, ensuring perfect alignment for multiple fixtures.
Frequently Asked Questions
Question: What is the best drill bit to use for ceramic tile?
Answer: For ceramic tile, a carbide-tipped masonry bit or a diamond-tipped drill bit is recommended. Diamond bits offer the best performance and longevity, especially for harder tiles.
Question: Can I use a regular drill bit on tile?
Answer: No, a regular metal drill bit is not suitable for tile. It will likely dull immediately, shatter the tile, or not even penetrate it.
Question: How do I stop tile from cracking when drilling?
Answer: To prevent cracking, use the correct drill bit (diamond or carbide-tipped), start with a slow speed, apply light and steady pressure, and keep the drilling area cool with water.
Question: Do I need a special drill for tile?
Answer: You don’t necessarily need a special drill. A standard corded or cordless drill with variable speed settings is sufficient. Avoid using the hammer drill function on most tiles.
Question: How deep should I drill into the tile?
Answer: You only need to drill through the thickness of the tile. Once the bit breaks through the back, stop applying pressure and withdraw the bit slowly.
Conclusion
Learning How to Drill a Hole in Tile: Best Bits and Local Secrets empowers you for many home projects. With the right bit, slow speeds, and steady pressure, you can achieve clean holes. Cooling with water and managing dust are simple but essential steps.
Enjoy tackling your next tiling task with confidence.