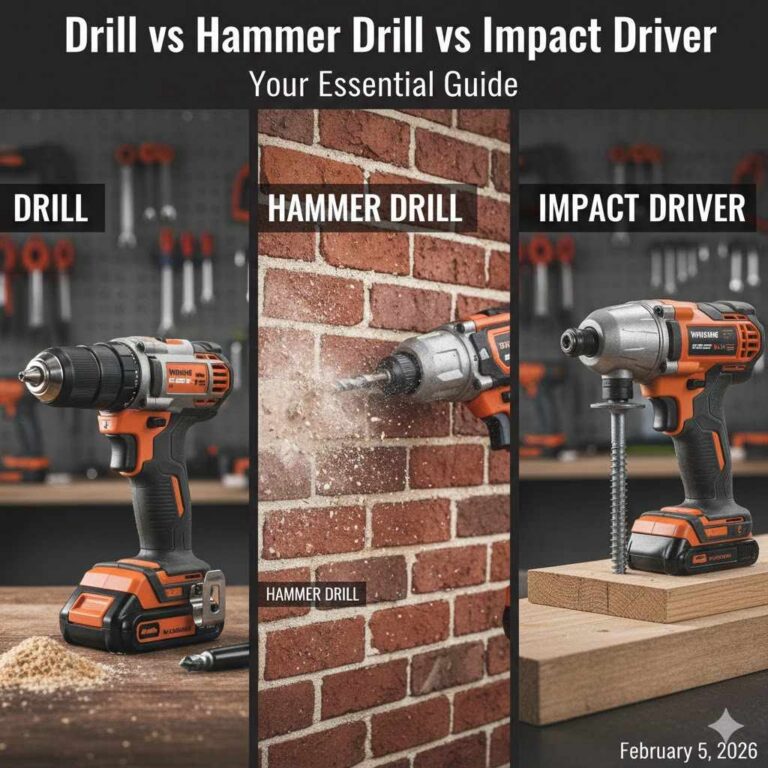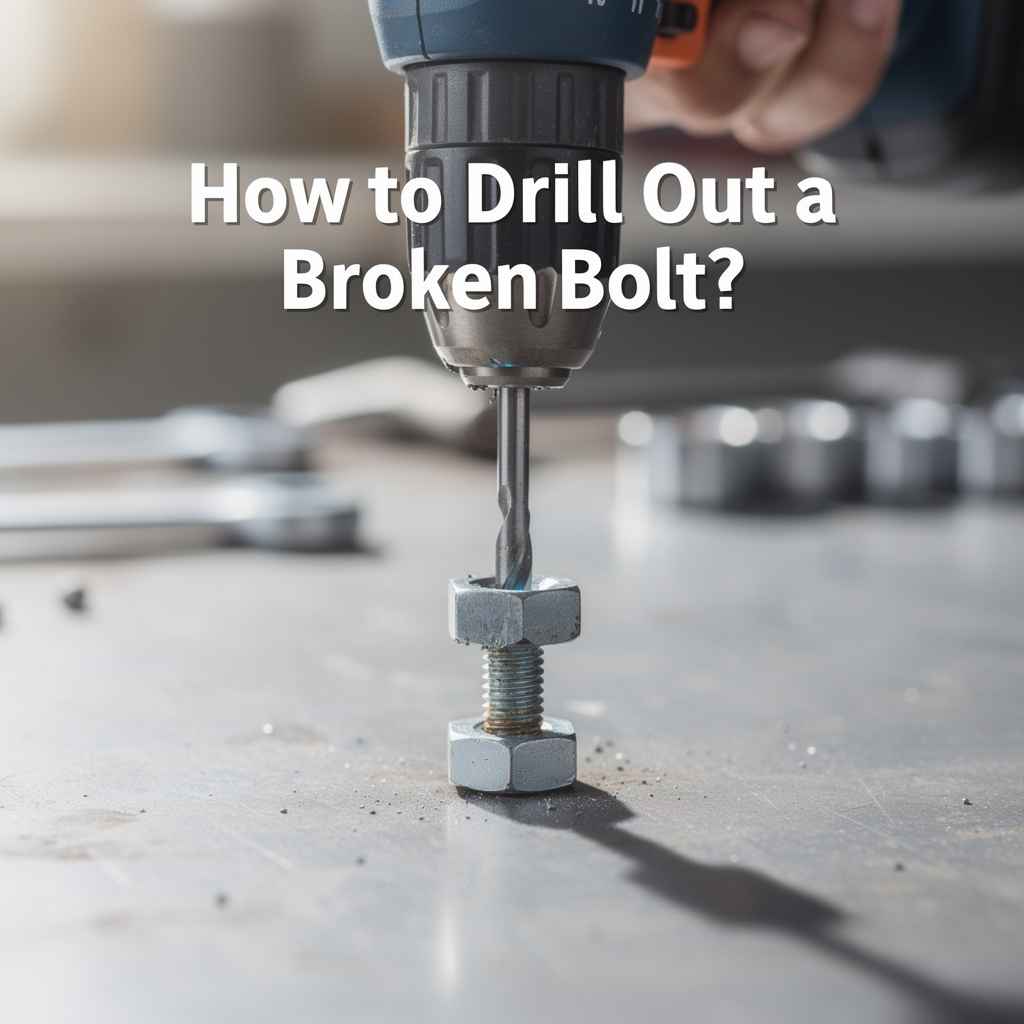
How to Drill Out a Broken Bolt?
Dealing with a broken bolt can feel like a big problem, especially for folks who aren’t mechanics. You might be wondering, how to drill out a broken bolt? It sounds tricky, but don’t worry!
This guide will walk you through it step-by-step. We’ll make this task simple and clear. Soon, you’ll know exactly what to do to fix that stubborn broken bolt.
Let’s get started on fixing it.
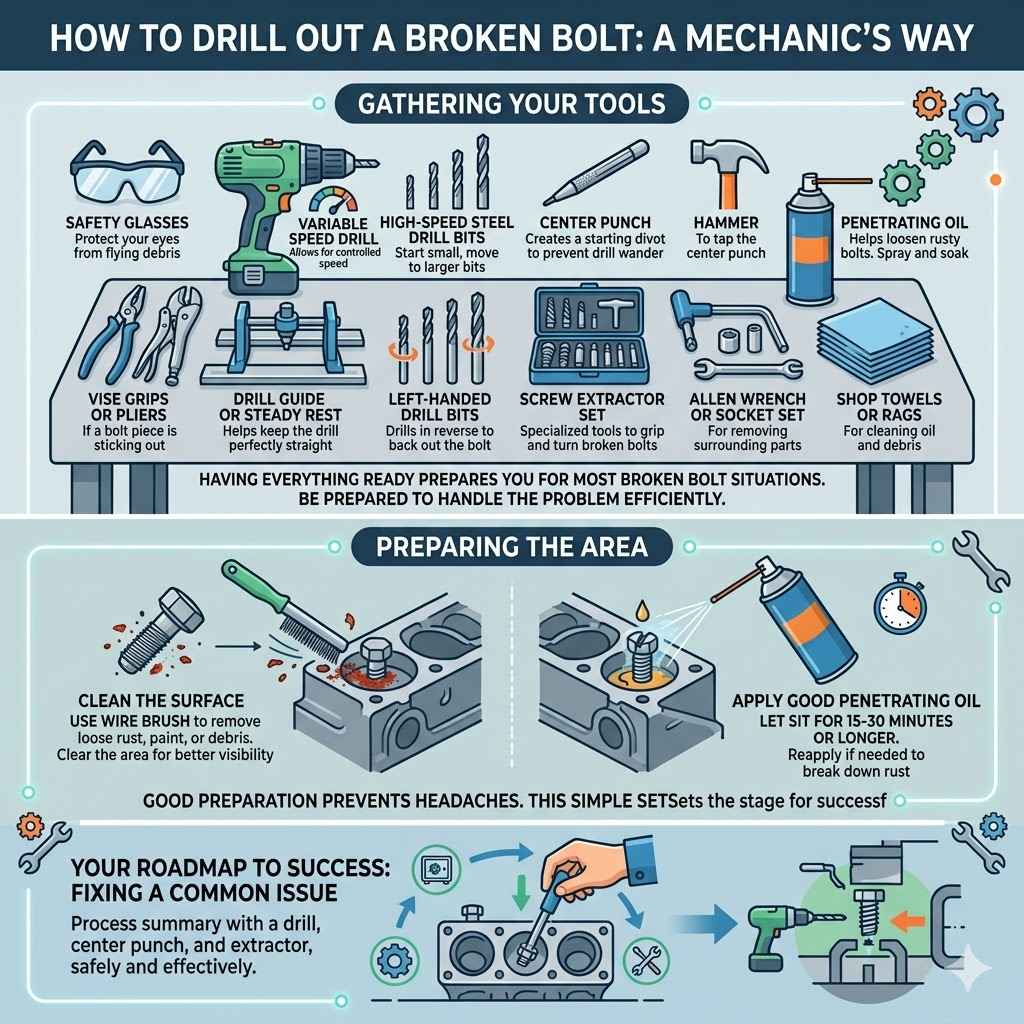
How to Drill Out a Broken Bolt A Mechanic’s Way
This section covers the essential process for removing a broken bolt. It’s the core of fixing this common issue. We’ll go over the tools you need and the basic steps to get the job done safely and effectively.
Think of this as your roadmap to success when a bolt snaps off.
Gathering Your Tools
Before you begin, having the right tools is super important. This makes the whole job much easier and safer. You don’t want to start and then realize you’re missing something vital.
Having everything ready means you can move from one step to the next without delay.
- Safety Glasses: Protect your eyes from flying debris. Metal shavings can be sharp and dangerous. Always wear them when drilling or working with metal.
- Drill: A variable speed drill is best. It allows you to control how fast the drill bit spins. Cordless drills are convenient, but a corded one might offer more consistent power.
- Drill Bits: You’ll need a set of high-speed steel drill bits. Start with a small bit and gradually move to larger ones.
- Center Punch: This tool makes a small divot where you want to start drilling. It stops the drill bit from wandering.
- Hammer: To tap the center punch and create the starting mark.
- Penetrating Oil: This helps loosen rusty bolts. Spray it on the broken bolt and let it soak in.
- Vise Grips or Pliers: Sometimes, if a piece of the bolt is sticking out, you can grab it.
- Drill Guide or Steady Rest: This helps keep your drill perfectly straight. It’s a big help for beginners.
- Left-Handed Drill Bits: These drill in reverse. Sometimes, as they drill, they catch the broken bolt and back it out.
- Screw Extractor Set: These specialized tools are designed to grip and turn broken bolts.
- Allen Wrench or Socket Set: If you need to remove surrounding parts.
- Shop Towels or Rags: For cleaning up oil and debris.
Having these tools ready will prepare you for most broken bolt situations. It’s about being prepared so you can handle the problem efficiently.
Preparing the Area
Good preparation prevents a lot of headaches. Cleaning the area around the broken bolt is a key first step. This removes dirt and rust that could get in the way or make things harder.
- Clean the Surface: Use a wire brush to remove any loose rust, paint, or debris from around the bolt. This gives you a clean surface to work on. A clean area also makes it easier to see exactly what you are doing.
- Apply Penetrating Oil: Spray a good penetrating oil onto the broken bolt. Let it sit for at least 15-30 minutes, or even longer if the bolt is really stuck. Some people even leave it overnight. This oil helps to break down rust and loosen the bolt’s grip. You might need to reapply it a few times.
This simple preparation makes a huge difference. It sets the stage for successful drilling.
How to Drill Out a Broken Bolt Step By Step
This is the main event. We will break down the actual drilling process into easy-to-follow steps. Following these carefully will help you remove the broken bolt without causing more damage.
Step 1 Marking the Center
Accuracy is key here. You need to drill right in the middle of the broken bolt. This ensures the extractor or subsequent drilling will work correctly.
- Use a center punch and a hammer to make a small indent. Place the tip of the punch exactly where you want to start drilling.
- Tap the punch gently with the hammer to create a small divot. This divot will guide your drill bit and prevent it from slipping.
This small mark is your guide for everything that follows. It’s a critical step for a clean job.
Step 2 Drilling the Pilot Hole
Now, it’s time to start drilling. Begin with a small drill bit. This pilot hole is important for guiding larger bits and for screw extractors.
- Select a small, sharp drill bit. It should be smaller than the diameter of the broken bolt. A common starting point is about 1/8 inch (3mm).
- Place the tip of the drill bit into the center punch mark.
- Start drilling slowly and steadily. Keep the drill bit as straight as possible. A drill guide can be very helpful here if you have one.
- Drill straight down into the bolt. You don’t need to drill too deep, just enough to get a good start.
The goal is a straight, centered hole. This is the foundation for removing the rest of the bolt.
Step 3 Increasing Drill Bit Size
As you drill further, you’ll gradually use larger bits. This step clears out more of the broken bolt material and prepares for the extractor.
- Choose a slightly larger drill bit. For instance, if you started with 1/8 inch, move to 5/32 inch or 3/16 inch.
- Continue drilling straight down into the bolt.
- Keep the drill speed moderate and apply steady pressure.
- If using left-handed drill bits, try drilling with the drill set to reverse. Sometimes, the bit will bite into the bolt and unscrew it automatically.
It’s like making a clean tunnel through the broken bolt. Each larger bit removes more material.
Step 4 Using a Screw Extractor
Screw extractors are your best friends for this job. They are designed to grip the inside of the drilled hole.
- Choose the correct size screw extractor for the hole you’ve drilled. Extractors have a tapered, reverse thread.
- Tap the end of the extractor gently into the drilled hole with a hammer. This helps it seat firmly.
- Using a tap wrench or a socket wrench, slowly turn the extractor counter-clockwise. Apply steady pressure.
- The extractor’s reverse threads should bite into the bolt. As you turn, it should start to unscrew the broken bolt.
If the extractor starts to slip, you may need to try a slightly larger bit and a corresponding larger extractor. Patience is key.
Step 5 Dealing with Stubborn Bolts
Sometimes, even with an extractor, the bolt won’t budge. Don’t give up; there are a few more things to try.
- Heat: Applying heat can expand the surrounding metal, which might loosen the bolt. Use a heat gun or a propane torch carefully. Apply heat to the metal around the bolt, not directly to the bolt itself.
- Hammering the Extractor: Sometimes, giving the extractor a few sharp taps with a hammer while turning can help break it free.
- Re-drilling: If the extractor fails, you might need to drill out the bolt more completely. This requires more skill to avoid damaging the threads in the part. You’d use a drill bit that’s almost the same size as the bolt’s thread diameter.
These methods require a bit more care, but they can be very effective.
Step 6 Cleaning Up Threads
Once the bolt is out, you need to clean up the threads. This ensures a new bolt will thread in properly.
- Use a tap of the correct size to clean the threads. This tool re-cuts the threads if they were damaged.
- If you don’t have a tap, a stiff wire brush can often remove remaining debris.
Clean threads are essential for a secure repair.
Tools and Techniques for Removing Broken Bolts
This section explores different tools and advanced techniques that can make removing broken bolts easier. It goes beyond the basics to offer more options for tricky situations.
Advanced Drilling Techniques
Sometimes, standard drilling isn’t enough. There are more precise methods for tough jobs.
- Drilling with the Part Submerged: For small parts, drilling while submerged in oil can help cool the bit and flush out shavings. It also reduces the risk of fire from hot metal shavings.
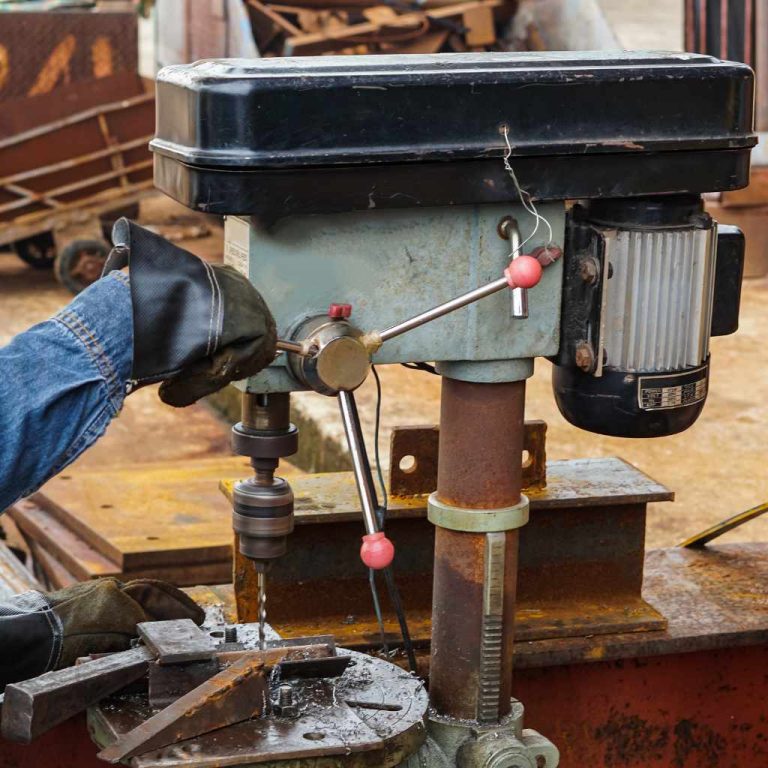
- Using a Drill Press: A drill press offers much more stability and accuracy than a hand drill. It ensures the drill bit stays perfectly perpendicular to the surface, which is critical for difficult removals.
- Left-Handed Drill Bits Explained: These bits are designed to cut while spinning in reverse (counter-clockwise). As they cut into the broken bolt, the counter-clockwise force can sometimes grip the bolt and unscrew it without needing an extractor. They are a great first step after the pilot hole.
These techniques require a bit more specialized equipment or care but can save the day.
The Role of Heat and Cold
Temperature changes can work wonders on stubborn metal. Understanding how to use them is a valuable skill.
- Heat Application: Applying heat to the material surrounding the broken bolt can cause it to expand. This expansion creates space, potentially loosening the bolt’s grip. Use a propane torch or a heat gun. Be careful not to overheat, especially if there are rubber or plastic parts nearby.
- Cold Application: In some cases, rapid cooling with an aerosol coolant or even dry ice can cause the broken bolt to contract, helping to break its bond with the surrounding material. This is often used in combination with heat.
- Thermal Shock: Alternating between heat and cold can be very effective. Heat the area, let it cool slightly, then apply cold. This rapid expansion and contraction can shock the bolt loose.
Temperature is a powerful force in mechanics. Using it wisely can avoid a lot of frustration.
When to Call a Professional
Sometimes, a job is just too difficult or risky to do yourself. Knowing when to get expert help is smart.
- Damaged Threads: If you suspect the threads in the component are badly damaged, it might be better to let a professional assess the situation. They have specialized tools for thread repair.
- Valuable or Critical Components: If the part the bolt is stuck in is very expensive or crucial to the function of a machine, it’s safer to get professional help. A mistake could cost more than professional repair.
- Lack of Tools or Experience: If you don’t have the necessary tools or feel uncomfortable with any of the steps, it’s wise to seek assistance from a qualified mechanic.
There’s no shame in asking for help. It’s about getting the job done right without causing more damage.
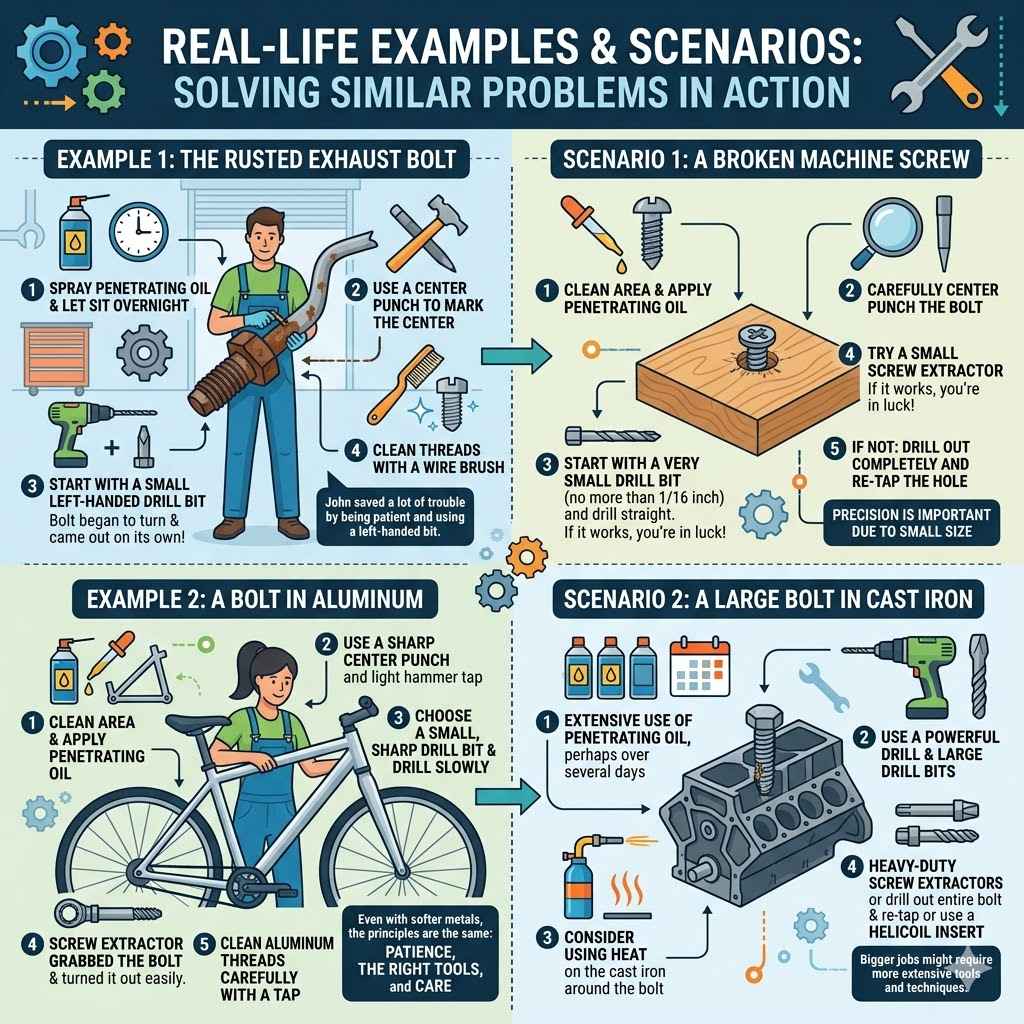
Real-Life Examples and Scenarios
Seeing how others have solved similar problems can be very helpful. These examples show the process in action.
Example 1: The Rusted Exhaust Bolt
John was trying to replace his car’s muffler. One of the bolts holding it in place snapped. It was heavily rusted.
- He sprayed penetrating oil on the broken bolt and let it sit overnight.
- The next day, he used a center punch to mark the center of the broken bolt.
- He started with a small left-handed drill bit, and as he drilled, the bolt began to turn and came out on its own!
- He then used a wire brush to clean the threads on the exhaust pipe.
John saved himself a lot of trouble by being patient with the penetrating oil and by using a left-handed bit.
Scenario 1: A Broken Machine Screw
Imagine you are assembling a piece of furniture, and a small machine screw breaks off inside. It’s flush with the surface.
- You would clean the area and apply penetrating oil.
- Carefully center punch the bolt.
- Start with a very small drill bit, no more than 1/16 inch, and drill straight.
- Try a small screw extractor. If it works, you’re in luck!
- If not, you might need to drill it out completely and then re-tap the hole.
This is a common situation where precision is important due to the small size of the screw.
Example 2: A Bolt in Aluminum
Sarah was working on an aluminum bike frame, and a bolt broke off. Aluminum is softer than steel, so you have to be careful not to damage the threads.
- She cleaned the area and applied a bit of penetrating oil.
- She used a sharp center punch and a light hammer tap.
- She chose a small, sharp drill bit and drilled slowly.
- When she tried a screw extractor, it grabbed the bolt and turned it out easily.
- She then used a tap to clean the aluminum threads carefully.
This shows that even with softer metals, the principles are the same: patience, the right tools, and care.
Scenario 2: A Large Bolt in Cast Iron
You are working on an old cast iron engine block, and a large bolt snaps off. These are often seized tight.
- Extensive use of penetrating oil is crucial, perhaps over several days.
- Use a powerful drill and large drill bits.
- Consider using heat on the cast iron around the bolt.
- Heavy-duty screw extractors or even drilling out the entire bolt and re-tapping or using a Helicoil insert might be necessary.
This scenario highlights that bigger jobs might require more aggressive methods and tools.
Frequently Asked Questions
Question: What is the most common reason bolts break off
Answer: Bolts often break off due to rust, over-tightening, using the wrong size tool, or repeated stress from vibration.
Question: Can I use a regular drill bit to remove a broken bolt
Answer: While you start with regular drill bits to make a hole, you usually need a screw extractor or specialized left-handed bits to actually remove the bolt.
Question: How do I know what size screw extractor to use
Answer: The size of the screw extractor depends on the size of the hole you drill into the broken bolt. The extractor packaging will usually indicate which drill bit size to use for a specific extractor.
Question: What if the bolt is broken flush with the surface
Answer: If it’s flush, you must start by carefully center punching the exact middle. Then, use small drill bits to make a pilot hole before attempting extraction.
Question: Can I damage the threads when drilling out a broken bolt
Answer: Yes, it’s possible to damage the threads if the drill bit wanders off center or if you are too aggressive. Using a drill guide and starting with small bits helps prevent this.
Wrap Up
Fixing a broken bolt is a common task. You have learned how to drill out a broken bolt using a step-by-step mechanic’s guide. Remember to gather your tools, prepare the area, and drill with care.
Using the right technique and tools will help you successfully remove the bolt. Don’t be afraid to try; practice makes perfect with this skill.