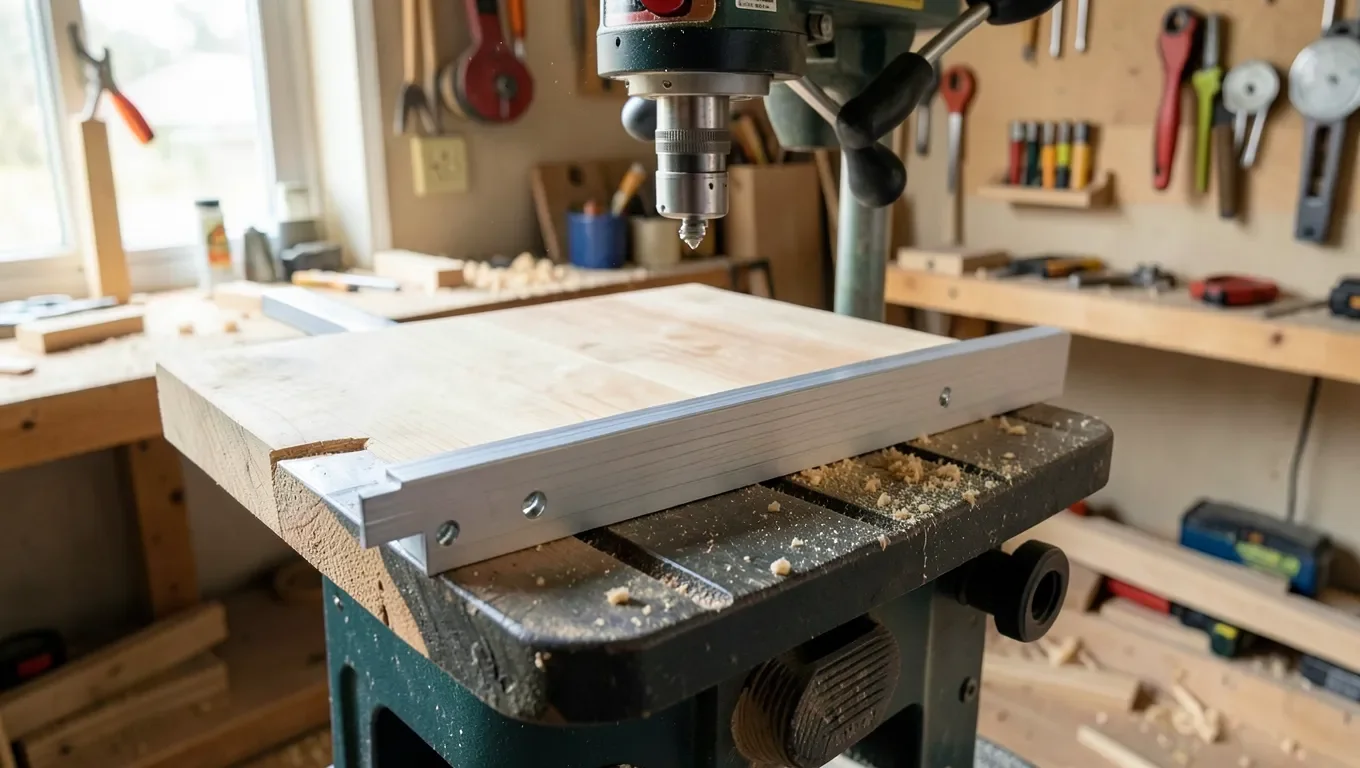
DIY Drill Press Table: T-Track Fence & Dust Collection Build Plan
A DIY drill press table needs three things a factory-stock cast-iron table doesn’t give you: a flat surface big enough for the workpiece, a fence you can lock down on a T-track, and a way to replace the hole in the middle after a spade bit blows through it. Build it right and it costs under $60 in materials plus one $19-$70 hardware kit — far less than most drill press themselves cost, and less than most pre-made aftermarket tables run.
Most online plans skip the part that actually fails first: the center hole. Drill a fixed hole straight through your tabletop and the first time you run a 1-inch Forstner bit or a hole saw through it, you’ve blown out the surface around the hole and the table stops sitting flat. The fix — a round, replaceable insert disc set into a routed recess — takes twenty extra minutes to build and means you swap a $2 scrap of MDF instead of rebuilding the whole table. That’s covered below, along with real T-track spacing, a dust-collection tunnel that actually pulls debris instead of just having a port glued on, and the exact hardware to buy instead of “some clamps.”
Materials and Hardware You’ll Need
Best T-Track Fence Upgrade Kit
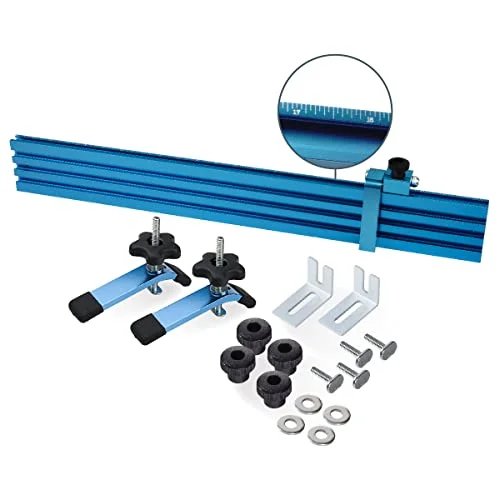 |
POWERTEC 71633 Drill Press Fence Set – $71.24 A ready-matched T-slot fence, hold-down clamps, and flip stops — the exact hardware set this build’s fence step calls for, instead of piecing one together from three different listings.
|
The tabletop is two layers, not one: a 3/4-inch MDF or Baltic birch plywood core for rigidity, topped with a sheet of 1/8-inch tempered hardboard as a sacrificial wear layer. MDF alone dents and swells at the edges after enough drilling; the hardboard skin takes the wear and gets replaced in under an hour when it’s chewed up. For a benchtop drill press, size the top at 24 inches wide by 18 inches deep — big enough to support a full-width board without it teetering off the edge, small enough that it doesn’t overhang your bench.
For the fence and hold-downs, buy the hardware instead of improvising it — a shop-built wooden fence with no T-track has no way to lock a stop block or a clamp in a repeatable position, which is the whole reason a fence exists. Look for double-cut profile aluminum T-track, 3/4 inch wide by 3/8 inch deep, which accepts standard 1/4-inch and 5/16-inch T-bolts and hex-head bolts. Run one length across the tabletop (for stop blocks) and a second length milled into the back face of the fence itself (for hold-down clamps). You’ll also need: 2-1/2 inch wood screws and wood glue for the base-to-top joint, a handful of #8 washer-head screws to hold the hardboard skin down (not glued, so it’s replaceable), a 3/8-inch round-over router bit for the tabletop edges, and a 2-inch or 2-1/2 inch shop-vac hose adapter for the dust port.
Getting the Size and Center Insert Right
Before cutting anything, check how much clearance sits between your drill press column and the quill when it’s lowered — that distance sets your maximum table depth. Most benchtop drill presses give you 10 to 14 inches of throat depth, so an 18-inch-deep table already overhangs the factory table on the infeed side, which is intentional: it gives long boards something to rest on before they reach the bit.
The Replaceable Center Insert
Rout a 4-inch-diameter, 1/4-inch-deep recess in the center of the tabletop, then cut a matching 4-inch disc of 1/4-inch hardboard or plywood to drop into it flush with the surface. Drill the insert’s own bit-clearance hole to match whatever bit you’re using that day — a 1/4-inch hole for small bits, or swap in a second insert pre-drilled at 1-1/4 inches for hole saws and Forstner bits (see our guide on drill bit if you’re swapping bits often on the same session). When the hole blows out or the insert splinters, you lift out one disc and drop in a fresh one instead of re-flattening the whole table.
Step-by-Step Build
1. Build and Mount the Base
Cut a base plate sized to your drill press’s own table or mounting arm. Transfer the bolt-hole pattern from the factory table directly onto the base with the drill press’s table still bolted on, so the holes line up exactly — measuring it off a tape measure invites a fraction-of-an-inch error that won’t seat evenly. Drill through and bolt the base to the drill press arm with the same hardware the factory table used. If your drill press is still sitting on its factory legs rather than a proper stand, it’s worth building a drill press first so the whole setup is bolted down and stable before you start adding a custom table on top of it.
2. Build the Tabletop
Cut the MDF or plywood core to 24×18 inches, then rout the center insert recess before attaching anything else — it’s far easier to rout flat stock on a workbench than after the fence and hardboard are on. Glue and screw the hardboard wear layer to the core, keeping screws at least an inch outside the working area so a bit never hits one. Round over the front and side edges with the 3/8-inch bit so the table doesn’t chew up your forearms during long sessions. Center and bolt the finished top to the base.
3. Install the T-Track Fence
Mount the tabletop T-track parallel to the front edge, centered on the insert hole, using the pre-drilled mounting holes and #8 wood screws. This is the track your fence rides on and your stop blocks lock into. Attach the fence itself — either shop-built from a straight hardwood strip with a T-track milled into its back face, or a ready-made fence set like the one below, which already has the T-slot, hold-down clamps, and flip stops built in. Set the fence square to the insert with a machinist’s square before locking it down; a fence that’s even a degree off will show up as a taper on every hole you drill against it.
4. Add the Dust-Collection Tunnel
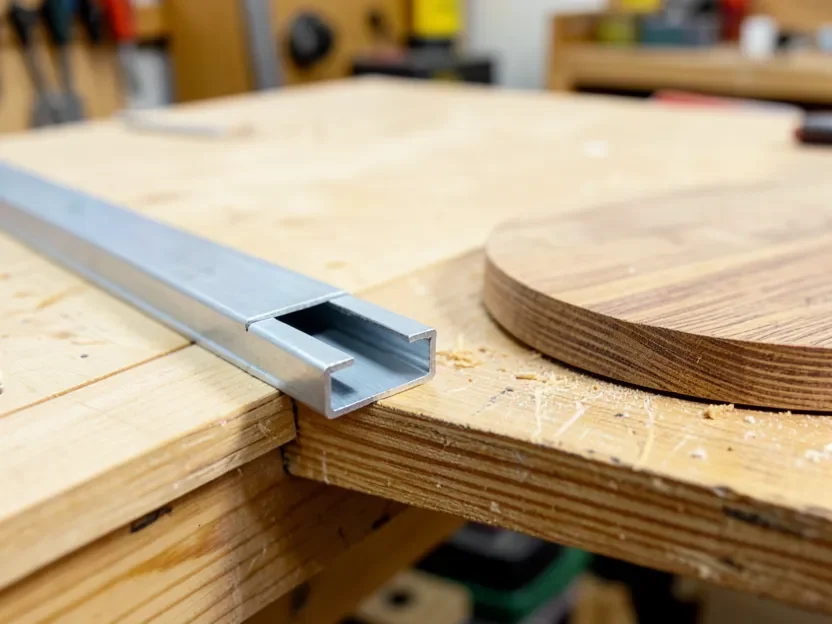
Instead of just zip-tying a hose near the bit, cut a shallow channel into the back face of the fence that runs its full length and terminates at a hole sized for your shop-vac adapter. Debris kicked up by the bit gets pulled sideways into the channel and out through the port, instead of piling up on the table where it hides your layout lines. A 2-inch port matches most shop-vac hoses directly; step up to 2-1/2 inch if you’re running a dedicated dust collector instead of a vacuum.
Upgrades for Specific Projects
Adding a Miter Gauge Slot
If you regularly drill angled holes in narrow stock, rout a second, shorter T-track perpendicular to the main fence track to accept a standard miter gauge bar. This turns repeatable angled drilling into a matter of setting the gauge once instead of re-clamping a wedge block for every hole.
Extending for Larger Panels
For plywood panels or long boards, bolt on a removable extension wing — another piece of 3/4-inch MDF the same thickness as the main top, supported by a fold-down leg or a bracket to your bench. Keep it removable rather than permanent; a fixed 4-foot table eats floor space you don’t get back on days you’re drilling small parts.
Maintenance
Wipe the hardboard surface with a tack cloth after each session — sawdust left sitting on hardboard absorbs shop humidity and swells the fibers, which is what actually causes a “flat” table to develop a hump over a season, not the wood itself failing. Every few months, back out the T-track mounting screws, clear packed sawdust out of the track channel with a shop-vac crevice tool, and check that the fence still slides without binding. Replace the hardboard wear layer once its surface is visibly pitted or grooved — it’s a $10, twenty-minute swap, and running a fresh bit against a gouged surface is what actually causes tear-out on the workpiece.
Troubleshooting
Table Rocks or Wobbles
Almost always a loose base-to-arm bolt, not a flatness problem — check that first before you start shimming. If the base itself rocks on the bench, the base plate was cut slightly out of square; true up the offending edge with a hand plane rather than adding shims, which compress over time and the wobble comes back.
Fence Won’t Stay Square
This is T-track slop, not a bad fence. Over time the T-bolt heads wear a slightly oversized channel in soft aluminum track. Swap in a T-bolt with a wider head, or add a second lock point near the far end of the fence instead of clamping only at one end — a fence locked at a single point will pivot slightly on that one bolt no matter how tight you crank it.
Holes Come Out Off-Center
Check the insert disc first — if it’s been swapped a few times, the bit-clearance hole may no longer be centered in the 4-inch recess. Re-cut a fresh insert rather than trying to correct for an off-center hole by eye; that’s the entire reason the insert is a separate, cheap, replaceable part instead of a hole drilled straight into the main top.
Frequently Asked Questions
What Materials Are Needed for a DIY Drill Press Table?
A 3/4-inch MDF or Baltic birch plywood core, a 1/8-inch tempered hardboard wear layer, 3/4-inch by 3/8-inch double-cut T-track, 2-1/2 inch wood screws, wood glue, and a 2-inch shop-vac hose adapter for the dust port. Budget $50-$60 for the plywood and hardware plus a T-track fence kit.
How Do I Keep the Center Hole from Wrecking the Table?
Rout a 4-inch recess in the center of the tabletop and drop in a separate, replaceable insert disc drilled for whatever bit you’re using. When a Forstner bit or hole saw blows out the insert, you swap that one disc instead of re-flattening or rebuilding the entire tabletop.
What Size Should a DIY Drill Press Table Be?
24 inches wide by 18 inches deep works for most benchtop drill presses, giving enough surface to support a full-width board without overhanging the factory table by more than a few inches. Check your own quill-to-column clearance before cutting, since that distance limits maximum table depth.
Does a Shop-Built Fence Really Need Dust Collection?
Yes, if debris is a problem you actually notice. A channel routed into the back of the fence that ties into a 2-inch shop-vac port pulls chips sideways off the table instead of letting them pile up over your layout lines, which is where most accuracy complaints about a DIY table actually come from.
Conclusion
A DIY drill press table earns its keep in two places a stock table can’t: a fence that locks square on a T-track instead of a single set-screw, and a center insert you replace for a couple of dollars instead of rebuilding the whole surface. Get the base bolted down flat, cut the insert recess before you attach anything else, and square the fence with an actual square instead of by eye — those three steps are what separate a table that stays accurate for years from one you’re re-shimming every few months.
Sponsored / affiliate links. As an Amazon Associate I earn from qualifying purchases. I may earn additional commission from eligible campaigns.