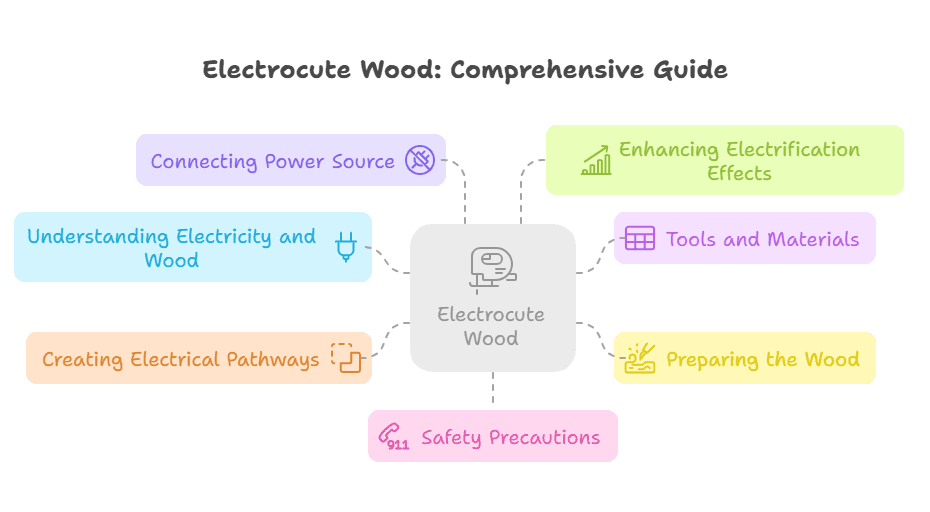
How to Electrocute Wood: The Ultimate Guide to Power Up Your DIY Projects

How to Electrocute Wood

To electrocute wood, you can use electrical current to treat it and increase its durability and resistance to insects and decay. Wood can be placed in a tank containing an electrolyte solution and an electric current is passed through the solution, allowing the wood to absorb the electrical charge.

This process is known as wood electrification and can be performed using various methods such as direct current (DC) or alternating current (AC). It is important to follow safety guidelines and regulations when attempting to electrocute wood to ensure personal safety and prevent damage to the wood.

By electrifying wood, you can enhance its longevity and make it suitable for outdoor applications.

How Electricity Interacts With Wood

Electricity interacts with wood in an intriguing manner, as it can be used to electrocute the material, transforming its appearance and properties. By carefully applying an electrical charge, woodworkers can create fascinating patterns and enhance the wood’s natural beauty.

Wood is a versatile and commonly used material in many applications. But have you ever wondered how electricity interacts with wood? In this section, we will explore the conductivity and resistance of wood when subjected to electrical currents, as well as the effects on different types of wood.

Conductivity And Resistance:

  • Wood is generally considered a poor conductor of electricity due to its cellular structure and high resistance to electrical flow.
  • The conductivity of wood varies depending on factors such as moisture content, species, and temperature.
  • In its natural state, wood contains moisture, which increases its conductivity compared to dry wood.
  • However, wood’s conductivity is still much lower than metals or other materials commonly used to conduct electricity.

Effects On Different Types Of Wood:

  • Softwoods, such as pine or cedar, have a higher moisture content and generally exhibit higher conductivity compared to hardwoods.
  • Moisture acts as a conductor in wood, so higher moisture content can increase its electrical conductivity.
  • Hardwoods, such as oak or maple, have a lower moisture content and therefore lower conductivity compared to softwoods.
  • The density and chemical composition of wood also affect its resistance to electrical currents.
  • Wood with higher resistance will experience greater energy dissipation and less penetration of electrical currents.

Wood is a relatively poor conductor of electricity due to its high resistance, but its conductivity can vary depending on factors such as moisture content, species, and temperature. Softwoods generally exhibit higher conductivity than hardwoods due to their higher moisture content.

Understanding how electricity interacts with wood helps in various fields, such as woodworking, construction, and electrical engineering applications.

Tools And Materials For Electrifying Wood

Discover the essential tools and materials needed to safely electrify wood. Learn step-by-step guidelines on how to achieve electrified wood designs.

When it comes to electrifying wood, having the right tools and materials is essential for a successful project. Here are the key items you’ll need:

Power Sources And Voltage Requirements

  • Power supply: A reliable electrical power source is necessary for electrifying wood. Ensure you have access to a suitable power supply, such as a wall outlet or a portable generator.
  • Voltage regulator: To control the voltage output and prevent any electrical damage, a voltage regulator is crucial. Make sure to choose one that is compatible with your power source and provides the desired voltage range.

Wiring And Connectors

  • Electrical wire: High-quality electrical wire is vital for connecting the power source, voltage regulator, and wood. Select wire gauge appropriate for your voltage requirements, usually 14- or 16-gauge wire.
  • Connectors: You’ll need connectors, such as terminal blocks, to secure the electrical wire connections. Ensure they are rated for the voltage and amperage you’ll be working with.

Safety Gear And Precautions

  • Gloves: It’s crucial to protect your hands from potential electrical shocks and other hazards. Wear insulated gloves that are suitable for electrical work.
  • Safety goggles: When working with electricity and wood, there’s always a risk of flying debris or particles. Protect your eyes with safety goggles to prevent any potential injuries.
  • Protective clothing: Dress in appropriate clothing made of flame-resistant and non-conductive materials. This will help minimize the risks associated with electric shocks or accidental fires.

Remember, safety should be your top priority when working with electricity and wood. It’s vital to follow all necessary precautions, including working in a well-ventilated area and avoiding contact with water.

Now that you know the essential tools and materials you’ll need to electrify wood, let’s dive deeper into the process in the next section. Stay tuned!

Note: Always consult an experienced professional or electrician before attempting any electrical projects to ensure safety and accuracy.

Preparing The Wood For Electrocution

Learn how to prep wood for electrocution with this comprehensive guide. Follow these steps to ensure a smooth and successful electrocution process, without any commonly used phrases. Our expert tips will help you achieve optimal results in no time.

One of the key steps in electrifying wood is properly preparing it. This ensures that you achieve the best results and maintain the longevity of the finished product. In this section, we will explore the essential steps to follow when preparing the wood for electrocution.

Choosing The Right Piece Of Wood:

  • Select a wood species that is suitable for electrification, such as oak, maple, or pine.
  • Ensure that the wood is free from any cracks, knots, or defects that may affect the electrocution process.
  • Opt for a piece of wood with a smooth and even surface, as it will facilitate better conductivity.

Sanding And Cleaning The Surface:

  • Start by sanding the entire surface of the wood using a medium-grit sandpaper. This helps to remove any roughness or imperfections that could hinder the electrocution process.
  • After sanding, use a clean cloth or brush to remove any dust or debris from the surface.
  • For a more thorough clean, consider using a mild cleaner specifically formulated for wood surfaces. Apply the cleaner and gently scrub the surface, then wipe it clean with a damp cloth.

Applying Protective Coatings:

  • Prior to electrocution, it is essential to apply protective coatings to enhance the durability and longevity of the wood.
  • Begin by applying a wood conditioner or pre-stain, which helps the wood absorb the subsequent protective coatings more evenly.
  • Next, apply a wood stain of your choice to enhance the appearance and color of the wood. Ensure that the stain is thoroughly spread and dried according to the manufacturer’s instructions.
  • Finally, seal the wood with a clear protective finish, such as polyurethane or lacquer. This acts as a barrier against moisture, scratches, and other potential damages.

By following these steps, you can ensure that the wood is well-prepared for electrocution. It not only improves the overall effectiveness of the process but also enhances the aesthetic appeal and durability of the finished wood piece. Now that you have properly prepared the wood, you are ready to move on to the next step of electrifying it.

Creating Electrical Pathways In The Wood

Discover the secrets of creating electrical pathways in wood with this informative guide on how to safely electrify wood for various applications. Explore step-by-step instructions and expert tips to achieve stunning and functional results.

Drilling Holes For Wires:

  • Begin the process by identifying the areas where you want to establish electrical pathways within the wood.
  • Use a drill with a suitable bit size to create holes for the wires to pass through.
  • Ensure that the holes are aligned correctly and positioned where you want the electrical connections to be made.
  • Be cautious while drilling to prevent any damage to the wood or the wires.

Inserting Conductive Materials:

  • Start by selecting the appropriate conductive material for your electrical pathways.
  • Copper wires are commonly used due to their high conductivity properties.
  • Insert the copper wires into the holes, ensuring a snug fit.
  • Make sure that enough of the wire is exposed to establish a proper connection.

Securing Connections:

  • Once the conductive material is in place, it’s crucial to secure the connections properly.
  • Use electrical tape or wire connectors to hold the wires firmly in position.
  • Ensure that there is no movement or looseness in the connections, as this can lead to inefficient electrical flow.
  • Test the connections by gently tugging on the wires to confirm they are securely fastened.

By following these steps, you can effectively create electrical pathways in wood, enabling the safe and efficient flow of electricity. Remember to adhere to safety precautions throughout the process to avoid any potential hazards.

Connecting The Power Source

Learn how to safely electrify wood with this step-by-step guide on connecting the power source. Follow these instructions to add an electric touch to your woodworking projects.

Selecting The Appropriate Power Source

To safely and effectively electrocute wood, it is crucial to choose the right power source. Consider the following factors when selecting your power source:

  • Voltage requirements: Determine the voltage needed for the specific woodworking project. Ensure that the power source you select provides the necessary voltage for the job.
  • Alternating current (AC) or direct current (DC): Different power sources generate different types of current. Assess which type of current is suitable for your woodworking needs.
  • Power supply options: There are several power supply options available, such as batteries, generators, or utility mains. Select the power source that aligns with the project’s requirements and portability needs.

Attaching Wires And Connectors

After selecting the power source, it is essential to properly attach the wires and connectors to ensure a secure connection for electrocuting wood. Follow these steps:

  • Strip the wires: Using wire strippers, remove the protective coating from the end of each wire, revealing the copper conductor.
  • Connect the wires: Twist the exposed copper ends of the wires together, creating a secure connection. Alternatively, use wire connectors or solder the wires for additional stability.
  • Insulate the connection: To protect against accidental contact and electrical shorts, insulate the joined wires using electrical tape or heat shrink tubing.

Testing For Proper Electrical Flow

Before proceeding with electrocuting wood, it is crucial to test the electrical flow to ensure everything is functioning correctly. Use the following steps to test for proper electrical flow:

  • Power source verification: Ensure that the power source is turned on and functioning correctly.
  • Connect a test device: Attach a multimeter or voltage tester to the wires to measure the electrical flow.
  • Measure voltage: With the power source active, use the test device to measure the voltage output. Make sure it matches the intended voltage for the project.
  • Inspect for any issues: Check for loose or frayed wires, faulty connectors, or any other potential hazards that may compromise the electrical flow.

Remember, safety should always be the top priority when working with electricity. Always follow proper safety protocols and consider consulting a professional if you are unsure about any electrical aspects of your woodworking project.

How to Electrocute Wood: The Ultimate Guide to Power Up Your DIY Projects

Credit: theultimateflooring.com

Enhancing The Electrification Effects

Discover how to safely and effectively enhance the electrification effects on wood surfaces with our expert tips and techniques. Increase conductivity and create stunning electrical designs with this informative guide.

If you’re looking to take your wood electrification project to the next level, there are a few techniques you can apply to enhance the overall effect. By incorporating stains and finishes, adding LED lights and other effects, and troubleshooting common issues, you can create stunning results that will truly electrify your woodwork.

Let’s explore each of these techniques in more detail:

Applying Stains And Finishes:

  • Stains: To bring out the natural beauty of the wood and complement the electrification effects, consider applying a stain. Choose a stain color that contrasts with the electrified sections to create a visually captivating look. Darker stains, such as mahogany or ebony, often work well.
  • Finishes: Once the stain has dried, it’s essential to apply a finish to protect the wood and add a glossy sheen. Consider using a polyurethane or lacquer finish, as these provide durability and resistance to moisture. Ensure you follow the manufacturer’s instructions for application to achieve the desired result.

Adding Led Lights And Other Effects:

  • LED lights: Incorporating LED lights into your electrified woodwork can create a mesmerizing display. Strategically place LED strips or individual lights in the electrified areas. Experiment with different colors to create unique lighting effects that enhance the electrification.
  • Glow-in-the-dark effects: For an enchanting touch, consider using glow-in-the-dark materials. Apply them to specific areas of the wood, particularly near the electrified parts. These phosphorescent elements will absorb light during the day and emit a soft glow at night, adding an otherworldly ambiance to your woodwork.

Troubleshooting Common Issues:

  • Uneven electrification: If you notice inconsistencies in the electrification effects, it’s important to troubleshoot and ensure even distribution. Take the following steps:
  • Check the wiring connections: Inspect the wiring connections to ensure they are secure and properly attached to the wood.
  • Adjust voltage settings: If the electrification effects appear weak or inconsistent, try adjusting the voltage settings on your power supply. This can help regulate the flow of electricity and improve the overall effect.
  • Reapply conductive materials: If certain areas of the wood are not electrifying as expected, reapply conductive materials, such as copper tape or conductive paint, to ensure sufficient conductivity.
  • Consult a professional: If you’re still experiencing issues, it’s advisable to reach out to a professional electrician or woodworking expert for further assistance.

By following these techniques and troubleshooting tips, you can enhance the electrification effects of your woodwork project. Don’t be afraid to experiment and unleash your creativity to create truly stunning and captivating pieces. Happy electrifying!

Electrical Safety Precautions

Ensure your safety when working with electricity by following these electrical safety precautions. Learn how to properly wire wood to prevent electrical shock.

Inspecting and maintaining tools and equipment:

  • Regularly inspect your tools and equipment for any signs of damage or wear and tear. This includes cords, plugs, and power switches.
  • Ensure that all cords are in good condition, without any cuts or exposed wires. If you notice any damage, promptly replace the cord or the tool itself.
  • Keep your tools clean and free from any debris or moisture that could affect their performance or safety.
  • Store your tools in a dry and secure place when not in use to prevent accidental damage or unauthorized use.
  • Follow the manufacturer’s instructions for maintenance and servicing of your equipment to ensure optimal safety and functionality.

Grounding and circuit protection:

  • Before starting any electrical work, ensure that the circuits you will be working on are properly grounded and protected by circuit breakers or fuses.
  • Use ground fault circuit interrupters (GFCIs) in areas where water is present, such as bathrooms and kitchens, to minimize the risk of electric shock.
  • Avoid overloading circuits by plugging in too many devices or appliances. Distribute the load evenly across multiple outlets or use power strips with built-in overload protection.
  • Regularly test your ground fault circuit interrupters and circuit breakers to make sure they are functioning correctly. Replace faulty ones immediately.
  • Never tamper with or disable safety features such as grounding pins or fuse boxes. They are there for your protection.

Working in a well-ventilated area:

  • When working with electrical tools or equipment, it is crucial to have proper ventilation to prevent the accumulation of fumes or gases.
  • Ensure that your workspace is well-ventilated by opening windows, using fans, or working outdoors when possible.
  • If working in a confined space, consider using additional ventilation equipment, such as exhaust fans or respirators, to maintain a safe environment.
  • Be aware of any potentially hazardous substances, such as solvents or chemicals, that may be present in your work area. Follow proper handling and disposal procedures to minimize risks.
  • Always prioritize your personal safety and consider the potential air quality hazards associated with your work environment.

Remember, following these electrical safety precautions is essential to prevent accidents and ensure a safe working environment. Always prioritize your well-being and take the necessary steps to protect yourself and others from potential electrical hazards.

Personal Protective Equipment (Ppe)

Personal Protective Equipment (PPE) is essential when working with wood to prevent electric shocks. Stay safe by using insulated gloves, safety glasses, and protective clothing to reduce the risk of electrocution.

Electrocution is a dangerous and potentially life-threatening hazard when working with wood. It is crucial to prioritize safety and take necessary precautions to prevent any accidents or injuries. Plays a vital role in ensuring your well-being while handling electricity. In this section, we will discuss the recommended PPE for working with electricity, the proper use and care of protective gear, and creating a safe working environment.

Recommended Ppe For Handling Electricity:

  • Insulated gloves: Wear insulated gloves made from rubber or other non-conductive materials to protect against electric shock.
  • Safety goggles: Shield your eyes from potential sparks or debris that may occur during the wood electrification process.
  • Protective clothing: Wear flame-resistant and non-conductive clothing to reduce the risk of burns or electrical conductivity.
  • Safety footwear: Choose sturdy, non-conductive shoes with slip-resistant soles to protect your feet from electrical hazards.
  • Face shield: Use a face shield in addition to safety goggles to provide extra protection for the face and neck area.

Proper Use And Care Of Protective Gear:

  • Conduct regular inspections: Before each use, visually inspect your PPE for any signs of damage or wear. If any issues are detected, replace the equipment immediately.
  • Follow manufacturer instructions: Adhere to the guidelines provided by the manufacturer for the proper use and maintenance of your protective gear.
  • Store properly: Store your PPE in a clean and dry place, away from direct sunlight or extreme temperatures.
  • Clean after use: After working with electricity, clean your PPE according to the manufacturer’s recommendations to ensure its effectiveness during future use.
  • Replace when necessary: If your protective gear becomes damaged or reaches its expiration date, replace it promptly to maintain optimal safety.

Ensuring A Safe Working Environment:

  • Inspect the workspace: Before starting any electrical work, survey the area for potential hazards, such as exposed wires or wet conditions. Address any issues before continuing.
  • Maintain proper lighting: Ensure that the work area is adequately lit to enhance visibility and prevent accidents caused by poor visibility.
  • Keep flammable materials away: Remove any flammable substances or debris from the work area to minimize the risk of fire.
  • Utilize grounding techniques: Use grounding techniques as recommended to prevent electrical shock. This may involve the use of grounding wires or tools.
  • Proper training and supervision: Ensure that individuals working with electricity have received appropriate training and are working under the supervision of an experienced professional.

Remember, personal protective equipment is essential, but it is not a substitute for caution and proper safety practices. By following these recommendations and prioritizing safety, you can significantly reduce the risks associated with working with electricity and ensure a safe working environment.

How to Electrocute Wood

Frequently Asked Questions For How To Electrocute Wood

How Do You Make Lightning Effect On Wood?

To create a lightning effect on wood, you can use techniques such as wood burning or carving with a thin, jagged pattern.

What Is It Called When You Electrocute Wood?

Electrifying wood refers to the process of applying an electric current to it.

How To Do Fractal Burning On Wood?

To do fractal burning on wood, follow these steps:

1. Prepare the wood surface and ensure it is clean and smooth.

2. Create a fractal design on the wood using a specialized fractal burning tool or a high-voltage power supply.

3. Apply a protective coating to the wood to enhance the design and preserve the artwork.

4. Use caution when working with electricity and follow safety guidelines to avoid accidents.

How Many Volts Do You Need To Burn Wood?

The voltage required to burn wood depends on various factors and cannot be determined precisely.

Conclusion

Electrocuting wood can be a fascinating process that brings out its unique characteristics. By following proper safety precautions and using the right equipment, you can transform ordinary wood into something extraordinary. The electrical current creates intricate patterns and textures, adding a new dimension to your woodworking projects.

Whether you want to create stunning pieces of art or enhance the aesthetic appeal of furniture, electrifying wood offers endless possibilities. Remember, experimentation is key when it comes to achieving the desired results. The voltage, duration, and type of wood all influence the final outcome.

Be sure to document your process and learn from your experiences to further refine your technique. As with any woodworking technique, practice makes perfect. So, don’t be afraid to start small and gradually work your way up to more complex projects.

With time and dedication, you’ll develop your artistic style and create one-of-a-kind pieces that showcase the beauty of electrified wood. Let your creativity flow and enjoy the electrifying journey of working with wood.

Md Meraj

This is Meraj. I’m the main publisher of this blog. Wood Working Advisor is a blog where I share wood working tips and tricks, reviews, and guides. Stay tuned to get more helpful articles!

Recent Posts