
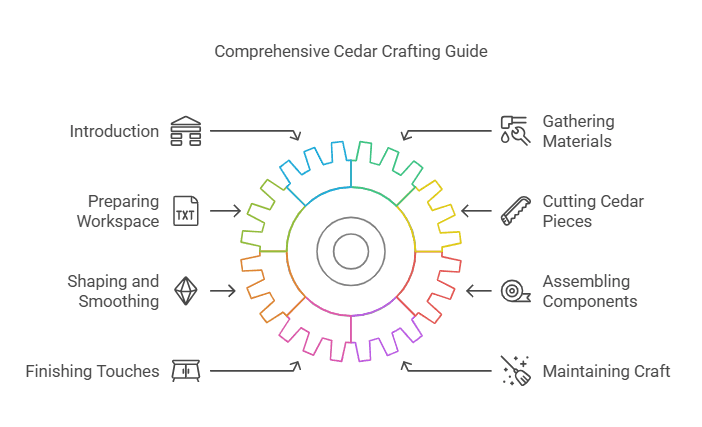
How to Make Cedar in Infinite Craft: Step-by-Step Guide
To make cedar in Infinite Craft, follow these steps. First, gather the necessary materials.
Second, understand the crafting process. Infinite Craft is a popular game that challenges your creativity and crafting skills. One of the valuable resources in the game is cedar. Cedar is not only useful for building structures but also for crafting various items.
Many players often wonder how to efficiently create cedar. In this guide, we will explore the steps to make cedar in Infinite Craft. We will cover everything from gathering materials to the actual crafting process. By the end of this guide, you will have a clear understanding of how to make cedar and use it to enhance your gameplay.
Introduction To Cedar Crafting
Cedar crafting in Infinite Craft offers a unique experience for players. Creating cedar items can enhance your gameplay and provide aesthetic value. This guide introduces you to the basics of cedar crafting.
What Is Cedar?
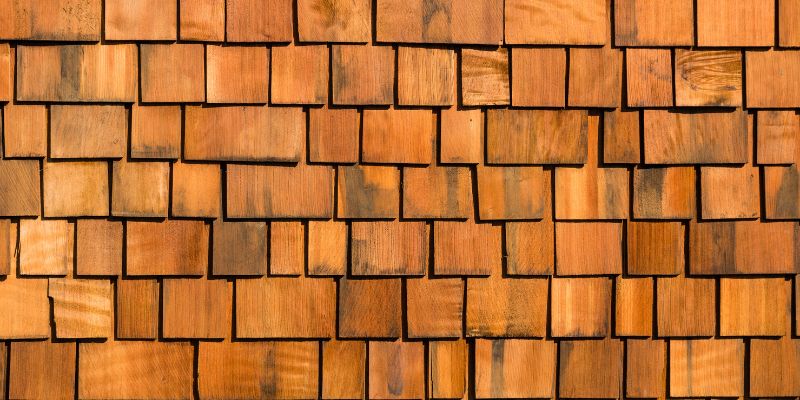
Cedar is a type of wood found in the game Infinite Craft. It is known for its durability and beautiful grain. Players often seek cedar for its strength and natural beauty.
Why Use Cedar In Crafting?
Cedar offers several benefits in crafting. First, it is strong and lasts a long time. This makes it ideal for building structures and crafting tools. Second, cedar has a unique, attractive appearance. Many players use it for decorative items. Finally, cedar is relatively easy to find in the game. This makes it accessible for most players.
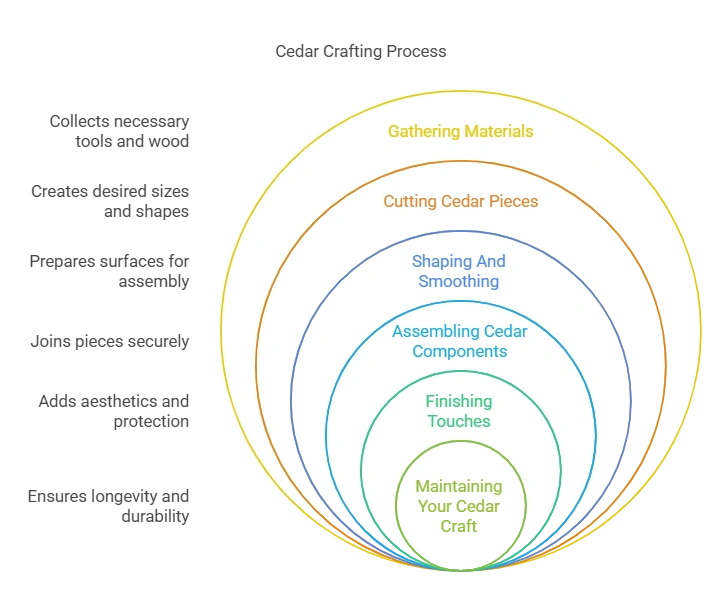
Gathering Materials
Gathering materials is the first step in making cedar in Infinite Craft. This process involves collecting essential tools and finding quality cedar. With the right approach, you can gather all the necessary materials quickly and efficiently. Let’s dive into the details.
Essential Tools
To start, you need the right tools. A sturdy axe is crucial. It will help you chop down trees and collect logs. Make sure your axe is in good condition. You don’t want it to break in the middle of gathering. A sharp axe works faster and lasts longer.
A backpack is also important. It allows you to carry more logs. The larger the backpack, the more you can gather in one trip. This saves time and effort. Keep your tools ready and you will be prepared for the task ahead.
Finding Quality Cedar
Next, you need to find quality cedar. Cedar trees are usually found in forests. They have a distinct, aromatic smell. Look for trees with reddish-brown bark. These are often the best ones. Mature trees are more likely to produce high-quality wood.
Check the condition of the trees. Healthy trees provide better logs. Avoid trees with signs of disease. They can produce weak wood. Healthy, mature cedar trees are your best bet for high-quality materials.
Preparing Your Workspace
Creating cedar in Infinite Craft is an exciting adventure. But before you dive into crafting, you need to set up your workspace. A well-prepared area ensures your safety and helps you keep your tools in order. Let’s get started!
Setting Up A Safe Area
Safety first! Before you start crafting, you need to make sure your workspace is safe. Here’s how:
- Clear the Area: Remove any clutter or unnecessary items. You need a clean space to work.
- Ventilation: Make sure your workspace is well-ventilated. This helps you avoid inhaling any dust or fumes.
- Lighting: Good lighting is essential. You need to see what you’re doing to avoid accidents.
Remember, a safe workspace makes crafting more enjoyable. You can focus on your project without worrying about hazards.
Organizing Your Tools
Once your area is safe, it’s time to organize your tools. Having everything you need within reach can save you a lot of time. Here’s a simple way to do it:
- Tool Rack: Install a tool rack or pegboard. Hang your tools where you can easily see and grab them.
- Labeling: Label your tools if necessary. This is especially helpful if you have a lot of similar-looking items.
- Storage Bins: Use bins or drawers for smaller items. Keep screws, nails, and other tiny pieces organized.
By organizing your tools, you’ll work more efficiently. Plus, it makes the cleanup process a breeze!
Now that your workspace is prepared, you’re ready to start making cedar in Infinite Craft. Happy crafting!
Cutting Cedar Pieces
Cedar is a beautiful and versatile wood that can be used in many crafting projects. If you’re a fan of Infinite Craft, you might want to know how to make cedar pieces. Cutting cedar can seem daunting, but with the right approach, it’s a straightforward task. In this section, we’ll go through the essential steps for cutting cedar pieces, ensuring you achieve the perfect cut each time.
Measuring And Marking
Before you start cutting, it’s crucial to measure and mark your cedar pieces accurately. Here’s how you can do it:
- Measure Twice, Cut Once: This age-old advice is particularly true for cedar. Use a reliable tape measure and double-check your measurements to avoid mistakes.
- Mark Your Cuts: Use a pencil or a chalk to mark where you will cut. Make sure your lines are visible but not too thick, to avoid inaccuracies.
- Use a Square: To ensure straight cuts, use a carpenter’s square to draw perpendicular lines. This tool helps keep your cuts at right angles, which is essential for neat and precise work.
Using The Right Saw
Choosing the right saw for cutting cedar is vital. Using the wrong tool can result in rough edges or even damage the wood. Here are some options:
- Hand Saw: For small and detailed cuts, a hand saw can be very effective. It gives you control and precision, though it might take more effort.
- Circular Saw: If you need to cut larger pieces, a circular saw can save time and effort. Ensure you have a sharp blade suited for wood to get clean cuts.
- Table Saw: For the most precise and straight cuts, especially on larger planks, a table saw is ideal. It offers stability and accuracy, making it a go-to choice for many woodworkers.
Remember, always prioritize safety when using saws. Wear protective gear, such as goggles and gloves, and follow the manufacturer’s instructions. Cutting cedar can be a rewarding task when done correctly. So, take your time, measure accurately, and choose the right saw for the job. Happy crafting!
Shaping And Smoothing
If you are diving into the world of Infinite Craft, understanding how to shape and smooth your cedar creations is essential. It’s not just about cutting and assembling; it’s about bringing out the natural beauty of the wood. In this section, we will explore the techniques and tips that will help you master the art of shaping and smoothing cedar. Let’s get started!
Sanding Techniques
Sanding is a crucial step in shaping and smoothing cedar. It’s like the magic wand that transforms rough cuts into silky surfaces. Here are some tips to get it right:
- Start with Coarse Grit: Begin with a coarse grit sandpaper, around 80-grit. This helps to remove any large imperfections and shapes the wood.
- Move to Medium Grit: Once the rough sanding is done, switch to a medium grit, such as 120-grit. This smooths out the rough sanding marks.
- Finish with Fine Grit: Finally, use a fine grit sandpaper, like 220-grit, to give the wood a smooth finish. This step is crucial for a polished look.
- Sand with the Grain: Always sand in the direction of the wood grain to avoid scratches and achieve a smooth surface.
Remember, patience is key. Rushing through sanding can leave your cedar piece looking less than perfect. Take your time, and your efforts will pay off.
Creating Smooth Edges
Now that you’ve sanded the surfaces, it’s time to focus on the edges. Smooth edges not only look better but also feel better to the touch. Here’s how to achieve them:
- Round the Edges: Use sandpaper to gently round off the sharp edges. This can be done by hand or with a sanding block. Rounded edges give a more finished look.
- Use a Router: If you have access to a router, use it to create decorative edge profiles. This adds a touch of elegance to your cedar project.
- Check for Splinters: Cedar can sometimes have splinters. Run your hand along the edges to check for any rough spots. If you find any, sand them down until smooth.
Creating smooth edges is all about attention to detail. It’s those small touches that make a big difference in the final product.
Shaping and smoothing cedar in Infinite Craft can be a rewarding experience. With the right techniques and a bit of patience, you’ll create stunning pieces that showcase the natural beauty of the wood. Happy crafting!
Assembling Cedar Components
Assembling cedar components in Infinite Craft requires attention to detail. Proper assembly ensures a sturdy final product. This section will guide you through the process.
Choosing The Right Adhesive
Selecting the correct adhesive is crucial. Wood glue is a strong choice for cedar. It binds the wood pieces effectively. Ensure the adhesive is suitable for outdoor use. Cedar often faces weather exposure. A weatherproof adhesive ensures durability. Apply the glue evenly on the surfaces. Spread it thin to avoid excess. Wait for it to become tacky before joining the pieces.
Clamping And Securing
Clamping the pieces tightly is essential. It ensures a strong bond. Use clamps that fit your cedar components. Apply them evenly across the surface. Avoid over-tightening. It can damage the wood. Check the alignment of the pieces. Adjust if necessary. Secure the clamps and leave them for 24 hours. This ensures the glue sets properly.
Finishing Touches
Now that you’ve created your cedar project in Infinite Craft, it’s time to add the finishing touches. These final steps will make your piece stand out and look professionally done. Let’s dive into how you can stain and seal your cedar, and add some decorative elements to give it that extra charm.
Staining And Sealing
Staining your cedar not only enhances its natural beauty but also protects it from the elements. Here’s a simple guide to get you started:
- Choose Your Stain: Select a stain that suits your project. Light stains highlight the wood’s natural grain, while darker stains provide a richer tone.
- Prepare the Surface: Sand the cedar with fine-grit sandpaper. This ensures the stain absorbs evenly.
- Apply the Stain: Use a clean cloth or brush to apply the stain. Work in the direction of the grain. Wipe off any excess stain with a dry cloth.
- Let It Dry: Allow the stain to dry completely. This can take up to 24 hours.
- Seal the Wood: After the stain is dry, apply a sealant to protect the wood. Polyurethane is a good choice. Apply it with a brush, and let it dry.
Staining and sealing your cedar not only makes it look beautiful but also ensures it lasts longer.
Adding Decorative Elements
Adding decorative elements can give your cedar project a unique touch. Here are a few ideas to consider:
- Carvings: If you’re handy with tools, carve designs into the wood. Simple patterns can add a lot of character.
- Paint: Use paint to create patterns or images. You can use stencils for precise designs.
- Hardware: Add decorative hinges, handles, or knobs. These small details can make a big difference.
Remember, the key is to personalize your project. Adding your own touch will make it truly special.
By following these tips, you’ll ensure your cedar project not only looks amazing but also stands the test of time. Happy crafting!
Maintaining Your Cedar Craft
You’ve put your heart and soul into creating that beautiful cedar craft in Infinite Craft. But just like anything precious, it needs regular care to keep looking great. In this section, we’ll talk about how to maintain your cedar craft. Simple tips can help it last longer and stay beautiful. Let’s dive in!
Regular Cleaning Tips
Keeping your cedar craft clean is essential. Dust and dirt can build up and make it look dull. Here are some easy cleaning tips:
- Use a soft cloth to wipe down the surface regularly. A microfiber cloth works best.
- For stubborn dirt, mix a little bit of mild soap with water. Dip your cloth in the soapy water, wring it out well, and gently wipe the craft.
- After cleaning, use a dry cloth to remove any moisture. Moisture can damage the cedar over time.
Preventing Damage
Cedar is strong, but it can still get damaged. Here are some tips to prevent damage:
- Avoid Direct Sunlight: Direct sunlight can fade the color of your cedar. Keep your craft in a shaded area or indoors.
- Control Humidity: Extreme changes in humidity can cause the wood to crack. Try to keep your cedar craft in a room with stable humidity.
- Use Protective Finish: Applying a protective finish like varnish can help shield the wood from scratches and stains.
- Handle With Care: Always handle your cedar craft gently. Avoid dropping or bumping it into hard surfaces.
Maintaining your cedar craft doesn’t have to be hard. With these simple steps, you can keep it looking as good as new. Remember, a little care goes a long way!
Conclusion And Final Thoughts
As we wrap up our guide on how to make cedar in Infinite Craft, it’s time to consolidate our learning and provide some final insights. Whether you’re a beginner or a seasoned player, understanding these steps can significantly enhance your crafting skills. Let’s dive into the concluding thoughts and summarize the key steps for making cedar.
Reviewing Key Steps
To ensure you’ve got everything covered, let’s review the key steps to make cedar in Infinite Craft:
- Gathering Materials: You will need the right tools and resources. Make sure to collect cedar wood logs, which are available in specific biomes.
- Processing the Wood: Use a crafting table or a similar workstation to process the logs into cedar planks. This step is crucial for further crafting.
- Crafting the Final Product: Combine cedar planks with other required materials in the crafting grid to create various items. Follow the specific recipes for the items you want to craft.
Remember, each step is important, and missing one can lead to a crafting disaster. So, take your time and enjoy the process!
Encouragement For Beginners
Starting out in Infinite Craft can feel overwhelming, but don’t worry, every expert was once a beginner. Here are a few tips to keep you motivated:
- Practice Makes Perfect: The more you craft, the better you’ll get. Start with simple items and gradually move to complex ones.
- Ask for Help: Join online forums or communities. Fellow players are often eager to share tips and tricks.
- Keep Experimenting: Don’t be afraid to try new combinations. Sometimes, the best discoveries come from happy accidents!
Remember, crafting in Infinite Craft is not just about following recipes; it’s about creativity and having fun. So, grab your tools, gather your materials, and start crafting!
In conclusion, making cedar in Infinite Craft is a rewarding experience. By following the key steps and staying motivated, you’ll soon master the art of crafting. Happy crafting!
Frequently Asked Questions
How Do You Make Wood In Infinite Craft?
Collect wood in Infinite Craft by punching trees. Approach a tree, hold the action button, and break the blocks.
How To Make Luffy In Infinite Craft?
To make Luffy in Infinite Craft, gather required materials and follow a crafting guide. Combine items at the crafting table.
How To Make New Zealand In Infinite Craft?
To make New Zealand in Infinite Craft, gather resources, build terrain, and use creative mode to design landscapes.
How To Make Rat In Infinite Craft?
Craft a rat in Infinite Craft by combining cheese and a mouse in the crafting menu.
Conclusion
Creating cedar in Infinite Craft is simple and fun. Gather the right tools and materials. Follow the steps to ensure success. Enjoy the process of crafting. Share your creations with friends. Experiment with different designs and techniques. Happy crafting!