How to Cedar Wrap a Post: 4×4 and 6×6 Cut List, Nails (2026)
To cedar wrap a post, nail four 3/4 in boards around it: two as wide as the post and two 1.5 in wider, which makes a 4×4 into a 5.0 in square column and a 6×6 into 7.0 in. Use 304 stainless nails, keep the bottom edge off the ground, and remember the wrap is cosmetic, not structural. This guide gives the cut list, joint choice, nail counts, base gap, cap, and finish.
Cedar Post Wrap Materials: Boards, Nails and Tools
Best Stainless Nail Pick | |
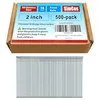 |
SimCos 16 Gauge 304 Stainless 2 in Finish Nails (500-Pack), $14.99 The cedar industry names 304 stainless as the general-purpose choice for fastening cedar, and a 2 in nail through 3/4 in cedar leaves 1-1/4 in in the post. That is the length our nail counts below are built on.
|
As an Amazon Associate we earn from qualifying purchases. | |
A post wrap is a thin box of 1x cedar built around an existing post. Dimensional 1x boards are 3/4 in thick, so every wrapped side adds 3/4 in to the post. The numbers in this guide use the actual sizes below. Measure your own boards before cutting, because rough-sawn or planed-down cedar can be thinner. For a refresher on why 1×4 is not 4 in wide, see our nominal vs actual lumber size chart.
| Item | Nominal size | Actual size used here |
|---|---|---|
| Post to wrap | 4×4 | 3.5 x 3.5 in |
| Post to wrap | 6×6 | 5.5 x 5.5 in |
| Cedar board | 1×4 | 3/4 x 3.5 in |
| Cedar board | 1×6 | 3/4 x 5.5 in |
| Cedar board | 1×8 | 3/4 x 7.25 in |
Which nails and screws to use
Fastener choice is the one decision here that can ruin cedar from the inside. According to the Western Red Cedar Lumber Association (Real Cedar), hot-dipped galvanized, aluminum, and stainless steel nails are all corrosion resistant for cedar, other nails can rust, disintegrate, and react with the natural oils in cedar to leave stains and streaks, and copper nails should not be used. Here is how that guidance sorts out for a post wrap:
| Fastener | Cedar industry guidance | Our note |
|---|---|---|
| 304 stainless steel | General-purpose choice | Our pick for a post wrap |
| 316 stainless steel | For seacoast exposure | Worth it only near salt water |
| Hot-dipped galvanized | Listed as corrosion resistant | Acceptable lower-cost option |
| Aluminum | Listed as corrosion resistant | Acceptable, but stainless is the better choice |
| Bright, electro-galvanized, or other | Not recommended: can rust and stain | Skip |
| Copper | Should not be used | Skip |
Use No. 304 stainless for general applications and No. 316 for seacoast exposure. Source: Real Cedar, Western Red Cedar Lumber Association
Ring-shank or spiral-shank nails hold better, and the same source recommends them for greater holding power. If you prefer screws, Real Cedar’s own fastener guidance says 304 (18-8) stainless is adequate for most uses and that screws should reach 1 in into the support. For trim-weight 3/4 in boards, finish nails with small heads look cleaner than screw heads.
Tools
- Table saw with a rip fence, riving knife, and push stick, or a circular saw with a straightedge guide
- Miter saw or hand saw for square cuts to length
- 16 gauge finish nailer (or a hammer and nail set), plus 304 stainless 2 in finish nails
- Level, tape measure, and speed square
- Exterior acrylic-latex caulk, a brush, and safety gear including a dust mask
Cedar Post Wrap Cut List for 4×4 and 6×6 Posts
This is our own design, worked out from the actual sizes above, not a published standard. The rule is simple: the outside dimension equals the post width plus 1.5 in (two board thicknesses of 3/4 in). With butt joints, two opposite faces get boards as wide as the post, and the other two faces get boards 1.5 in wider so they cover the edges of the first pair.
| 4×4 post, butt joints | 6×6 post, butt joints | |
|---|---|---|
| Post actual size | 3.5 x 3.5 in | 5.5 x 5.5 in |
| Boards on faces 1 and 3 (2 pcs) | 3.5 in wide (1×4 as is) | 5.5 in wide (1×6 as is) |
| Boards on faces 2 and 4 (2 pcs) | 5.0 in wide (1×6 ripped from 5.5 in) | 7.0 in wide (1×8 ripped from 7.25 in) |
| Outside size of wrap | 5.0 x 5.0 in | 7.0 x 7.0 in |
| Stock for an 8 ft wrap | Two 1x4x8 and two 1x6x8 | Two 1x6x8 and two 1x8x8 |
| Nominal board feet | 13.3 | 18.7 |
| Cap board (0.75 in overhang each side) | 6.5 x 6.5 in | 8.5 x 8.5 in |
Check the arithmetic against your own post: 3.5 + 0.75 + 0.75 = 5.0 for the wide boards, and 5.5 + 0.75 + 0.75 = 7.0. Board feet are nominal, which is how cedar is priced: a 1x4x8 is 2.67, a 1x6x8 is 4.0, and a 1x8x8 is 5.33. Buy one spare board, because knots and splits turn up while ripping.

Butt Joints or Mitered Corners on a Cedar Post Wrap
Both work, and the choice is mostly about skill and appearance. On siding, Real Cedar describes mitered corners as giving a professional-looking finish but demanding good carpentry skills, and corner boards as a popular and easier alternative (see their Real Cedar siding installation guidance). A butt-joint post wrap is the same idea as corner boards.
| Butt joint (overlap) | Mitered corner | |
|---|---|---|
| Rip and bevel work | One straight rip on two boards | Four boards, each ripped and beveled at 45 degrees on both edges |
| Stock for 4×4 wrap, 8 ft | Two 1×4 and two 1×6 | Four 1×6 ripped to 5.0 in at the outside face |
| Stock for 6×6 wrap, 8 ft | Two 1×6 and two 1×8 | Four 1×8 ripped to 7.0 in at the outside face |
| Nails, 8 ft post (our count) | 84 for 4×4, 98 for 6×6 | 84 for 4×4, 112 for 6×6 |
| Looks like | Square corners with one visible board edge | One clean seam at each corner |
| Forgiveness | Hides small length errors | Shows every angle error |
A mitered wrap checks out geometrically: the outside face is 5.0 in and the inside face is 5.0 minus 1.5 = 3.5 in, exactly the width of a 4×4. Our reasoning, not tested here, is that boards shrink and swell across their width, so a tight miter can open into a hairline gap, while a butt joint hides that movement better. If you are new to wrapping, start with butt joints.
How to Cedar Wrap a Post: Step-by-Step
- Check the post first: probe the base and any cracks with a screwdriver. Soft, crumbly wood means the post needs repair or replacement before anything gets wrapped. Our guide to fixing a rotted post covers repair options.
- Confirm it is plumb and dry: hold a level on two adjacent faces. A wrap follows the post, so a leaning post makes a leaning column. Real Cedar says moisture content should not be above 20 percent before finishing new cedar, so let wet boards dry first.
- Measure the actual post: take width on both axes at top, middle, and bottom, then set board widths from the real numbers using the table above.
- Cut and rip: cut all four boards to the same length, then rip the two wide boards on the saw. Cut parts a hair long and trim to fit.
- Seal the ends before assembly: brush water-repellent or finish onto every cut end, especially the bottom ends, while the boards are easy to reach.
- Fasten the first pair: nail the two narrow boards to opposite faces, about every 16 in with two nails per row, keeping the bottom at your chosen gap above grade.
- Fasten the wide pair: set each wide board over the exposed edges, nail into the post at the center, then nail down through the board into the edge of the first pair every 16 in. Pilot drill within 1 in of an edge to avoid splits.
- Add the cap: set a cap board 3/4 in proud on every side, fasten with stainless nails, and seal the top and edges.
- Caulk and finish: caulk the top joint where the wrap meets a beam or rail, then finish all faces.
Nail counts come from our arithmetic, for an 8 ft wrap with rows about 16 in apart (7 rows). A 4×4 butt wrap takes 2 nails per row on each of four boards, plus 2 edge nails per row on each of the two wide boards: 28 + 28 + 28 = 84. On a 6×6 the wide boards get 3 nails per row, giving 28 + 42 + 28 = 98. A 500-pack therefore covers about five 4×4 wraps with a margin for bent nails. For siding, Real Cedar allows a maximum of 24 in between nails, so 16 in is tighter than their ceiling.
Base Gap, End Grain and Cap: Keeping Water Out
Water is the real enemy of a wrap, not the cedar. For siding, Real Cedar says to keep the lowest edge at least 6 in off the ground and to coat the end grain at the bottom of vertical siding with water repellent. A post wrap is not siding, so we treat that as a guide. Over soil, hold the wrap at least 6 in above grade. Over a concrete pad or deck, we suggest leaving about 1/2 in of air at the bottom, which is our own design choice and not a published figure.
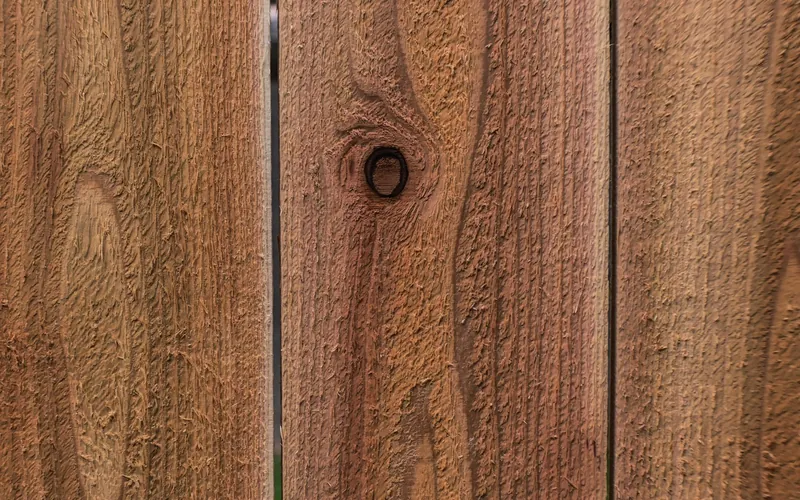
- Seal every cut end, not just the bottom. Real Cedar’s decking advice is to apply liberal amounts of water-repellent to the end grain, and the same logic applies to wrap boards.
- Caulk the top only. Closing the bottom traps water inside the box with nowhere to go. That is our reasoning, not a tested result, but it is the cheap side to get wrong.
- Use the right caulk. Real Cedar lists acrylic-latex, acrylic, acrylic-silicone, polyurethane, polysulfide, and terpolymer rubber caulks, and says pure silicone and clear caulks do not work well on cedar.
- Slope the cap. A perfectly flat cap holds water. A slight bevel along the top edge, or a small drip kerf underneath, is a cheap way to shed it.
Finishing a Cedar Post Wrap
Finish soon after the wrap goes up. Per Real Cedar finishing guidance, a prime coat plus a top coat protects better than a single coat, solid-color acrylic latex stain over a primer, applied in two coats, generally outperforms other options, and brush application is usually best. If you want to see the grain, a penetrating stain works, but expect more upkeep. Our guide to the best finish for cedar compares options.
Leaving cedar bare is a legitimate choice, though not a low-effort one. Real Cedar says unfinished cedar usually does not weather evenly and tends toward a dark, blotchy grey. For upkeep, they recommend an occasional wash with mild non-phosphate detergent and an oxygen-bleach solution for mildew. Our cedar siding repair guide covers fixing cedar that has already gone wrong.
Safety: A Cedar Wrap Is Cosmetic, Not Structural
- Do not cut, notch, or remove material from the post to make the wrap fit. The post carries the load; the wrap carries nothing.
- If the post leans, splits, or is soft at the base, have a qualified builder or engineer inspect it before wrapping. A wrap can hide the problem, not fix it.
- If the post is painted and the house predates 1978, treat the paint as possible lead until tested. The EPA Renovation, Repair and Painting program says roughly three-quarters of US homes built before 1978 still contain some lead-based paint, and that paid contractors who disturb it must be certified. Test first, and hire a lead-safe certified pro if the result is positive.
- Ripping narrow boards on a table saw is a high-risk cut. Use the riving knife and a push stick, and keep your hands out of the blade path. Cedar dust irritates some people, so wear a mask.
Common Cedar Post Wrap Mistakes
- Believing the wrap protects the post from rot. It does not. It hides the post, and a wet post inside a closed box can rot unseen, so check the post first and keep water out of the base.
- Using bright or electro-galvanized nails. The cedar industry warns that other nails can rust and stain the wood. Pay the small premium for 304 stainless.
- Nailing the wide board only into the narrow board’s edge. That edge is just 3/4 in thick, so also nail into the post at the center.
- Choosing the wrong post material. If the post is untreated softwood in contact with soil, see our pressure treated wood posts guide, and our cedar vs pressure treated comparison for what each wood is actually good at.
Cedar Post Wrap FAQ
Can you wrap a post with cedar boards?
Yes. Four 3/4 in cedar boards around a 4×4 give a 5.0 in square column, and around a 6×6 give 7.0 in. The wrap is cosmetic: it adds no strength, so the post underneath must already be sound, plumb, and dry.
What size cedar boards do you need to wrap a 4×4 post?
With butt joints, use two boards 3.5 in wide and two boards 5.0 in wide. In practice that is two 1×4 boards plus two 1×6 boards ripped from 5.5 in down to 5.0 in. Mitered corners instead use four boards ripped to 5.0 in at the outside face.
What nails should you use on cedar?
Use 304 stainless steel, or 316 near saltwater. The Western Red Cedar Lumber Association also lists hot-dipped galvanized and aluminum as corrosion resistant, but says other nails can rust and cause stains and streaks, and that copper nails should not be used.
Should a cedar post wrap touch the ground?
No. Real Cedar tells installers to keep the lowest edge of siding at least 6 in off the ground and to coat bottom end grain with water repellent. A post wrap is not siding, so applying that rule to a wrap over soil is our judgment call, not a published wrap rule.
Do you need to seal cedar post wraps?
Yes, with a finish suited to cedar. Real Cedar says a prime coat with a top coat protects better than a single coat, and that unfinished cedar usually weathers to a blotchy grey. Whatever you choose, coat the cut ends before assembly, since they soak up water fastest.
A good cedar wrap is mostly arithmetic and water management: post width plus 1.5 in for the boards, 304 stainless nails, a base that stays dry, and sealed ends. Termites are another common worry with cedar, covered in do termites like cedar wood. Clean offcuts of raw cedar can go to kindling per can cedar be used for firewood, but never burn stained, painted, or sealed cedar.
Sponsored / affiliate links. As an Amazon Associate I earn from qualifying purchases. I may earn additional commission from eligible campaigns.