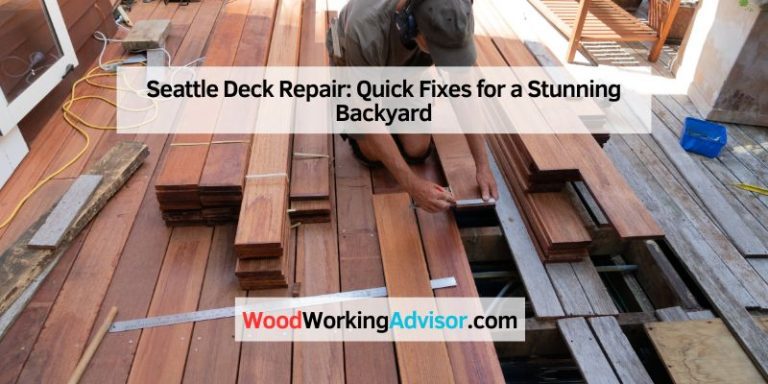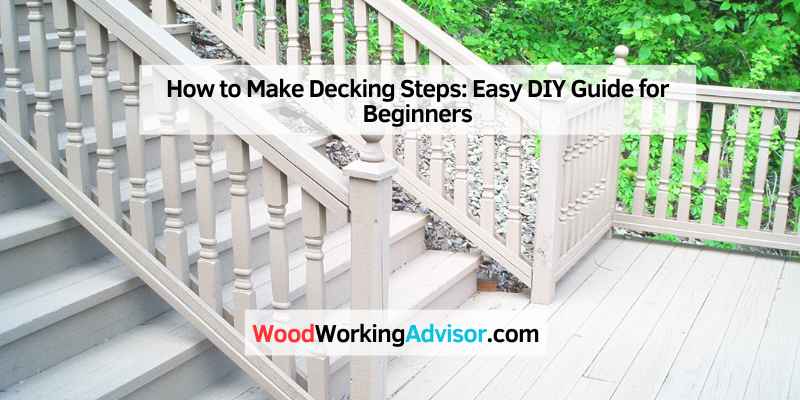
How to Make Decking Steps: Easy DIY Guide for Beginners
To make decking steps, measure the height, cut and install the stringer boards, then add risers and secure the treads in place. Building decking steps requires careful planning and precise measurements for a safe and sturdy structure.
Whether you are sprucing up your outdoor space or adding functionality to your deck, creating well-built and attractive decking steps can enhance the overall look and usability of your space. By following the proper steps and using the right materials, you can achieve a professional-looking result that complements your deck and provides a seamless transition between different levels of your outdoor area.
We will explore the essential steps and considerations for building decking steps, ensuring a successful and visually appealing outcome for your project.
Introduction To DIY Decking Steps
Building decking steps is a practical and rewarding DIY project that can enhance the accessibility and aesthetic appeal of your outdoor space. Whether you’re adding steps to an existing deck or constructing a new one, mastering the art of building decking steps can be a valuable skill. In this guide, we’ll explore the benefits of building your own decking steps, the essential safety considerations, and the step-by-step process to bring your vision to life.
Why Build Your Own Decking Steps?
Constructing your own decking steps offers a range of advantages. First and foremost, it provides a sense of satisfaction and accomplishment, knowing that you have contributed to the creation of a functional and visually appealing outdoor feature. Additionally, building your own steps allows for customization, enabling you to tailor the design to suit your specific preferences and the layout of your outdoor space. Moreover, it can be a cost-effective option, especially if you have the necessary tools and skills. By taking on this DIY project, you can also gain valuable knowledge and experience in woodworking and construction.
Safety First: Understanding The Basics
Prior to embarking on the construction of decking steps, it is crucial to prioritize safety. Understanding the fundamental principles of structural integrity, weight distribution, and secure anchoring is essential for a safe and durable end result. Careful consideration should be given to the materials, such as durable and weather-resistant wood or composite decking, as well as the proper installation of handrails and support posts to ensure stability. By adhering to safety guidelines and building codes, you can create steps that not only look appealing but also provide a secure and reliable access point to your deck.
Materials And Tools Required
To make decking steps, you will need materials such as pressure-treated lumber, galvanized or stainless-steel screws, and concrete mix. You will also need tools like a circular saw, drill, level, and measuring tape. Proper planning and precise measurements are crucial to ensure that your decking steps are safe and sturdy.
If you’re planning on building decking steps for your outdoor space, you’ll need to have the right materials and tools on hand. Here are some essential items you’ll need to get started:
Choosing The Right Wood
The first step in building decking steps is selecting the right type of wood. Some popular options include pressure-treated lumber, cedar, and redwood. Pressure-treated lumber is the most affordable option, but it may not be as aesthetically pleasing as cedar or redwood.
Essential Tools For The Job
In addition to the wood, you’ll also need several tools to complete the job. Here are some essential tools you’ll need:
- Measuring tape
- Circular saw
- Table saw
- Power drill
- Level
- Hammer
- Nails or screws
- Deck screws
- String
- Safety glasses
- Ear protection
Having these tools on hand will make the process of building decking steps much easier and more efficient. You can also rent some of these tools from a local hardware store if you don’t want to purchase them outright.
Now that you know what materials and tools you’ll need, it’s time to start planning your decking steps. With a little bit of effort and the right resources, you can create a beautiful and functional set of steps that will add value and style to your outdoor space.
Measuring And Planning
To make decking steps, start by measuring the height and width of the area, then calculate the number of risers, treads, and stringers needed. Cut the stringer boards and install them, ensuring the risers are of the same height for each step.
Finally, measure, cut, and secure the treads in place for a sturdy and functional set of decking steps.
Calculating The Rise And Run
To start building your decking steps, you’ll need to calculate the rise and run of each step. The rise refers to the vertical height of each step, while the run is the horizontal distance. Calculating these measurements accurately is crucial for creating safe and comfortable steps.
To determine the rise, measure the total height from the ground to the top of your deck. Divide this measurement by the desired number of steps to get the rise for each step. Make sure to round off the measurement to the nearest whole number for ease of construction.
Next, you’ll need to calculate the run, which is the distance from the front of one step to the front of the next step. A comfortable run for most people is around 10 to 12 inches. Divide the total length of your deck by the number of steps to find the run for each step. Again, round off the measurement to the nearest whole number.
Determining The Size Of The Steps
Once you have the rise and run measurements, you can determine the size of each step. The size of the steps will depend on the rise and run measurements, as well as any local building codes or regulations that you need to adhere to.
To determine the size of each step, divide the total rise by the number of steps. This will give you the height of each individual step. Make sure the height of each step is consistent to ensure a smooth and comfortable ascent.
For the width of each step, multiply the run measurement by the desired width of each step. A width of around 36 inches is commonly used for outdoor steps. However, you can adjust the width based on your personal preference and available space.
Remember to also consider the depth of each step, which is the distance from the front of the step to the back. A depth of around 10 inches is typically comfortable for most people.
By accurately measuring and planning your decking steps, you can ensure a safe and aesthetically pleasing addition to your outdoor space. Take the time to calculate the rise and run, and determine the size of each step to create a functional and inviting staircase.
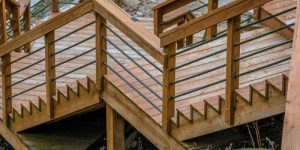
Building The Stringers
To create decking steps, start by building the stringers, which are the notched support structures for the stairs. Cut the stringer boards to the required size and securely attach them to the deck frame. Ensure the risers and treads are accurately measured and installed for a safe and sturdy set of steps.
Steps For Cutting Stringers
To build sturdy and safe decking steps, it is essential to cut the stringers accurately. Follow these steps to ensure precise cutting:
- Measure the height of the area where the steps will be installed. This measurement will determine the number of risers, treads, and stringers needed for the project.
- With the help of a circular saw, cut the stringer boards to the appropriate size. It is crucial to ensure that the cuts are straight and even.
- Double-check the measurements and make any necessary adjustments before proceeding.
- Insert the stringers into the desired location, ensuring they are evenly spaced and aligned with the deck.
- Secure the stringers to the deck using screws or other appropriate fasteners. Make sure they are firmly attached to provide stability and support.
- Repeat the process for each additional stringer required for the number of steps desired.
Attaching Stringers To The Deck
Once the stringers have been accurately cut, it is time to attach them securely to the deck. Follow these steps for a successful installation:
- Place the stringers in their designated positions, ensuring they are level and aligned with the deck.
- Using a drill and appropriate screws or fasteners, attach the stringers to the deck. Make sure to drive the screws through the stringers and into the deck joists for maximum stability.
- Check the alignment of the stringers and make any necessary adjustments before fully securing them.
- Repeat the process for each stringer, ensuring they are evenly spaced and securely attached to the deck.
By following these steps for cutting and attaching stringers, you will be able to build durable and reliable decking steps that will enhance the safety and functionality of your outdoor space. Remember to measure accurately, use the right tools, and take your time to ensure a successful installation.
Assembling The Steps
Learn how to make decking steps with this easy-to-follow guide. Measure the height of the area, cut and install the stringer boards, insert the risers, and secure the treads in place. Spruce up your outdoor space with these beautiful and functional steps.
Installing Risers And Treads
Assembling the decking steps involves several steps. Once the stringers are in place, the next step is to install the risers and treads. The riser is the vertical part of the step, while the tread is the horizontal part that you step on.
To install the risers, measure the height of each step and cut the riser boards to fit. Make sure to use a level to ensure that each riser is plumb. Then, attach the riser boards to the stringers using deck screws or galvanized nails.
Next, it’s time to install the treads. Measure the width of the step, then cut the tread boards to fit. Make sure to leave a slight overhang on each side for a finished look. Place the tread board on top of the stringers, and attach it using deck screws or galvanized nails.
Ensuring Even Step Height
One important consideration when assembling decking steps is to ensure even step height. Uneven step height can be a safety hazard, causing trips and falls. To ensure even step height, measure the height of each step and adjust the riser board accordingly.
If one step is slightly higher than the others, you can use a sander or saw to trim the riser board down to the correct height. It’s important to take the time to ensure even step height, as it will make the steps safer and more comfortable to use.
In conclusion, assembling decking steps involves several steps, including installing risers and treads and ensuring even step height. With a little bit of planning and attention to detail, you can create a beautiful and safe set of steps for your deck.
Finishing Touches
Start of HTML content for WordPress
When it comes to adding the final touches to your decking steps, the finishing touches play a crucial role in both enhancing the appearance and ensuring safety.
Applying Stain Or Sealant
- Choose a high-quality stain or sealant specifically designed for outdoor wood.
- Apply the stain or sealant evenly using a brush or roller.
- Ensure full coverage on all surfaces of the steps to protect them from weather damage.
Adding Anti-slip Materials
- Consider using anti-slip tape or paint to improve traction on the steps.
- Place anti-slip mats or strips strategically on the steps for maximum effectiveness.
- Regularly inspect and maintain the anti-slip materials to ensure continued safety.
End of HTML content for WordPress
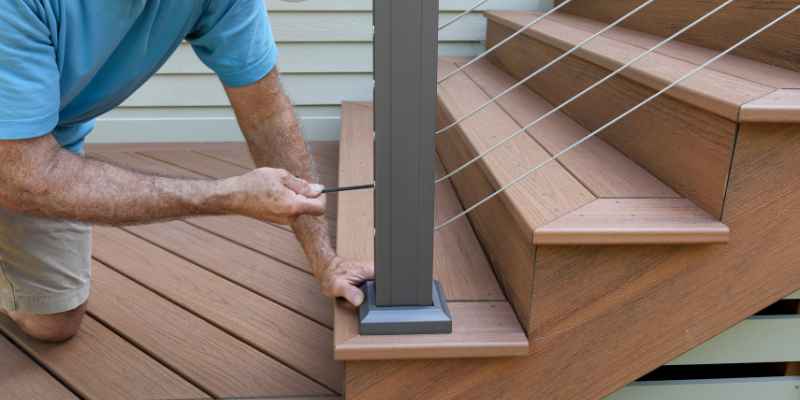
Adding Handrails And Safety Features
When it comes to enhancing the safety of your decking steps, adding handrails and safety features is crucial. These elements not only provide support and stability but also ensure the well-being of everyone using the steps.
Choosing Handrail Style
Selecting the right handrail style is essential to complement your deck’s design. Consider factors such as material, color, and design to match the overall aesthetic.
Installation Of Safety Gates
- Install safety gates to prevent children or pets from accessing the stairs unsupervised.
- Choose gates that are durable, easy to operate, and blend well with the handrail design.
Maintenance And Care
To ensure the durability of your decking steps, regular maintenance and care are crucial. Start by cleaning the steps regularly to remove dirt and debris. Inspect for any signs of wear and tear, and treat the wood with a protective sealant to prevent rot and decay.
Regular maintenance will keep your decking steps safe and attractive for years to come.
Routine Inspection
Regularly check for any signs of wear or damage.
Repair And Replacement Strategies
Address any issues promptly to prevent further damage.
Common Mistakes To Avoid
When making decking steps, avoid common mistakes such as neglecting proper measurements, using inadequate materials, and overlooking safety considerations. Ensure accurate calculations for risers and treads, choose durable and suitable wood, and install handrails and safety gates for a secure and functional deck entrance.
Incorrect Measurements
When measuring for decking steps, ensure accuracy to prevent errors.
Inadequate Support
Ensure proper support to prevent instability and safety hazards.
Alternative Decking Step Designs
Create Unique and Stylish Alternative Decking Step Designs with Our Step-by-Step Guide. Learn How to Make Decking Steps that are Functional and Eye-Catching, Perfect for Enhancing Your Outdoor Space. Follow our SEO-friendly Tips and Techniques for a Successful Decking Project.
Decking steps are an essential feature of any outdoor deck, providing safe and easy access from one level to another. While traditional decking steps are functional, there are many alternative designs that can add style and creativity to your deck. In this article, we will explore some creative ideas for unique steps and incorporating landscaping features into your decking steps.
Creative Ideas For Unique Steps
If you want to make your decking steps stand out, there are many unique and creative designs to choose from. Here are some ideas to get you started:
- Curved steps: Instead of traditional straight steps, consider adding a curve to your decking steps. This design not only adds visual interest but also provides a softer, more natural flow.
- Multilevel steps: If you have a multi-level deck, consider incorporating steps that follow the contour of the deck. This design creates a unique and functional feature that also adds interest to your deck.
- Integrated lighting: Adding lighting to your decking steps not only enhances the safety of your deck but also creates a dramatic effect at night. Try adding LED lights to the underside of each step for a subtle and sophisticated look.
Incorporating Landscaping Features
Another way to add creativity to your decking steps is by incorporating landscaping features. Here are some ideas to consider:
- Planters: Add built-in planters to your decking steps to bring color and life to your deck. You can use these planters to grow flowers, herbs, or even small shrubs.
- Water features: Adding a small water feature, such as a fountain or waterfall, to your decking steps can create a tranquil and relaxing atmosphere.
- Stone accents: Consider adding stone accents, such as boulders or pavers, to your decking steps. These features not only add visual interest but also create a natural and rustic feel.
In conclusion, there are many alternative decking step designs to choose from that can add style and creativity to your outdoor deck. Whether you opt for unique step designs or incorporate landscaping features, the possibilities are endless. So, get creative and make your decking steps a standout feature of your deck!
Deck Stairs Calculator
Calculating the dimensions for your deck stairs can be a tedious task, but with the help of a deck stairs calculator, you can simplify the process. A deck stairs calculator is an online tool that allows you to input the necessary measurements and automatically generates the dimensions for your stairs. This tool can save you time and ensure accuracy in your calculations.
Using Online Tools
Online tools provide a convenient and efficient way to calculate the dimensions of your deck stairs. These tools typically require you to input the total height of the stairs, the desired tread depth, and the desired riser height. Once you enter these measurements, the calculator will generate the number of steps required, the tread width, and the riser height for each step. This information can then be used as a guide when constructing your stairs.
Manual Calculation Methods
If you prefer a more hands-on approach, manual calculation methods can also be used to determine the dimensions of your deck stairs. One method involves dividing the total height of the stairs by the desired riser height to determine the number of steps needed. Then, dividing the total run (the distance from the top of the deck to the bottom step) by the number of steps will give you the tread depth. This method requires accurate measurements and careful calculations, but it can be an effective way to calculate your stair dimensions without relying on online tools.
Whether you choose to use an online calculator or prefer manual calculations, it is crucial to ensure the safety and stability of your deck stairs. Proper measurements and construction techniques are essential to create sturdy and functional stairs that meet building codes and regulations.
Building Steps Without Stringers
To construct decking steps without stringers, begin by determining the height and width of the steps. Cut the stringer boards to size and install them, ensuring the risers are of equal height for each step. Measure, cut, and secure the treads in place to complete the process.
This method provides an easy way to build sturdy and attractive deck steps.
Methods For Stringer-free Steps
When it comes to building decking steps, one common method is to use stringers, which are the diagonal supports that hold the steps in place. However, there is an alternative approach that involves building steps without stringers. This method can be a great option if you want a more minimalist and open look for your deck. In this section, we will explore the different methods for building stringer-free steps and discuss their pros and cons.
Pros And Cons
Building steps without stringers offers several advantages. Firstly, it allows for a cleaner and more streamlined appearance, as there are no visible diagonal supports. This can enhance the overall aesthetic appeal of your deck and create a more open and spacious feel.
Another advantage is that without stringers, there is more flexibility in terms of step design. You can create custom-shaped steps or incorporate unique features such as curves or angles. This can add visual interest and make your deck stand out.
Additionally, building steps without stringers can be a more cost-effective option. Stringers require extra materials and labor to install, whereas stringer-free steps may only require the use of additional decking boards or other materials for support.
However, there are also some considerations to keep in mind when opting for stringer-free steps. One potential drawback is that without the diagonal supports, the steps may not be as structurally strong. This means they may have a lower weight capacity and may not be suitable for heavy foot traffic or large gatherings.
Furthermore, without stringers, the steps may be more prone to movement or shifting over time. This can result in uneven steps or a less stable walking surface. It is important to ensure proper reinforcement and support to minimize the risk of any structural issues.
In conclusion, building steps without stringers can be a viable option for those looking for a modern and minimalist design. It offers advantages such as a clean appearance, design flexibility, and potential cost savings. However, it is crucial to consider the potential drawbacks, including reduced structural strength and the need for proper reinforcement. By carefully weighing the pros and cons, you can determine if this method is suitable for your deck project.
Frequently Asked Questions
How Do You Make Steps For A Deck?
To make steps for a deck, measure the height, cut stringer boards and risers, then install them. Finally, measure, cut, and secure the treads in place.
What Is The Formula For Deck Stairs?
The formula for deck stairs involves calculating the number of risers and treads needed based on the height of the area. Stringer boards are cut to size, risers are inserted to ensure equal height for each step, and treads are secured in place.
The process can be tricky, but there are many online resources available for guidance.
How To Build Steps For Beginners?
To build steps for beginners, follow these steps: 1. Measure the height of the area to determine the number of risers, treads, and stringers you need. 2. Cut the stringer boards to size with a circular saw and install them. 3.
Cut the risers to the same height for each step and insert them. 4. Measure, cut, and secure the treads in place. By following these guidelines, beginners can easily build steps for their decks or outdoor spaces.
How To Make Outdoor Wooden Steps?
To make outdoor wooden steps, follow these steps: 1. Prepare the area for the steps. 2. Measure the height of the area to determine the number of risers, treads, and stringers needed. 3. Cut the stringer boards to size and install them.
4. Cut and insert the risers to be the same height for each step. 5. Measure, cut, and secure the treads in place. Building outdoor wooden steps can spruce up your entryway.
Conclusion
Building decking steps can be a straightforward process if you follow the right steps. By properly planning the height and width, considering important safety factors like handrail height and safety gates, and using the right materials, you can create sturdy and functional deck steps.
Remember to accurately measure and cut the stringers, risers, and treads, and secure everything in place. With these tips, you’ll be able to create beautiful and safe decking steps for your outdoor space.