How To Renew Teak Wood: Proven, Effortless Guide
Renewing teak wood is straightforward! Simply clean the grayed surface thoroughly with a gentle cleaner, lightly sand the grain if needed, and then apply a quality teak oil or sealant to restore its rich, golden-brown color and natural protection. This easy guide walks you through every step, guaranteeing beautiful results.
Do you have outdoor teak furniture that used to be a warm, beautiful brown, but now looks faded and gray? You are not alone! Teak wood is amazing because it resists rot and weather so well. However, exposure to sun and rain causes that classic silver-gray patina. Fixing this doesn’t require professional skills or expensive trips to the store. As a woodworking mentor, I promise that bringing back that rich, original glow is simpler than you think. With a few basic supplies and my step-by-step instructions, you can easily restore your beloved teak pieces. Ready to transform dull gray into dazzling gold? Let’s get started!
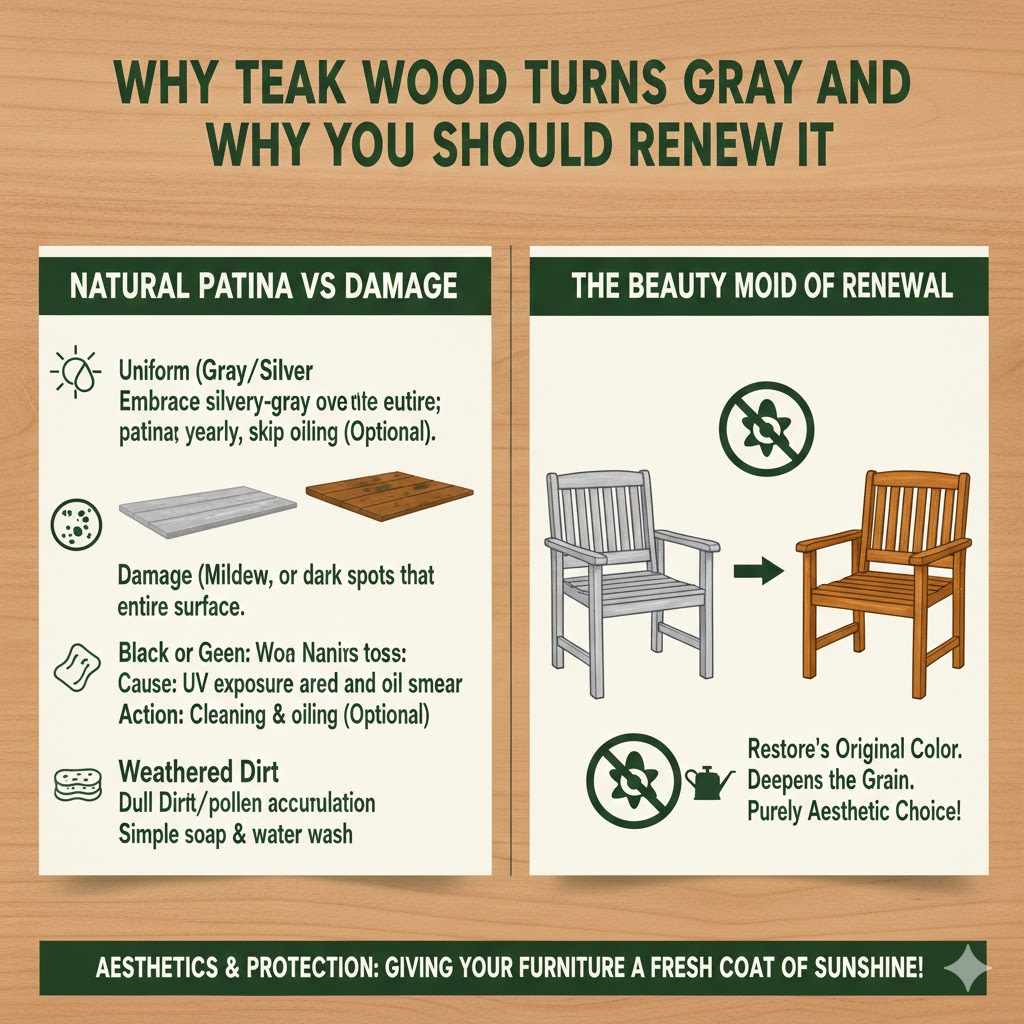
Why Teak Wood Turns Gray and Why You Should Renew It
Teak (Tectona grandis) is famous for being tough. It contains natural oils that make it resistant to water, pests, and decay. That’s why it’s the go-to for boat decks and high-quality patio furniture.
When raw teak wood is left outdoors, something interesting happens. Those natural oils rise to the surface and oxidize when exposed to UV rays and moisture. This process creates a protective, silvery-gray surface layer called a patina. While the patina is harmless and shows the wood’s longevity, many people prefer the original, deep honey-brown color.
The decision to renew teak is mostly about aesthetics. Renewing doesn’t stop the wood from resisting water, but it restores its appearance and deepens the grain. It’s like giving your furniture a fresh coat of sunshine!
The Difference Between Patina and Damage
It’s important to know that graying isn’t rot. Rot is decomposition, usually caused by fungus feeding on the wood structure. Graying is purely a surface discoloration caused by UV exposure.
| Condition | Appearance | Cause | Action Needed |
|---|---|---|---|
| Patina (Gray/Silver) | Uniform light gray or silver dusting over the entire surface. | Natural UV exposure and oil oxidation. | Cleaning and oiling for appearance (Optional but recommended). |
| Damage (Mildew/Mold) | Black, green, or dark spots that appear fuzzy or smear when wiped. | Prolonged dampness and poor airflow. | Requires a strong cleaner or a diluted bleach solution (If deep cleaning is needed). |
| Weathered Dirt | Dull, dark brown, or black grime that coats the wood. | Dirt, pollen, and pollution accumulation. | Simple washing with soap and water. |
Tools and Supplies for Effortless Teak Renewal
One of the best things about this project is that you likely already have many of these items or can find them easily at any hardware store. Safety and proper cleaning agents are our priorities here.
Essential Gear Checklist
Before you begin the process of how to renew teak wood, gather these supplies. Having everything ready makes the process smooth and quick.
- Cleaning Agent: Oxygen bleach (sodium percarbonate) cleaner designed for wood, or a mild soap solution (dish soap works well).
- Scrub Brush or Sponge: A non-metallic bristle brush or a stiff nylon brush. Avoid steel wool, which can leave metal particles that rust.
- Abrasive (If Needed): Medium-grit sandpaper (120-grit) or fine-grit (180 or 220-grit).
- Safety Gear: Gloves and safety glasses (especially when using any commercial cleaner).
- Drying/Wiping: Plenty of clean, lint-free cloths or soft old towels.
- Restorer (Optional but Recommended): High-quality Teak Oil or a specialized clear deck sealant.
- Water Source: Garden hose with a spray nozzle.
Step-by-Step Guide to Renewing Gray Teak Wood
This process breaks down into four easy phases: Preparation, Deep Cleaning, Optional Sanding, and Restoration/Sealing. Follow these steps carefully, and I guarantee you will be amazed by the transformation.
Phase 1: Preparation and Workspace Setup
Preparation is key to a fantastic finish and protects your surroundings.
- Move the Furniture: If possible, move your teak pieces to an area where you can easily wash and rinse them, like a driveway, garage floor, or lawn.
- Protect the Area: Cover any delicate plants or surfaces nearby with plastic sheeting, especially if you use a commercial chemical cleaner. Even wood-safe cleaners can affect grass or sensitive surfaces if left sitting too long.
- Test the Cleaner: Always mix your cleaner (or open your bottle) and apply a small, hidden area first. Wait 15 minutes to ensure the product does not excessively lighten the wood or react negatively.
Phase 2: Deep Cleaning to Remove the Gray
This step removes the surface grime and the gray patina, exposing the fresh wood underneath.
Choosing Your Cleaner: Mild vs. Strong
For simple, lightly grayed wood, warm water and dish soap are enough. For years of neglect or darker stains, you’ll need an oxygenated wood brightener. I highly recommend using an oxygen bleach cleaner over chlorine bleach. Chlorine bleach can damage wood fibers over time, whereas oxygen bleach is gentler while still being highly effective at brightening.
The Environmental Protection Agency (EPA) encourages using products that minimize environmental impact. Oxygen-based brighteners are often biodegradable and gentler on surrounding areas than harsh chemicals.
- Wet the Surface: Lightly dampen the teak surface with the hose. This prevents the dry wood from absorbing too much cleaner too quickly.
- Apply the Cleaner: Following the cleaner’s directions (usually mixing concentrate with water), apply the solution generously across the furniture using a bucket or a pump sprayer. Work section by section.
- Let It Dwell: Allow the cleaner to sit for 10 to 20 minutes. This soaking time is crucial for breaking down the oxidized oils and embedded dirt. Don’t let it dry out completely; lightly mist with water if needed.
- Scrub Gently: Using your nylon brush or sponge, scrub the wood with the grain. Apply moderate pressure. You should immediately see the gray color dissolving into a light, creamy foam. Remember, teak is strong, but we always work gently to respect the fibers.
- Rinse Thoroughly: Use the hose (medium pressure) to rinse off all soap residue and cleaner. It is vital to remove all chemical traces to ensure the oil/sealant adheres correctly later. Rinse until the water runs clear.
Phase 3: The Sanding Option (For Deep Restoration)
If your wood is extremely weathered, deeply scratched, or if the cleaner didn’t remove all the dullness, light sanding is the next step. For beginners, I suggest only sanding if absolutely necessary, as cleaning should do most of the heavy lifting.
When to Skip Sanding
- If the wood looks uniformly clean and brighter after washing.
- If you want the fastest, easiest renewal possible.
- If the wood feels smooth already.
Sanding Steps
- Ensure It Is Dry: Sanding should ideally be done on wood that is completely dry (wait at least 24 hours after washing).
- Start Coarse (If Necessary): Use 120-grit sandpaper. Wrap it around a sanding block for an even surface. Sand lightly, only moving in the direction of the wood grain. We are just aiming to knock off the top few microscopic layers of gray, not removing significant amounts of wood.
- Follow Up with Finer Grit: If you used 120-grit, switch to 180-grit or 220-grit paper for a smoother feel. This refines the surface for better oil absorption.
- Clean Off Dust: Use a vacuum or a tack cloth (a lightly sticky cloth) to remove all fine sanding dust. Any dust left behind will turn into a muddy mess when you apply the oil.
Phase 4: Sealing and Re-oiling for Protection and Color
This is where the magic happens! Sealing locks in that refreshed color and protects the wood from fast re-weathering.
Note on Teak Oil: True “teak oil” is often a mix of Tung oil or Linseed oil combined with mineral spirits. It soaks in well and looks fantastic but requires yearly maintenance. Synthetic sealants are easier but may not look as “natural.”
- Ensure Total Dryness: This step requires bone-dry wood. If it rained, wait another day. Applying oil to even slightly damp wood traps moisture inside, which can cause clouding or mildew.
- Apply the First Coat: Using a clean cloth or a foam brush, apply your chosen teak oil or sealant liberally over the entire surface. Work with the grain. Don’t worry about coating the sides or the bottom yet; focus on the top surfaces first.
- Let It Penetrate (The “Dwell Time”): Allow the oil to soak in for 15 to 30 minutes, checking the manufacturer’s instructions. You want the wood to absorb as much as possible.
- Wipe Off Excess (Crucial Step): After the dwell time, take a clean, dry cloth and wipe off every bit of remaining surface oil. This is perhaps the most important part of oiling. Any excess oil left on the surface will turn sticky, gummy, and will attract dirt, ruining your beautiful finish. Wipe until the surface feels dry to the touch.
- Wait and Reapply: Let the first coat dry according to the oil instructions (often 4-24 hours). If the wood looks patchy or doesn’t have the deep color you desire, apply a second, lighter coat following the same dwell-and-wipe process. Most outdoor items only need one heavy coat or two light coats.
Understanding Different Renewal Products
When you shop, you’ll encounter several options. As a beginner, understanding the pros and cons helps you choose wisely.
| Product Type | Pros | Cons | Recommended Frequency |
|---|---|---|---|
| Pure Teak Oil (Oil-Based) | Restores deep, rich color; absorbs deeply; classic look. | Requires annual reapplication; can look wet if over-applied. | Annually (or every 6 months if furniture gets heavy sun). |
| Water-Based Sealants (Clear) | Fast drying; UV protection is often built-in; easier cleanup. | Can sometimes look slightly artificial; doesn’t penetrate as deeply. | Every 1–2 years. |
| Stripper/Brightener Kit (Without Oil) | Excellent at removing severe graying and mold stains quickly. | Leaves wood raw and unprotected; REQUIRES an oil/sealant afterward. | Only as needed (usually every 3–5 years). |
Expert Tips for Longevity and Maintenance
You’ve done the hard work! To keep your teak looking fantastic for years to come, smart maintenance is easy. Think of maintenance not as a chore, but as preventative care for your investment.
Simple Tips from the Workshop
Let It Weather Naturally: Understand that high-quality teak furniture is designed to be left unfinished outside. If you love the silvery-gray patina but hate the dirt build-up, just stick to Phase 2 (Cleaning) once a year and skip Phase 4 (Oiling).
Avoid Pressure Washing: While tempting, high-pressure washing can damage the softer grain lines between the hard wood fibers, leading to roughness and premature wear. Use a garden hose with a nozzle instead.
Check for Excess Oil: If you notice small puddles or shiny, sticky spots days after oiling, immediately wipe them away with a clean rag. Excess oil causes problems, not protection.
Storage During Off-Season: If you live in an area with harsh winters, cover or store your furniture indoors. This vastly slows down the weathering process. For general tips on caring for outdoor wood finishes, resources from organizations like the U.S. Forest Service (USDA) often provide excellent, science-backed advice on wood durability.
Dealing with Mold and Mildew
If, during your inspection, you find actual black or green mold spots (not just gray dirt), your cleaning routine needs a small boost.
- Mix a solution of one part household white vinegar to four parts water, or use a commercial deck cleaner formulated for mold removal.
- Apply it directly to the affected area and let it sit for 15 minutes.
- Scrub vigorously with the grain.
- Rinse exceptionally well. This slightly acidic wash helps kill the spores that cause mildew growth. Always follow up with your chosen oil if you are aiming for the honey color.

Frequently Asked Questions (FAQ) about Teak Renewal
Q1: Do I absolutely have to oil my teak furniture after cleaning it?
A: No, you don’t have to. Cleaning removes the gray layer, but leaving it “raw” after cleaning will cause it to start turning gray again in just a few weeks due to sun exposure. Oiling is optional, but it brings back the deep, rich color and offers some extra UV protection.
Q2: How long does it take for teak oil to fully dry?
A: This varies wildly by product and humidity! Most teak oils dry to the touch within 4 to 8 hours, but they often need 24 to 48 hours to fully cure before placing items on them or exposing them to heavy moisture. Always follow the specific product label for curing times.
Q3: Can I use mineral spirits to clean teak instead of wood cleaner?
A: Mineral spirits are excellent at removing sticky, old sealant residue before you re-oil, as they cut through oil and grease. However, they are not effective at lifting the gray patina or killing mildew spores. They should only be used as a preparatory step before final cleaning or oiling.
Q4: Will sanding hurt my furniture if I use the wrong grit paper?
A: Light sanding with 120 or 150-grit sandpaper won’t hurt unless you sand aggressively in the same spot for too long. The real risk comes from sanding against the grain, which causes fuzzing, or failing to remove all the dust, which leads to a muddy finish when oiling. Always go with the grain.
Q5: What is the main ingredient in commercial teak oil that makes it work?
A: Genuine teak oils usually contain naturally derived drying oils like Tung oil or polymerized Linseed oil. They are combined with mineral spirits or solvents to allow them to penetrate deep into the wood pores. Look for high solids content for better long-term protection.
Q6: Can I stain teak wood to change its color permanently?
A: While you can apply stains, it is generally not recommended for outdoor teak. Teak’s natural oils repel standard wood stains, making them often fail prematurely or blotch. Oil finishes or colored sealants designed specifically for exterior hardwoods work best for color variation.
Conclusion: Enjoying Your Revitalized Teak
You have successfully navigated the process of how to renew teak wood! Pat yourself on the back. This isn’t just about making outdoor furniture look new; it’s about respecting and maintaining quality materials. We started with dull, weather-beaten wood and, through simple cleaning and perhaps a light conditioning oil, revealed the gorgeous, rich grain hidden beneath.
Remember the key takeaways: Clean thoroughly with the grain, be obsessive about wiping off excess oil, and allow everything adequate drying time. By choosing gentle yet effective methods over harsh chemicals or heavy sanding, you have ensured your teak remains durable and beautiful for many seasons to come. Head out, relax on your newly restored furniture, and enjoy the satisfaction of a job done right!