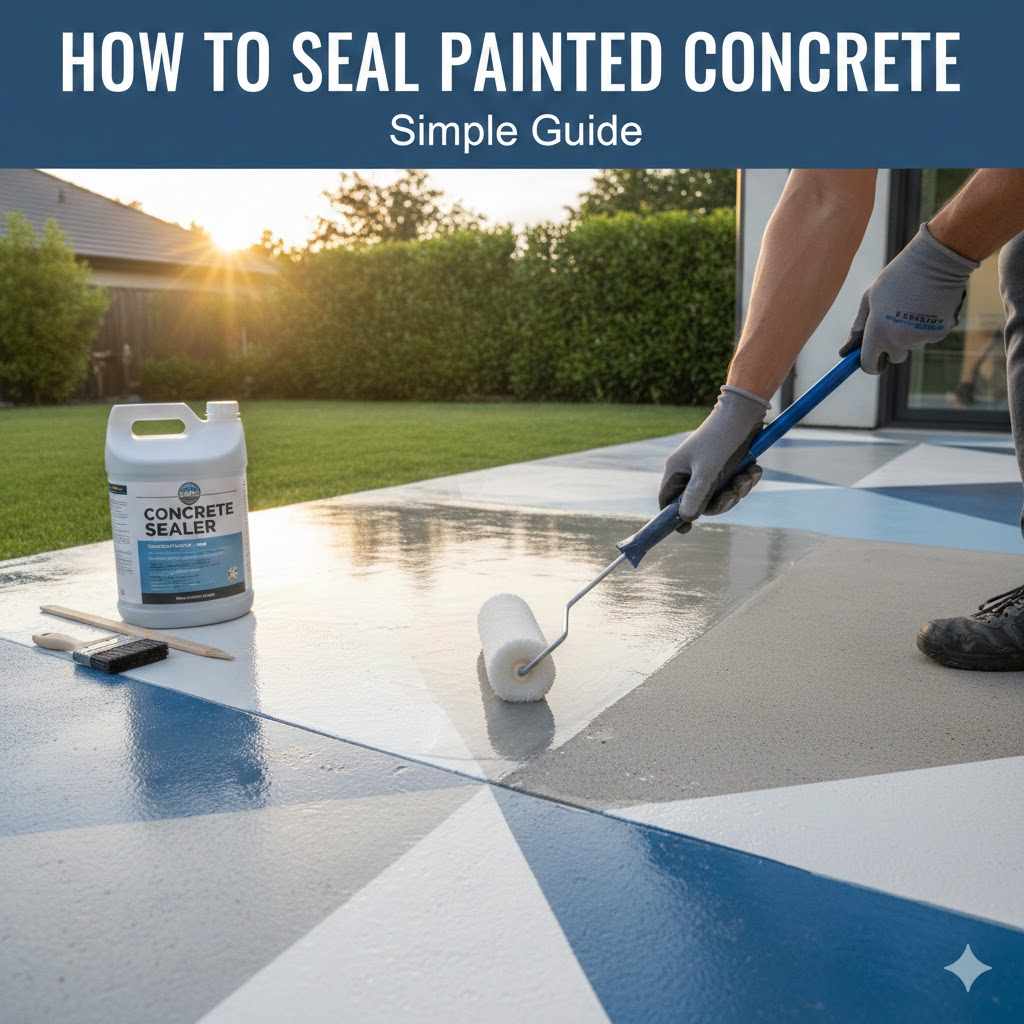
How to Seal Painted Concrete Simple Guide
Painting concrete is a great way to make it look new again. But after all your hard work, you might wonder what happens next. Sometimes, people aren’t sure about the best way to protect their painted concrete.
They might worry about the steps involved or if they can do it themselves. This guide is here to help! We’ll walk you through How to Seal Painted Concrete: Simple Protection Guide.
You’ll learn how to keep your painted concrete looking its best for a long time. Let’s get started!
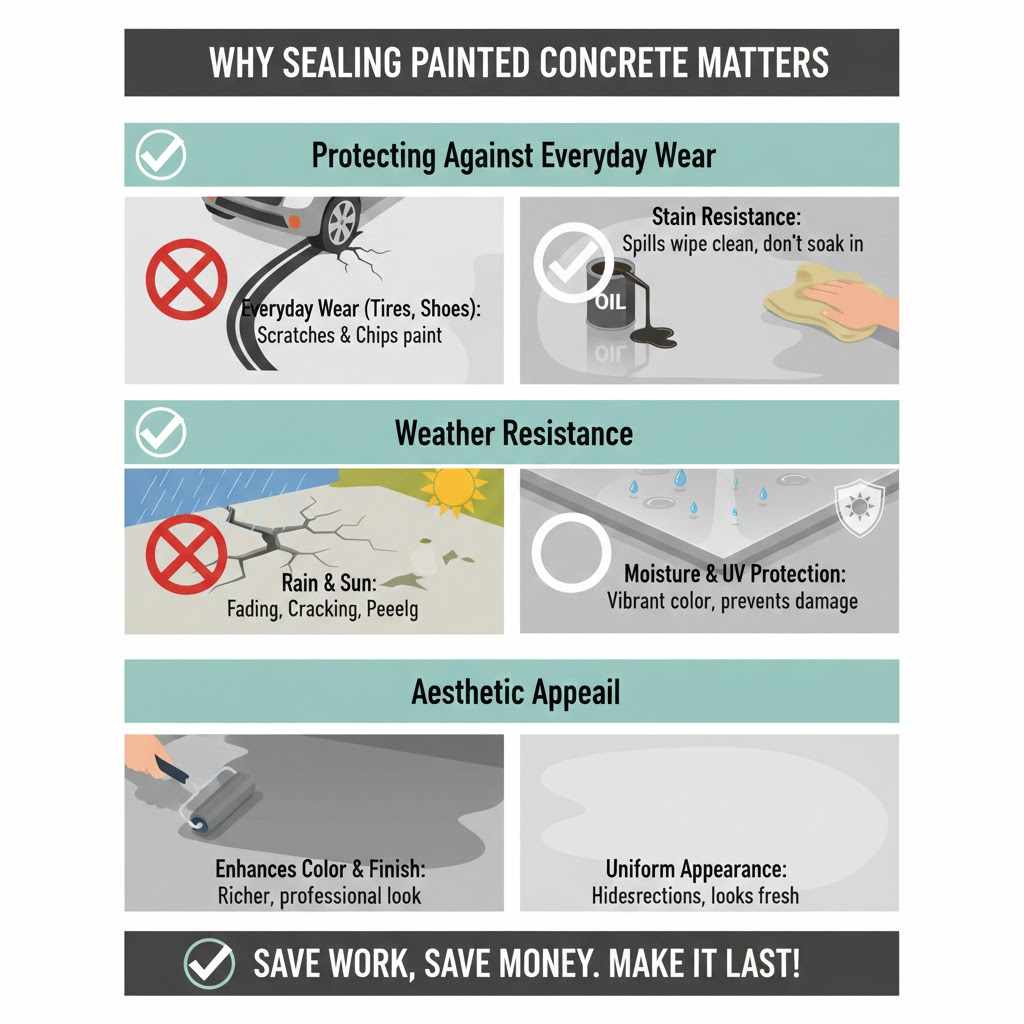
Why Sealing Painted Concrete Matters
Sealing painted concrete is super important for making your paint job last longer and look great. Think of it like putting a clear coat on a painting. It shields the art from dust, spills, and wear.
Painted concrete surfaces face the same kinds of things, especially if they are outdoors or get a lot of foot traffic. Without a sealer, the paint can fade, chip, or get stained more easily. This can lead to more work and cost down the road.
Learning how to seal painted concrete is a simple step that saves a lot of trouble.
Protecting Against Everyday Wear
Painted concrete floors or driveways can take a beating. Things like car tires, shoes, and dropped items can scratch and chip away at the paint. A good sealer acts as a protective shield, making the paint surface harder and more resistant to these kinds of damages.
This means you won’t have to touch up your paint job as often.
Imagine spilling some oil on your garage floor or some juice on your patio. Without a sealer, these liquids can soak into the concrete and leave tough stains. A sealer creates a barrier that prevents spills from penetrating the paint and concrete.
This makes cleaning up much easier and keeps your painted surface looking clean and fresh.
Weather Resistance
If your painted concrete is outside, it has to deal with rain, sun, and temperature changes. These weather elements can break down the paint over time. Rain can wash away pigment, and UV rays from the sun can cause fading.
Freezing temperatures can cause moisture to expand in the concrete, leading to cracks and paint peeling. A sealer helps to block moisture and offers some protection against UV rays, keeping your paint looking vibrant for longer.
For example, a driveway sealed with a quality product will be less likely to suffer from salt damage in the winter. Salt used to melt ice can eat away at concrete and paint. A sealer adds a layer of defense against this corrosive effect.
Aesthetic Appeal
Beyond protection, sealing can also make your painted concrete look even better. Many sealers add a slight sheen or a satin finish, which can give your painted surface a richer, more professional look. This extra touch can really make your painted concrete stand out.
It enhances the color and depth of the paint, making it more appealing to look at.
Some sealers can also help to even out the appearance of the painted surface, hiding minor imperfections and giving it a uniform finish. This is especially useful for DIY projects where achieving a perfectly smooth finish might be challenging.
Choosing the Right Sealer for Painted Concrete
Picking the correct sealer is a big part of How to Seal Painted Concrete: Simple Protection Guide. Not all sealers are made the same, and the best one for you depends on a few things. You’ll want to think about where your concrete is, how much it will be used, and what kind of look you want.
Using the wrong type of sealer might not protect your paint well or could even damage it. So, let’s look at the different types and what they are good for.
Types of Concrete Sealers
There are generally two main types of sealers used on concrete: topical sealers and penetrating sealers. Topical sealers form a protective film on the surface of the concrete. Penetrating sealers soak into the concrete pores, reacting chemically to form a barrier within the material.
Topical Sealers
These sealers lay on top of the painted surface, forming a protective layer. They are excellent at guarding against stains and wear because they create a physical barrier. This type of sealer often enhances the color of the paint and can add a desired sheen, from matte to high gloss.
They are usually easier to apply and can be reapplied if needed.
Common topical sealers include acrylics, urethanes, and epoxies. Acrylics are economical and easy to use, offering good UV resistance and a natural look. Urethanes are more durable than acrylics, offering better abrasion and chemical resistance.
Epoxies are very tough and chemical-resistant, often used in garages and industrial settings, but they can yellow over time with UV exposure if not properly formulated or top-coated.
A key benefit of topical sealers is their ability to “gloss up” the paint, making the colors appear richer. They are also very effective at preventing water and oil from soaking in.
Penetrating Sealers
These sealers go deeper into the concrete itself. They don’t form a visible film on the surface. Instead, they react with the concrete to make it less porous.
This makes it harder for water, salt, and other liquids to get in and cause damage. They are great for preventing freeze-thaw damage and for protecting against chemical spills.
Types of penetrating sealers include silanes, siloxanes, and siliconates. Silanes are good for deep penetration and protection against water and de-icing salts. Siloxanes offer excellent water repellency and are ideal for exterior applications.
Siliconates provide good protection against water and efflorescence (a white powdery deposit).
Penetrating sealers are often chosen when the goal is to protect the concrete itself from the elements rather than just the paint layer. They maintain the natural look of the concrete and painted surface without adding shine or changing the texture. They are also less likely to peel or flake over time because they become part of the concrete.
Considerations for Your Project
When deciding which sealer to use, think about the location of your painted concrete. Is it inside or outside? Will it be walked on a lot?
Will cars drive on it? These factors will influence how durable the sealer needs to be.
Traffic Levels
For areas with heavy foot traffic, like a patio or a busy entryway, you’ll want a more durable sealer. A urethane or a high-solids acrylic would be a good choice. These sealers are designed to withstand more abrasion and wear and tear.
If your concrete is in a garage that cars will drive on, you need something very tough. An epoxy or a high-performance urethane sealer is recommended. These can handle the weight and constant movement of vehicles.
For areas with light traffic, such as a decorative concrete floor in a spare room, a standard acrylic sealer might be sufficient. It provides a good level of protection without being overkill.
Environment
If your concrete is exposed to harsh weather, like strong sunlight or freezing temperatures, you need a sealer that can handle it. Acrylic sealers offer good UV resistance and can protect against moisture. Penetrating sealers are excellent for preventing damage from freeze-thaw cycles and salt exposure on driveways.
For indoor use, the primary concerns might be stain resistance and ease of cleaning. Many topical sealers perform very well in this regard. If there’s a risk of chemical spills, like in a workshop, a chemical-resistant sealer like an epoxy or urethane is a must.
Desired Finish
Do you want your painted concrete to have a shiny look, or do you prefer a natural, matte finish? Topical sealers come in various finishes. Acrylic sealers are often available in matte, satin, and gloss.
Urethanes and epoxies typically offer a higher gloss finish. If you want to keep the original look of your paint and concrete, a penetrating sealer is the way to go, as it doesn’t alter the surface appearance.
Think about the overall aesthetic you’re trying to achieve. A high-gloss finish can make colors pop and make a space feel brighter, while a matte finish offers a more understated elegance.
Here’s a quick look at sealer types and their typical uses:
| Sealer Type | Typical Uses | Finish | Durability |
|---|---|---|---|
| Acrylic | Patios, walkways, garage floors (light traffic) | Matte, Satin, Gloss | Good |
| Urethane | High-traffic areas, garage floors, commercial spaces | Satin, Gloss | Very Good |
| Epoxy | Garages, workshops, industrial floors | Gloss | Excellent |
| Penetrating (Silane/Siloxane) | Exterior concrete, driveways, surfaces needing moisture protection | Natural/Matte | Excellent (Concrete Protection) |
Product Recommendations
When selecting a specific product, always read the manufacturer’s instructions carefully. Look for sealers specifically designed for painted concrete surfaces. Some sealers might be too harsh and could damage or lift the paint, especially if the paint is not fully cured or properly adhered.
For DIYers, acrylic sealers are often the easiest to work with. They are generally water-based, so cleanup is simple, and they offer good protection for most home applications. Look for a high-quality, exterior-grade acrylic sealer if your project is outdoors.
If you’re sealing a garage floor, research epoxy kits that are designed for DIY application. These often come with a primer and a topcoat for maximum protection against oil, chemicals, and tire marks.
Preparing Your Painted Concrete Surface
Before you can apply any sealer, you need to make sure your painted concrete is ready. Proper preparation is key to How to Seal Painted Concrete: Simple Protection Guide. If the surface isn’t clean and dry, the sealer won’t stick well.
This could lead to peeling or uneven coverage. Taking the time to prep will ensure your sealer works its best and lasts a long time.
Cleaning the Concrete
The first step is thorough cleaning. Remove all dirt, grime, oil, grease, and any loose paint. For general dirt, a stiff brush and a concrete cleaner or a mild detergent solution will work.
Rinse the surface well with water and let it dry completely.
Stubborn stains might need a degreaser or a concrete stain remover. Always test these products in an inconspicuous area first to ensure they don’t damage the paint. For oily stains, you might need to use an absorbent material like kitty litter to soak up as much oil as possible before cleaning.
If your painted concrete has any mold or mildew, use a solution of bleach and water (1 part bleach to 3 parts water) or a specialized concrete cleaner that kills mold and mildew. Be sure to rinse thoroughly after using bleach, as any residue can affect the sealer application.
Here’s a quick cleaning checklist:
- Sweep away loose debris
- Wash with concrete cleaner or mild soap and water
- Address oil or grease stains with a degreaser
- Remove mold or mildew if present
- Rinse thoroughly
After cleaning, let the concrete dry for at least 24-48 hours, depending on the weather. Moisture trapped under the sealer can cause it to fail.
Checking Paint Adhesion
It’s crucial to ensure the paint is well-adhered to the concrete before sealing. You can test this by doing a scratch test in a small, hidden area. Use a sharp object, like a putty knife or a coin, and try to scrape off the paint.
If it comes off easily, the paint is not well-bonded, and you might need to re-prime and repaint before sealing.
Also, make sure the paint is fully cured. Most paints need several days, or even weeks for some heavy-duty coatings, to fully cure and harden. Applying a sealer too soon can trap moisture or solvents within the paint, which can lead to bubbling, peeling, or cloudiness in the sealer.
Always refer to the paint manufacturer’s guidelines for cure times. If you are unsure about the adhesion or cure time of your paint, it’s better to wait a little longer or perform more tests.
Repairing Cracks and Imperfections
Before you seal, take some time to fill any cracks or chips in the concrete. Small cracks can be filled with a concrete crack filler or a flexible sealant. Larger cracks and holes might require a concrete patching compound.
For cracks, clean out any loose debris from them first. Then, apply the crack filler according to the product’s instructions. Make sure the filler is flush with the concrete surface once it has dried and cured.
These repairs should be done well in advance of sealing, as most repair materials need time to cure properly.
If there are significant surface imperfections, like spalling (where the top layer of concrete has chipped away), these areas should be repaired. Smooth out any rough edges and fill them with a suitable concrete patching material. Once dry, you can lightly sand the repaired areas to match the surrounding surface.
The goal is to create as smooth and uniform a surface as possible. This will not only improve the appearance of the sealed concrete but also ensure the sealer can be applied evenly without pooling or creating uneven spots.
Applying the Concrete Sealer
Now for the part where you actually apply the sealer! This is where How to Seal Painted Concrete: Simple Protection Guide really comes into play. Applying sealer is not overly complicated, but it needs to be done carefully and correctly.
We will go over the best ways to apply it so you get a great, long-lasting finish. Remember, following the steps and using the right tools will make all the difference.
Gathering Your Supplies
Before you start, make sure you have everything you need. This includes the sealer you chose, application tools, and safety gear. Having everything ready will make the process smoother and prevent interruptions.
Tools and Materials:
- The concrete sealer (enough for your project area)
- Paint roller with an extension pole (for larger areas)
- High-quality, chemical-resistant roller covers (lint-free is best)
- Paint tray or bucket with a grid for rollers
- High-quality synthetic bristle brush (for edges and corners)
- Squeegee (optional, for spreading and leveling some sealers)
- Measuring cups or buckets (if mixing is required)
- Stirring stick
- Safety glasses or goggles
- Chemical-resistant gloves
- Respirator mask (especially for solvent-based sealers)
- Protective clothing or old clothes
- Drop cloths or plastic sheeting (to protect surrounding areas)
Make sure your roller covers and brushes are suitable for the type of sealer you are using. Water-based sealers can often be applied with standard rollers, while solvent-based sealers might require more specialized, chemical-resistant tools.
For epoxy or urethane systems, specific applicators might be recommended by the manufacturer. Always check the product label for specific tool recommendations.
Application Techniques
The method of application will depend on the type of sealer. Always follow the manufacturer’s instructions for the best results. Most sealers are applied in thin, even coats.
Using a Roller
For large, flat areas like driveways or patios, a roller is the most efficient tool. Pour some sealer into a paint tray or a bucket with a grid. Dip the roller into the sealer, ensuring it’s not overloaded.
Roll it back and forth on the tray to distribute the sealer evenly. Apply to the concrete surface in long, overlapping strokes. Work in sections, maintaining a wet edge to avoid visible seams between dried and wet areas.
Use the extension pole to reach further and maintain a consistent pressure. If using a squeegee, spread the sealer evenly with it, then follow up with a roller to smooth it out and ensure uniform coverage. Be careful not to leave puddles of sealer, as these can dry to a cloudy or uneven finish.
Using a Brush
A brush is essential for applying sealer to edges, corners, and around obstacles like doorways or pillars. Load the brush with a moderate amount of sealer and apply it carefully, working it into any crevices or difficult-to-reach spots. After brushing the edges, immediately use a roller to blend them into the larger area.
This helps create a seamless finish.
For very detailed areas or small projects, a brush might be your primary application tool.
Spray Application
Some sealers, particularly acrylics, can be applied with a garden sprayer or a specialized sprayer. If you choose this method, ensure you have a sprayer that can handle the viscosity of the sealer. You’ll want to use a pump sprayer with a fan tip.
Apply in thin, even coats, overlapping your passes. Be mindful of overspray and protect surrounding areas.
A spray application can be quick for large areas, but it requires a steady hand and careful technique to achieve an even coat. It is often recommended to back-roll or back-brush after spraying to ensure the sealer is worked into the surface and to eliminate any roller marks or unevenness.
Important Application Tips:
- Work in Sections: Divide your project into manageable sections. This helps you maintain a wet edge and ensures consistent application.
- Apply Thin Coats: It’s better to apply two thin coats than one thick coat. Thin coats dry more evenly and are less likely to bubble or peel.
- Overlap Strokes: When using a roller or sprayer, overlap your passes slightly to avoid streaks or missed spots.
- Check for Pooling: Make sure there are no puddles of sealer left on the surface. These can cure to a glossy, uneven patch.
- Follow Manufacturer’s Instructions: This is the most important tip! Each sealer is different, and the manufacturer knows best how to apply it for optimal results.
Number of Coats and Drying Times
Most sealers require at least two thin coats for adequate protection. The first coat acts as a primer and helps seal the concrete. The second coat provides the main protective layer and enhances the finish.
Drying time between coats is critical. It can range from a few hours to overnight, depending on the type of sealer, temperature, and humidity. Always consult the product label for specific drying times.
Rushing this process can lead to delamination or poor adhesion.
After the final coat, allow the sealer to cure completely before allowing foot traffic or placing heavy items on the surface. Full cure times can be anywhere from 24 hours to several days, or even weeks for some epoxies. Be patient; this final curing stage is essential for the sealer’s durability.
A common mistake is to walk on the surface too soon, which can leave footprints or scuff marks that are difficult to remove. For vehicles, the wait time is even longer, often up to 7 days for full chemical and tire resistance.
Weather Conditions
The weather plays a significant role in sealer application and curing. Avoid applying sealer in direct, hot sunlight, as it can dry too quickly, leading to lap marks and poor adhesion. Also, avoid applying it when rain is expected, as water can wash away the sealer before it cures.
Ideal conditions for applying sealer are moderate temperatures (typically between 50°F and 85°F or 10°C and 30°C) with low humidity and no chance of rain. Check the weather forecast before you start. If temperatures are expected to drop below freezing within a few days after application, it’s best to wait for warmer weather, as freezing can damage the sealer before it fully cures.
High humidity can slow down the drying and curing process. In humid conditions, allow for extra drying time between coats and before allowing traffic. Conversely, very low humidity and high heat can cause the sealer to dry too fast, creating an uneven finish.
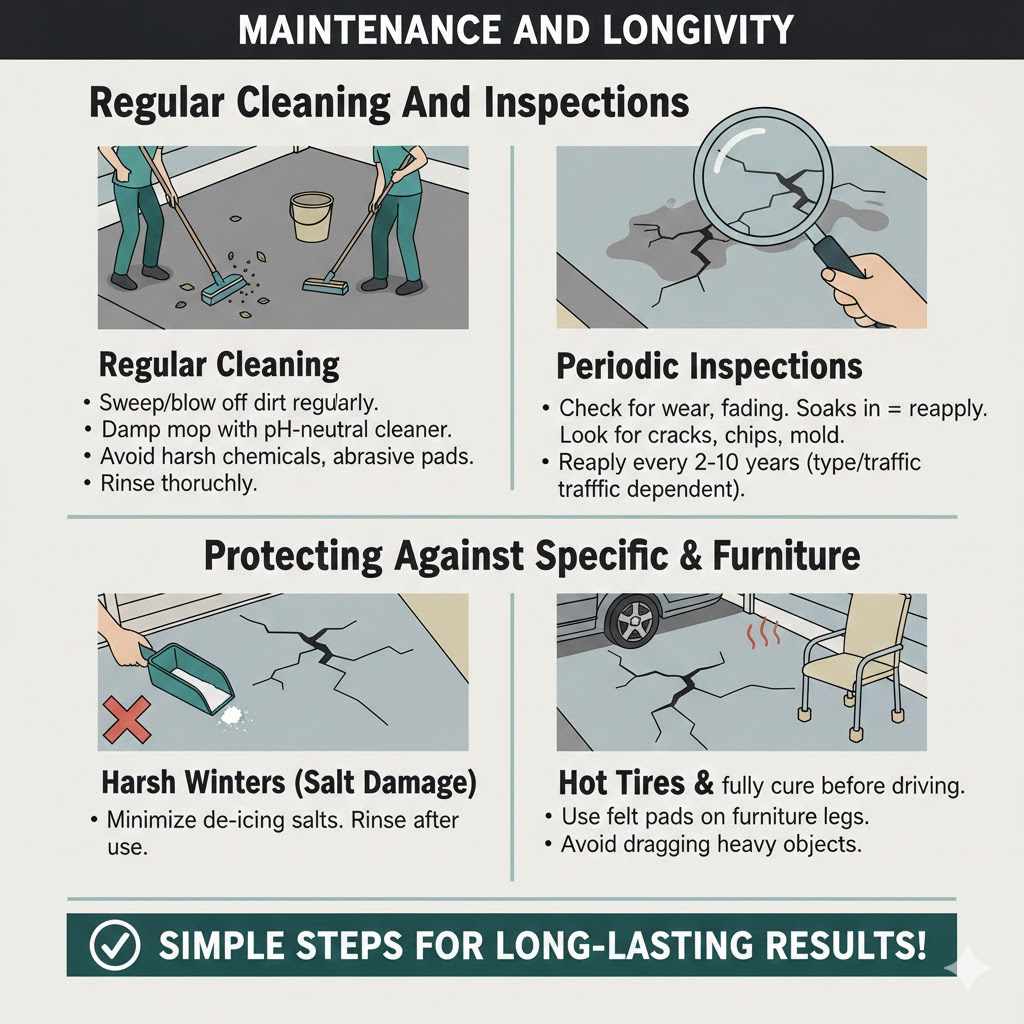
Maintenance and Longevity
You’ve learned how to seal painted concrete. Now, let’s talk about keeping it looking good! The right maintenance will make your sealed concrete last much longer.
This part of How to Seal Painted Concrete: Simple Protection Guide is about simple steps you can take regularly to protect your investment.
Regular Cleaning
Keeping your sealed concrete clean is the most important maintenance task. Sweep or blow off loose dirt, leaves, and debris regularly. This prevents abrasive materials from scratching the sealer.
For everyday cleaning, a damp mop or a soft broom is usually sufficient. If you need to clean up spills or more stubborn dirt, use a pH-neutral cleaner designed for sealed concrete. Avoid harsh chemicals, abrasive scrubbing pads, or power washers set on high pressure, as these can damage the sealer over time.
A mild detergent mixed with water is often enough for most cleaning needs. Always rinse the surface thoroughly with clean water after washing to remove any soap residue, which can make the surface slippery or dull the finish.
If you have stains, treat them as soon as possible. For oil or grease stains, use an absorbent material first, then a concrete degreaser. For other types of stains, research the best method for removal without harming the sealer.
Inspection and Reapplication
Periodically inspect your sealed concrete for any signs of wear, damage, or fading. Look for areas where the sealer might be thinning or showing scratches. You might notice that water no longer beads up on the surface; instead, it starts to soak in.
The lifespan of a concrete sealer varies greatly depending on the type of sealer, the amount of traffic, and environmental conditions. A good quality sealer might last anywhere from 2 to 10 years. Acrylic sealers typically need reapplication more often than urethanes or epoxies.
When it’s time to reapply, you usually don’t need to strip the old sealer unless it’s peeling or damaged. Simply clean the surface thoroughly and apply a new coat or two of the same type of sealer. If you are unsure about the type of sealer that was originally applied, it’s often best to stick with an acrylic or compatible sealer to avoid potential adhesion issues.
Always perform a small test area with the new sealer before applying it to the entire surface. This ensures compatibility and helps you preview the final look.
Here’s a scenario:
- You sealed your patio two years ago with an acrylic sealer.
- You notice that water is starting to soak in more than bead up.
- You clean the patio thoroughly to remove all dirt and debris.
- You test a small, inconspicuous area with a new coat of acrylic sealer.
- Once satisfied with the look, you apply a second coat to the entire patio.
Protecting Against Specific Threats
If you live in an area with harsh winters, be mindful of de-icing salts. While sealers offer protection, prolonged exposure can still cause damage. Try to minimize the use of salts directly on sealed concrete surfaces.
If you do use them, rinse the concrete thoroughly after the ice melts.
For driveways, avoid parking hot tires on the sealed surface immediately after application. Tires can sometimes react with the sealer, causing it to lift or soften. This is more common with certain types of sealers and warmer temperatures.
Always allow the sealer to fully cure before driving on it.
If you use furniture on your patio or deck, use felt pads or protective caps on the legs to prevent scratching the sealer. Similarly, avoid dragging heavy objects across the surface.
Proper maintenance and care will ensure your painted concrete looks great and remains protected for many years. It’s a small effort for a significant return on your investment in its appearance and durability.
Frequently Asked Questions
Question: How long should I wait before walking on sealed painted concrete
Answer: You can typically walk on sealed painted concrete after 24 hours, but it’s best to check the specific sealer manufacturer’s instructions. For full curing and resistance to scuffing, it’s recommended to wait longer, often 48-72 hours for foot traffic.
Question: Can I seal over old, peeling paint
Answer: No, you should not seal over old, peeling paint. The sealer will only adhere to the loose paint, and when the paint peels, the sealer will come with it. You must remove all loose paint and prepare the surface properly before sealing.
Question: What is the best sealer for a painted garage floor
Answer: For a painted garage floor, an epoxy or a high-performance urethane sealer is generally recommended. These offer excellent resistance to oil, chemicals, tire marks, and abrasion, providing long-lasting protection.
Question: Does sealer change the color of painted concrete
Answer: Some sealers, especially topical sealers like acrylics and urethanes, can enhance the color and add a sheen (from matte to high gloss). Penetrating sealers, however, generally do not alter the color or appearance of the painted surface.
Question: How often do I need to reapply concrete sealer
Answer: The frequency of reapplication depends on the type of sealer and the amount of wear and exposure it receives. Acrylic sealers may need reapplication every 2-3 years, while more durable sealers like urethanes or epoxies can last 5-10 years or more.
Summary
Following these steps for How to Seal Painted Concrete: Simple Protection Guide ensures your painted surfaces stay beautiful and protected. Proper cleaning, choosing the right sealer, careful application, and regular maintenance are key. Enjoy your newly protected and long-lasting painted concrete.