How to Seal Driftwood: Avoid the Salt-Bloom Mistake
To seal driftwood correctly, first desalinate it: soak beach or tidal driftwood in fresh water (changing the water regularly, or boiling smaller pieces) until it stops tasting or looking salty, since trapped salt causes a white “bloom” under a finish. Let it dry completely for one to several weeks, sand it smooth, then apply thin coats of a clear sealant — water-based polyurethane, a matte spray sealer, or aquarium-safe epoxy for tank use — letting each coat cure before the next.
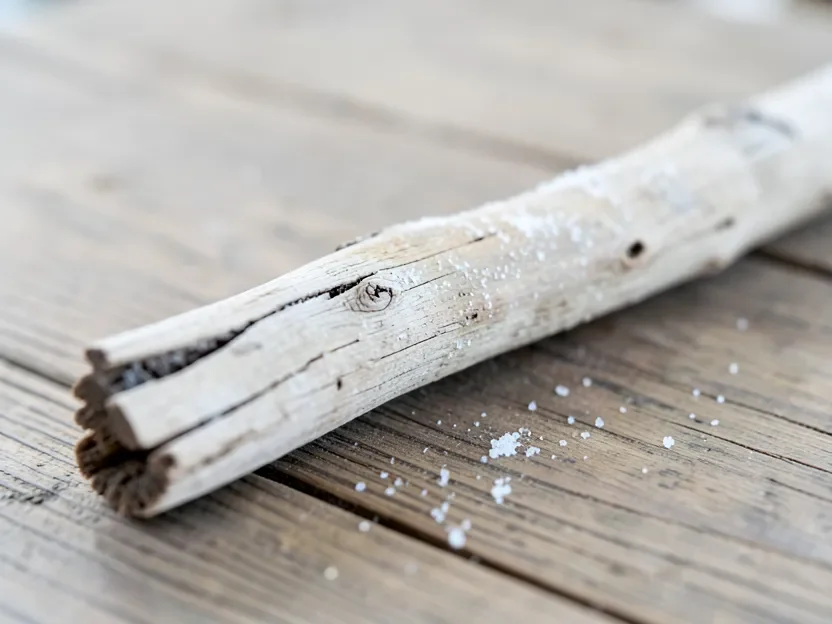
Here is the mistake that ruins more driftwood projects than a bad sealant choice ever does: sealing wood that still has salt trapped inside it. Beach and tidal driftwood soaks up saltwater for years before it ever reaches your shelf, and that salt does not leave on its own just because the wood looks dry on the outside. Seal over it and the salt keeps pulling moisture through the finish from the inside, which is what causes the cloudy, milky patches and white crusty “bloom” that show up weeks or months after a project looked perfect. The fix is a short desalination step before you ever open a can of sealant — and it is the one step most quick tutorials skip entirely.
Why Should You Seal Driftwood?
Sealing isn’t about making a natural find look glossy or artificial. A piece of driftwood already survived years of sun, saltwater, and being tumbled across sand or riverbed, so it arrives with a texture and shape you don’t want to cover up. A clear finish just gives that same piece enough stability to handle being indoors, where humidity and temperature swings are very different from the beach it came from.
Here’s what sealing actually solves once a piece is properly desalinated, dried, and coated:
- Stops moisture cycling: Unsealed driftwood is porous enough to keep absorbing and releasing humidity from the room around it. That constant swelling and shrinking is what eventually starts rot in a piece that would otherwise be stable.
- Locks in fragile fibers: Sun-bleached, weathered driftwood is often already dry and brittle before it even gets to your workshop. A sealant binds the surface fibers together so the piece stops shedding splinters or dust.
- Removes hiding spots for pests: The cracks, holes, and bark pockets that make driftwood interesting are also where wood-boring insects and their eggs can survive. A cleaned and sealed surface gives them nowhere to live.
- Turns a porous surface smooth: Raw driftwood grabs dust like sandpaper. Once it’s sealed, a soft, dry cloth is all it takes to keep it clean.
- Deepens the grain without hiding it: A thin clear coat brings out the contrast between the pale, sun-bleached areas and the darker grain lines underneath — the same “wet look” effect you see when driftwood is still damp from the tide.
Best Matte Spray Pick For Driftwood Decor
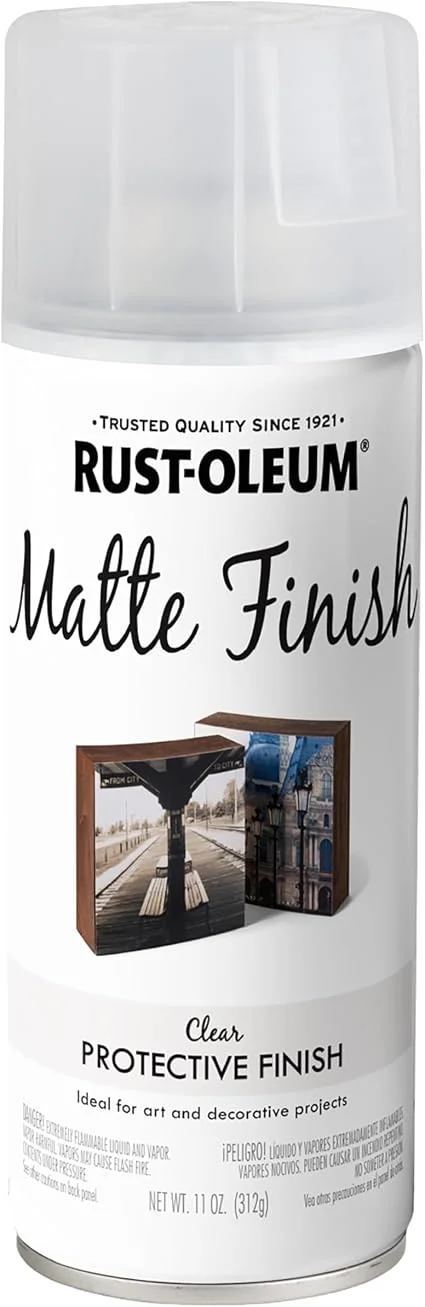 |
Rust-Oleum Matte Clear Spray Paint (11 oz) – $9.78 The matte spray option from the sealant table below — it reaches every crevice on a knotted or hollow piece without a brush.
|
Choosing the Right Sealant: Your Key to Success
Once your driftwood is desalinated and bone dry, picking a wood sealer comes down to one question: where is this piece going to live? A shelf display, a fish tank, and an outdoor planter each need a different approach, and using the wrong one is the second most common reason driftwood projects fail.
Aquarium or terrarium use is the one exception to “just seal it.” Standard polyurethane, spray lacquer, and most craft sealants are not safe once submerged, even after they’ve fully cured. If a piece is going into a tank, the safest route is no sealant at all — boil it for one to two hours to sterilize it and help it sink, then soak it in fresh water for one to two weeks, changing the water daily to pull out tannins. If you do need a sealed look for a display piece near (not inside) a tank, look specifically for an epoxy resin rated “aquarium-safe” after full cure, not a generic craft epoxy.
For everything else — shelves, wall art, centerpieces — here’s how the common options compare.
| Sealant Type | Best For | Pros | Cons |
|---|---|---|---|
| Water-Based Polyurethane | Beginners and most decor projects. |
|
|
| Oil-Based Polyurethane | Projects needing maximum durability. |
|
|
| Clear Matte or Satin Spray Sealant | Intricate pieces with lots of nooks and crannies. |
|
|
| Tung Oil or Linseed Oil | Achieving a very natural, hand-rubbed look. |
|
|
For a first project, a water-based polyurethane in satin or matte is the easiest to get right, and a matte spray sealant is worth the extra cost on a piece with a lot of holes and twists that a brush can’t reach evenly — see the pick above.
Tools and Materials You’ll Need
Nothing here requires a real workshop. Gather these before you start so the desalination step doesn’t stall out halfway through.
For Cleaning and Desalinating
- A stiff-bristled brush (a vegetable brush works great)
- A bucket or stockpot large enough to fully submerge the wood
- Plain tap water (a lot of it — you’ll be changing it repeatedly)
- Optional: table salt or Epsom salt for an initial hot-soak, which can help pull sodium out of heavily salt-soaked pieces
- Sandpaper (medium 120-grit and fine 220-grit)
For Sealing
- Your chosen sealant (water-based polyurethane, spray sealant, or oil)
- A good quality paintbrush (a 1-2 inch synthetic bristle brush is perfect for brush-on finishes)
- Clean, lint-free cloths or rags
- Gloves to protect your hands
- A drop cloth or old newspapers to protect your workspace
The Step-by-Step Guide to Perfectly Sealed Driftwood
Follow these in order — especially the desalinating and drying steps. Skipping ahead to sealing is the single most common way this project goes wrong.
Step 1: Clean and Desalinate the Driftwood
If your driftwood came from a beach, tidal river, or anywhere near saltwater, it has salt soaked deep into its fibers — not just on the surface. Skip this step and that salt will eventually pull moisture back through your finish, leaving a cloudy or crusty white “bloom” weeks or months after the project looked done.
- Initial Scrub: Take the driftwood outside and use your stiff-bristled brush to knock off loose sand, dirt, algae, and flaking bark.
- Leach Out the Salt: Submerge the wood completely in fresh water and change the water every 12 to 24 hours. For heavily salt-soaked or thick, aged pieces, a hot salt-water pre-soak (roughly 1 cup of salt per 2.5 gallons of water) for the first 24 hours, followed by plain fresh-water soaks, can help pull embedded salt out faster than fresh water alone — some woodworkers also add Epsom salt to the rinse water for the same reason. Small pieces can be sped up by boiling them in fresh water for 30-60 minutes instead of soaking.
- Repeat Until It Runs Clear: Keep changing the water until it stays clear and no longer tastes or smells salty. For a small beach find, this might only take a couple of days. For a large, deeply waterlogged piece, plan on it taking one to several weeks — rushing this step is what causes bloom later.
Step 2: Dry the Driftwood Completely (The Most Important Step!)
Your driftwood needs to be bone dry all the way through before you seal it. Trapped moisture — not just trapped salt — will also make a sealant bubble, peel, or turn milky, and can cause the wood to rot from the inside out later.
Set the desalinated wood in a warm, dry, well-ventilated spot — a sunny porch, a dry garage, or a utility room all work. Give it at least one to two weeks for a small piece; thick or aged pieces that were heavily waterlogged can take a month or more. Pick it up periodically — it should feel noticeably lighter than when it went in. If it still feels heavy or cool to the touch, it’s still holding water and needs more time.
For more on the principles of drying wood properly, the University of Massachusetts Amherst’s extension resources on air circulation and moisture content are a solid reference for any wood-drying project.
Step 3: Sand for a Silky-Smooth Finish
This step is optional but worth doing. It knocks down splinters and rough patches and helps the sealant go on evenly instead of soaking in unevenly.
- Start with 120-grit sandpaper and sand the whole surface following the grain. The goal is smoothing it out, not reshaping it.
- Wipe away all sanding dust with a clean, dry, lint-free cloth. A barely-damp cloth also works, as long as you let the wood dry fully again afterward.
Step 4: Set Up Your Workspace
Work somewhere well-ventilated — a garage with the door open or a shady spot outdoors on a calm day both work well. For guidance on maintaining good air quality while finishing indoors, the Environmental Protection Agency (EPA) has useful ventilation advice.
Lay down a drop cloth or newspaper to catch drips.
Step 5: Apply the First Coat of Sealant
Stir your sealant gently — don’t shake it, or you’ll trap air bubbles that end up in the finish.
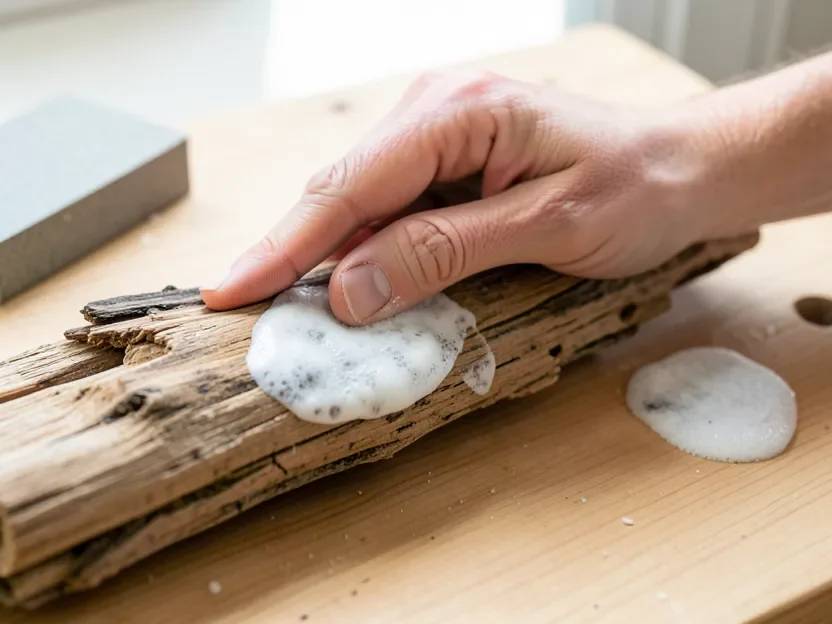
For a brush-on finish, load a small amount onto the bristles and apply a thin, even coat following the grain, covering the underside and every crevice. For a spray sealant, hold the can 8-12 inches away and use light, even passes rather than one heavy coat. Either way: thin is better than thick. A thick coat runs, drips, and takes far longer to dry properly.
Step 6: Let It Dry and Lightly Sand Again
Let the first coat dry fully per the can’s directions (typically 2-4 hours for water-based polyurethane, often faster for spray sealants). Once it’s dry to the touch, the surface may feel slightly rough — that’s “raised grain,” and it’s normal.
Lightly sand the whole surface with 220-grit paper, just enough to knock down that roughness without removing the coat underneath. Wipe away the dust with a clean, dry cloth before continuing.
Step 7: Apply Additional Coats
Apply a second thin, even coat the same way. Two to three coats total is typical for a decorative piece. Repeat the dry-then-lightly-sand cycle between each one.
Skip the sanding after your final coat — that one stays as-is.
Step 8: Give It Time to Cure
Dry to the touch is not the same as fully cured. Curing is when the sealant finishes hardening and reaches its full durability, and it can take anywhere from a few days to a few weeks depending on the product and your local humidity.
Set the finished piece somewhere it won’t be bumped or handled while it cures. Check the can’s label for the full cure time, then display it.
Troubleshooting Common Issues
Most problems here trace back to one of two causes: leftover salt or leftover moisture. Here’s how to spot and fix the most common ones.
| Problem | What It Looks Like | How to Fix It |
|---|---|---|
| Bubbles in the Finish | Tiny bumps or bubbles on the surface. | Usually caused by shaking the can or applying too quickly. Let the coat dry fully, sand the bubbles out with fine-grit paper, wipe clean, and apply another thin coat more slowly. |
| Milky, Cloudy, or Crusty-White Finish | The finish looks hazy, or a white crust forms under or on top of it. | This is the salt-bloom or moisture problem described above. Sand the finish off completely, re-soak the piece in fresh water to leach out remaining salt, dry it fully again (longer this time), and reapply in a less humid environment. |
| Sticky or Tacky Surface | The finish doesn’t feel hard after the recommended dry time. | Usually from coats applied too thick or high humidity. Move the piece to a warmer, drier area with good airflow and give it more time to cure. |
| Brush Strokes or Drips | Visible lines or hardened drips in the finish. | Let the coat dry fully. Shave off drips carefully with a razor blade, sand brush-stroke areas smooth with fine-grit paper, then apply a final thin coat to even it out. |
Frequently Asked Questions (FAQ)
Is it always necessary to seal driftwood?
No. If you’re fine with the raw, ever-changing look of untreated driftwood and don’t mind it staying fragile and dusty, you can leave it unsealed. Sealing is worth doing when you want the piece to be durable, easy to wipe clean, and stable for years of indoor display.
What causes “salt bloom” and how do I prevent it?
Salt bloom is the cloudy or crusty-white residue that appears under or on a finish when driftwood was sealed before its trapped salt was fully leached out. Salt is hygroscopic — it keeps pulling moisture through the finish from the inside — which is what causes the haze. The only real prevention is soaking (or boiling small pieces) in repeatedly changed fresh water until the water runs clear and doesn’t taste salty, then drying the wood completely before sealing.
What is the best beginner-friendly sealant for driftwood decor?
A water-based polyurethane in satin or matte is the easiest option for a first project — low odor, dries clear without yellowing, and cleans up with soap and water. A matte spray sealant is a close second and is easier on pieces with lots of holes or twists that a brush struggles to reach evenly.
How do you seal driftwood for an aquarium?
Most sealants, including polyurethane, are not safe for aquatic life even after curing. For aquarium driftwood, skip sealants: boil it for one to two hours to sterilize it and help it sink, then soak it in fresh water for one to two weeks, changing the water daily to pull out tannins. If a sealed look is required, only use an epoxy resin specifically rated “aquarium-safe” once fully cured — never a generic craft sealant.
Can I use a spray sealant instead of a brush-on one?
Yes. A spray sealant is a strong choice for driftwood with complex shapes, twists, or holes a brush can’t easily reach, and it lays down an even coat. Work in a well-ventilated area and apply several thin passes rather than one heavy coat to avoid drips.
How long will sealed driftwood last?
Properly desalinated, dried, and sealed, driftwood kept indoors can last for years to decades. The finish is what keeps moisture, decay, and physical wear from getting back into the wood, so the prep work before sealing matters more than the sealant brand you choose.
How do I know when the driftwood is dry enough to seal?
Time and touch are the best tests. After drying in a warm, ventilated spot for at least a week (longer for thick or aged pieces), the wood should feel noticeably light for its size and should not feel cool or damp anywhere. If you’re unsure, wait a few more days — sealing too early is what causes bubbling, cloudiness, and bloom.
Your Driftwood, Protected for the Long Haul
The steps themselves aren’t complicated — desalinate, dry completely, sand, then seal in thin coats and let each one cure. The part that actually determines whether a piece lasts is patience during the desalinating and drying stages, since that’s where almost every sealant failure actually starts. Skip ahead to sealing too early and you’ll be sanding off a cloudy finish and starting over; take the extra week or two up front and the piece will hold up for years.
Sponsored / affiliate links. As an Amazon Associate I earn from qualifying purchases. I may earn additional commission from eligible campaigns.