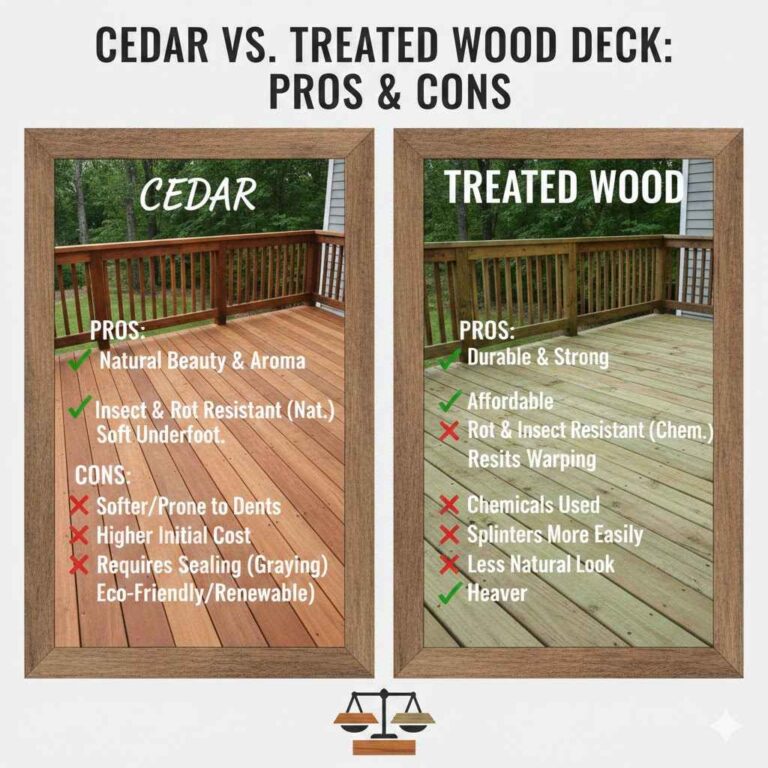
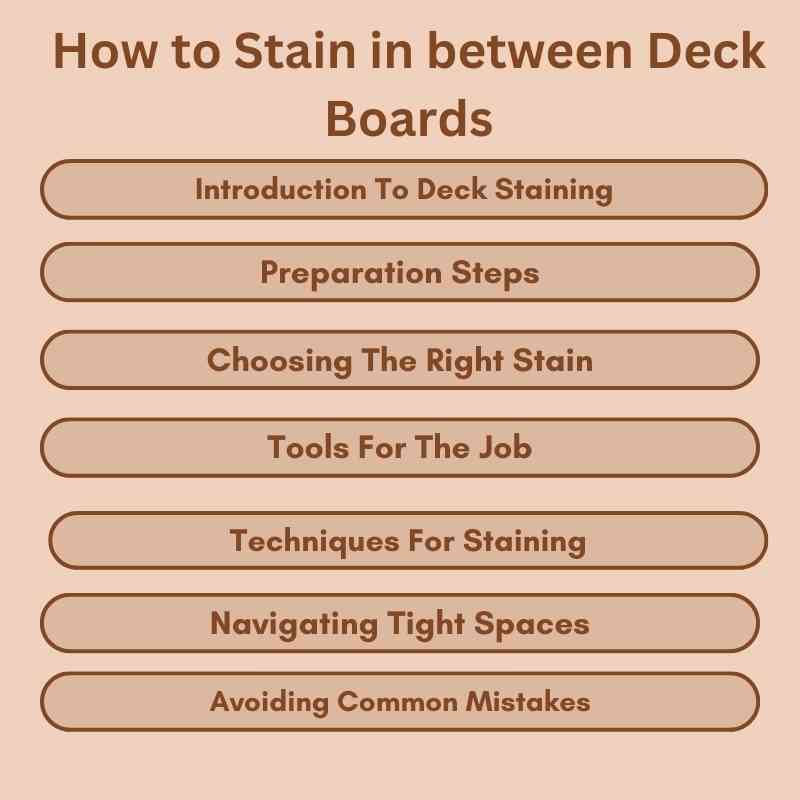
How to Stain in between Deck Boards: Easy Guide
To stain between deck boards, use a specialized tool like a crack and groove applicator for a precise application. This tool allows you to reach narrow spaces without bending or climbing up a ladder.
Staining between deck boards can be a challenging task, but with the right tools and techniques, you can achieve a professional finish. Whether you’re refinishing an existing deck or working on a new project, applying stain between the boards is essential for complete coverage and protection.
We’ll explore effective methods and tools for staining between deck boards, ensuring that your deck not only looks great but also stands the test of time. So, let’s dive in and discover the best approach to staining between deck boards for a stunning and long-lasting result.
Introduction To Deck Staining
Staining between deck boards can be a tricky task, but there are several methods that can make it easier. One option is to use a crack and groove tool, which is designed to reach narrow and hard-to-reach areas between deck boards.
Another option is to use a brush or sponge brush for more precision and control.
Importance Of Staining
Staining your deck is crucial for maintaining its appearance and structural integrity. It helps protect the wood from weather damage, such as UV rays, moisture, and rot. Additionally, staining creates a barrier against insects and mold, prolonging the life of your deck.
Benefits Of Staining Deck Boards
Staining deck boards offers numerous benefits. It enhances the aesthetic appeal of your deck, providing a beautiful finish that complements your outdoor space. Furthermore, staining helps prevent cracking and warping of the wood, extending the lifespan of your deck. It also makes cleaning and maintenance easier, reducing the need for frequent repairs.
Preparation Steps
To stain in between deck boards, follow these steps: 1. Use a narrow brush or a special deck stain applicator tool to reach the narrow spaces. 2. Apply the stain carefully, making sure to cover all surfaces evenly. 3. Use a dry brush or cloth to remove any excess stain.
This will help prevent pooling or uneven drying. By following these steps, you can achieve a professional-looking finish on your deck.
Cleaning The Deck
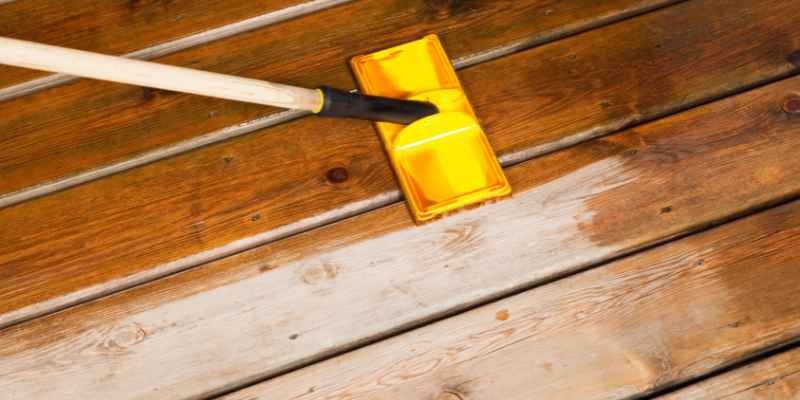
Before staining in between deck boards, it is important to clean the deck thoroughly. Use a pressure washer to remove dirt, debris, and any old stain or paint. Start from the highest point of the deck and work your way down to avoid streaks. Allow the deck to dry completely before moving on to the next step.
Stripping Old Finish
If there is any old stain or paint left on the deck, use a deck stripper to remove it. Apply the stripper with a paintbrush and let it sit for the recommended time before scrubbing it off with a stiff-bristled brush. Rinse the deck thoroughly with a hose and allow it to dry completely before moving on to the next step.
Sanding The Surface
After cleaning and stripping the deck, sand the surface to remove any remaining rough spots or splinters. Use a fine-grit sandpaper to achieve a smooth surface. This step will also help the new stain to adhere properly.
Choosing the right stain for your deck is crucial in ensuring that it lasts for a long time. Look for a stain that is specifically designed for decks and offers protection against weathering, UV rays, and mildew. Make sure to choose a color that complements the overall look of your home.
By following these preparation steps, you can ensure that your deck is properly prepared for staining in between the boards. A well-maintained deck not only adds beauty to your home but also increases its value.
Choosing The Right Stain
When it comes to staining your deck, choosing the right stain is crucial for achieving the desired results. The right stain not only enhances the appearance of your deck but also protects it from weathering and UV damage. In this section, we will discuss the different types of stains, selecting the color that suits your preferences, and understanding stain viscosity.
Types Of Stains
Before you start staining, it’s important to understand the different types of stains available. There are three main types of stains: transparent, semi-transparent, and solid stains.
- Transparent stains: These stains offer minimal color while allowing the natural grain and texture of the wood to show through. They provide protection against moisture and UV rays but may require more frequent reapplication.
- Semi-transparent stains: These stains offer moderate color coverage while still allowing the wood’s natural beauty to shine through. They provide better protection against moisture and UV rays compared to transparent stains.
- Solid stains: These stains provide the most coverage and offer a wide range of color options. They provide excellent protection against moisture and UV rays and are ideal for older decks or those with imperfections.
Selecting The Color
Selecting the right stain color can significantly impact the overall look of your deck. Consider the following factors when choosing the color:
- Wood type: Different wood species may react differently to stain colors. It’s essential to test the stain on a small, inconspicuous area before applying it to the entire deck.
- Exterior surroundings: Take into account the exterior surroundings, such as the color of your house, landscaping, and outdoor furniture. Choose a stain color that complements the overall aesthetic.
- Personal preference: Ultimately, the stain color should reflect your personal style and preferences. Whether you prefer a natural wood look or a bolder, more vibrant color, choose a stain that resonates with you.
Understanding Stain Viscosity
Stain viscosity refers to the thickness or consistency of the stain. Understanding stain viscosity is crucial for achieving an even and uniform application. Here are a few key points to consider:
- Thin stains: Thin stains have a lower viscosity and are ideal for smooth surfaces. They penetrate the wood more easily, providing a more natural look.
- Thick stains: Thick stains have a higher viscosity and are suitable for rough or porous surfaces. They tend to sit on the surface, providing better coverage and protection.
- Application method: The stain viscosity may also influence the application method. Thin stains are often applied with a brush, while thick stains may require a roller or sprayer for even distribution.
By choosing the right stain type, color, and viscosity, you can achieve a beautifully stained deck that enhances the overall appeal of your outdoor space. Take the time to consider these factors before starting your staining project, and you’ll be rewarded with a deck that looks stunning and lasts for years to come.
Tools For The Job
To effectively stain in between deck boards, you can use a tool like the Any Angle Crack & Groove™ Tool. This tool allows you to paint or stain narrow and hard-to-reach areas between the boards, saving you from bending down or climbing up a ladder.
It is threaded to accept a standard extension pole for added convenience.
When it comes to staining between deck boards, having the right tools can make all the difference. Using the correct tools ensures that you can efficiently and effectively apply the stain, reaching even the narrowest and hard-to-reach areas. In this section, we will discuss the different tools you can use for staining between deck boards.
Brushes Vs. Pads Vs. Rollers
One of the first decisions you’ll need to make is whether to use a brush, pad, or roller for staining between deck boards. Each tool has its own advantages and can produce different results.
Brushes: Brushes are a popular choice for staining between deck boards due to their versatility and ability to provide more control and precision. They allow you to easily navigate around obstacles such as screws or nails, ensuring that every nook and cranny gets covered with stain. Additionally, brushes are ideal for applying stain in narrow gaps and cracks between the boards.
Pads: Stain pads are another option for staining between deck boards. They are designed with a flat surface that can evenly distribute the stain, making the application process quick and efficient. Pads are particularly useful for covering larger surface areas, as they can hold a significant amount of stain.
Rollers: While rollers are commonly used for staining larger surfaces, they can also be employed for staining between deck boards. Rollers provide a fast and even coverage, making them suitable for larger gaps between the boards. However, it’s important to choose a roller that won’t over-apply the stain, as excessive stain can lead to pooling or uneven coloring.
Specialty Tools For Cracks And Grooves
In addition to brushes, pads, and rollers, there are specialty tools available specifically designed for staining in cracks and grooves between deck boards. These tools allow you to reach areas that are otherwise difficult to access, ensuring that every part of your deck is properly stained.
One example of a specialty tool is the Any Angle Crack & Groove™ Tool. This tool is designed to paint or stain narrow and hard-to-reach areas between deck and fence boards, under siding, or any other tight space. It eliminates the need for bending down or climbing up a ladder, as it can be easily attached to a standard extension pole.
Using specialty tools like the Any Angle Crack & Groove™ Tool can save you time and effort, as you won’t have to strain or struggle to reach every part of your deck.
In conclusion, choosing the right tools for staining between deck boards is crucial for achieving a professional and even finish. Whether you opt for brushes, pads, rollers, or specialty tools, make sure to select the tool that best suits your specific needs and the characteristics of your deck.
Techniques For Staining
Staining between deck boards can be a tricky task, but there are some techniques that can make it easier. One option is to use a crack and groove tool to reach those hard-to-get areas. Another option is to use a small brush or sponge brush to apply the stain between the boards.
Whatever method you choose, be sure to prep the deck beforehand by cleaning and sanding the surface for best results.
Staining between deck boards can be a tricky task, but with the right techniques, it can be done with ease. Here are some effective ways to apply stain between deck boards:
Brushing Method
One of the most common techniques for staining between deck boards is by using a brush. A brush allows for precision and control when applying the stain. To use this method, dip the brush in the stain and apply it between the boards, making sure to cover every inch of the surface. Use a smaller brush to get into tight spaces. Be sure to wipe away any excess stain to prevent drips and uneven application.
Using A Roller
Another technique for staining between deck boards is by using a roller. This method is faster for larger surface areas and can provide even coverage. However, choosing the right roller that won’t over-apply the stain is essential. Roll the stain onto the surface and then use a brush to work it into the spaces between the boards. This method requires a bit more effort than brushing but can be just as effective.
Applying Stain With A Pad
Using a pad applicator is another technique for staining between deck boards. This method can be a bit messier than the others, but it can provide an even application. Dip the pad into the stain and press it into the spaces between the boards. Make sure to work the stain into the wood for the best results.
No matter which method you choose, be sure to follow the manufacturer’s instructions for the best results. Take your time and don’t rush the process, as a well-stained deck can make all the difference in the appearance and longevity of your outdoor space.
When it comes to navigating tight spaces while staining between deck boards, it’s essential to have the right approach.
Staining Between Boards
Dealing with narrow cracks between deck boards can be challenging but with the right tools and techniques, it can be done effectively.
Dealing With Narrow Cracks
Using a specialized tool like the Any Angle Crack & Groove™ Tool can help reach tight spaces between deck boards easily.
Avoiding Common Mistakes
When staining in between deck boards, it’s crucial to be mindful of common mistakes that can affect the finish. By paying attention to these key areas, you can achieve a professional-looking result without any hassle.
Applying Even Coats
To ensure a uniform finish, apply the stain in even coats using a brush or roller. Work in small sections to avoid overlap marks and maintain a consistent look across the entire deck.
Preventing Sticky Finishes
Avoid ending up with a sticky finish by applying thin coats of stain and allowing each layer to dry completely before adding another. This will help prevent the stain from becoming tacky and ensure a smooth, professional-looking result.
Finishing Touches
Allow adequate time for the stain to fully dry and cure between the deck boards. Follow manufacturer’s instructions for the specific drying and curing times.
Clean up any stain spills or drips immediately using a rag or brush soaked in mineral spirits. Dispose of used rags or brushes properly.
Maintenance And Care
To effectively stain in between deck boards, start by using a narrow brush or stain applicator to reach the tight spaces. Apply the stain carefully, ensuring full coverage between the boards. Consider using a tool specifically designed for this purpose to make the job easier and more efficient.
Regular Deck Maintenance
It’s essential to regularly maintain your deck to ensure its longevity and aesthetic appeal. Performing routine upkeep tasks can prevent costly repairs down the line.
When To Re-stain Your Deck
Knowing when to re-stain your deck is crucial for preserving its beauty and protecting the wood from weathering. Keep an eye out for signs such as fading color or water absorption.
Frequently Asked Questions
Is There A Tool To Stain Between Deck Boards?
Yes, you can use a tool to stain between deck boards. There are specialized applicators and brushes available for this purpose.
How To Paint In Between Boards On A Deck?
To paint in between boards on a deck, you can use a narrow brush or a special tool called a crack and groove tool. This tool allows you to reach narrow and hard-to-reach areas between the deck boards. Simply apply the paint or stain using the brush or tool, making sure to cover the entire surface evenly.
What Is The Best Brush For Staining Between Deck Boards?
The best brush for staining between deck boards is a narrow, angled brush with stiff bristles. This type of brush provides precision and reaches tight spaces effectively. Using the right brush ensures even coverage and a professional finish for your deck staining project.
Is It Better To Roll Or Brush Stain On A Deck?
Brushing allows for more control and precision, while rolling is faster for larger areas. Both methods work well, but using a brush may provide better results.
Conclusion
Staining in between deck boards can be a challenging task, but with the right tools and techniques, it can be accomplished effectively. Using a brush or a specialized applicator tool can help you reach those narrow and hard-to-reach areas, ensuring an even and thorough stain application.
Remember to properly prepare the deck surface by cleaning and sanding before staining. Whether you choose to roll or brush the stain on the deck, the key is to maintain control and precision for optimal results. Happy staining!