How to Finish the Ends of Composite Decking: 3 Methods Compared
Composite deck ends need one of three finishes: an end cap, a fascia board, or a brand-approved end coating. Which one is right depends on your board profile, because hollow, grooved and solid boards fail in different ways at the cut. Trex also wants a 1/8 inch gap at butt joints above 40 degrees F, so cut length matters too. This guide compares all three methods, with the cutting tips and brand rules most guides skip.
Pick the Right Finish for Your Board Type
Best Bagged End Cap Pick | |
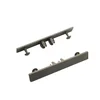 |
UltraShield Roman Antique End Caps for 16 ft. Boards (10-Piece Bag), $10.31 A bag covers five cut boards (two ends each), which suits the cap method below when you only have a handful of exposed ends to finish.
|
As an Amazon Associate we earn from qualifying purchases. | |
Before you buy anything, look at the cut end of one spare board. A hollow or ridged profile leaves open channels that a cap can plug. A solid profile has nothing to plug, so a fascia board or a picture-frame border usually looks better. A grooved edge shows its groove at the cut, which is the usual reason people search for how to hide it.
| Method | Works best on | Extra framing needed | Main weakness |
|---|---|---|---|
| End cap | Hollow or ridged boards cut to length | None | Must match your board’s profile and color, or the seam shows |
| Fascia board | Most decks with an exposed rim joist | None beyond fastening to the rim joist | Water can sit behind it, so flash the joist first |
| Picture frame border | New builds, planned before framing | Yes: extra joists and blocking | Hard to retrofit, and mitered corners can open as boards move |
| End coating | A few exposed ends, if your brand allows it | None | Not every manufacturer permits it, so check the warranty first |
Most homeowners searching for how to edge composite decking end up with fascia on an existing deck and picture framing on a new one. Caps and coatings are the quick fixes for a few stray ends, like a board cut short at a post or stair. For a wider look at what each board line is made of, see our composite decking brands comparison and the rest of our decking guides.
Cut the End Square First, Because Everything Else Depends on It
Every finish on this page sits against the cut face, so a crooked or chipped cut ruins all of them. A cap will not seat on an out-of-square end, and fascia leaves a visible wedge of daylight.
- Measure and mark: account for the butt-joint gap before you cut, not after.
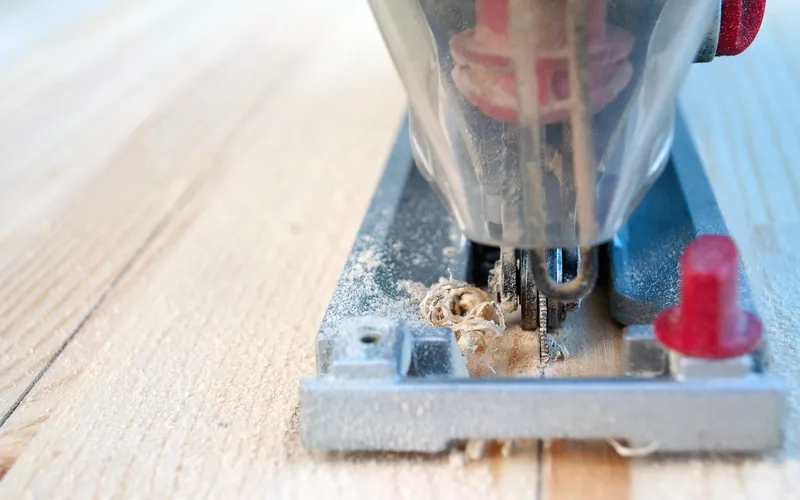
- Support both sides of the cut: an unsupported offcut drops and tears the shell at the end of the stroke.
- Use a carbide-tipped blade: Trex’s own FAQ specifies a carbide-tipped blade for cutting its boards.
- Cut at a true 90 degrees: check with a speed square before the first board, then reuse the same setup.
- Dry-fit before gluing: press the cap or hold the fascia in place first and look for gaps.
If you plan to rip a board down for fascia or a border, Trex says its boards can be ripped to reduce width but should not go narrower than 2 inches, and should never be ripped to reduce thickness. For fastener choices when you attach anything to the deck, see our guide to Trex composite decking fasteners. Trimming a board at a corner angle? Our 45-degree cut measuring guide covers the math.
Method 1: End Caps for Hollow and Ridged Boards
End caps are small molded pieces that cover the open end of a board. They go on fast, they cost little per end, and they are the right answer when only a few ends are exposed. They are also the method most likely to go wrong, because caps are molded to specific profiles and a near match leaves a visible gap.
- Match width and depth: measure your board, then compare with the cap’s listed size. A 5.5 inch cap does not suit a narrower board.
- Match color under daylight: a cap that looks right indoors can read lighter or darker on the deck.
- Clean the end: brush off dust, because dust under the adhesive is the usual reason a cap lifts.
- Follow the maker’s attachment method: some caps push in and some are glued with an adhesive recommended on the pack.
A cap covers the end, but it is not a guarantee against water getting in at the seam, so seat it snug and keep the cut face clean and dry when it goes on. Our pick above comes as a 10-piece bag, which is useful because a cap is a one-time part: crack one while seating it and you want a spare.
Gluing is part of this method, so it helps to know your options. We cover what holds composite together in can Trex be glued together.
Method 2: Fascia Boards and Picture Framing
A fascia board is a trim board that covers the rim joist and the cut ends together, so no end is visible from the side. It is the manufacturer-recommended route for many decks because it hides the ends completely and works on both new and existing structures.
- PVC fascia (TimberTech): apply exterior-grade construction adhesive to the back, set it over the rim joist and end cuts, then fasten with the appropriate fastener.
- Composite fascia (TimberTech): pre-drill 2 inches from the top and bottom, and fasten every 12 inches.
- Board width: TimberTech says standard or wide boards work, and narrow deck boards do not work as well as fascia.
- Overhang (Trex): for picture framing, install fascia first, with an optional overhang just under 3/4 inch using 1-1/4 inch spacing blocks.
Fascia has one weakness: water can get trapped between the trim and the joist, so protect the joist top with flashing tape before the board goes on. Trex recommends its flashing tape on joist tops for general moisture protection.
Picture framing: best on a new build
Picture framing runs one to three layers of boards around the deck perimeter so the cut ends of the field boards are hidden behind the frame. TimberTech notes it needs specific substructure framing planned before construction, with additional joists and blocking depending on the frame size. That is why it rarely suits a finished deck. Mitered corners also take work: some installers report the joints can open as boards expand and contract. Trex recommends square-edge boards rather than grooved ones, and a narrower 1×4 board for a refined look.
📊 Trex butt-joint gap: 1/8 inch if the installation temperature is above 40 degrees F, 3/16 inch if below 40 degrees F. Source: Trex Academy, picture framing guide
Method 3: End Coating, and the Warranty Catch Nobody Mentions
An end coating means brushing a color-matched paint onto the cut face where the core is exposed. It is the cheapest option and the only one with no hardware, but it is also the one where brands disagree.
| Brand | What the manufacturer says | What it means for you |
|---|---|---|
| TimberTech | Describes painting only the ends where the core is exposed, with a paint brush, for a few exposed ends | A reasonable fix for one or two stray ends |
| Trex | Its FAQ says painting or staining Trex decking is not recommended and may void the limited residential fade and stain warranty | Read the warranty and ask Trex before coating any cut end |
That mismatch is the information most how-to pages leave out. If you coat a cut end on a board whose maker does not endorse it, you could put a warranty claim at risk to fix a cosmetic issue. If your brand sells its own end coating, use that rather than a generic exterior paint. If it does not, fall back to a cap or fascia, which carry no such risk.
Common Mistakes When Finishing Composite Decking Ends
- Buying caps before measuring the board, then finding the profile does not match.
- Cutting without allowing the 1/8 or 3/16 inch butt-joint gap, which leaves no room for expansion.
- Coating cut ends without checking the warranty first.
- Fastening fascia without pre-drilling, which can crack the board near the edge.
- Skipping the dry fit, then discovering a gap after the adhesive has grabbed.
- Trimming with a dull or general-purpose blade, which chips the shell at the cut.
If you chip or scuff an end while cutting, sanding it is a different job on composite than on wood. Our guide on sanding composite decking explains what is safe.
Frequently Asked Questions About Finishing Composite Decking Ends
What do you put on the ends of composite decking?
You can cover cut ends with a snap-on or glued end cap, hide them behind a fascia board, tuck them inside a picture-frame border, or brush on a color-matched end coating if your brand allows it. Hollow and ridged profiles usually suit caps best. Solid boards are often finished with fascia or framing instead.
Do you need to finish the ends of composite decking?
Not always for function, but nearly always for looks. A raw cut face shows the core and a different texture from the factory shell. Some brands tell you to coat exposed cores, others say nothing, so check your own manufacturer’s guidance before deciding.
How do you hide the cut ends of composite decking?
The two most reliable ways are a fascia board over the rim joist and a picture-frame border that turns the deck boards so no cut end faces outward. Both need no cap, but picture framing has to be planned into the framing before the deck is built.
Can you paint or seal the ends of composite decking?
It depends on the brand. TimberTech describes brushing paint onto exposed cores for a few ends. Trex says painting or staining its decking is not recommended and may void the limited residential fade and stain warranty, so confirm with your manufacturer before putting anything on a cut end.
How much gap should you leave at the ends of composite decking boards?
For Trex, leave 1/8 inch at butt joints when the installation temperature is above 40 degrees F and 3/16 inch when it is below 40 degrees F. Other brands publish their own numbers, so read your installation guide.
How do you finish the ends of grooved or scalloped composite boards?
Cut ends of grooved boards show the groove profile, so they either get a cap made for that profile, a fascia board that covers the end, or a square-edge picture-frame border. Trex suggests square-edge boards, not grooved, for a picture-frame border.
Conclusion
Choose your finish by board profile: caps for a few ends on hollow or ridged boards, fascia for most decks, picture framing when you are still building, and coatings only when your manufacturer allows it. Cut square, leave the gap your brand specifies, and dry-fit before you glue. Planning materials? See our 16-foot Trex decking price guide.
Sponsored / affiliate links. As an Amazon Associate I earn from qualifying purchases. I may earn additional commission from eligible campaigns.
 SuperStructuring Plugs for Decking - 1/4" Trex Composite Decking Wood Plugs, Weather-Resistant, UV Protection, Hole Covers for Outdoor Home Improvement & Repair - Enhance Naturals Foggy Wharf, 100-PcSuperStructuring Plugs for Decking - 1/4" Trex Composite Decking Wood Plugs, Weather-Resistant, UV Protection, Hole Covers for Outdoor Home Improvement & Repair - Transcend Tiki Torch, 100-Pc