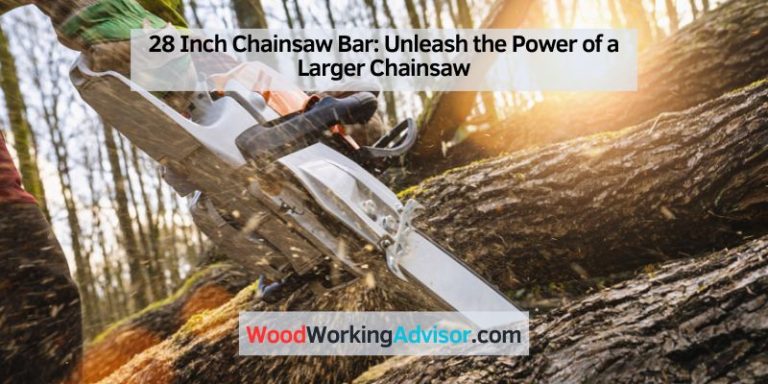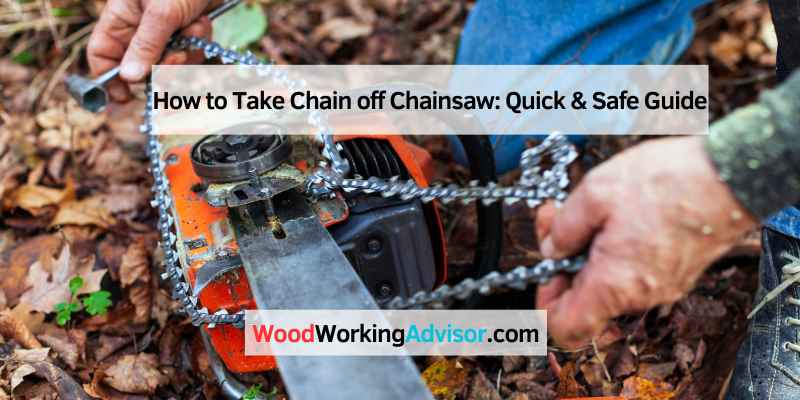
How to Take Chain off Chainsaw: Quick & Safe Guide
To take the chain off a chainsaw, use a wrench to loosen the nuts and remove the plate covering the chain. This will provide access to the chain for removal.
Chainsaw maintenance is important for optimal performance and safety. Regularly checking and adjusting the tension of the chain, as well as sharpening the teeth, can help prolong the life of the saw and prevent accidents. It is also important to turn off the engine before attempting any maintenance on the chainsaw to avoid injury.
By following proper procedures, taking the chain off a chainsaw can be a straightforward task that can be done quickly and safely.
Introduction To Chainsaw Maintenance
To remove the chain from a chainsaw, start by ensuring the brake is disengaged. Then, use a wrench to loosen the bar nuts and remove the plate to access the chain. With these steps, you can easily take off the chain for replacement or maintenance.
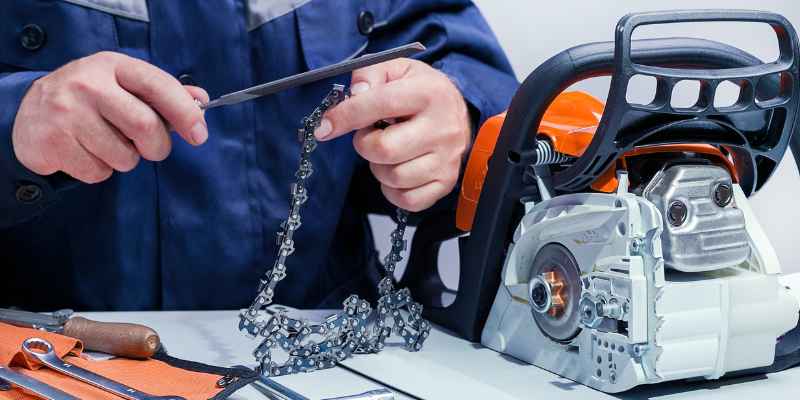
Proper chainsaw maintenance is essential for ensuring the longevity and performance of your tool. One crucial aspect of maintaining a chainsaw is the regular removal of the chain. This not only allows for inspection and cleaning but also facilitates sharpening and replacement when necessary. In this guide, we will delve into the importance of regular chain removal and the safety measures to take when preparing for this task.
Importance Of Regular Chain Removal
Regular chain removal is vital for maintaining the efficiency and safety of your chainsaw. Removing the chain allows you to inspect for wear and damage, clean out debris and sawdust, and lubricate the components. Moreover, it provides the opportunity to sharpen the chain, ensuring precise and efficient cutting, ultimately extending the life of the chain and improving the performance of the chainsaw.
Safety First: Preparing For Chain Removal
Prior to removing the chain, it is imperative to prioritize safety. Preparing for chain removal involves several critical steps to mitigate any potential risks. Ensure that the chainsaw is turned off and the engine is cool. Wear protective gloves and eyewear to safeguard yourself from sharp edges and debris. Familiarize yourself with the saw’s user manual for specific instructions on chain removal and always follow the manufacturer’s guidelines meticulously.
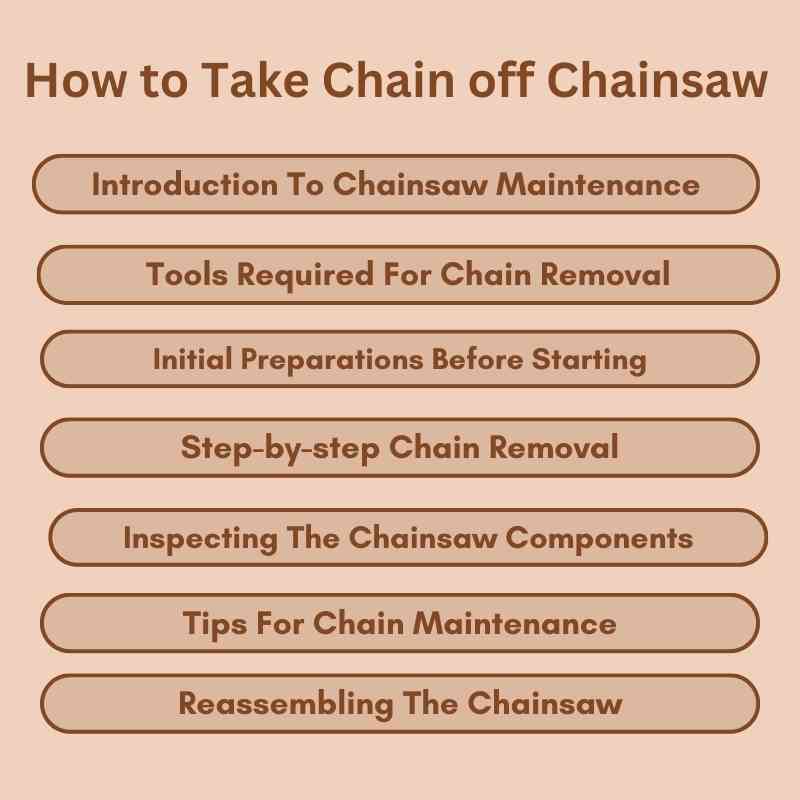
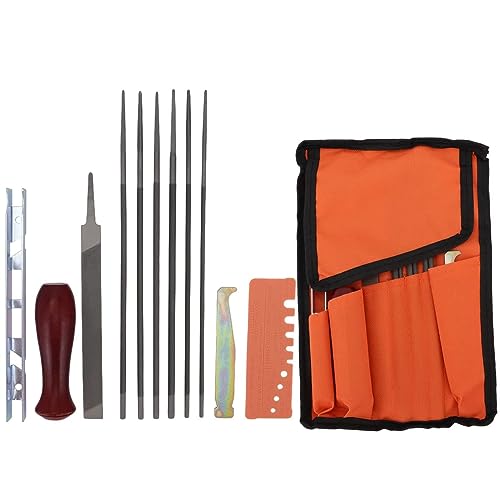
Tools Required For Chain Removal
When it comes to removing the chain from your chainsaw, having the right tools is essential to ensure a smooth and efficient process. Identifying your chainsaw model and having a list of necessary tools and equipment will make the chain removal task much easier. In this section, we will discuss the tools you need and how to use them effectively.
Identifying Your Chainsaw Model
Before you start the chain removal process, it’s important to identify your chainsaw model. Different chainsaw models may have slight variations in the chain removal method, so it’s crucial to know the specific requirements for your chainsaw. You can find this information in the user manual or by searching for your chainsaw model online.
List Of Necessary Tools And Equipment
Now that you have identified your chainsaw model, let’s take a look at the necessary tools and equipment you will need for chain removal:
| Tools | Equipment |
|---|---|
|
|
Using a socket wrench or chainsaw wrench, you can loosen the nuts that hold the chain cover or bar in place. A flathead screwdriver may be required to pry open the cover if it’s stuck. The wire brush will come in handy to clean any debris or dirt from the chain and other components.
Having a chain vise or clamp will help secure the chainsaw during the chain removal process, providing stability and preventing any accidental movements. It’s important to have a workbench or sturdy surface to support the chainsaw during the procedure.
Additionally, it is essential to wear safety gloves to protect your hands from sharp edges and moving parts. Safety glasses will safeguard your eyes from any flying debris.
By having these tools and equipment on hand, you can confidently proceed with removing the chain from your chainsaw.
Initial Preparations Before Starting
Before you begin the process of taking the chain off your chainsaw, it is essential to follow some initial preparations to ensure a safe and smooth procedure. This section will guide you through engaging the chain brake and removing the battery or disconnecting power, which are crucial steps to take before proceeding with the chain removal.
Engaging The Chain Brake
The chain brake is a safety feature designed to stop the chain from rotating during operation. Engaging the chain brake before removing the chain adds an extra layer of protection and prevents any accidental movement that could lead to injuries. Follow the steps below to engage the chain brake:
- Locate the chain brake handle, typically located on the top front handle of the chainsaw.
- Push the chain brake handle forward to engage the brake. You should hear or feel a click when the brake is engaged.
- Verify that the chain brake is engaged by trying to rotate the chain manually. It should not move when the brake is properly engaged.
Removing The Battery Or Disconnecting Power
Removing the battery or disconnecting power is essential to ensure your safety and prevent accidental starts while working on the chainsaw. This step is especially important for cordless or electric chainsaws. Follow the instructions below to remove the battery or disconnect power:
- If your chainsaw is battery-powered, locate the battery compartment and open it.
- Remove the battery from the compartment by sliding it out or pressing the release button, if applicable.
- If your chainsaw is corded, unplug it from the power source or remove the power cord from the outlet.
- Ensure that the chainsaw is completely disconnected from any power source before proceeding.
By engaging the chain brake and removing the battery or disconnecting power, you have taken the necessary precautions to ensure your safety while working on the chainsaw. Now you can proceed with the chain removal process confidently.
Step-by-step Chain Removal
Removing the chain from your chainsaw is a necessary task when it comes to maintenance or replacing a worn-out chain. By following these step-by-step instructions, you can easily remove the chain from your chainsaw and ensure a smooth process. Let’s get started!
Loosening The Bar Nuts
To begin with, you’ll need to loosen the bar nuts that secure the side cover of your chainsaw. Using a wrench or a scwrench, carefully unscrew the nuts and remove the plate to access the chain. It’s important to make sure the brake is off before proceeding further.
Detaching The Side Cover
Once the bar nuts are loosened, you can proceed to detach the side cover of your chainsaw. Gently lift the cover and set it aside, making sure to keep it in a safe place where it won’t get lost or damaged.
Sliding The Bar And Removing The Chain
With the side cover removed, you can now slide the bar of the chainsaw to release tension on the chain. This will allow you to easily remove the chain from the bar. Take caution while handling the chain, as it may still have sharp edges.
Once you have removed the chain, you can proceed with any necessary maintenance or replace it with a new one. When reinstalling the chain, make sure to follow the manufacturer’s instructions and properly tension it to ensure optimal performance.
That’s it! You have successfully completed the chain removal process for your chainsaw. Remember to always prioritize safety and take necessary precautions while working with power tools.
Inspecting The Chainsaw Components
To take the chain off a chainsaw, first ensure the brake is disengaged. Then, loosen the bar nuts, remove the plate to access the chain, and use a wrench to unscrew the nuts. Carefully remove the old chain and install the new one, ensuring proper tension before tightening the nuts back in place.
When it comes to taking the chain off a chainsaw, it is important to inspect the different components of the tool to ensure they are in good condition and functioning properly. This will not only make the process easier, but it will also help avoid any damage or accidents. Here are two important components to inspect:
Checking The Bar For Wear And Damage
The chainsaw bar is the long, flat metal piece that the chain wraps around. Over time, the bar can become worn or damaged, which can affect the performance of the chainsaw. To inspect the bar, follow these steps:
- Remove the chain from the chainsaw
- Inspect the bar for any signs of wear or damage, such as cracks, dents, or warping.
- If the bar is damaged, it should be replaced before using the chainsaw again.
Cleaning The Chainsaw’s Interior
Another important component to inspect is the chainsaw’s interior. Over time, sawdust and debris can accumulate inside the tool, which can affect its performance. To clean the chainsaw’s interior, follow these steps:
- Remove the spark plug wire to prevent the chainsaw from accidentally starting.
- Remove the air filter cover and the air filter.
- Use a brush or compressed air to clean out any sawdust or debris from inside the chainsaw.
- Inspect the air filter for any damage or wear and replace if necessary.
By inspecting the chainsaw components, you can ensure that your chainsaw is in good condition and ready to use. Remember to always prioritize safety when working with power tools and to follow the manufacturer’s instructions for removing the chain.
Tips For Chain Maintenance
To take the chain off a chainsaw, you’ll need to first remove the bar and chain cover and then loosen the nuts that hold the bar in place. Once the nuts are loose, you can slide the bar and chain off the chainsaw.
Be sure to wear gloves and exercise caution while removing the chain.
Chainsaws are powerful tools that require regular maintenance to function properly. One of the most important aspects of chainsaw maintenance is chain maintenance. To ensure that your chainsaw’s chain stays in good condition, it is important to regularly sharpen and oil it. In this article, we’ll go over some tips for chain maintenance, including sharpening the chain and oiling the chain and bar.
Sharpening The Chain
Sharpening the chain is an essential part of chainsaw maintenance. Over time, the chain can become dull and lose its effectiveness. To sharpen the chain, you will need a round file and a file guide. Follow these steps to sharpen the chain:
- Secure the chainsaw in a vice
- Identify the cutting teeth that require sharpening
- Set the file guide to the proper depth and angle
- Place the file guide over the cutting tooth and file in one direction
- Repeat the process for each cutting tooth
Oiling The Chain And Bar
Oiling the chain and bar is another important aspect of chainsaw maintenance. The oil lubricates the chain and bar, reducing friction and preventing wear and tear. To oil the chain and bar, follow these steps:
- Ensure that the chainsaw is turned off and the chain has stopped moving
- Fill the oil reservoir with chainsaw oil
- Start the chainsaw and let it run for a few seconds to allow the oil to distribute
- Inspect the oil level frequently and refill the reservoir as needed
Regular chain maintenance is essential for the optimal functioning of your chainsaw. By sharpening the chain and oiling the chain and bar, you can ensure that your chainsaw remains effective and safe to use.
Reassembling The Chainsaw
After successfully removing the chain from your chainsaw, it’s time to reassemble it and get back to work. Follow these steps to ensure a proper reassembly:
Placing The Chain Back On The Bar
The first step in reassembling your chainsaw is to place the chain back on the bar. Start by aligning the chain with the bar groove, making sure the cutting teeth are facing the correct direction. Carefully guide the chain around the bar, ensuring that it properly engages with the sprocket at the end of the bar.
Reattaching The Side Cover And Tightening The Bar Nuts
Once the chain is in place, it’s time to reattach the side cover. Line up the holes on the side cover with the studs on the chainsaw body and carefully slide it into position. Make sure the chain tensioning mechanism is properly aligned with the tensioning pin on the side cover.
Next, take the bar nuts and thread them onto the studs. Use a wrench or a scwrench to tighten the nuts securely, but be careful not to overtighten. Properly tightened bar nuts ensure that the chain remains in place during operation and prevent any potential accidents.
Adjusting The Chain Tension Correctly
Now that the chain is back on the bar and the side cover is securely attached, it’s important to adjust the chain tension correctly. A properly tensioned chain ensures optimal performance and reduces the risk of kickback.
Refer to your chainsaw’s user manual for specific instructions on adjusting the chain tension. Typically, you will need to locate the chain tensioning screw or knob on the side of the chainsaw body. Loosen the tensioning mechanism and adjust the tension until there is approximately 1/8 inch of slack between the chain and the bar. Once you have achieved the desired tension, tighten the tensioning mechanism to lock it in place.
Remember to check the chain tension periodically during use and make any necessary adjustments to ensure safe and efficient operation.
With the chain reassembled and properly tensioned, your chainsaw is now ready to be used again. Always prioritize safety and follow the manufacturer’s guidelines for maintenance and operation to ensure the longevity and performance of your chainsaw.
Post-removal Checklist
Once you have successfully removed the chain from your chainsaw, it is important to follow a post-removal checklist to ensure proper maintenance and safety. This checklist includes testing the chain brake and ensuring proper chain movement.
Testing The Chain Brake
Before proceeding with any further maintenance or repairs, it is essential to test the chain brake. This safety feature is designed to stop the chain from rotating in case of kickback or other accidents. To test the chain brake:
- Make sure the chainsaw is turned off and the spark plug is disconnected.
- Engage the chain brake by pulling the chain brake handle towards the front handle of the chainsaw.
- Try to rotate the chain by hand. It should not move freely.
- If the chain moves, there may be an issue with the chain brake mechanism. Consult the chainsaw’s manual or seek professional assistance to fix the problem before using the chainsaw again.
Ensuring Proper Chain Movement
After testing the chain brake, it is important to ensure that the chain moves smoothly and correctly. Improper chain movement can affect the performance and safety of the chainsaw. Follow these steps to ensure proper chain movement:
- Inspect the chain for any damage, such as broken or missing teeth. Replace the chain if necessary.
- Clean any dirt, debris, or sawdust from the chain and the guide bar using a brush or compressed air.
- Apply lubrication to the chain to ensure smooth movement. Use chainsaw-specific oil and follow the manufacturer’s instructions.
- Check the tension of the chain. It should be snug against the guide bar but still able to be pulled easily by hand. Adjust the tension if needed.
- Rotate the chain manually to ensure it moves freely along the guide bar without any sticking or binding.
By following this post-removal checklist, you can ensure that your chainsaw is in proper working condition and ready for the next use. Remember, proper maintenance and safety precautions are essential for the longevity and performance of your chainsaw.
Troubleshooting Common Issues
To take the chain off a chainsaw, you will need to remove the clutch cover and loosen the nuts holding the plate. Use a scwrench or wrench to unscrew the nuts and access the chain. Make sure to turn off the engine to prevent accidental movement of the chain and potential injury.
Final Thoughts
When it comes to taking the chain off a chainsaw, it’s important to remember that practice makes perfect. Regularly practicing the process of removing and re-installing the chain can help you become more efficient and confident in handling this task. Additionally, knowing when to seek professional help is crucial for ensuring the safety and proper functioning of your chainsaw.
The Importance Of Regular Practice
Regularly practicing how to take the chain off your chainsaw can significantly improve your proficiency in performing this task. By familiarizing yourself with the necessary steps, you can minimize the time it takes to complete the process and reduce the likelihood of errors. Moreover, consistent practice helps you become more comfortable and confident in handling the chainsaw, which is essential for ensuring safety and efficiency.
Knowing When To Seek Professional Help
While it’s beneficial to be able to handle basic maintenance tasks for your chainsaw, there are instances where it’s best to seek the expertise of a professional. If you encounter any complications or uncertainties during the process of taking the chain off your chainsaw, it’s advisable to consult a professional. This is especially important for ensuring the proper functioning and longevity of your chainsaw, as well as your personal safety.
Frequently Asked Questions
Can A Chain Come Off A Chainsaw?
Yes, a chain can come off a chainsaw during use. Regular maintenance and proper tensioning can help prevent this issue.
How Do You Loosen A Chainsaw Chain?
To loosen a chainsaw chain, use a wrench to unscrew the nuts and remove the plate. Then, adjust the tension by loosening the bar nuts and re-installing the chain. Finally, tension the chain and tighten the nuts.
How Do You Take The Chain Off A Stihl Chainsaw?
To take the chain off a Stihl chainsaw, follow these steps: 1. Make sure the brake is off. 2. Loosen the bar nuts using a wrench. 3. Remove the nuts and the plate to access the chain. 4. Carefully take off the old chain.
How Do You Get A Chainsaw Chain Out Of A Tree?
To remove a chainsaw chain from a tree, follow these steps: 1. Turn off the engine to prevent accidental movement. 2. Use a felling wedge or crowbar to gently lift the pressure and tension of the tree off the chain and bar.
3. Unscrew the nuts and remove the plate to access the chain.
4. Carefully remove the chain from the chainsaw.
5. Replace the chain with a new one if necessary. Remember to prioritize safety and take precautions to prevent damage or injury.
Conclusion
Learning how to take the chain off a chainsaw is a valuable skill for maintaining your equipment. By following the proper steps and safety precautions, you can easily remove and replace the chain, ensuring that your chainsaw operates efficiently and safely.
Regular maintenance will extend the lifespan of your chainsaw and improve its performance.