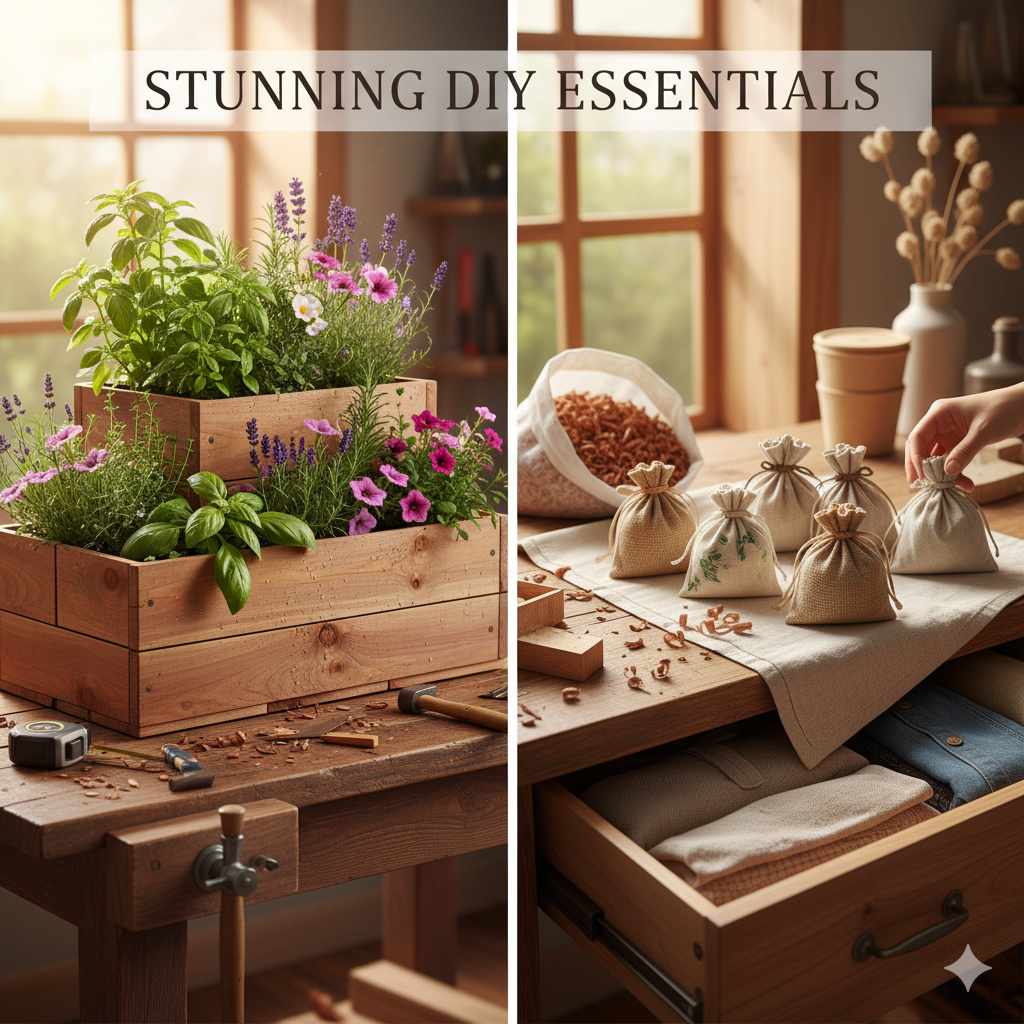
Ideas For Cedar Wood: Stunning DIY Essentials
Transform your home and garden with stunning DIY cedar wood projects! Discover easy, beginner-friendly ideas that showcase cedar’s natural beauty, durability, and amazing aroma. From practical essentials to charming decor, learn how to create lasting pieces that add rustic elegance and value to your space. Unleash your inner woodworker today!
Welcome to the wonderful world of cedar wood! If you’re looking to add a touch of natural beauty and lasting value to your home or garden, cedar is an excellent choice. It’s a dream to work with, smells fantastic, and is incredibly durable, resisting rot and insects naturally. But where do you start? Many DIYers feel overwhelmed by the possibilities or aren’t sure which projects are truly beginner-friendly. That’s where I come in! As your woodworking mentor, I’m here to guide you through some fantastic, achievable DIY essentials using this incredible wood. We’ll explore simple projects that look stunning and will serve you for years. Get ready to discover how easy it can be to craft beautiful, functional pieces with cedar!
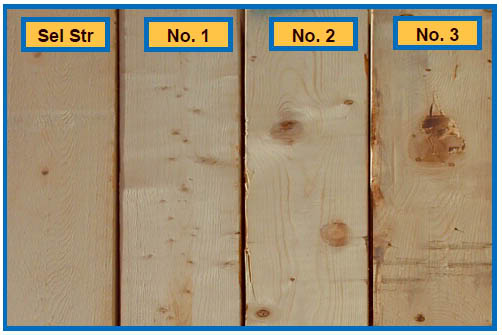
Cedar wood is a superstar in the DIY world for good reason. Its natural oils make it resistant to decay and pests, meaning your projects can withstand the elements outdoors. Plus, it has a beautiful reddish-brown hue and a distinct, pleasant aroma that many people love. For beginners, cedar’s relative softness makes it easier to cut, sand, and assemble than harder woods, which means fewer frustrations and more satisfying results. Let’s dive into some inspiring ideas!
Why Choose Cedar Wood for Your DIY Projects?
Before we get to the projects, let’s chat about why cedar is such a fantastic material for DIYers, especially beginners.
- Natural Durability: Cedar contains natural oils called ‘thujaplicins’ that make it highly resistant to rot, decay, and insect infestations. This means your outdoor projects, like garden beds or benches, will last much longer without needing harsh chemical treatments. You can learn more about wood durability from resources like the Forest Products Laboratory.
- Beautiful Aesthetics: Cedar boasts a rich, warm color, often with beautiful grain patterns. It ages gracefully, developing a silvery-gray patina over time if left unfinished outdoors, which many find very appealing.
- Pleasant Aroma: That classic cedar scent isn’t just nice; it’s a natural insect repellent! It makes working with cedar a joy and adds a subtle, pleasant fragrance to enclosed spaces like closets or chests.
- Ease of Use: Compared to many hardwoods, cedar is relatively soft and lightweight. This makes it easier to cut, drill, and fasten without excessive effort or specialized tools, perfect for those new to woodworking.
- Sustainability: Cedar is often sourced from sustainably managed forests, making it an environmentally friendly choice for your projects.
With these benefits, it’s easy to see why cedar is a favorite for everything from simple birdhouses to elegant outdoor furniture.
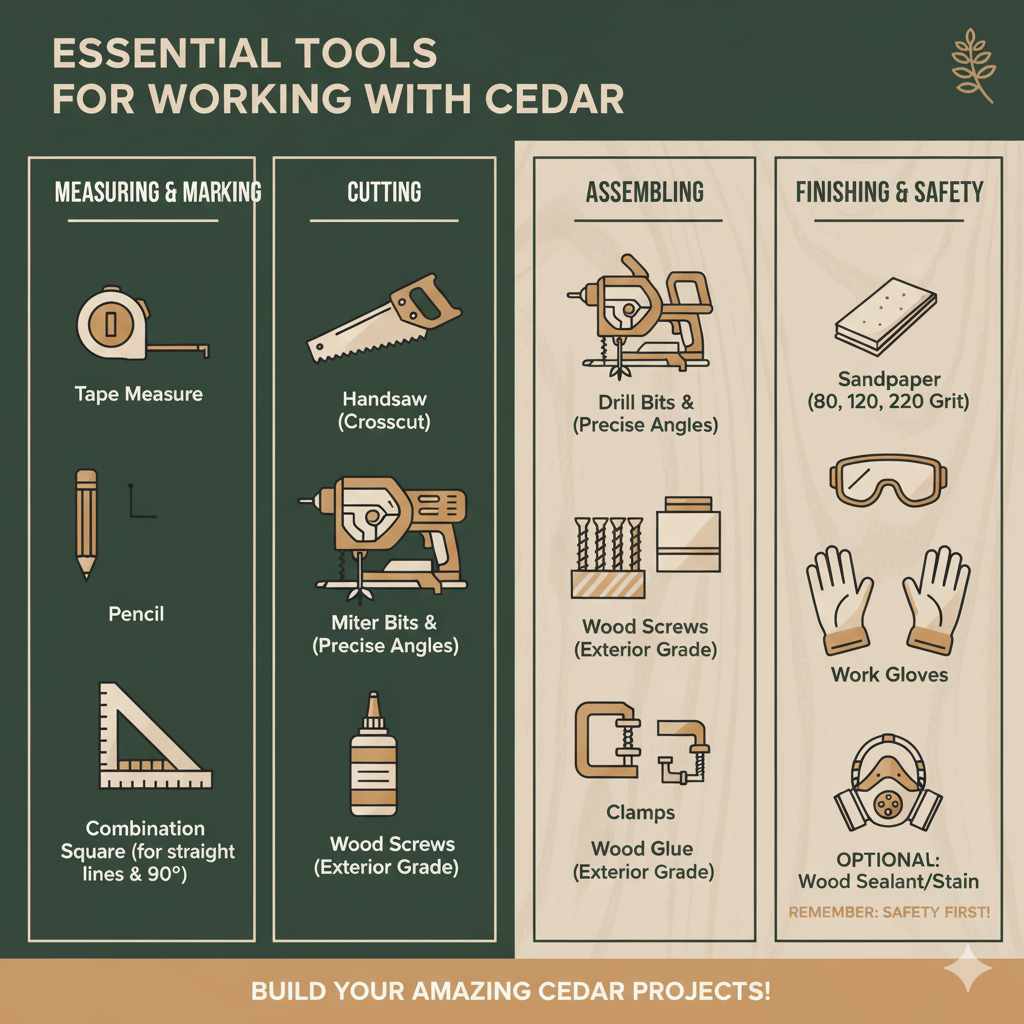
Essential Tools for Working with Cedar
You don’t need a professional workshop to make amazing cedar projects. Here are some basic tools that will help you get started safely and effectively:
For Measuring and Marking:
- Tape Measure
- Pencil
- Combination Square (great for marking straight lines and 90-degree angles)
For Cutting:
- Handsaw (a good crosscut saw will do for most beginner projects)
- OR Miter Saw (for more precise angled cuts, a great investment if you plan on doing more woodworking)
- OR Jigsaw (useful for curved cuts, though less common for basic cedar projects)
For Assembling:
- Drill/Driver (cordless is very convenient)
- Drill Bits (for pilot holes and driving screws)
- Screwdriver bits
- Wood Screws (exterior grade for outdoor projects)
- Wood Glue (exterior grade for outdoor projects)
- Clamps (helpful for holding pieces together while glue dries)
For Finishing & Safety:
- Sandpaper (various grits, like 80, 120, and 220)
- Sanding Block or Orbital Sander
- Safety Glasses (Absolutely essential!)
- Work Gloves
- Dust Mask
- Optional: Exterior wood sealant or stain (if you want to preserve color or add protection)
Remember, safety always comes first. Wear your safety glasses whenever you’re cutting, drilling, or sanding. Always read and understand your tool’s instructions before use.
Beginner-Friendly Cedar Wood Project Ideas
Let’s get to the fun part – turning beautiful cedar wood into practical and stunning items for your home and garden!
1. Classic Cedar Planter Boxes
Cedar planter boxes are a fantastic beginner project. They add instant curb appeal to your patio or garden and are perfect for growing herbs, flowers, or vegetables. Their natural rot resistance means they’ll last for years without succumbing to moisture.
Why it’s great for beginners:
- Simple, straight cuts.
- Easy assembly with screws and glue.
- Customizable to any size.
Basic Steps:
- Cut your wood: Decide on your dimensions. For a small planter, you might need four pieces for the sides (e.g., 2 feet long, 8 inches high) and two for the bottom (e.g., 1 foot by 1 foot, cut to fit inside the assembled sides).
- Assemble the sides: Apply exterior wood glue to the edges where the side pieces meet at the corners. Secure them with exterior wood screws. Drill pilot holes first to prevent splitting.
- Attach the bottom: Place the bottom pieces inside the assembled frame. Secure them with glue and screws through the side pieces.
- Add drainage: Ensure there are gaps or drill a few holes in the bottom for water drainage.
- Finish (Optional): You can leave the cedar to weather naturally, or apply a clear, water-based sealant for extra protection and to maintain its color longer.
2. Rustic Cedar Crate/Storage Box
These versatile crates can be used for storage in the garage, organizing toys, or creating stylish rustic decor. They are incredibly simple to build and can be made in various sizes.
Why it’s great for beginners:
- Minimal cuts, often using just one board width.
- Quick assembly.
- Can look great with intentional gaps or a more solid build.
Basic Steps:
- Cut your pieces: You’ll need two identical side panels, two identical end panels, and pieces for the bottom. For a simple crate with a base and no lid, cut four identical side slats and four identical bottom slats.
- Assemble the sides: For the rectangular sides, attach the side slats to the ends of the end panels. You can leave slight gaps between the slats for a traditional look, or butt them tightly together. Use glue and screws.
- Attach the bottom: Flip the assembled sides over and attach the bottom slats across the opening using glue and screws.
- Add handles (optional): You can add rope handles or cut-out handholds for easier carrying.
3. Simple Cedar Birdhouse
Attract feathered friends to your garden with a charming cedar birdhouse. Cedar’s natural properties keep the interior cool and dry, making it a safe haven for birds.
Why it’s great for beginners:
- Small, manageable pieces.
- Teaches basic joinery and roof construction.
- A rewarding project with visible results.
Basic Steps:
- Cut the pieces: You’ll need a front, back, two sides, a floor, and two roof pieces. The front and back pieces will typically have angled tops to form the peak of the roof.
- Drill the entrance hole: On the front piece, drill an entrance hole sized appropriately for the birds you want to attract (e.g., 1 1/8″ to 1 1/2″ is common). Position it a few inches from the floor.
- Assemble the box: Glue and screw the side pieces to the edges of the floor piece. Then, attach the front and back pieces.
- Attach the roof: Overlap the two roof pieces at the peak and attach them to the angled tops of the front and back. Ensure there’s a slight overhang to protect the entrance.
- Add ventilation/drainage: Drill a few small holes in the floor for drainage and near the top of the sides for ventilation.
- Mounting: Add a mounting board to the back or a hanger. Avoid adding a perch below the entrance hole, as predators can use it.
4. Cedar Garden Markers
Keep your garden organized and add a touch of rustic charm with these simple cedar garden markers. They are incredibly easy to make and perfect for identifying your herbs and vegetables.
Why it’s great for beginners:
- Uses small scraps of cedar.
- Requires minimal tools.
- Teaches basic lettering or stenciling.
Basic Steps:
- Cut strips: Rip cedar boards into strips about 1-2 inches wide and 8-12 inches long. You can cut the top edge at an angle for a decorative touch.
- Sand smooth: Sand all edges and surfaces until smooth, especially the areas where you’ll write.
- Add lettering: Use a permanent marker, wood-burning tool, or stencils to write the names of your plants.
- Protect (optional): A light coat of exterior sealant can help protect the writing if it’s not waterproof.
- Insert into soil: Sharpen one end slightly (or attach a dowel) and gently push them into your garden beds.
5. Cedar Deck or Table Caddy
Keep your drinks, snacks, or gardening tools right where you need them with a simple cedar caddy. These are perfect for placing over the armrest of a deck chair or at the side of your outdoor table.
Why it’s great for beginners:
- Rectangular construction, easy to measure and cut.
- Teaches basic box building.
- Highly functional and practical.
Basic Steps:
- Design: Sketch out your caddy. A common design is a long base with two short ends and two long sides, forming a trough. Consider the width of your deck chair’s armrest or where you intend to place it.
- Cut pieces: Cut your cedar boards to size for the base, sides, and ends.
- Assemble the box: Glue and screw the sides and ends to the base. Ensure your corners are square.
- Add compartments (optional): You can add internal dividers for different items.
- Add handles (optional): For larger caddies, consider adding rope or wooden handles.
- Finishing: Apply a protective sealant suitable for outdoor use.
Cedar Wood Project Planning Table
To help you visualize and plan, here’s a table outlining some key project considerations:
| Project Idea | Difficulty Level | Approximate Time (Beginner) | Key Skills Learned | Outdoor Durability |
|---|---|---|---|---|
| Planter Boxes | Beginner | 2-4 hours | Measuring, Cutting, Assembling Box, Screwing | High (with sealant), Very High (natural) |
| Storage Crate | Beginner | 1-3 hours | Measuring, Cutting, Assembling Frame | Medium (unless sealed for heavy outdoor use) |
| Birdhouse | Beginner-Intermediate | 3-5 hours | Angled Cuts, Small Piece Assembly, Drilling Holes | High (with sealant), Very High (natural) |
| Garden Markers | Absolute Beginner | 30-60 minutes | Cutting small pieces, Sanding, Marking | Medium (natural), High (sealed) |
| Deck/Table Caddy | Beginner | 2-3 hours | Measuring, Cutting, Assembling Box | High (with sealant), Very High (natural) |
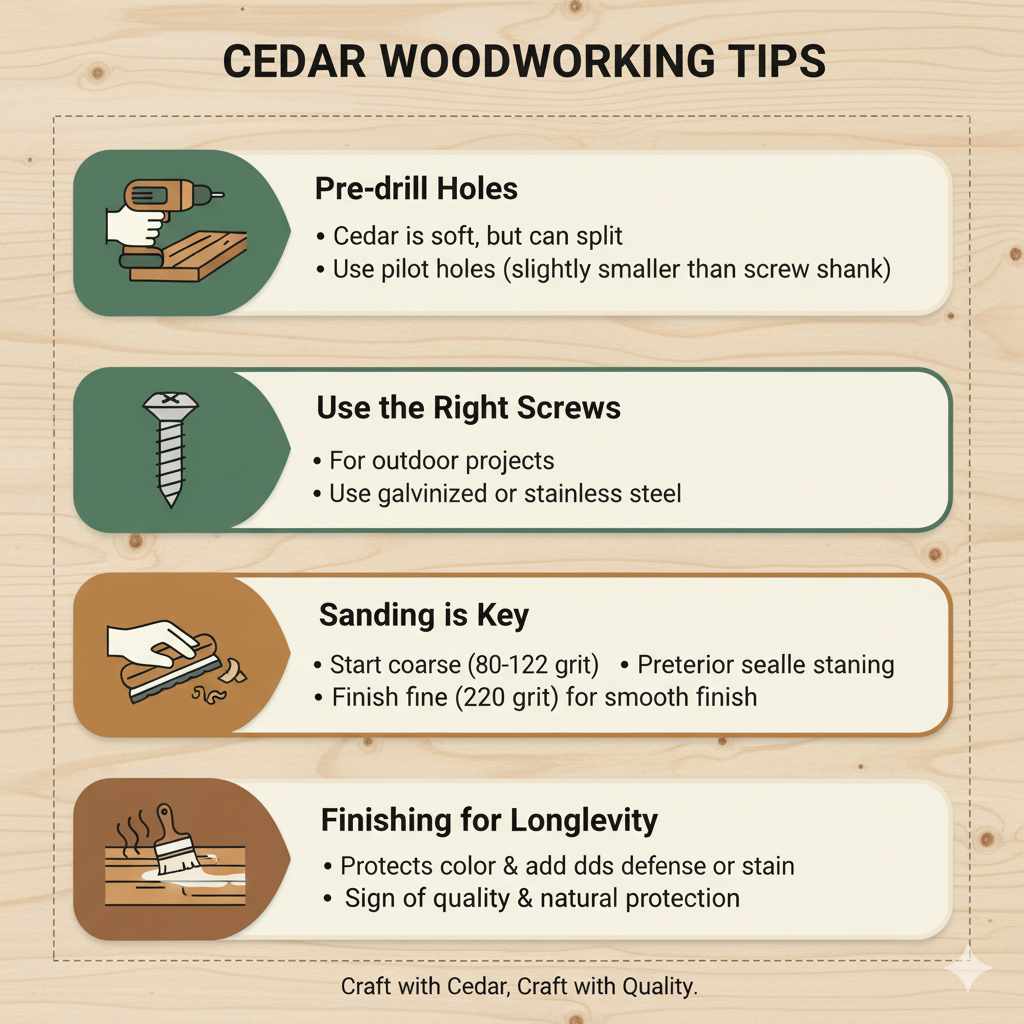
Tips for Working with Cedar
Here are some extra tips to make your cedar woodworking experience even smoother and more enjoyable:
- Pre-drill holes: Cedar is relatively soft, but it can still split, especially near the ends. Always drill pilot holes for your screws. The pilot hole should be slightly smaller than the screw’s shank diameter.
- Use the right screws: For outdoor projects, always use exterior-grade screws (like galvanized or stainless steel) to prevent rust and staining.
- Sanding is key: Cedar sands beautifully. Start with a coarser grit (like 80 or 120) to remove any saw marks, then move to a finer grit (like 220) for a smooth finish.
- Finishing for longevity: While cedar is naturally durable, a good quality exterior sealant or stain can help protect its color and add an extra layer of defense against moisture and UV rays. Look for products specifically designed for wood, like those recommended by reputable paint and hardware stores.
- Embrace the aroma: Enjoy the natural scent of cedar! It’s a sign of its quality and natural protective properties.
Cedar Wood FAQs
Here are some common questions beginners have about working with cedar:
Q1: Is cedar wood easy for beginners to work with?
A: Yes, absolutely! Cedar is a fantastic wood for beginners. It’s relatively soft, lightweight, and easy to cut, drill, and sand. Its natural oils also make it forgiving and easier to finish.
Q2: Does cedar wood need to be sealed or treated?
A: Cedar has natural resistance to rot and insects, so it doesn’t need treatment to last. However, for outdoor projects intended to retain their color, applying a clear UV-resistant sealant or an exterior-grade stain is recommended. Natural weathering will turn the wood a beautiful silvery-gray over time.
Q3: What kind of screws should I use for cedar projects?
A: For outdoor cedar projects, always use corrosion-resistant screws, such as stainless steel or galvanized screws. This prevents rust stains that can bleed into the wood over time.
Q4: Can I paint or stain cedar wood?
A: Yes, you can paint or stain cedar. However, its natural beauty is often a primary reason for choosing it. If you do stain it, a clear or lightly tinted stain will showcase the grain. If painting, ensure the wood is clean and dry, and use a good quality exterior primer and paint.
Q5: How do I prevent cedar wood from splitting?
A: The best way to prevent splitting is to always pre-drill pilot holes for your screws. The pilot hole should be slightly smaller than the diameter of the screw threads.
Q6: What’s the best way to clean cedar wood?
A: For general cleaning, a soft brush or damp cloth is usually sufficient. For tougher dirt or mildew on outdoor projects, you can use a mild detergent mixed with water and a soft scrub brush. Always rinse thoroughly and allow the wood to dry completely.
These questions should help clear up any immediate concerns you might have as you begin your cedar woodworking journey!
Conclusion
Working with cedar wood is a rewarding experience, especially for those new to DIY and woodworking. Its natural beauty, durability, and pleasant aroma make it an ideal material for a wide range of projects, from garden essentials to charming home decor. We’ve explored why cedar is a top choice, the basic tools you’ll need, and several beginner-friendly project ideas like planter boxes, crates, birdhouses, garden markers, and caddies.
Remember the key tips: always pre-drill to prevent splitting, use the right hardware for outdoor projects, and sand your pieces to a smooth finish. Don’t be afraid to experiment with different sizes and designs. Each project you complete will build your confidence and add functional beauty to your living space.