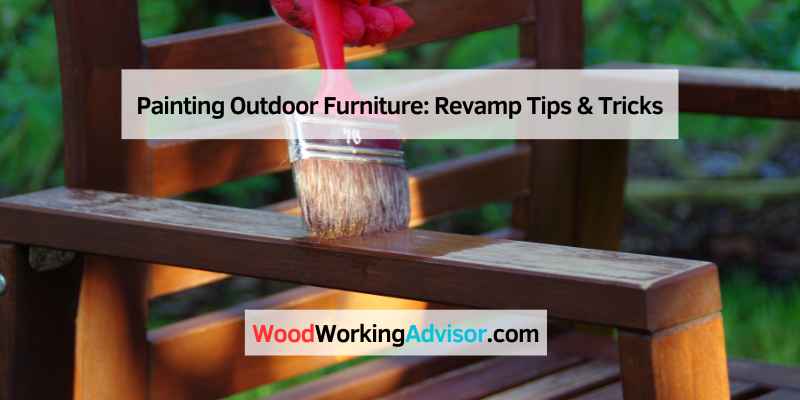
Painting Outdoor Furniture: A Genius & Essential Guide
Painting outdoor furniture is simple with the right steps. Success comes from thorough cleaning to remove dirt, proper sanding to create a smooth surface for adhesion, and applying a quality outdoor-rated primer and paint. Allow each coat to dry completely for a durable, weather-resistant finish that will protect and beautify your furniture for years.
Does your patio set look a little sad? Has your favorite wooden bench seen better days? You are not alone. Sun, rain, and time can make any outdoor furniture look old and tired. It can be frustrating to see something you love lose its charm. But there is a simple, rewarding fix.
Don’t worry, you don’t need to be a professional to bring your furniture back to life. I’m here to show you how. With a little bit of work and the right guidance, you can make your outdoor pieces look brand new. This guide will walk you through every step, from picking the paint to the final beautiful coat. Let’s get started!
Why Bother Painting Your Outdoor Furniture?
Before we grab our brushes, let’s talk about why this project is so worthwhile. It’s about more than just a new color. Taking the time to paint your outdoor furniture is one of the smartest things you can do for your outdoor space. It’s a project that pays you back in many ways.
Protection From the Elements
Your outdoor furniture is in a constant battle with Mother Nature. The sun’s UV rays can bleach wood and make plastic brittle. Rain and humidity can cause wood to rot and metal to rust. A good coat of paint is like armor. It creates a protective barrier that seals the material from moisture and sun damage, extending the life of your furniture significantly.
A Stunning Visual Upgrade
A fresh coat of paint has a magical effect. It can instantly transform a drab, weathered piece into the star of your patio or garden. You can change the color to match your home’s exterior, complement your garden flowers, or simply pick a bold color that makes you happy. It’s an easy and affordable way to refresh your entire outdoor aesthetic.
Save Money, Reduce Waste
Let’s be honest, new outdoor furniture can be expensive. Why spend hundreds of dollars on a new set when your current one is still sturdy? Painting is a budget-friendly alternative that delivers amazing results. Plus, by refreshing what you already have, you’re keeping perfectly good furniture out of a landfill. It’s a win for your wallet and the planet.
The Joy of a DIY Project
There is immense satisfaction in completing a project with your own two hands. Transforming a piece of worn-out furniture is incredibly rewarding. Every time you relax on that bench or eat at that table, you’ll feel a sense of pride. This isn’t just about maintenance; it’s about creating something beautiful and useful for your home.
First Things First: Choosing the Right Paint
The paint aisle can feel overwhelming, but choosing the right product is the most important decision you’ll make for this project. The paint you choose determines how good your furniture will look and how long it will last. Outdoor paint is specially formulated to be flexible, durable, and resistant to fading and moisture.
Understanding Different Paint Types
For outdoor projects, you’ll mainly choose between oil-based and water-based (latex or acrylic) paints. Each has its strengths, and the best choice depends on your furniture’s material and your personal preference.
- Water-Based Latex/Acrylic Paint: This is the most popular choice for outdoor furniture today. It’s easy to work with, cleans up with just soap and water, and dries quickly. Modern acrylic paints are very durable and flexible, allowing them to expand and contract with temperature changes without cracking. They are also excellent at resisting fading from UV rays.
- Oil-Based Enamel Paint: Traditionally known for its incredible durability and smooth, hard finish, oil-based paint is a solid choice for high-traffic items. It levels out beautifully, hiding brush strokes. However, it takes much longer to dry, has a strong odor due to higher VOCs (Volatile Organic Compounds), and requires mineral spirits for cleanup.
- Spray Paint vs. Brush-on Paint: You can find both water-based and oil-based formulas in spray cans or traditional liquid cans. Spray paint is fantastic for furniture with complex shapes, like wicker chairs or intricate metalwork, as it provides a smooth, even coat without brush marks. Brushing is great for flat surfaces like tables and benches, giving you more control over the application.
Paint Type Comparison for Outdoor Furniture
| Paint Type | Best For | Pros | Cons | Cleanup |
|---|---|---|---|---|
| Acrylic Latex | Wood, Metal, Plastic | UV resistant, flexible, low odor, fast drying, easy cleanup | May show brush strokes more easily | Soap and Water |
| Oil-Based Enamel | Wood, Metal (especially for high-use surfaces) | Extremely durable, smooth finish, excellent adhesion | Strong odor, long dry time, can yellow over time | Mineral Spirits |
| Spray Paint | Intricate designs, Wicker, Metal | Smooth, factory-like finish, fast application | Can be messy (overspray), less control | Depends on formula (check can) |
Gathering Your Tools and Materials
Having everything you need ready before you start makes the entire process smoother and more enjoyable. Think of it as setting up your workshop for success. Here’s a simple checklist of everything you’ll need.
Essential Supplies Checklist
- Safety Gear: Your safety is always first.
- Safety glasses to protect your eyes from debris and paint.
- A dust mask or respirator, especially for sanding and spray painting.
- Gloves to keep your hands clean and protected.
- Preparation Tools: This is for getting the surface ready.
- Drop cloths or plastic sheeting to protect your work area.
- Paint scraper or wire brush for removing loose, peeling paint.
- Sandpaper in various grits (e.g., 80, 120, and 220). A sanding block or random orbit sander makes this easier.
- Tack cloth or a damp rag for wiping away sanding dust.
- Cleaning Supplies: A clean surface is key!
- Bucket, water, and a stiff-bristled brush.
- Mild detergent or a specialized cleaner like a TSP (Trisodium Phosphate) substitute.
- Painting Tools: The fun part!
- High-quality outdoor primer suited for your furniture material.
- Your chosen exterior paint.
- High-quality paintbrushes (angled for corners, flat for surfaces), mini foam rollers, or a paint sprayer.
- Paint tray if you are using a roller.
- Finishing Touch (Optional but Recommended):
- A clear outdoor topcoat or sealer (like spar urethane) for extra protection.
The 5 Essential Steps to Painting Outdoor Furniture
Alright, you’ve picked your paint and gathered your supplies. Now it’s time to bring that furniture back to life! Follow these five steps carefully, and you’ll get a finish you can be proud of. Remember, patience is your best tool here. Don’t rush the process.
- Step 1: The All-Important Prep Work – Cleaning You cannot skip this step. Ever. Paint needs a perfectly clean, dry surface to stick to. Any dirt, grime, pollen, or mildew will prevent the paint from bonding properly, causing it to peel and fail down the road. Give your furniture a thorough scrub with soapy water and a brush. For really tough grime or mildew, a solution of water and a TSP substitute works wonders. After scrubbing, rinse it completely with clean water and let it dry thoroughly. This might take a full day or two in the sun, but it’s absolutely worth the wait.
- Step 2: Sanding for a Flawless Finish Sanding does two critical things: it smooths out any rough patches and, more importantly, it scuffs up the surface. This “scuffing” creates a texture that gives the primer and paint something to grip onto. If your furniture has peeling paint, start with a scraper or wire brush to knock off the loose bits. Then, begin sanding. The grit you use depends on the condition of your piece. What Sandpaper Grit Should I Use? Grit Number Name Primary Use 60-80 Grit Coarse Removing old, stubborn paint or rust. Use with care. 100-150 Grit Medium General smoothing and removing minor imperfections. Perfect for the first main pass. 180-220 Grit Fine Final smoothing before priming and for light scuffing between paint coats. Start with a medium grit (like 120) to smooth everything out. If the old finish is very damaged, you might need to start with a coarser 80-grit. Once it feels smooth, move to a finer grit (like 220) for the final pass. The goal isn’t to remove all the old paint, just to create a smooth, dull, and uniform surface. After sanding, wipe away every speck of dust with a tack cloth or a slightly damp rag. Let it dry completely before moving on.
- Step 3: Priming – Your Secret Weapon for Durability Think of primer as the double-sided tape between your furniture and your paint. It ensures a strong bond, a uniform color, and a long-lasting finish. Skipping primer, especially on bare wood or metal, is asking for trouble. Primer seals the surface so the paint doesn’t soak in unevenly, it blocks stains from bleeding through, and it dramatically improves paint adhesion. Choose a primer designed for outdoor use and for your specific material. There are primers for wood that block tannins, primers for metal that inhibit rust, and bonding primers for slick surfaces like plastic. Apply one thin, even coat of primer. Don’t worry about full coverage; you just want a consistent base layer. Let it dry completely according to the manufacturer’s instructions on the can.
- Step 4: The Fun Part – Applying the Paint This is where your vision comes to life! Before you start, check the weather. Avoid painting in direct sunlight, high humidity, or when it’s very windy, as these conditions can ruin the finish. Work in a well-ventilated area, like an open garage or a shaded spot outdoors. Brush, Roller, or Sprayer?
- Brushing gives you the most control and is perfect for detailed areas and flat surfaces. Use a high-quality brush to minimize stroke marks.
- A mini foam roller is excellent for large, flat areas like tabletops. It provides a very smooth finish quickly.
- Spraying is the fastest method and is ideal for complex pieces like wicker chairs, giving a professional, brushless finish. Use several light misting coats rather than one heavy coat to avoid drips.
- Step 5: Sealing the Deal with a Topcoat For most pieces, a high-quality exterior paint is durable enough on its own. However, for surfaces that will see a lot of wear and tear—like a tabletop or the arms of a chair—an optional clear topcoat adds another layer of armor. A product like spar urethane is an excellent choice as it contains UV blockers and is flexible enough to handle temperature changes. Apply one or two thin coats, following the product’s directions for drying times. This extra step can add years to the life of your paint job.
Pro Tips for a Professional-Looking Finish
You’ve mastered the basic steps. Now, here are a few extra tips that will take your project from “good” to “amazing” and make the process even easier.
- Always Read the Can: Every paint and primer product is slightly different. The instructions on the can are your best friend. They will tell you the ideal temperature for application, the time between coats, and the full cure time.
- Keep a Wet Edge: When brushing or rolling, try to overlap your strokes onto the previous wet stroke. This technique, called “keeping a wet edge,” helps to blend the paint seamlessly and avoid ugly lap marks where sections have dried at different rates.
- Elevate Your Furniture: Place your furniture on small blocks of wood or painter’s pyramids. This lifts it off the ground, allowing you to easily paint the very bottom of the legs and preventing the piece from sticking to your drop cloth as it dries.
- Be Patient with Cure Time: This is a big one. Even if the paint feels dry to the touch after a few hours, it hasn’t fully cured. Curing is the chemical process where the paint hardens into its final, durable state. This can take anywhere from a few days to a month. Avoid heavy use, and don’t place items like potted plants on the surface until it has fully cured.
- Fixing Drips: If you spot a drip while the paint is still wet, you can gently smooth it out with your brush. If you find a dried drip later, don’t panic. Carefully shave it off with a razor blade, then lightly sand the area smooth. You may need to touch it up with a bit more paint.
Frequently Asked Questions (FAQ)
What’s the best paint for outdoor wood furniture?
A high-quality 100% acrylic latex exterior paint is often the best choice for wood. It’s flexible, which means it can expand and contract with the wood as temperature and humidity change, preventing cracking and peeling. It also has excellent UV resistance to prevent fading.
Do I absolutely have to sand before painting outdoor furniture?
Yes, you really should. Even if the existing paint looks okay, a light sanding (or “scuffing”) is critical. It cleans the surface of any unseen residue and creates a slightly rough texture that allows the new primer and paint to grab on tightly, ensuring a long-lasting bond.
Can I paint plastic or metal outdoor furniture?
Absolutely! The process is very similar. For plastic, cleaning and then using a specific “bonding primer” designed for plastic is key. For metal, you’ll want to remove any rust with a wire brush or sandpaper and use a rust-inhibiting metal primer before painting.
How long will my new paint job last?
If you followed all the prep steps carefully—thorough cleaning, sanding, priming, and using a quality exterior paint—your finish should last for many years. Typically, a good paint job on outdoor furniture can last 3-5 years or longer, depending on the climate and its exposure to the elements.
Can I use my leftover interior paint outside?
Please don’t. Interior paint is not formulated to handle the challenges of the outdoors. It lacks the necessary UV inhibitors and flexibility to withstand sunlight, rain, and temperature fluctuations. It will quickly fade, crack, and peel, and you’ll have to redo the entire project much sooner.
What is the fastest way to paint an outdoor chair?
For chairs with spindles or intricate parts, using spray paint is by far the fastest method. After proper cleaning and sanding, apply a spray primer followed by a few light coats of spray paint. It provides a smooth, even finish in a fraction of the time it would take with a brush.
Your Beautifully Refreshed Outdoor Oasis Awaits
And there you have it! You’ve successfully navigated every step of the process, from choosing the right materials to applying that final, beautiful coat. Take a moment to step back and admire your work. You didn’t just paint a piece of furniture; you rescued it, you transformed it, and you gave it a brand new life.
That chair, table, or bench is now more than just a place to sit. It’s a testament to your hard work, your patience, and your ability to create something wonderful with your own hands. You’ve not only added beauty and protection to your furniture but also created a welcoming space for friends and family to gather. Now, all that’s left to do is let it cure, then sit back, relax, and enjoy your stunning new outdoor oasis. Well done!