DIY Cooler Plans: Build a Wood Cooler Box This Weekend
A DIY wood cooler box built from basic lumber and rigid foam insulation holds ice nearly as long as a mid-range store-bought cooler, for a fraction of the cost. Skip the insulation step and it sweats and drains fast in summer heat. This guide covers the frame, the insulation layer, and the hinge-and-latch hardware that keeps the lid sealed.
Summer heat can be unbearable. A DIY cooler can be a lifesaver.
Creating your own cooler is easier than you think. It’s a fun project that can save you money. Plus, it’s a great way to recycle materials you already have. Whether you need it for a picnic, camping, or just to keep drinks cold at home, a DIY cooler is a handy solution.
This blog post will guide you through simple steps to make your own cooler. You’ll find it practical and satisfying. Let’s dive into the world of DIY coolers and beat the heat together.
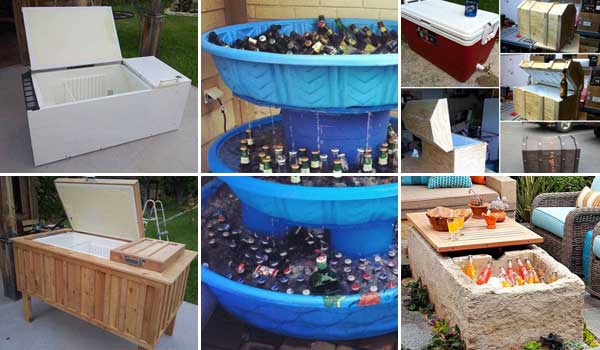
Credit: www.woohome.com
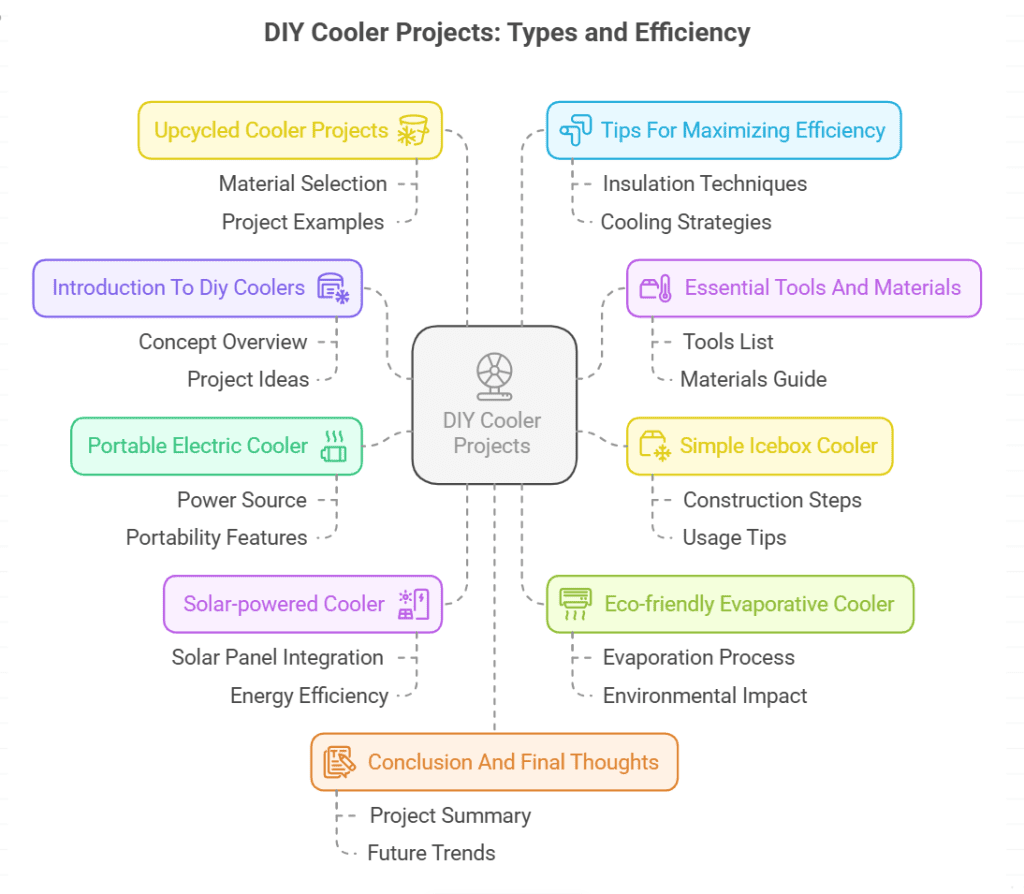
Introduction To DIY Coolers
Best Hardware Kit for a DIY Cooler Lid
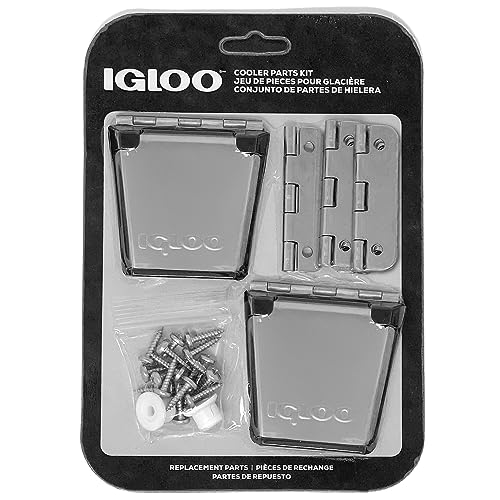 |
Igloo Cooler Heavy-Duty Stainless Steel Parts Kit – 2Igloo | Our pick | $28.74
Price as of 20 Oct 2026
|
View |
A quality rotomolded cooler with thick foam walls and a gasketed lid often runs well over $200, mainly because 2″+ of dense foam and a tight-sealing lid are what actually hold ice for days rather than hours. Building your own with rigid foam board (typically rated around R-5 per inch of thickness) and a plywood or plastic shell gets you a meaningful fraction of that ice-holding performance for a materials cost usually under $40, especially if you’re reusing an old cooler shell or storage bin as the outer box.
The real advantage of a DIY build isn’t just the price — it’s that you control the size and shape for a specific use, like a long, narrow cooler that fits a boat’s gunwale or a cooler built into a truck bed toolbox. Whatever shell you start with, the insulation thickness and how well the lid seals matter more to ice retention than the shell material itself.
- Cost-effective
- Customizable size and design
- Eco-friendly
- Fun to build
- Use of available materials
Essential Tools And Materials
A cordless drill handles both pilot holes and driving screws for hinges and latches, and it’s worth using one rather than a screwdriver alone since hand-driving screws into a loaded lid hinge tends to strip the screw head before it seats fully. A sharp utility knife is what actually determines how clean your foam-board cuts come out — a dull blade tears the foam’s surface instead of slicing it, which opens up small gaps that let warm air creep in around the edges. Round out the kit with a tape measure, a square for marking straight cut lines on the foam, and pliers for pulling and bending any aluminum tape or flashing at the corners.
| Material | Quantity |
|---|---|
| Cooler Box | 1 |
| Insulation Foam | Enough to cover inside |
| Sealant | 1 Tube |
| Ice Packs | 4-6 Packs |
| Aluminum Tape | 1 Roll |
Simple Icebox Cooler
Start with a rigid outer shell — an old cooler, a plastic storage tote, or a plywood box you’ve built to size — and check it for any cracks or gaps first, since even a hairline crack in the shell will eventually let humid outside air reach the foam and reduce its insulating value over time. Cut 1-2″ XPS or polyiso foam board to line every interior surface, including the bottom and the underside of the lid, not just the side walls; skipping the lid is one of the most common reasons a homemade cooler still loses ice fast, since a bare lid conducts heat straight through with nothing stopping it. A construction adhesive rated for foam (some solvent-based adhesives actually dissolve foam board) holds it to the shell without the gaps that separate over time.
A layer of thin plastic sheeting or a heavy-duty contractor bag over the foam keeps the foam itself from soaking up condensation, which matters because wet foam loses much of its insulating value. Seal every seam with aluminum foil tape rather than standard duct tape — foil tape holds up to condensation and cold far longer without the adhesive failing and peeling loose.
For actual ice life, dry ice outperforms regular ice roughly 3-to-1 by weight because it sublimates at -109.3°F instead of melting at 32°F, but it needs some ventilation (never a fully sealed container) since the carbon dioxide gas it releases can build up pressure. For a standard ice-and-water setup, a small drain hole near the bottom lets you dump meltwater without opening the lid and letting warm air in, and a folded towel on the bottom slows how fast that meltwater actually reaches the drain.

Credit: m.youtube.com
Portable Electric Cooler
It’s worth being clear on what a fan-and-battery build actually does before starting one: a fan alone doesn’t refrigerate anything, it just circulates air, so this design works best paired with ice or frozen gel packs inside an insulated box rather than as a standalone cooling source. Line a sturdy box with foam the same way as the icebox build above, then mount a small 12V computer or automotive fan through a hole cut in the lid or a side wall, secured with screws through the fan’s own mounting tabs rather than glued in place, since a glued fan is much harder to service if it fails.
Wire the fan to a small rechargeable battery pack or a USB power bank rated for continuous output — a typical 12V computer fan draws well under 5 watts, so even a modest power bank can run one for many hours. Route the wiring away from any spot where meltwater collects, and test the whole assembly outside the cooler before final installation to confirm polarity is correct; a reversed-polarity 12V fan either won’t spin or will spin backward, pulling air the wrong direction.
Solar-powered Cooler
A solar setup makes the most sense for a fan-driven cooler that needs to run unattended for days, like at a campsite without outlet access. A small 10-20 watt solar panel is generally enough to keep a small battery pack topped off for a low-draw fan, but a true 12V compressor cooler (the kind that actually refrigerates rather than just insulates) typically draws 40-60 watts continuously, which calls for a larger panel in the 60-100 watt range plus a deep-cycle battery to bridge overnight hours when the panel isn’t producing.
Wire the panel through a basic charge controller before it reaches the battery — connecting a panel directly to a battery risks overcharging on a bright day, which shortens the battery’s life. From there, the battery powers the fan or compressor exactly as it would from any other power source; the solar panel and controller are just replenishing what the load draws down during the day.
Eco-friendly Evaporative Cooler
Evaporative cooling relies on a simple physical effect: water needs energy to change from liquid to vapor, and it pulls that energy (as heat) from the surrounding air as it evaporates, which is why the air coming off a wet surface feels cooler than the air around it. The catch is humidity — this only works well in dry climates, since air that’s already holding a lot of moisture can’t absorb much more, which is why evaporative cooling is common in the desert Southwest and largely ineffective in humid regions.
A basic build uses a small fan pulling air across a wet surface — a pad of burlap or a sponge kept damp by a small aquarium-style water pump works, mounted inside a perforated container so air enters dry on one side and exits cooler and more humid on the other. This won’t drop temperatures dramatically the way a compressor-based cooler does, typically a handful of degrees at most, but it draws very little power and works well as a supplement to shade and airflow rather than as a replacement for ice-based cooling.
Upcycled Cooler Projects
Salvaged foam is usually the most valuable material to reuse here — packaging foam from appliance or electronics boxes is often the same rigid polystyrene used in commercial coolers, and scavenging enough of it from a few large-appliance deliveries can insulate an entire homemade box for free. An old backpack or duffel bag with foam board cut to fit its interior panels becomes a soft-sided cooler that’s easier to carry over distance than a rigid box, which matters for hiking or biking trips where a hard cooler’s weight and shape are impractical.
Old leather or nylon belts make surprisingly durable handles when bolted through reinforced holes in a wood or plastic shell, since they’re already designed to flex repeatedly under load without tearing. A cardboard box lined with foil-backed foam board works as a genuinely disposable single-use cooler for a picnic, though cardboard’s weakness is that any moisture reaching the outer layer weakens it fast, so it’s a one-trip solution rather than a durable build.
Tips For Maximizing Efficiency
Foam thickness has diminishing returns past a certain point — going from 1″ to 2″ of foam roughly doubles the insulating value, but doubling again to 4″ only helps marginally more while eating into usable interior space. A tight seal at every seam and around the lid matters at least as much as raw foam thickness, since even a small gap creates a convection path where warm air continuously replaces cold air rather than the slow, even heat transfer that thick insulation is designed to resist.
A reflective (foil-faced) layer on the outside only works as a radiant barrier if there’s an air gap on the side facing the sun — foil pressed directly against foam with no gap barely helps, since it’s blocking radiant heat, not conductive heat. Keeping the cooler in shade does more for ice retention than almost any single upgrade to the box itself, since direct sun on a dark-colored lid can raise its surface temperature well above the surrounding air temperature.
After each use, dry the interior fully before storing it closed — trapped moisture in a sealed cooler is exactly the environment mold needs, and once mold gets into foam insulation it’s difficult to fully remove. Storing the lid propped slightly open between uses prevents that trapped-moisture smell from building up in the first place.
Conclusion And Final Thoughts
Whichever version fits your needs — a simple insulated icebox, a fan-assisted build, or a full solar setup — the fundamentals stay the same across all of them: thick, gap-free insulation on every surface including the lid, a tight seal, and keeping the whole thing out of direct sun. Get those three right and a homemade cooler built from scrap foam and an old box competes reasonably well against a mid-range store-bought one, at a fraction of the cost.
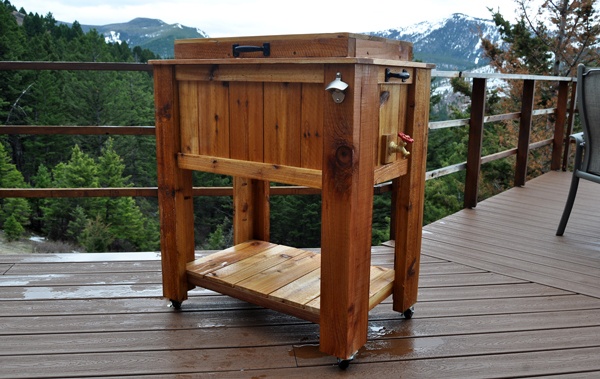
Credit: www.diypete.com
Frequently Asked Questions
What Can You Use Instead Of A Cooler?
Use fans, ice packs, or portable air conditioners instead of a cooler. Try wet towels or natural ventilation too.
What Cooler Keeps Things Cold The Longest?
Yeti Tundra coolers keep things cold the longest. They offer superior insulation and durability. Ideal for long trips and outdoor adventures.
How Long Will Ice Stay Cold In A Styrofoam Cooler?
Ice stays cold in a styrofoam cooler for about 18 to 24 hours. Cooler quality and external temperature may affect this duration.
How To Make A Natural Cooler?
Use a clay pot, fill it with water, and cover it with a damp cloth. Place it in a breezy area.
Conclusion
Building your own cooler can be a fun and rewarding project. It saves money and provides a personalized touch. You can make it with materials you already have at home. Plus, you will have a unique cooler that stands out.
Start with whatever shell and foam you already have around before buying anything new — most of the ice-retention gain comes from insulation thickness and a tight seal, not from expensive materials, so a first build made from scavenged packaging foam is a reasonable way to test the design before investing in a nicer shell.
Sponsored / affiliate links. As an Amazon Associate I earn from qualifying purchases. I may earn additional commission from eligible campaigns.