How to Remove Sharpie from Hardwood Floor
Hey there! So, you’ve got a Sharpie mark on your beautiful hardwood floor, and it’s driving you nuts, right? I’ve been there. Whether it’s a rogue doodle from your kid or an accidental swipe during a craft session, those bold, stubborn ink stains can feel like a personal attack on your home’s charm. Don’t worry, though—I’ve spent hours experimenting, researching, and scrubbing to figure out how to remove Sharpie from hardwood floors without ruining the finish. In this guide, I’ll walk you through every method I’ve tried, sharing what works, what doesn’t, and how to keep your floors looking pristine. Let’s dive in and get that mark gone!
Why Sharpie Stains Are So Stubborn
Sharpie ink is permanent for a reason. It’s designed to stick to surfaces like nobody’s business, whether it’s paper, plastic, or—yep—your hardwood floor. The ink contains dyes and solvents that sink into porous surfaces like wood, especially if the floor isn’t sealed properly. If your hardwood has a polyurethane or wax finish, you’re in luck; the ink might not have penetrated too deeply. But on unfinished or worn floors, that stain can feel like it’s mocking you. Understanding this helps you pick the right approach, so let’s explore the methods I’ve tested to tackle this beast.
Before You Start: Prep Your Floor
Before you grab any cleaner, let’s set the stage to avoid more damage. I learned this the hard way when I once scrubbed too hard and dulled my floor’s finish. First, test any cleaning method on a small, hidden spot—like under a rug or furniture. This ensures the solution won’t strip the finish or discolor the wood. Next, clean the area around the stain with a damp cloth to remove dust or grime. Dry it thoroughly; water and wood aren’t best friends. Finally, gather your supplies: soft cloths, a microfiber towel, and patience. Trust me, rushing can make things worse.
Method 1: Rubbing Alcohol to the Rescue
Rubbing alcohol was my first go-to when I found a Sharpie scribble on my oak floor. It’s a solvent that breaks down the ink’s chemicals without being too harsh. Here’s how I did it:
- Grab a bottle of rubbing alcohol (70% or higher works best).
- Dampen a clean, soft cloth with a small amount—don’t soak it.
- Gently rub the stain in circular motions. You’ll see the ink start to lift.
- Wipe the area with a dry microfiber cloth to remove residue.
- If the stain lingers, repeat but don’t overdo it; too much alcohol can dull the finish.
This method worked like a charm for a fresh stain. For older marks, it took a few tries. Be gentle, and stop if you notice the finish looking cloudy.
Method 2: Toothpaste, the Surprising Hero
I was skeptical when a friend suggested toothpaste, but it’s now one of my favorite tricks. Non-gel, white toothpaste (not the fancy whitening kind) has mild abrasives that can lift ink without scratching. Here’s what I did:
- Squeeze a pea-sized amount of toothpaste onto a soft cloth.
- Rub it gently over the stain for about a minute.
- Wipe it off with a damp cloth, then dry the area completely.
- Buff with a microfiber cloth to restore shine.
This worked best on my sealed maple floor. If your floor is waxed, skip this method—it can strip the wax. I love how simple and cheap this is, but it’s not a cure-all for deep stains.
Method 3: Baking Soda for Stubborn Marks
Baking soda is my kitchen staple for cleaning, and it’s great for Sharpie stains, too. Its gritty texture acts like a gentle scrub. Here’s how I tackled a particularly stubborn mark:
- Mix a tablespoon of baking soda with a few drops of water to make a paste.
- Apply the paste to the stain with a soft cloth.
- Rub gently in small circles for 30 seconds.
- Wipe it off with a damp cloth and dry the area.
This method took some elbow grease, but it worked on an old stain that alcohol couldn’t fully remove. Be careful not to scrub too hard; you don’t want to damage the finish.
Method 4: Acetone (Nail Polish Remover) with Caution
Acetone is strong stuff, so I only used it as a last resort on a small, stubborn stain. It can strip finishes, so test it first. Here’s what I did:
- Use pure acetone or nail polish remover (check that it’s acetone-based).
- Dip a cotton ball in a tiny amount of acetone.
- Dab the stain gently—don’t rub too hard.
- Wipe immediately with a damp cloth, then dry thoroughly.
- Buff the area to check for damage.
This worked on a sealed floor but dulled the finish slightly. I wouldn’t try it on waxed or unfinished wood. Use it sparingly and with lots of caution.
Method 5: Magic Eraser for Quick Fixes
Magic erasers are like little miracles, but they’re abrasive, so I used them carefully. Here’s how I approached it:
- Dampen a magic eraser slightly with water.
- Gently rub the stain for a few seconds.
- Wipe the area with a damp cloth and dry it right away.
- Check for any dulling of the finish.
This method was great for a light mark on my polyurethane-coated floor. But on waxed or delicate finishes, it can do more harm than good, so test it first.
Comparing Cleaning Methods
Here’s a quick table to help you choose the best method for your situation:
| Method | Best For | Pros | Cons | Finish-Safe? |
|---|---|---|---|---|
| Rubbing Alcohol | Fresh stains, sealed floors | Fast, affordable, effective | May dull finish if overused | Yes (with care) |
| Toothpaste | Light stains, sealed floors | Cheap, easy to find | Not for waxed floors | Mostly |
| Baking Soda | Stubborn stains | Gentle, natural | Takes effort, messy | Yes (with care) |
| Acetone | Deep, stubborn stains | Very effective | Can strip finish | Risky |
| Magic Eraser | Light stains, sealed floors | Quick, easy | Abrasive, may dull finish | Use with caution |
Protecting Your Floor After Cleaning
Once the stain is gone, you want to keep your floor looking great. I learned to apply a thin layer of floor polish or wax (depending on your finish) to restore shine. Use a product made for hardwood floors, and follow the instructions carefully. Also, consider placing a rug or mat in high-traffic areas to prevent future mishaps. I now keep Sharpies far away from my kids’ art table near the hardwood!
Preventing Future Sharpie Disasters
Prevention is easier than scrubbing. Here are tips I’ve adopted:
- Keep permanent markers out of reach of kids or clumsy adults (like me).
- Use washable markers for craft projects near hardwood.
- Cover floors with drop cloths during art sessions.
- Seal or reseal your floors every few years to create a protective barrier.
I also started checking my floors regularly for small marks. Catching them early makes removal a breeze.
What to Do If the Stain Won’t Budge
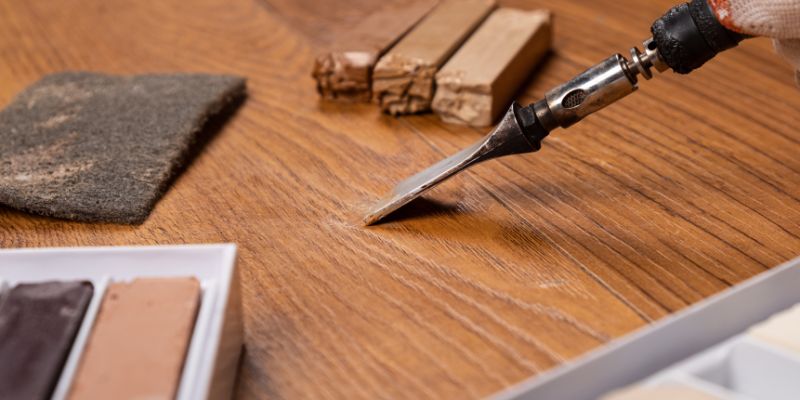
Sometimes, despite your best efforts, the stain just won’t quit. I had one mark that laughed at all my attempts. If this happens, don’t panic. You can try sanding the area lightly with fine-grit sandpaper (like 220-grit) and refinishing it. This is a big step, so I’d recommend calling a professional if you’re not comfortable. They can sand and refinish just the stained spot to blend it with the rest of the floor. It’s pricey but worth it to save your hardwood’s beauty.
My Personal Experience and Tips
I’ve dealt with Sharpie stains on my hardwood floors more times than I’d like to admit. My toddler once turned my living room floor into a “masterpiece” with a black Sharpie. Rubbing alcohol saved the day for most of it, but a stubborn spot needed baking soda. Through trial and error, I learned that patience is key. Don’t scrub like you’re mad at the floor—it’ll only make things worse. Also, always have a microfiber cloth handy; it’s a game-changer for buffing out residue and restoring shine.
Conclusion
Dealing with a Sharpie stain on your hardwood floor can feel like a nightmare, but it’s not the end of the world. I’ve been through the panic and the scrubbing, and I promise you can get your floor looking good as new. Whether you reach for rubbing alcohol, toothpaste, or baking soda, the key is to act fast, test carefully, and be gentle. Each method has its strengths, so pick the one that suits your floor’s finish and the stain’s stubbornness. With a little effort, your hardwood will be back to its gorgeous self, and you’ll feel like a cleaning superhero. Got kids or a crafty streak? Keep those Sharpies under lock and key, and maybe invest in a good rug. Here’s to beautiful, stain-free floors!
FAQs
Can I use vinegar to remove Sharpie from hardwood floors?
I wouldn’t recommend vinegar. It’s acidic and can dull or damage the finish on hardwood floors. Stick to rubbing alcohol or toothpaste for safer results.
Will these methods work on unfinished hardwood?
Unfinished hardwood is trickier because the ink sinks deeper. Rubbing alcohol or baking soda might help, but you’ll need to be extra gentle. If the stain persists, sanding and refinishing might be your only option.
How do I know if my floor is sealed or waxed?
Rub a damp cloth over a small area. If it stays shiny and doesn’t absorb water, it’s likely sealed with polyurethane. If it feels waxy or looks duller, it’s probably waxed. When in doubt, test cleaning methods in a hidden spot.
Can I use a hairdryer to speed up drying after cleaning?
I’ve tried this, and it’s not a great idea. The heat can warp or damage the wood. Just use a dry microfiber cloth and let the floor air-dry naturally.
What if I accidentally dull the finish while cleaning?
Don’t worry! You can buff the area with a hardwood floor polish suited for your finish. Apply it sparingly with a soft cloth, and it should restore the shine.